There are different scenarios in which you might want to integrate with Microsoft Azure Active Directory (AD):
- You want to let users into your application from an Azure AD you or your organization controls (such as employees in your company).
- You want to let users coming from other companies’ Azure ADs into your application. You may want to set up those external directories as different connections.
If you plan on allowing users to log in using a Microsoft Azure Active Directory account, either from your company or from external directories, you must register your application through the Microsoft Azure portal.
Create a new application
Login to Microsoft Azure and choose Azure Active Directory from the sidebar.
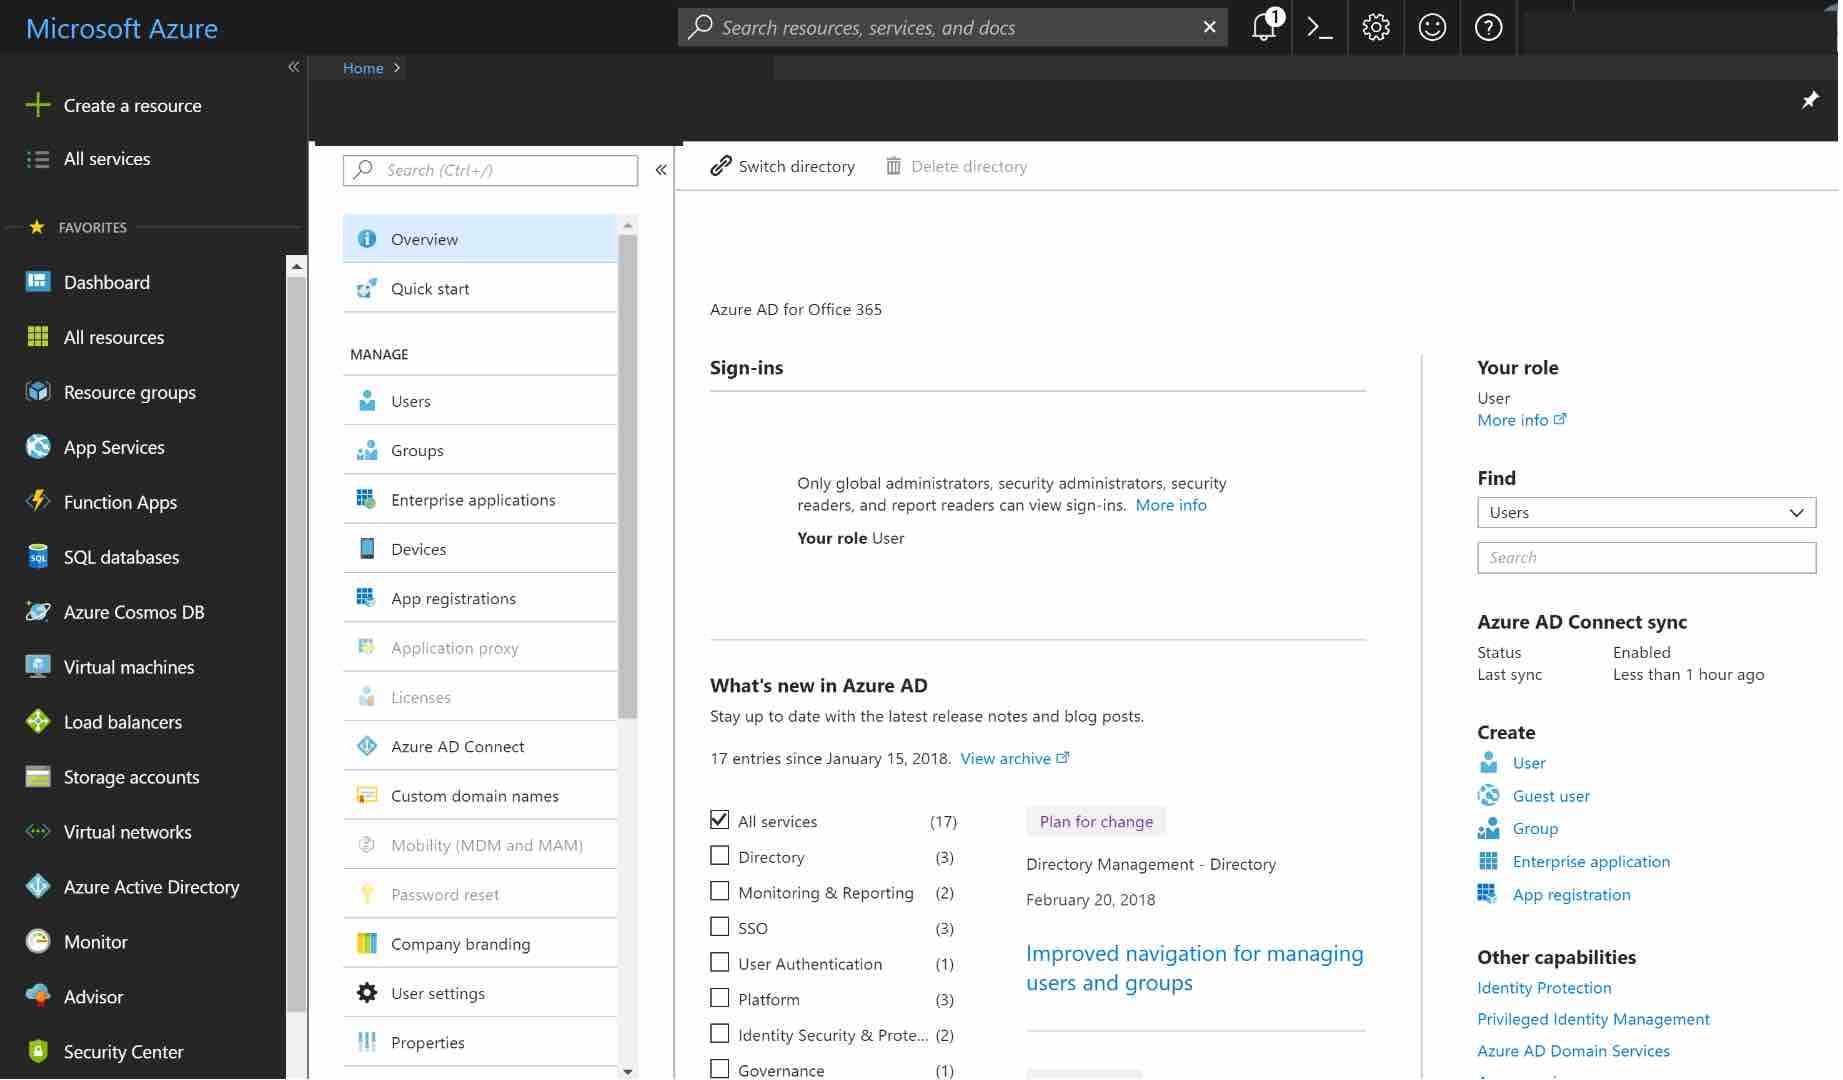
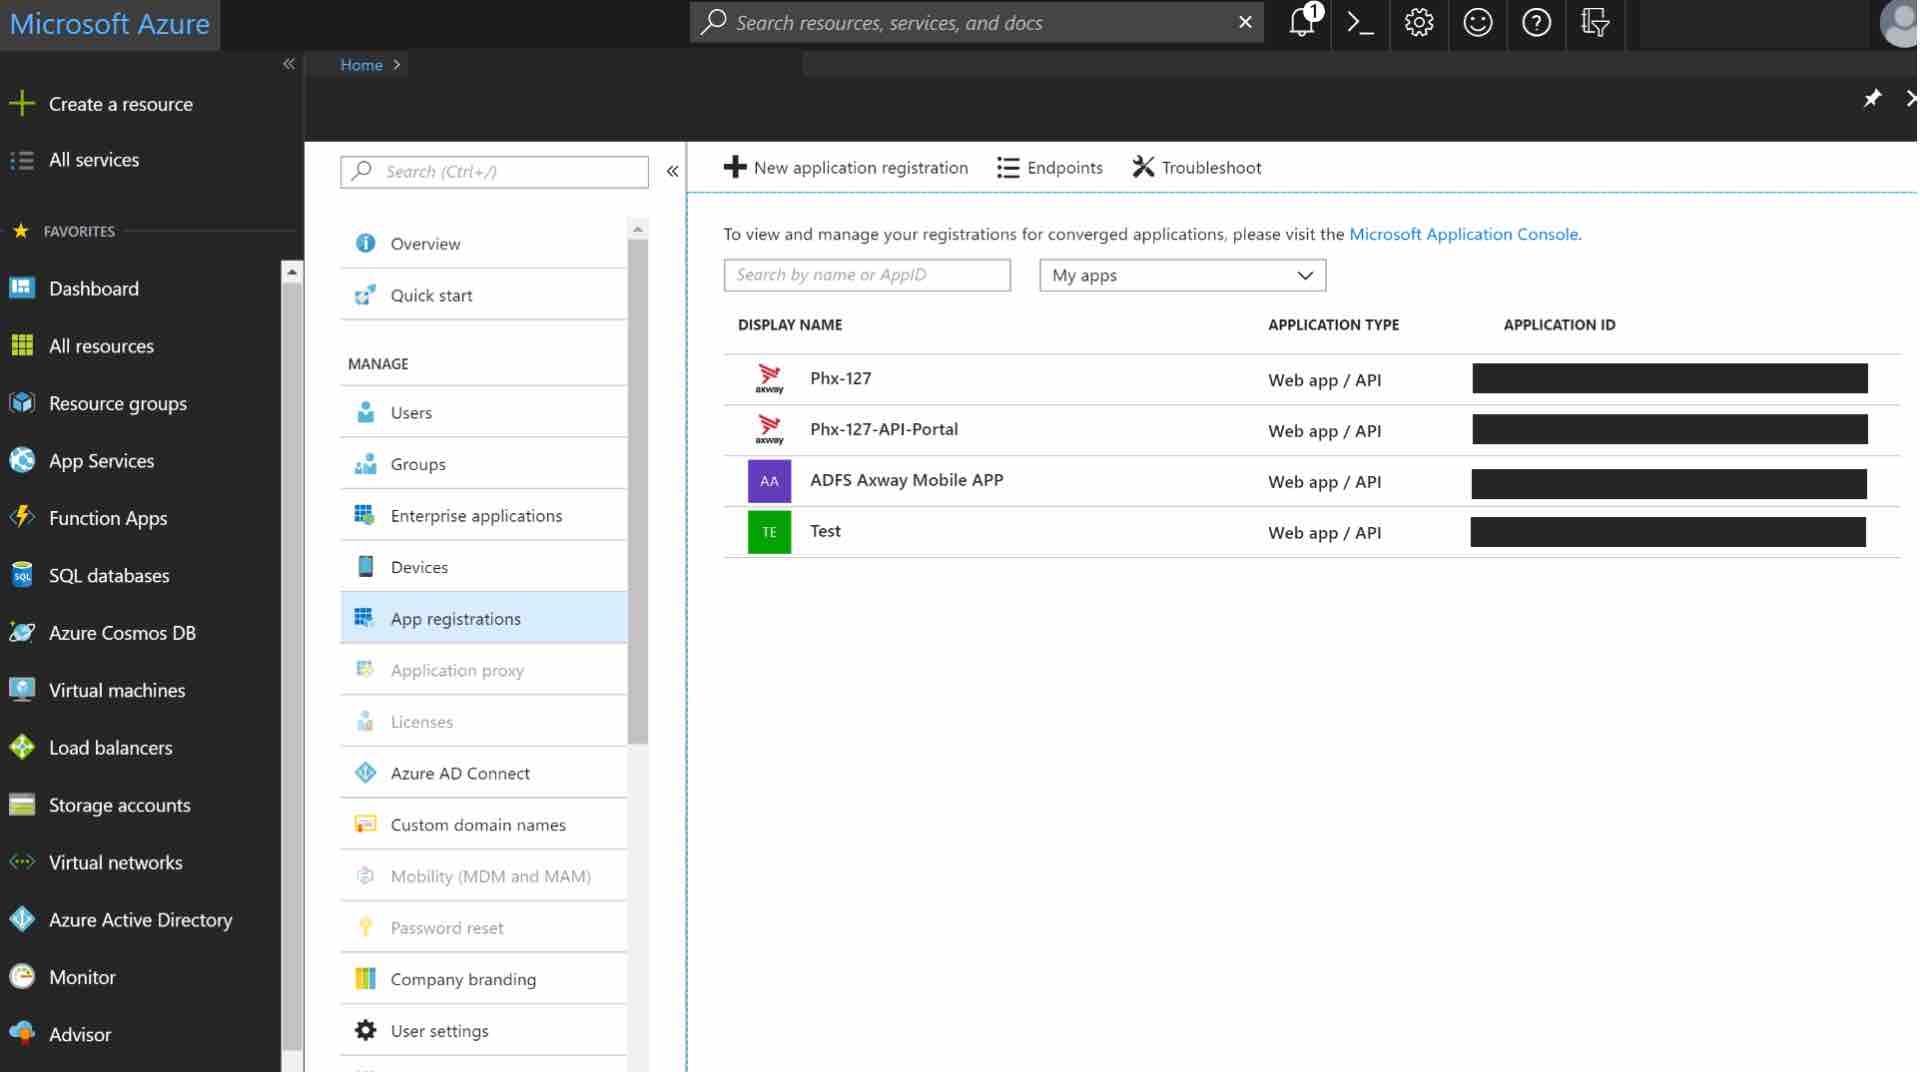
Under MANAGE, select App registrations.

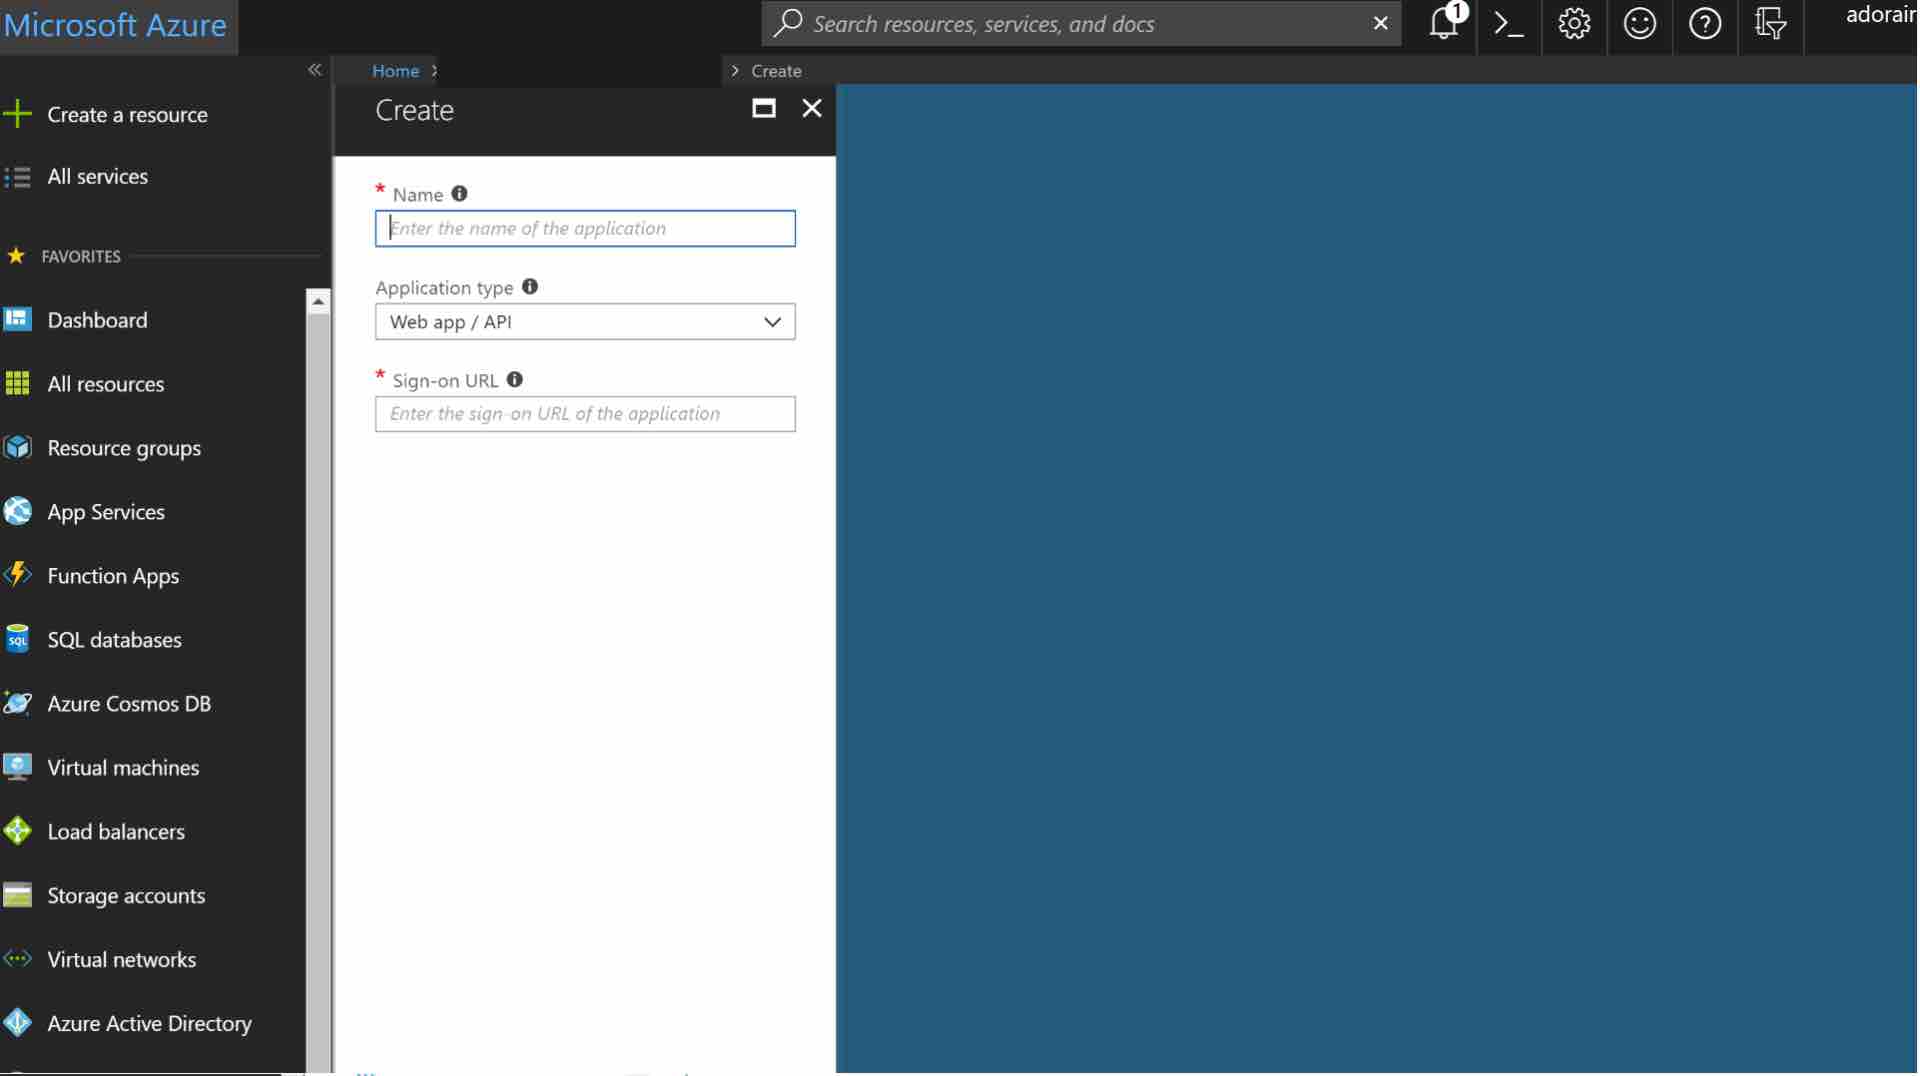
Click on the + ADD button to add a new application.
Enter a Name for the application, select Web app/API as the Application Type, and enter your application URL for Sign-on URL.
Configure the permissions
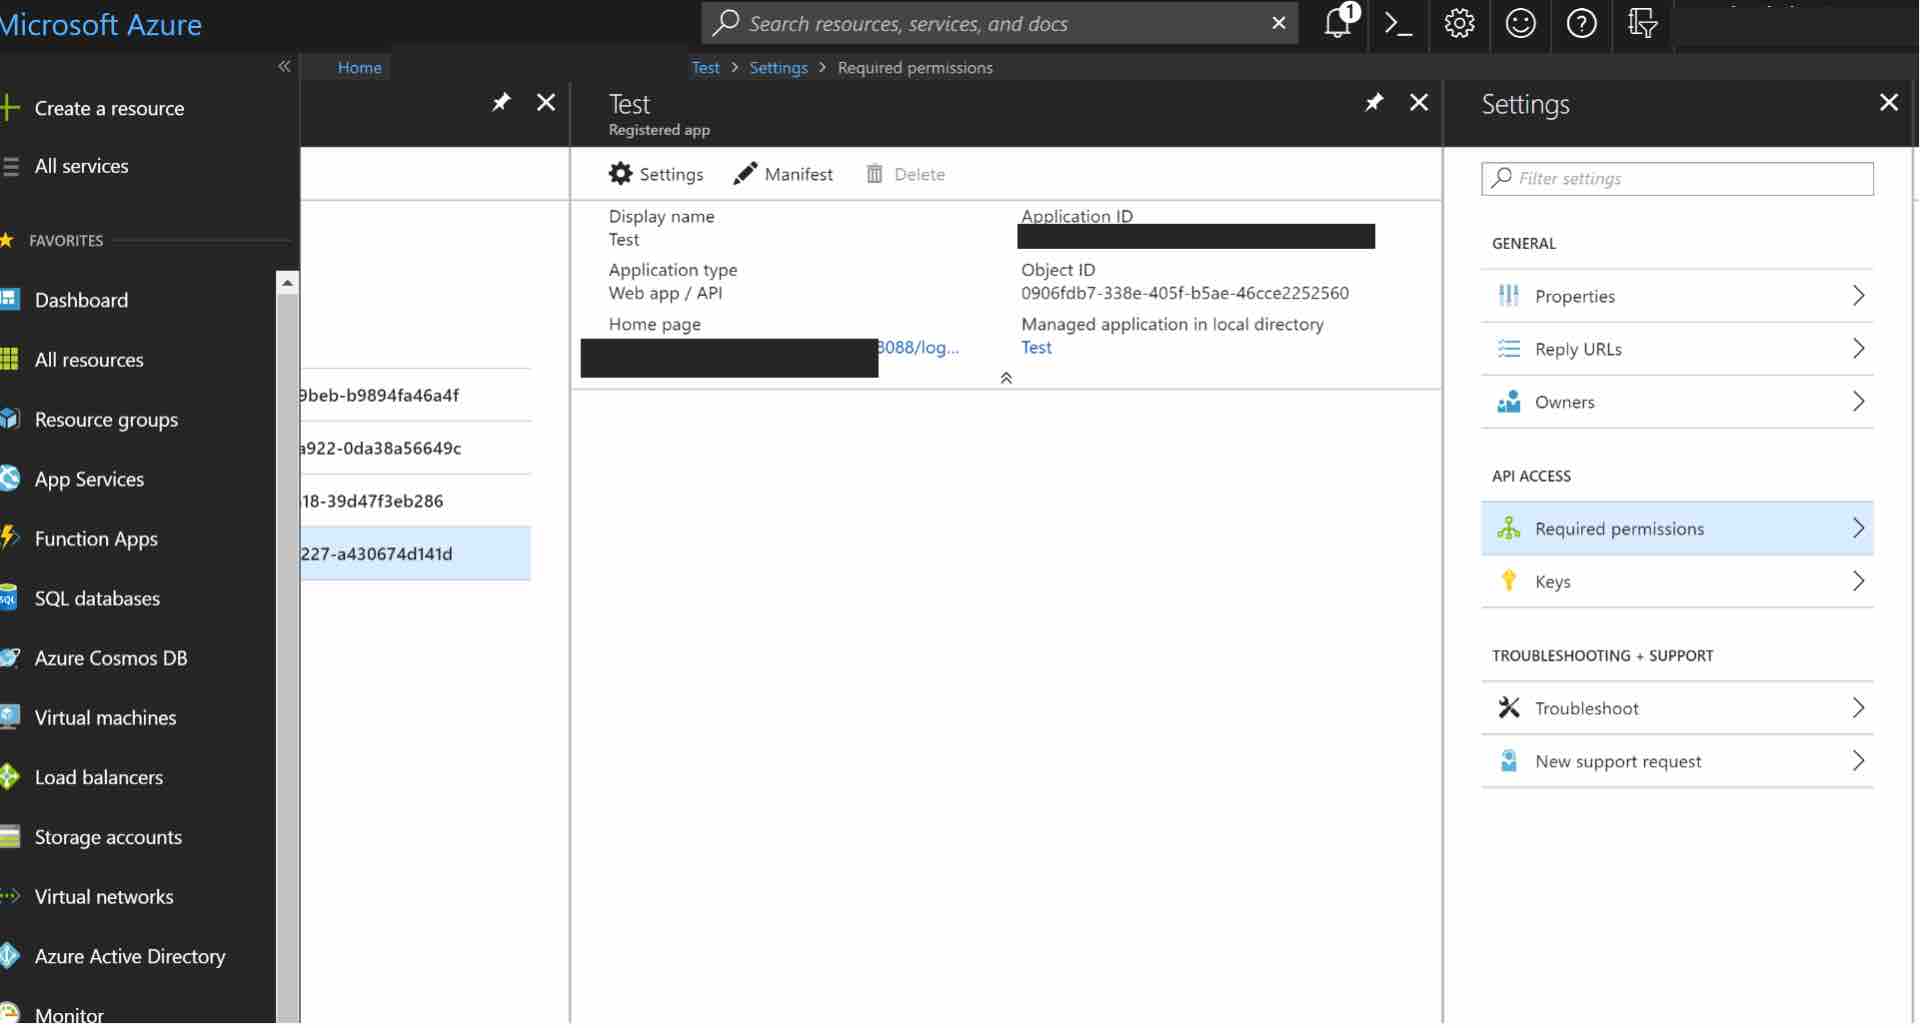
Once the application has been created, configure the permissions. Click on the name of the application to open the Settings section. For example, see the “Test” application below.
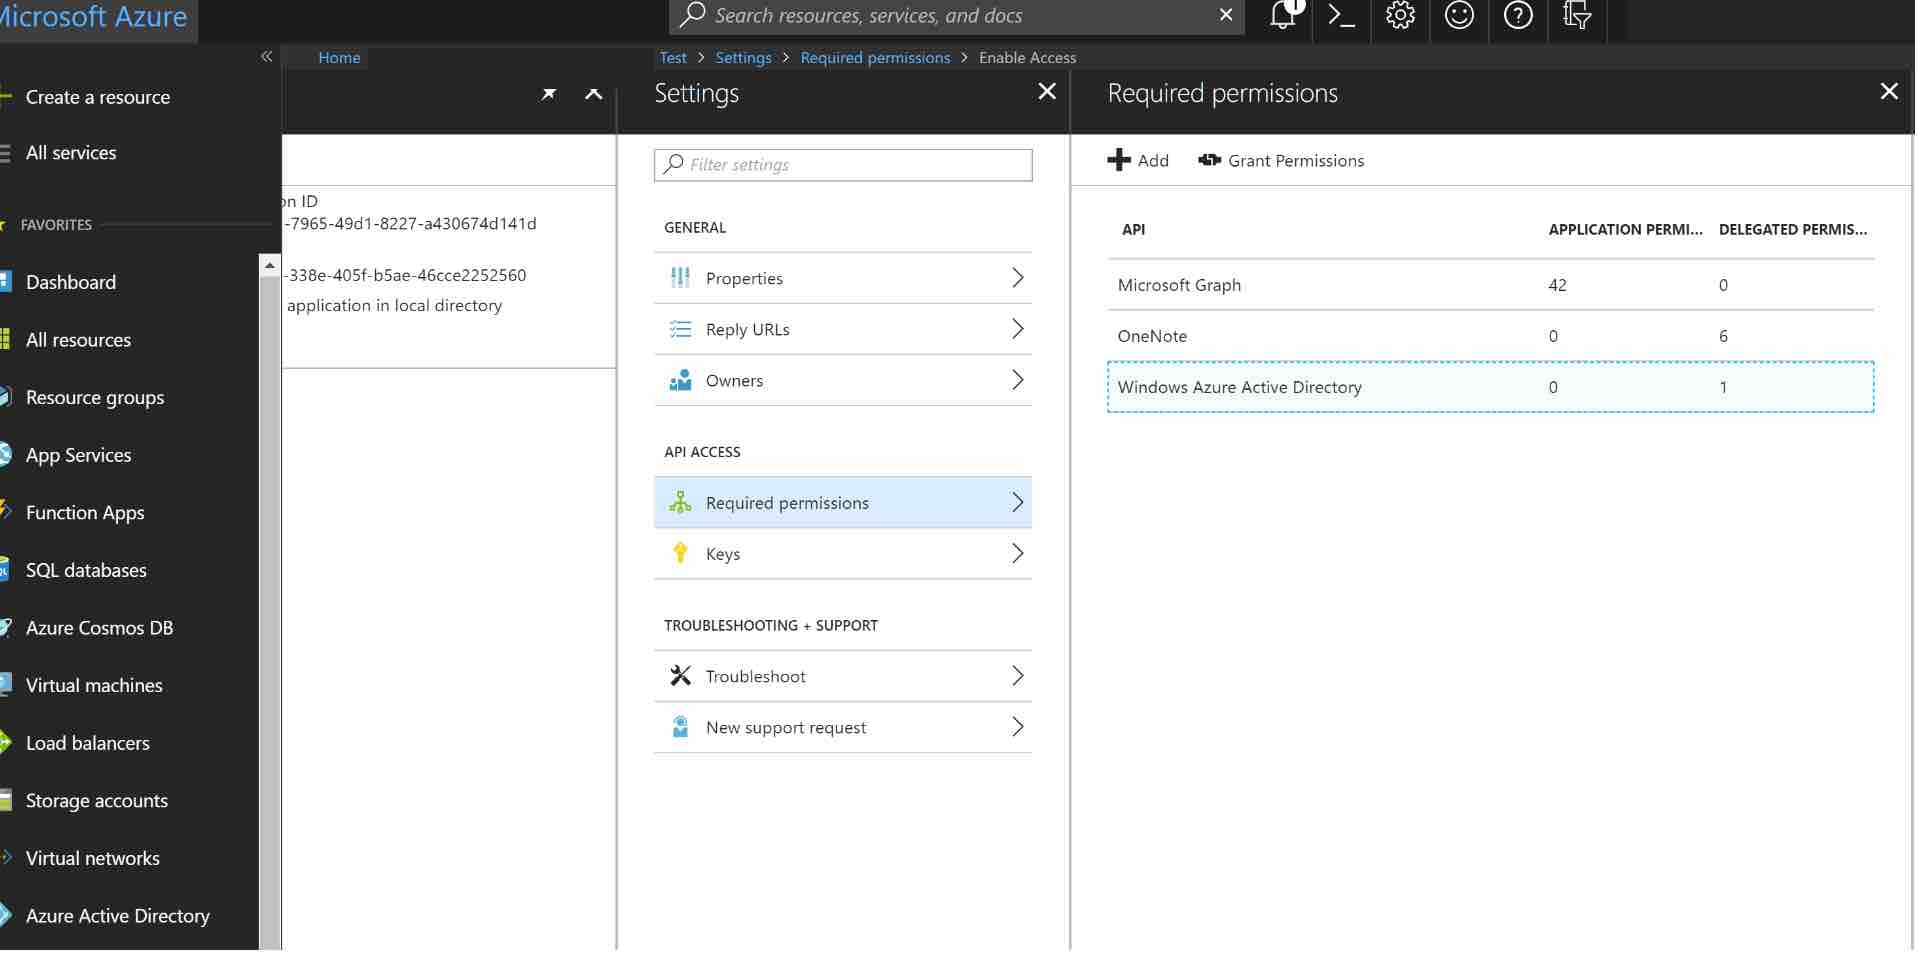
Click Required permissions.
Then, click on Windows Azure Active Directory to change the access levels.
The next step is to modify permissions, so your app can read the directory. Under DELEGATED PERMISSIONS, check next to Sign in and read user profile and Read directory data.
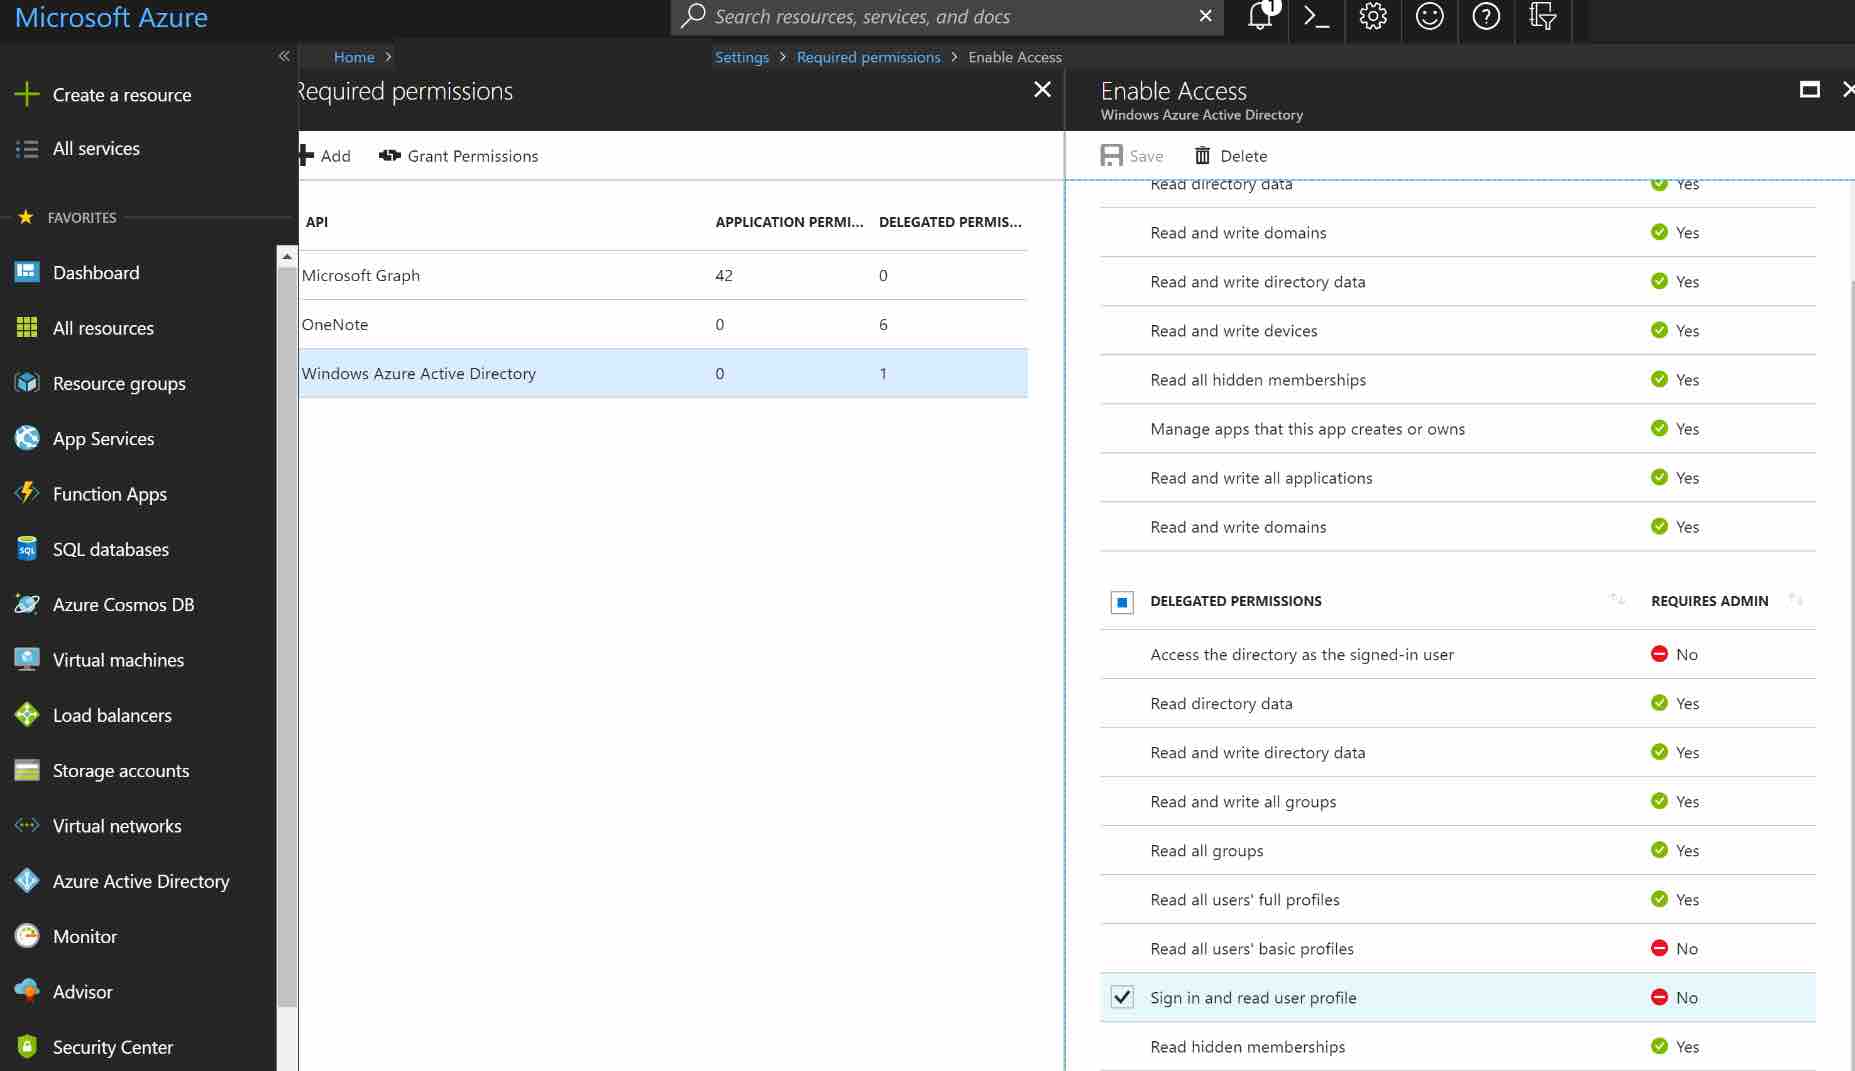
NOTE: If you want to enable extended attributes (like Extended Profile or Security Groups), you will also need to enable the following permissions:
- Application Permissions: Read directory data
- Delegated Permissions: Access the directory as the signed-in user
Click the SAVE button at the top to save these changes.
Allow access from external organizations (optional)
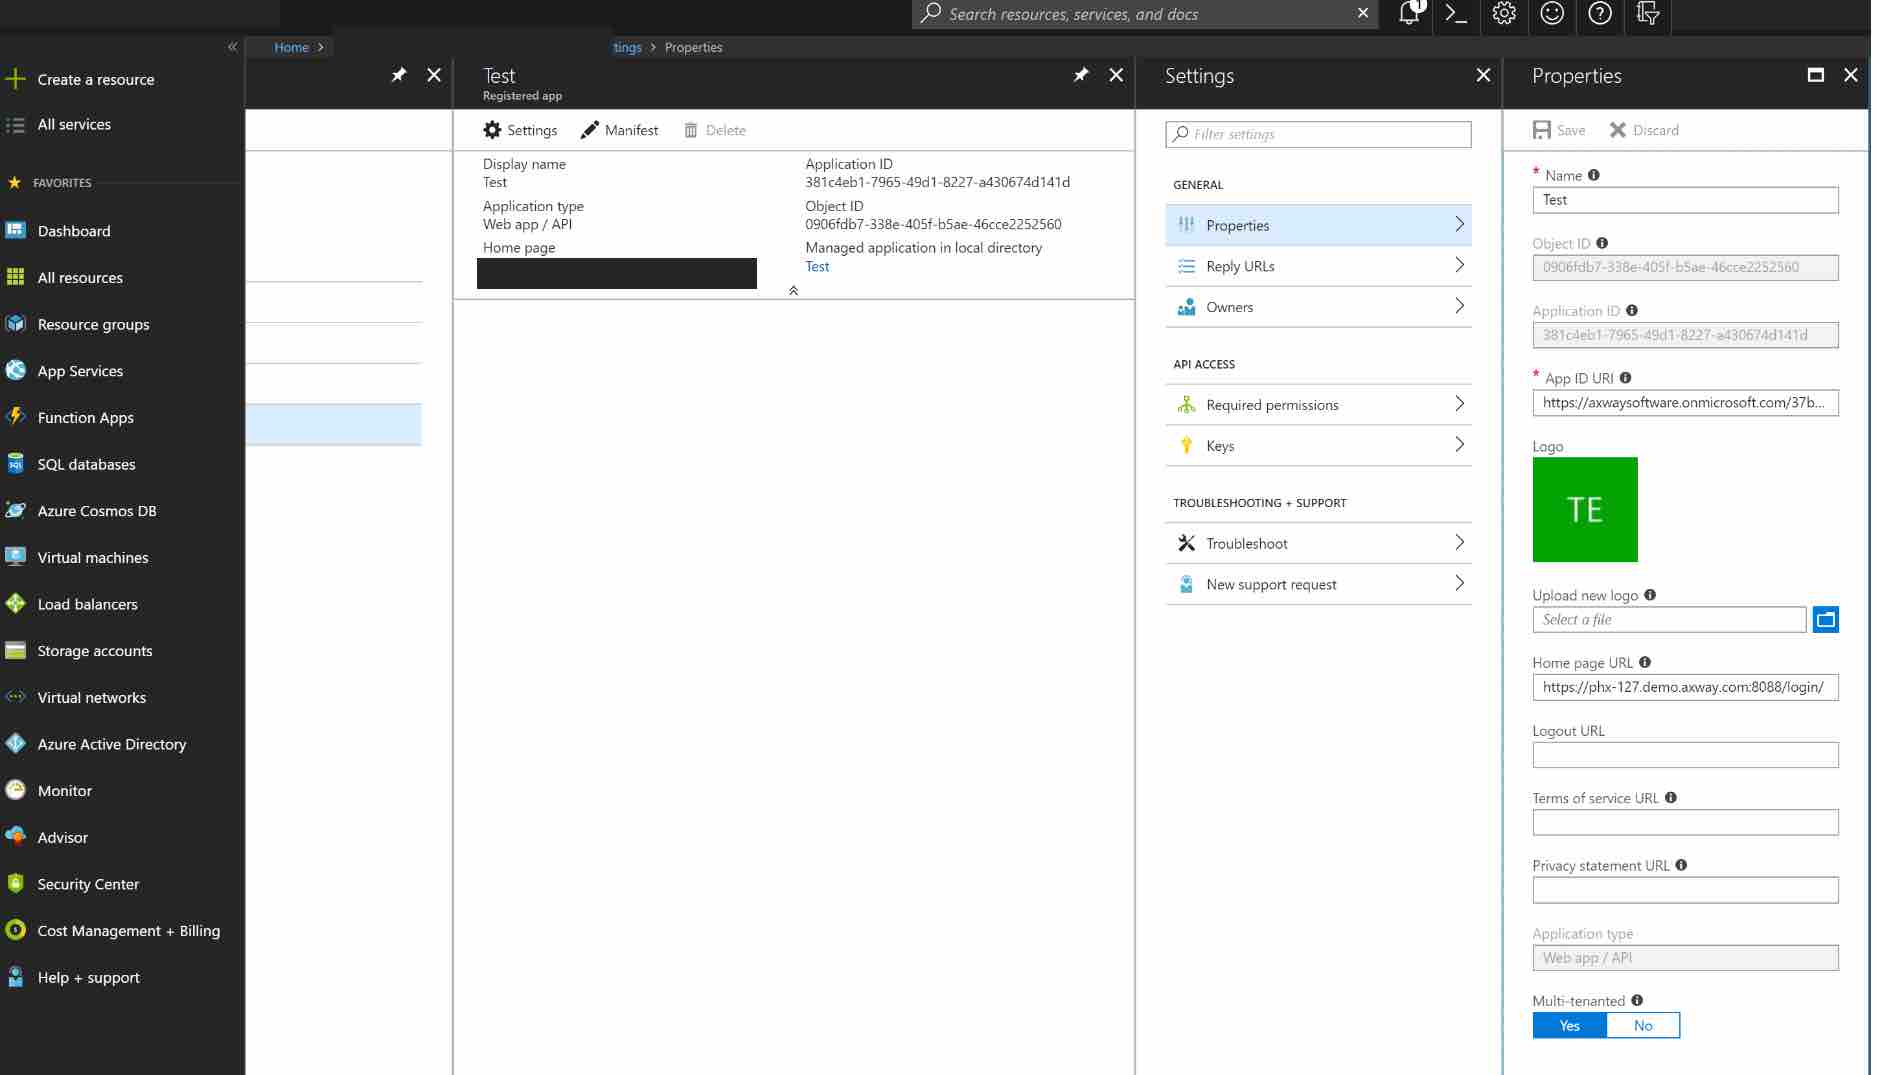
If you want to allow users from external organizations (such as other Azure directories) to log in, you will need to enable the Multi-Tenant flag for this application. In the Settings section, click Properties. Locate the Multi-tenanted toggle at the bottom and select Yes. Finally click the SAVE button at the top to save these changes.
Create the key
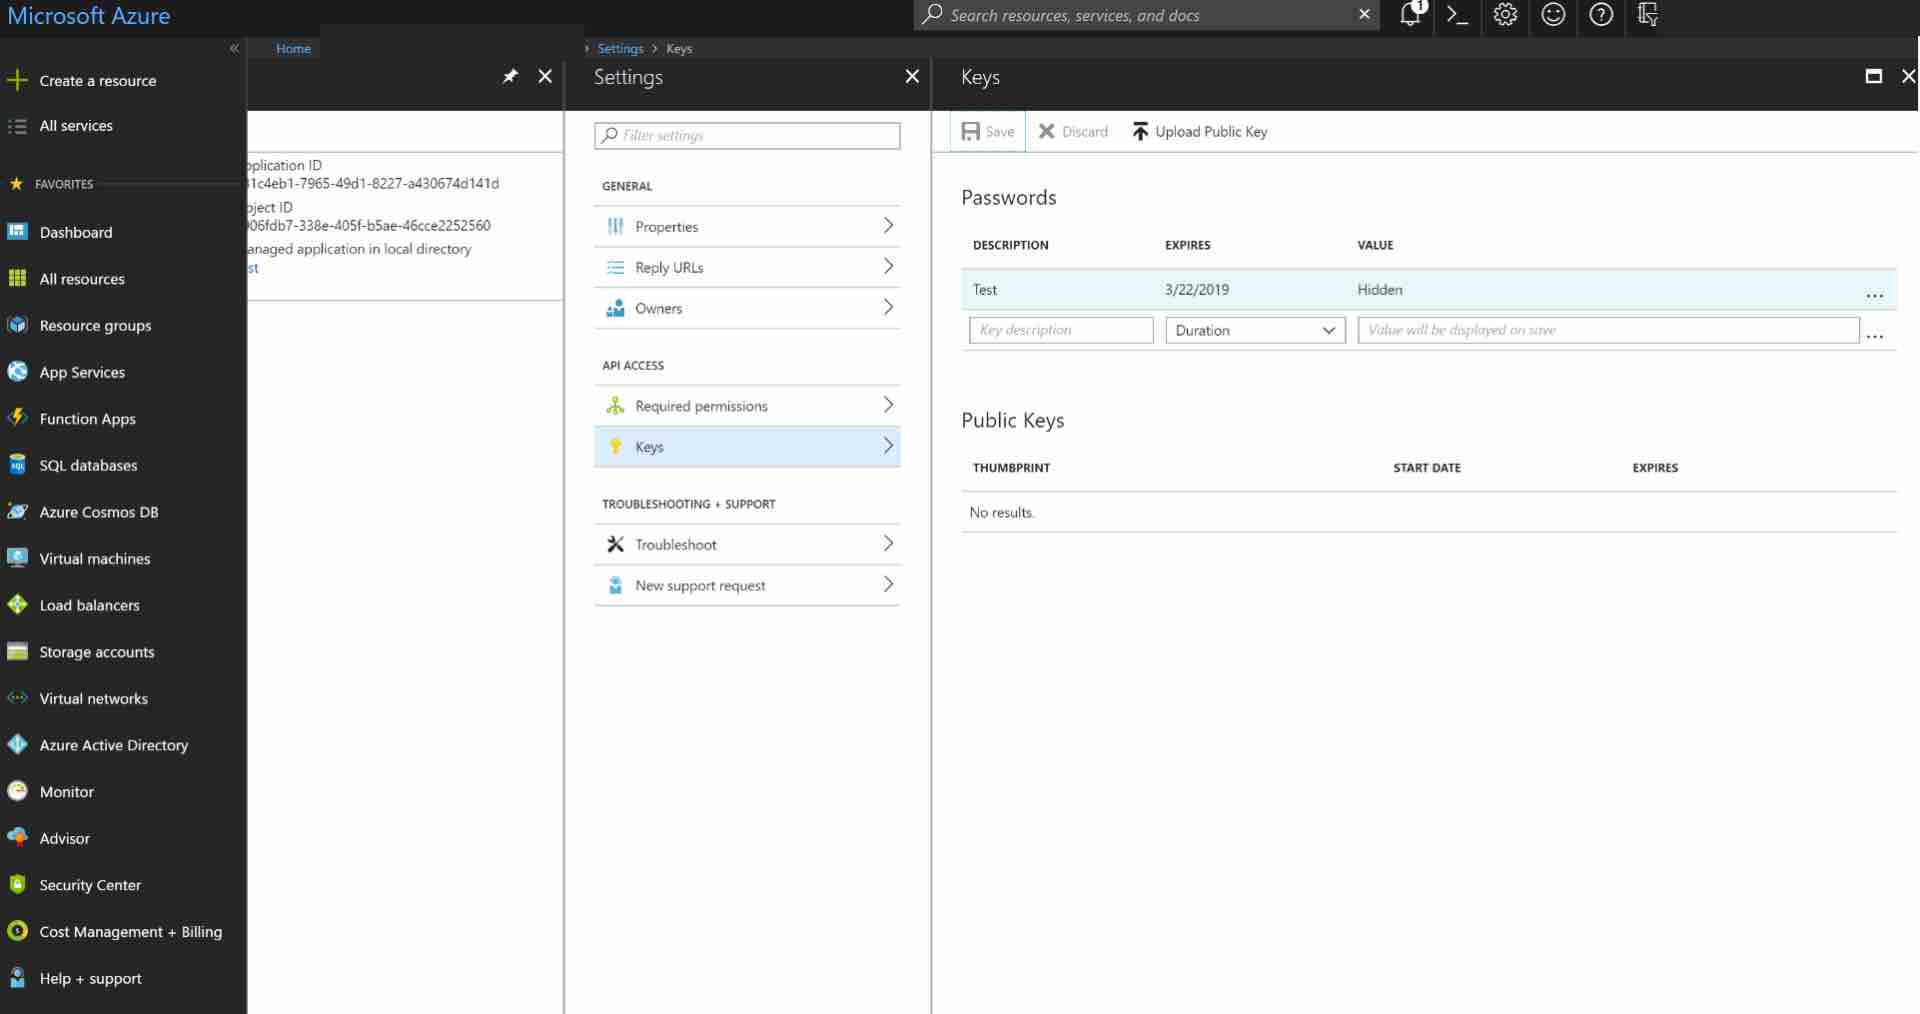
Next, you will need to create a key to be used as the Client Secret in the API Gateway connection. Click on Keys from the Settings menu.
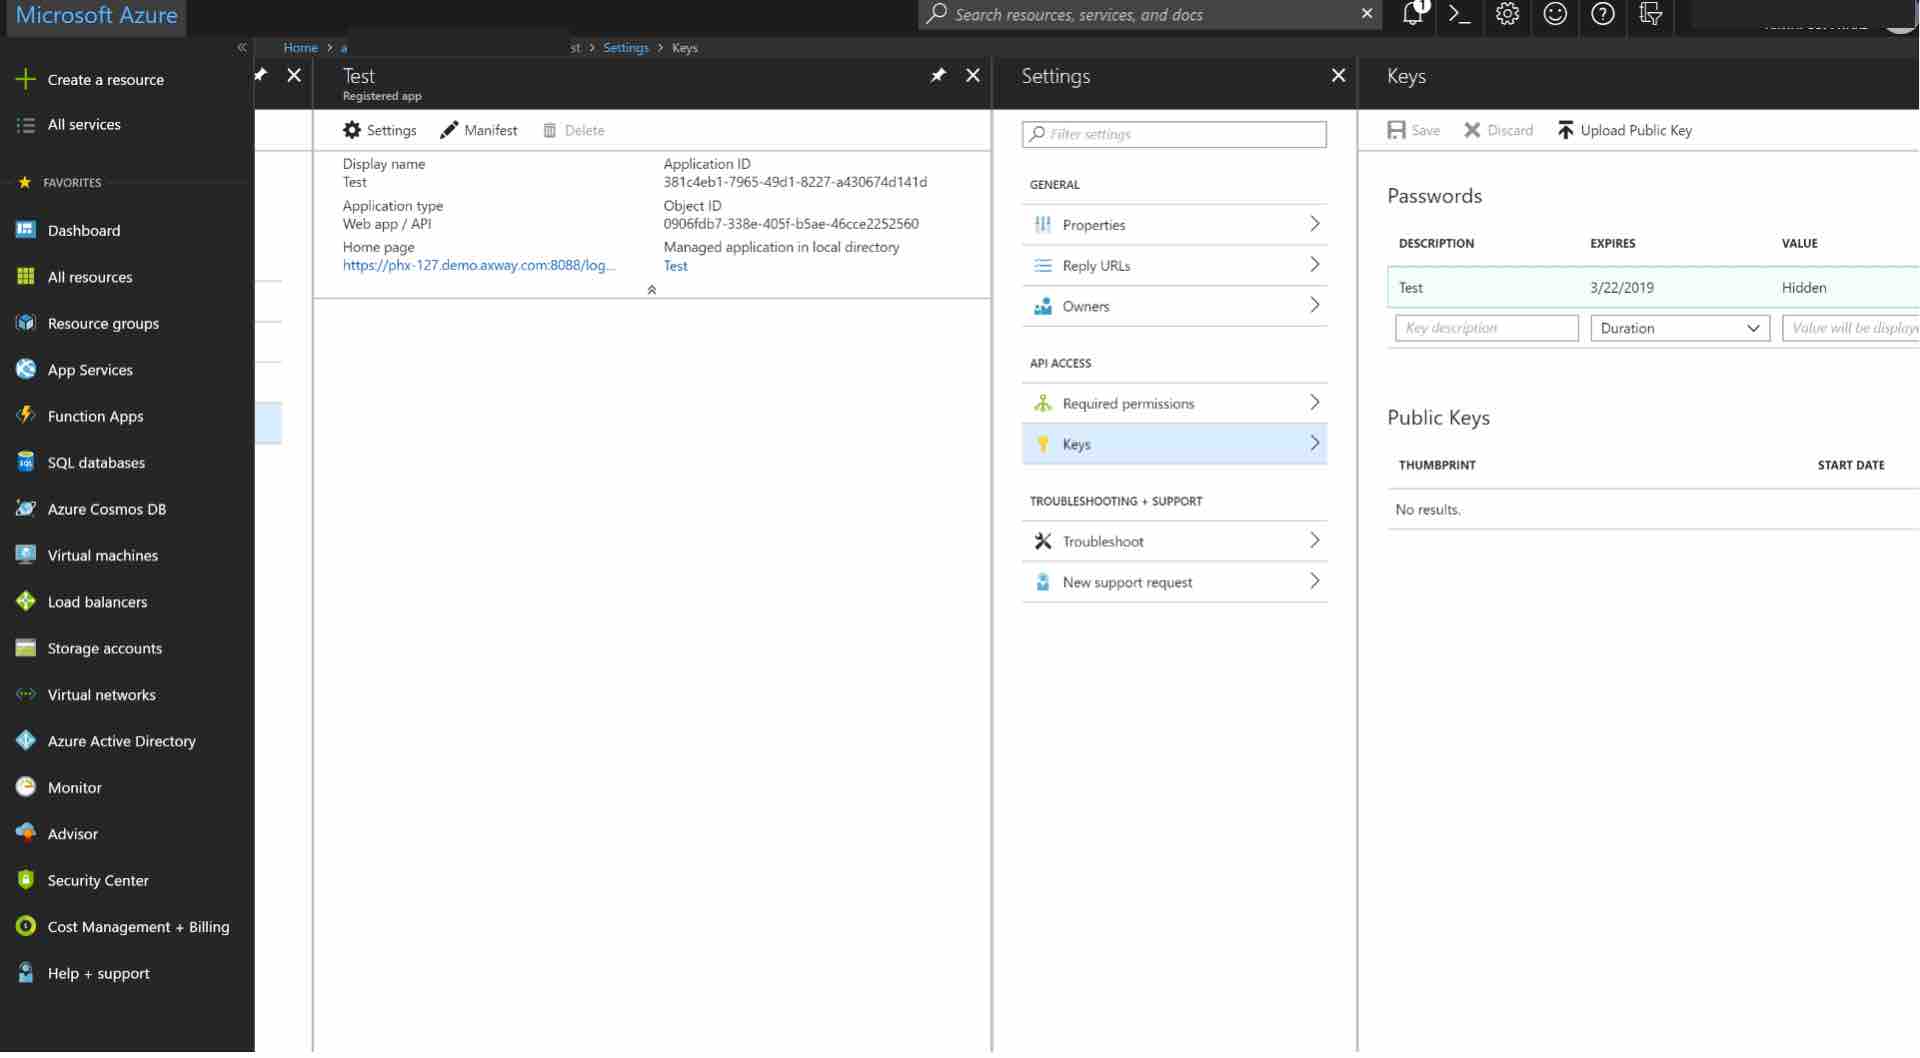
Enter a name for the key and choose the desired duration.
NOTE: If you choose an expiring key, make sure to record the expiration date in your calendar, as you will need to renew the key (get a new one) before that day in order to ensure users don’t experience a service interruption.
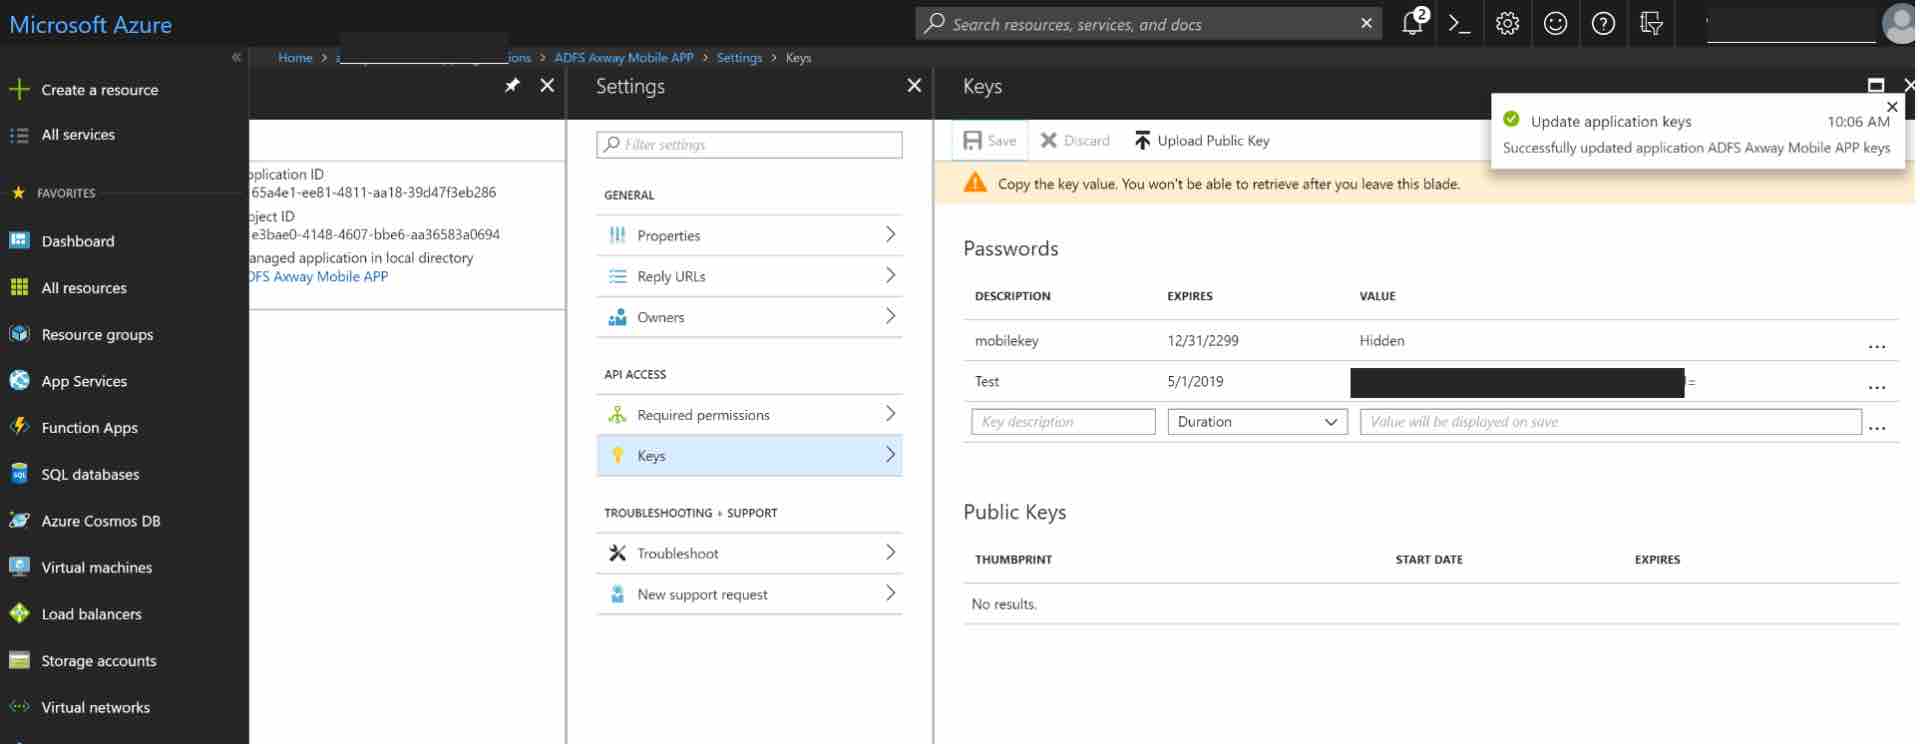
Click Save and the key will be displayed. Make sure to copy the value of this key before leaving this screen, otherwise you may need to create a new key. This value is used as the Client Secret in the next step.
Configure Reply URLs
Next, ensure that your API Gateway OAuth callback URL is listed in allowed reply URLs for the created application. Navigate to Azure Active Directory -> Apps registrations and select your app. Then click Settings -> Reply URLs and add:
https://YOUR_APIGATEWAY_OAUTH_DOMAIN/oauth2/callback
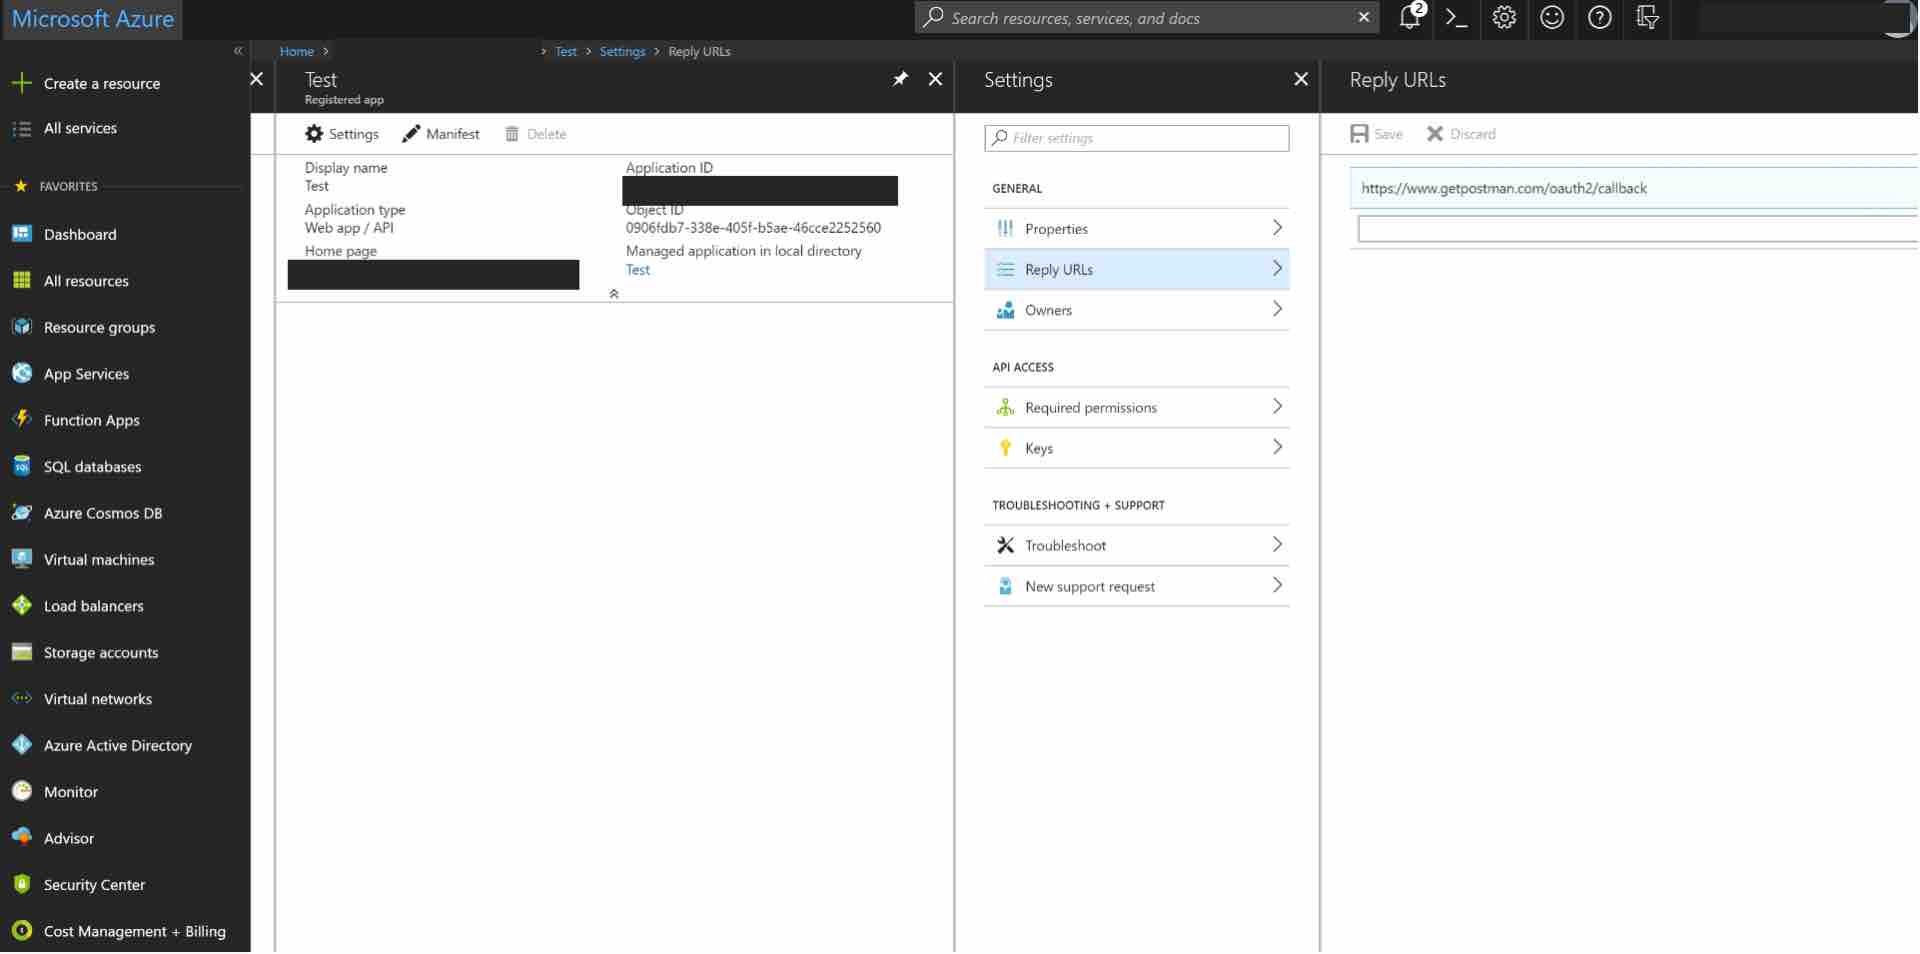
We are using Postman as the call back, hence the postman callback url has been added here. (https://www.getpostman.com/oauth2/callback)
Without this step, the App consent page will return a “Bad request” error. The fine print in the footer of this error page can be used to identify the exact tenant name and missing callback url.
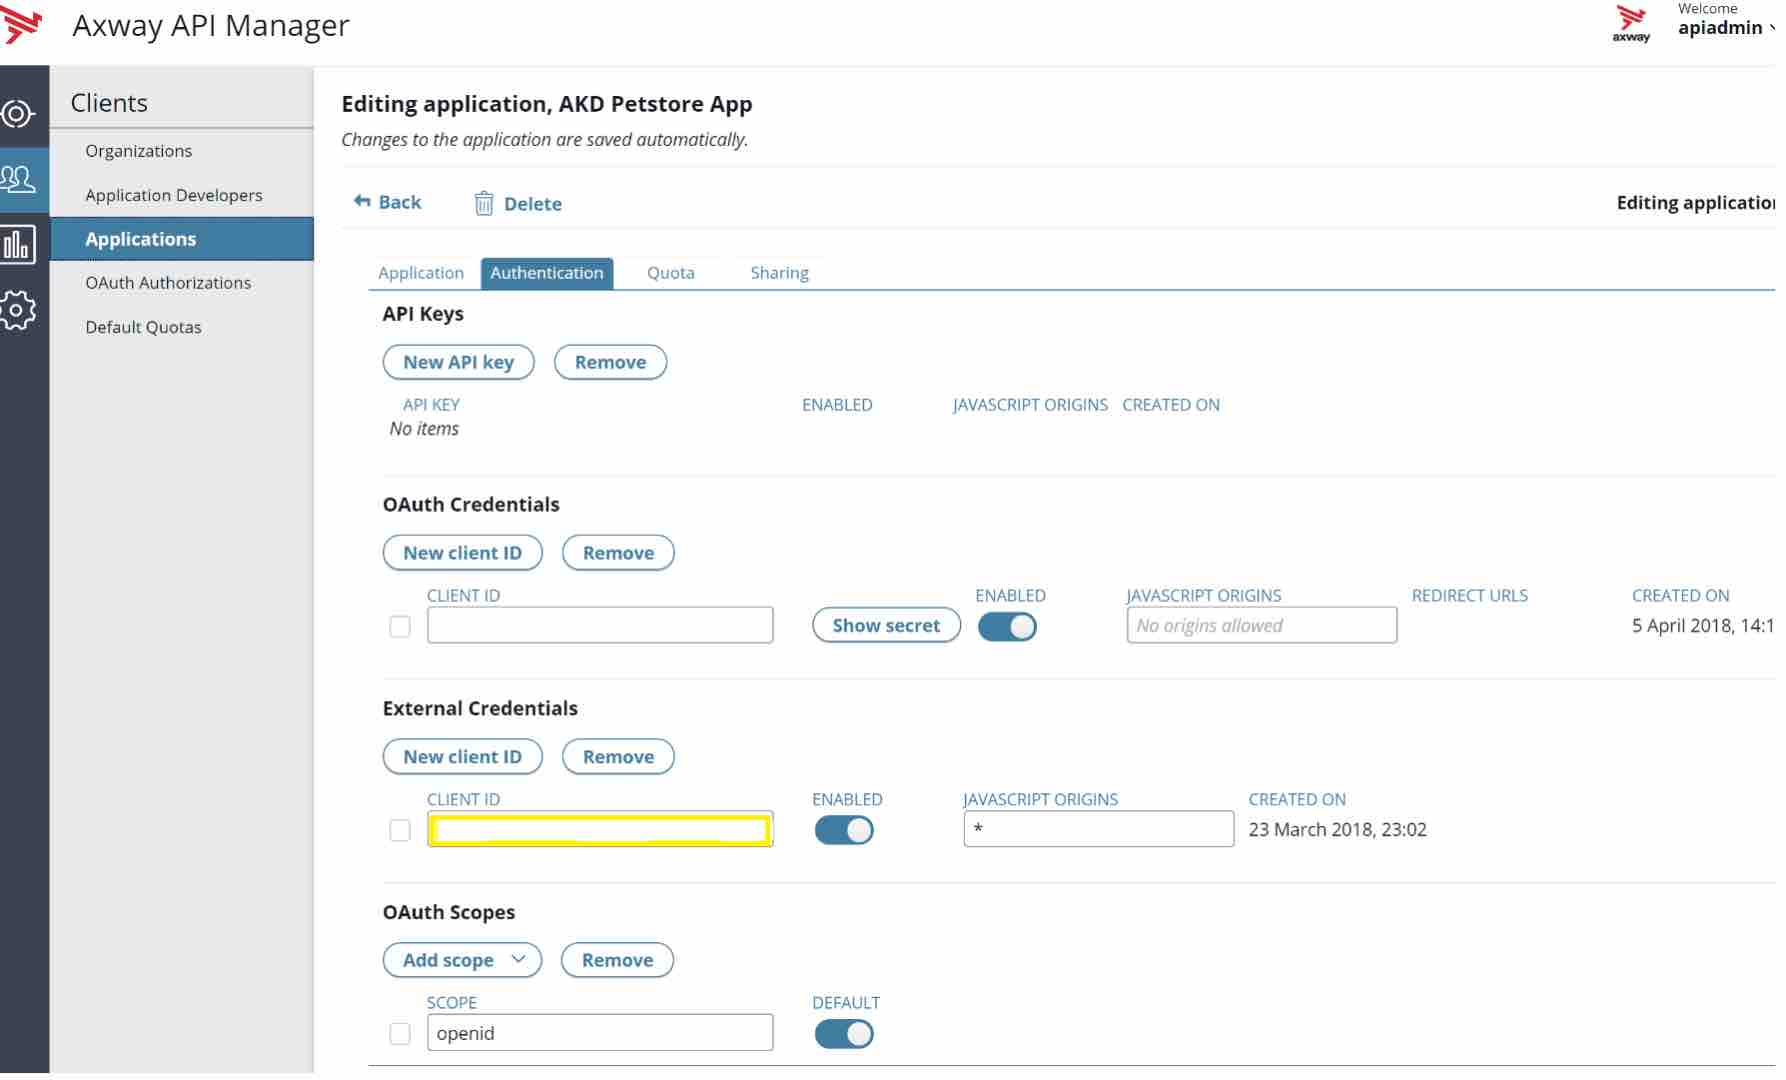
Configure the App in API Manager
Now, you need to Login to API Manager to create an App and use the Azure Client Id.
Build the Azure Token Verification Policy in Policy Studio
It does the following:
- Verify the JWT with the right X509 certificate (the certificate can be found in the FEDERATION METADATA DOCUMENT in Azure ( App Registrations – Endpoints )
Example – (https://login.microsoftonline.com/{your-azure-instance}/federationmetadata/2007-06/federationmetadata.xml ) - If Valid – extract the token and check if the DateTime is Valid, the client id, scopes are valid. Return True.
- If Invalid – Return False.
Policy is also attached with this document.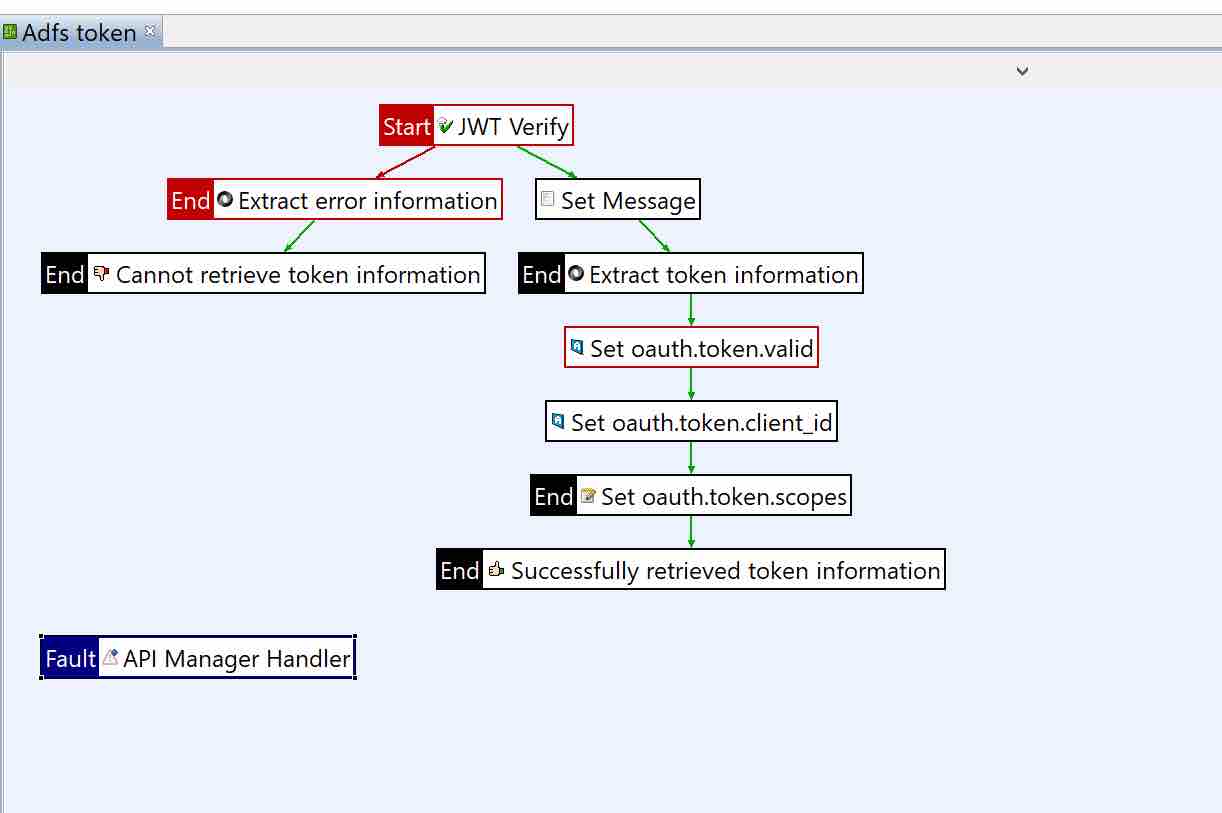
Add the Policy Under the OAuth Token Information Policies.
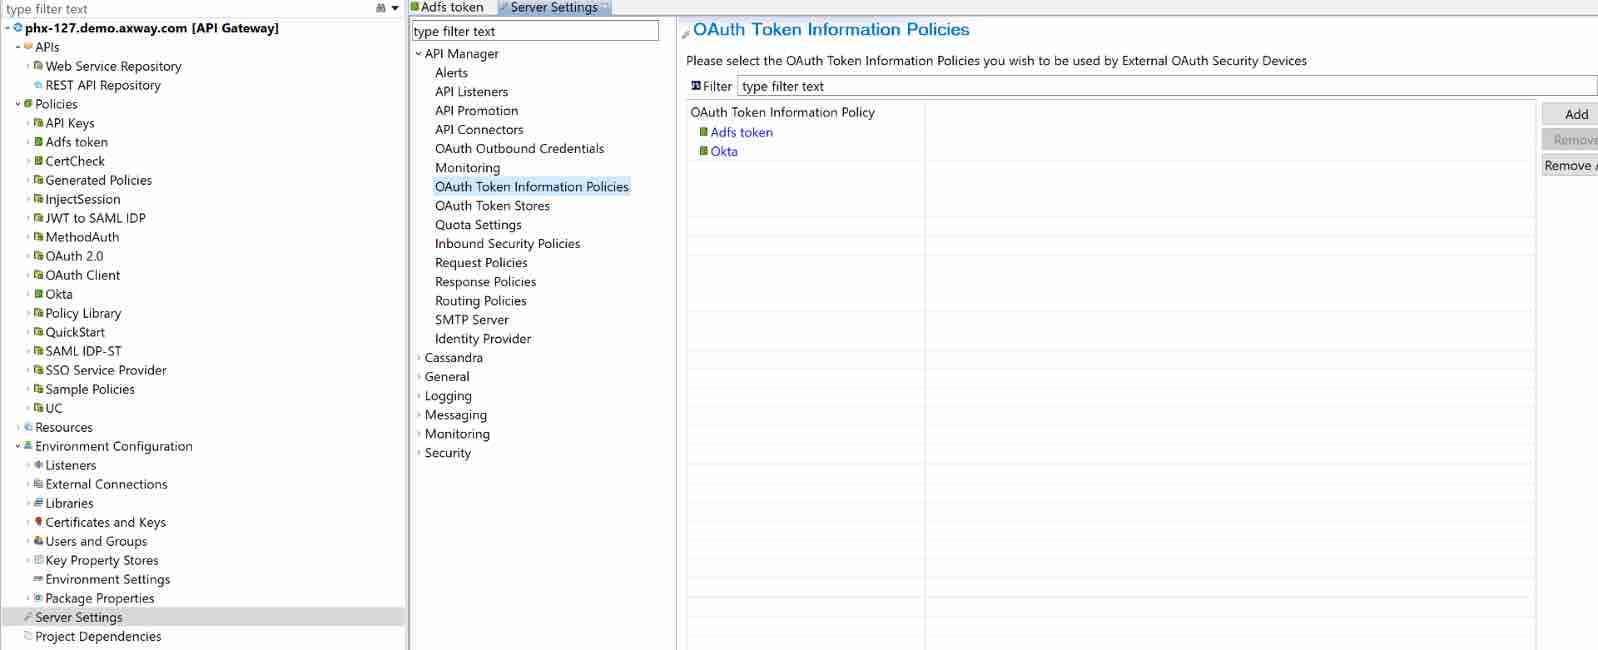
And then Deploy, so the Policy is available in API Manager.
Secure your API in API Manager with the Policy
- Import a backend API and virtualize as Frontend API
- Select OAuth (External) as FrontEnd Authentication from the drop-down.
- Select the policy previously created from the Token Information policy dropdown.
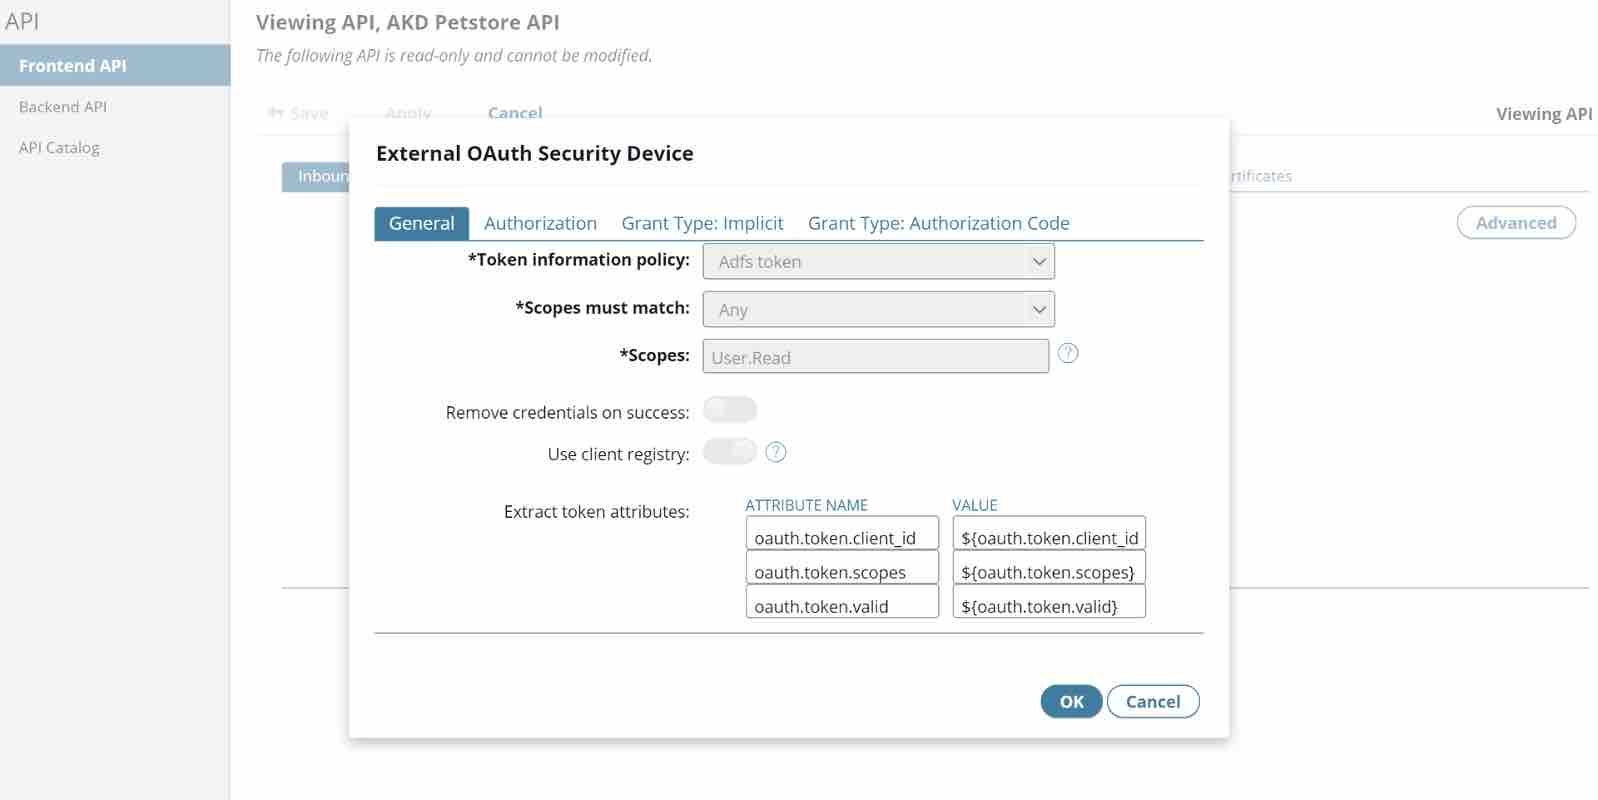
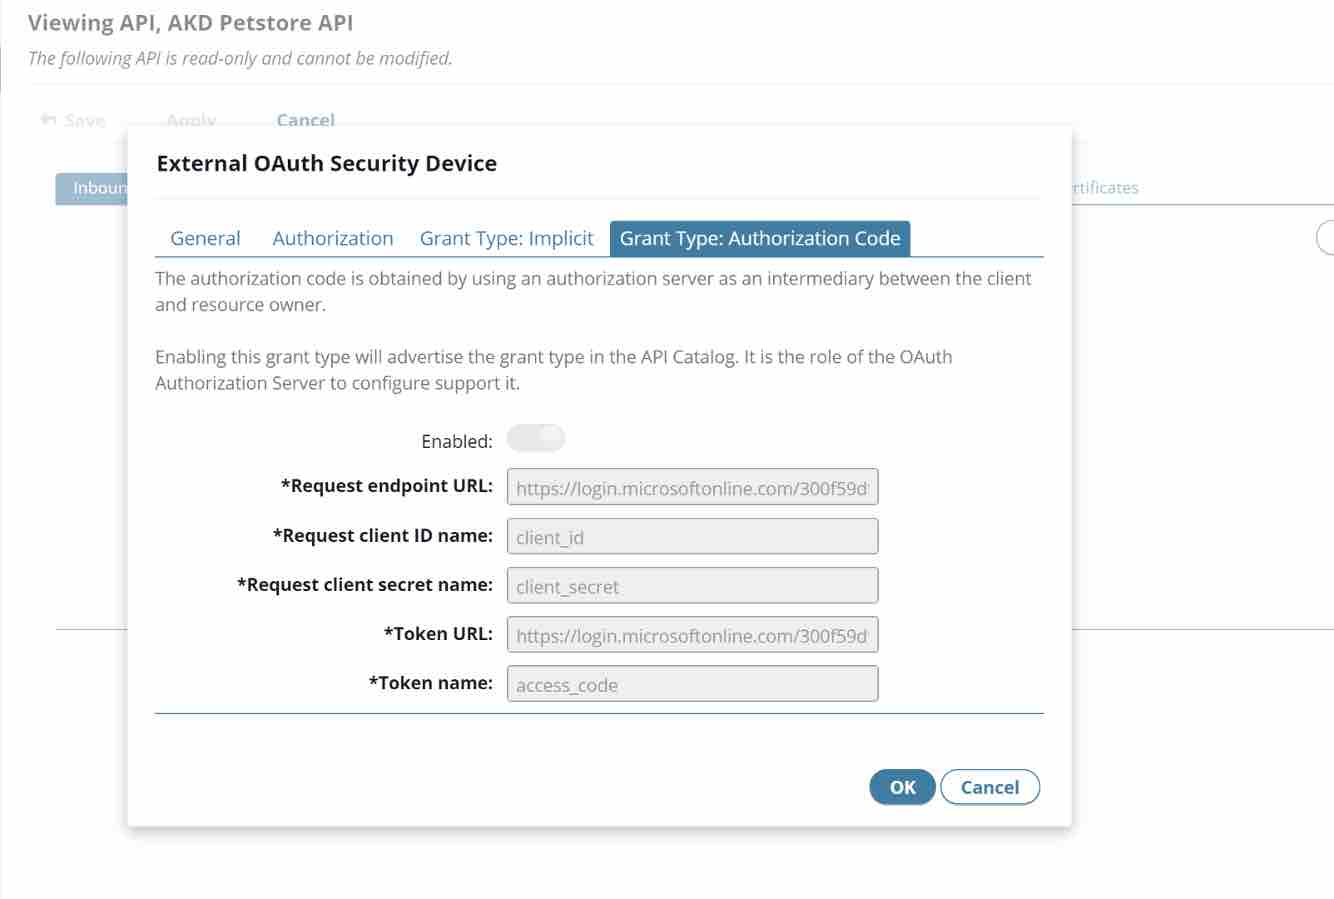
- Since we are configuring Authorization Code as the Grant Type:
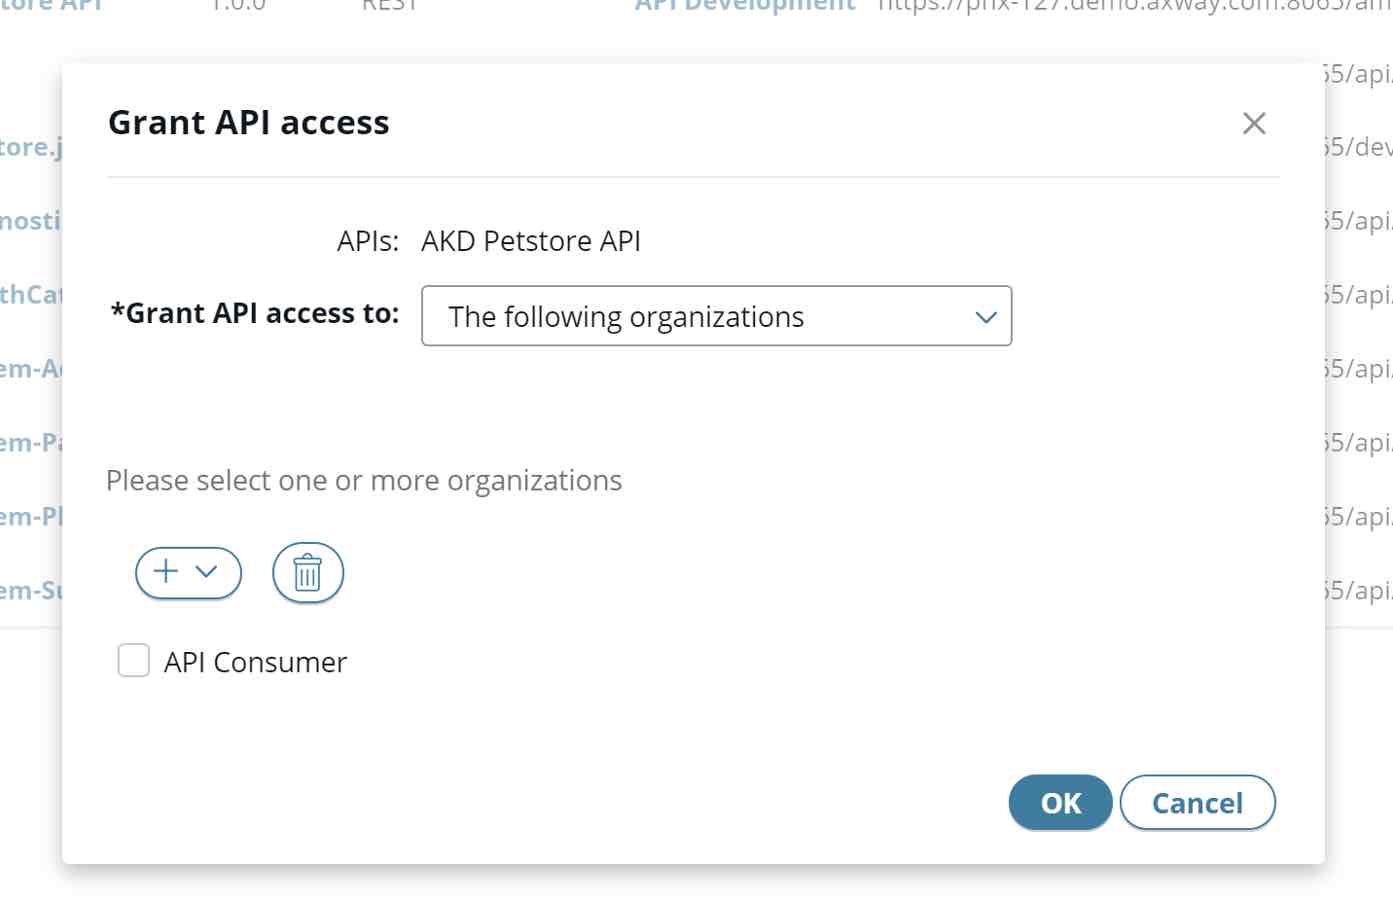
- Publish the API, grant the API access to the right Organization (the Organization where the App was created)
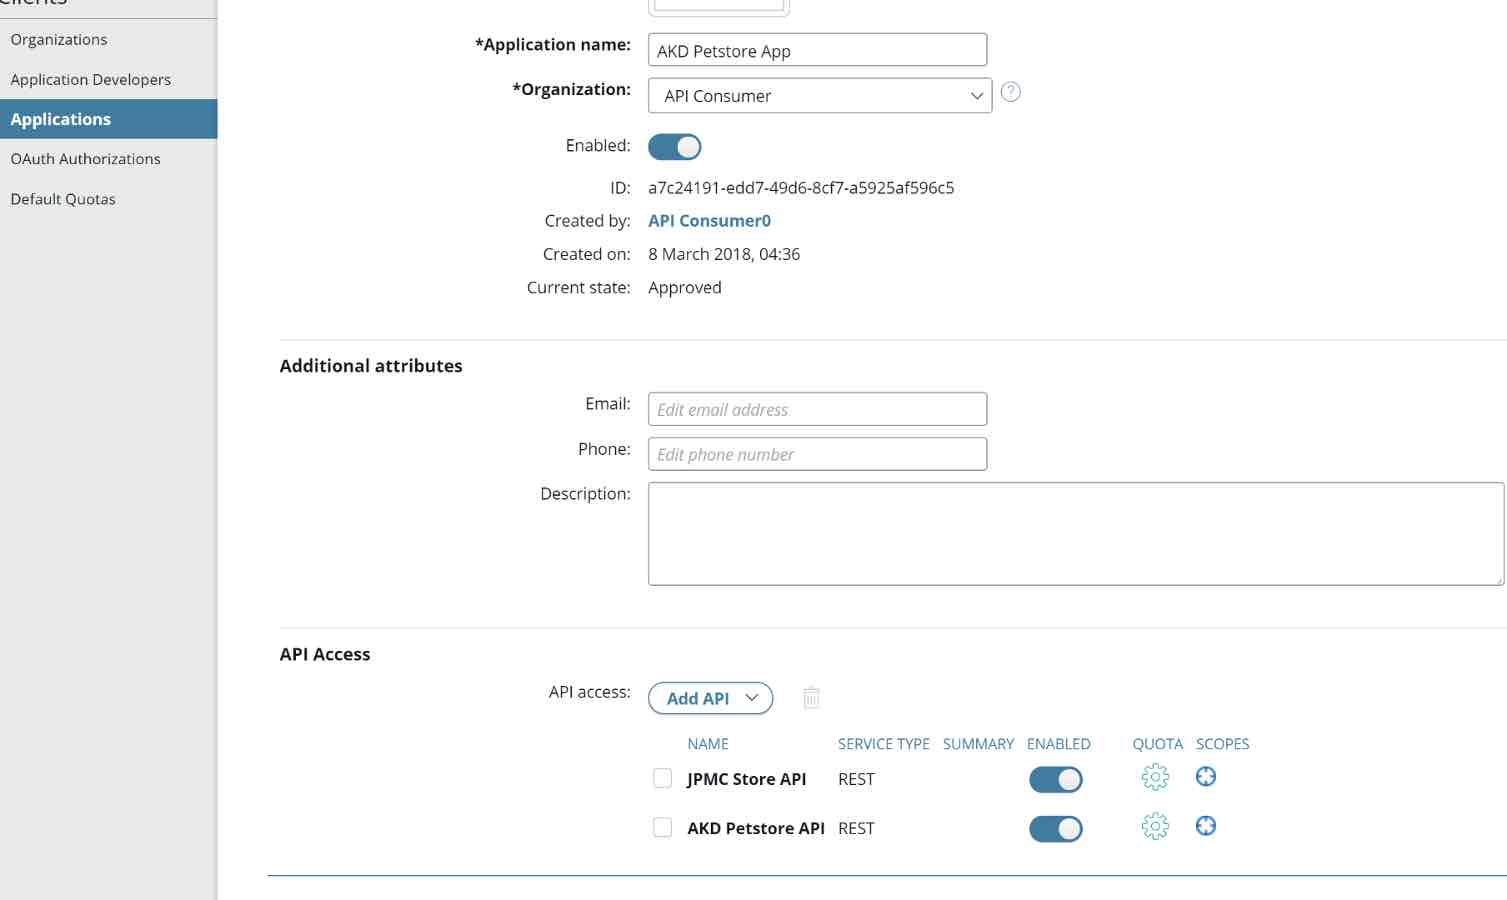
- Go to the App that was created and Grant API Access
- The API is now ready to be tested.
Congratulations! You are now ready to accept Microsoft Azure AD users.
Test the API via Postman
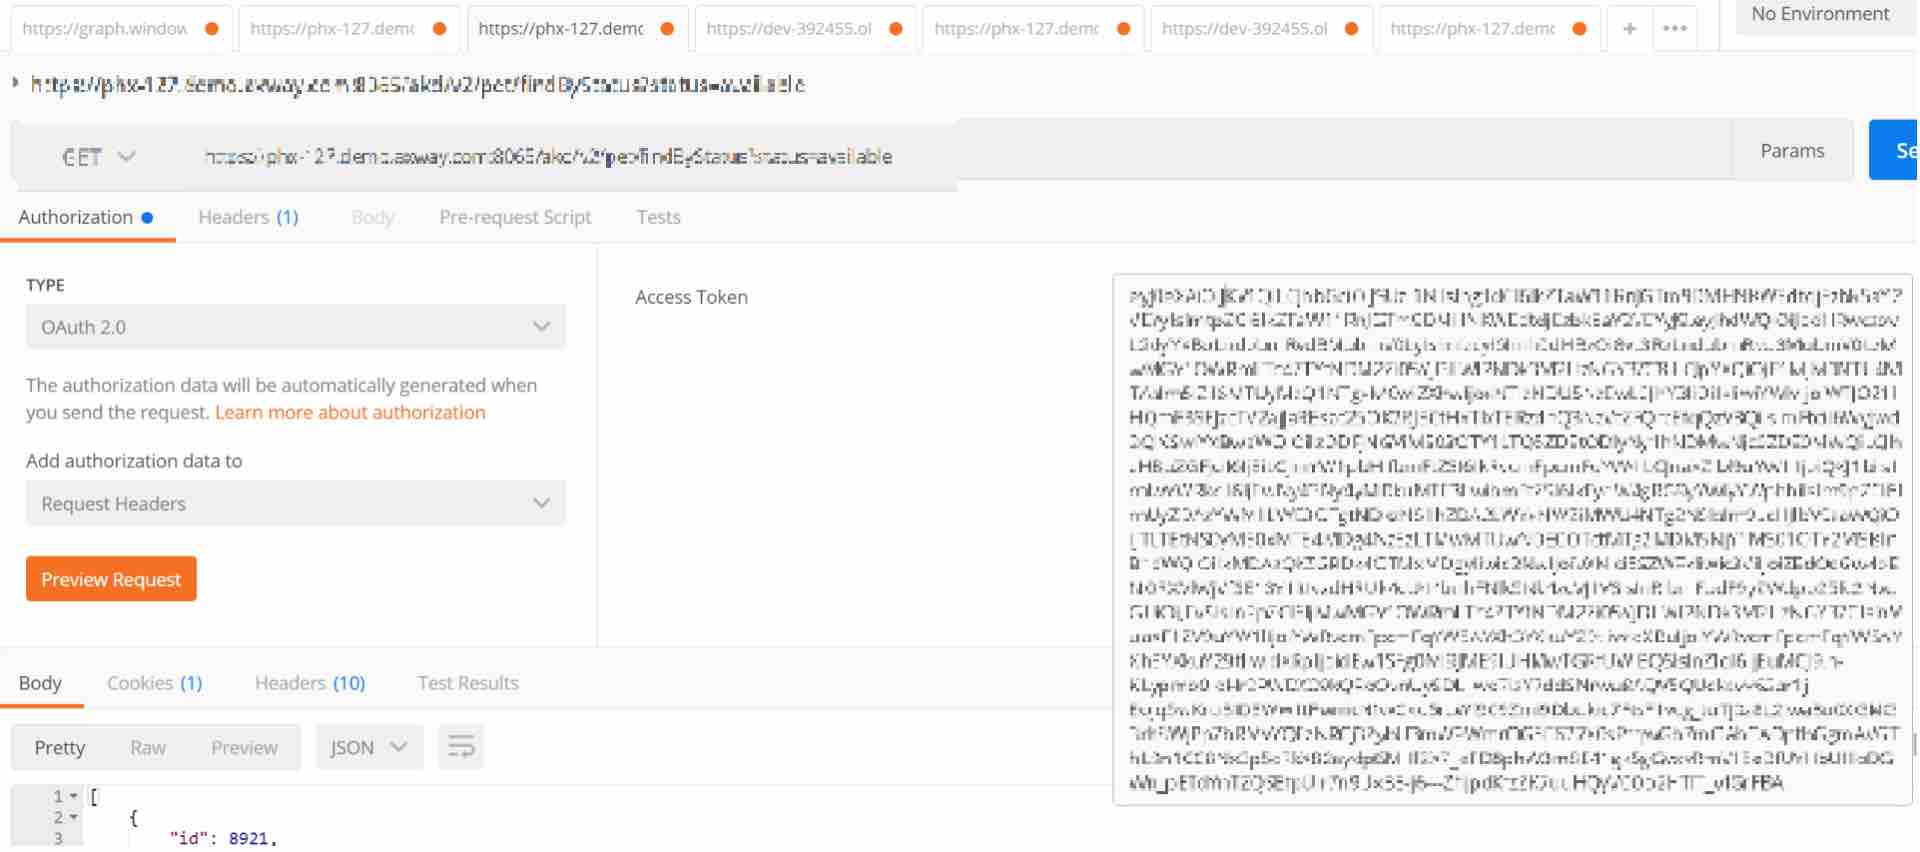
Next, configure Postman with all the right information required to make the call to Azure and get the JWT Token.
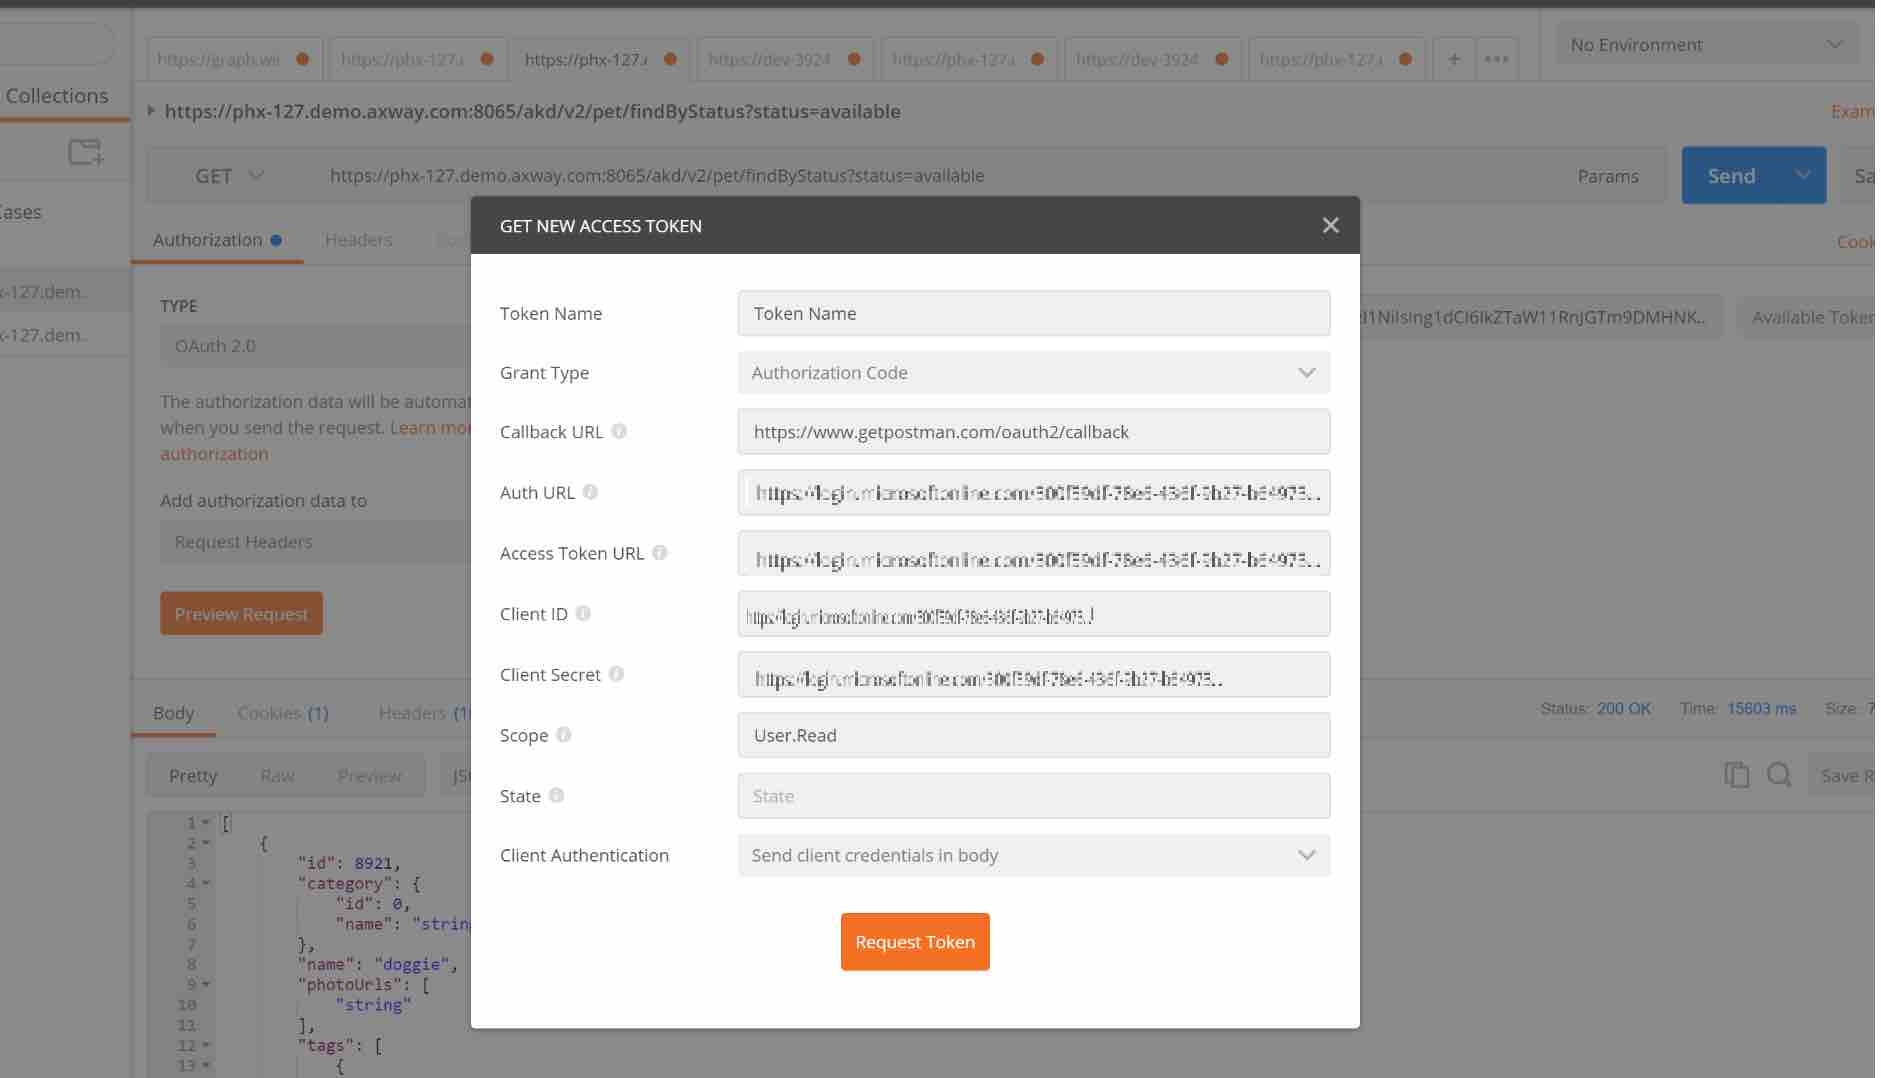
Click on Request Token and if everything is configured correctly, it will take you to the Azure Authentication Page where you will enter you credentials.
Once the credentials are validated, it will return back to Postman with the JWT Access Token.

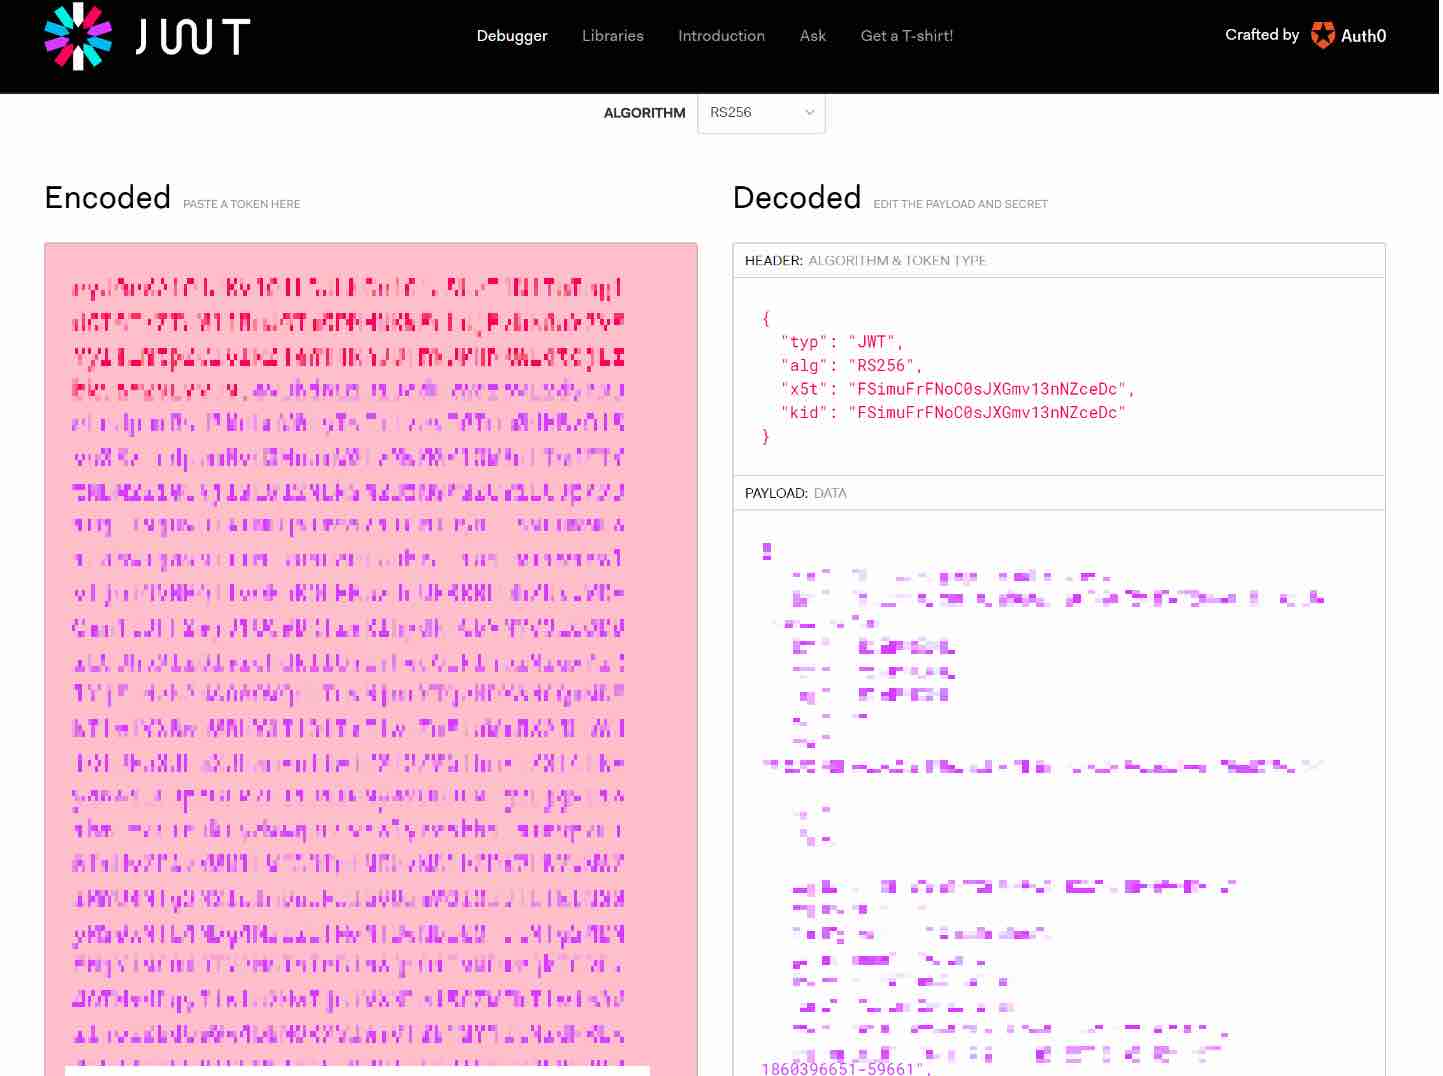
Optionally, this Token can also be verified in jwt.io. Copy and paste it on the website to review the details like the expiry.
Now, use the JWT Access Token to test your API.
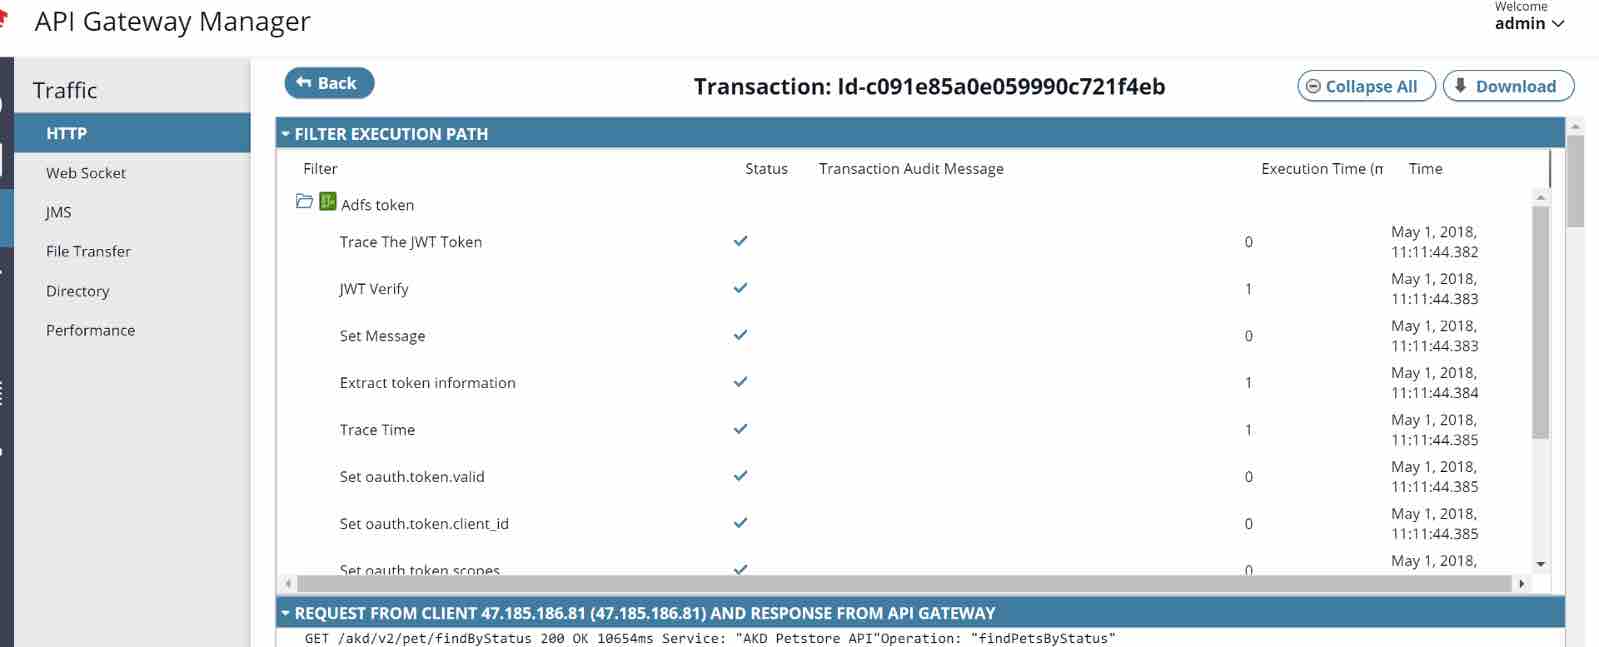
The Token is validated by the API Gateway and if Valid, the response is sent.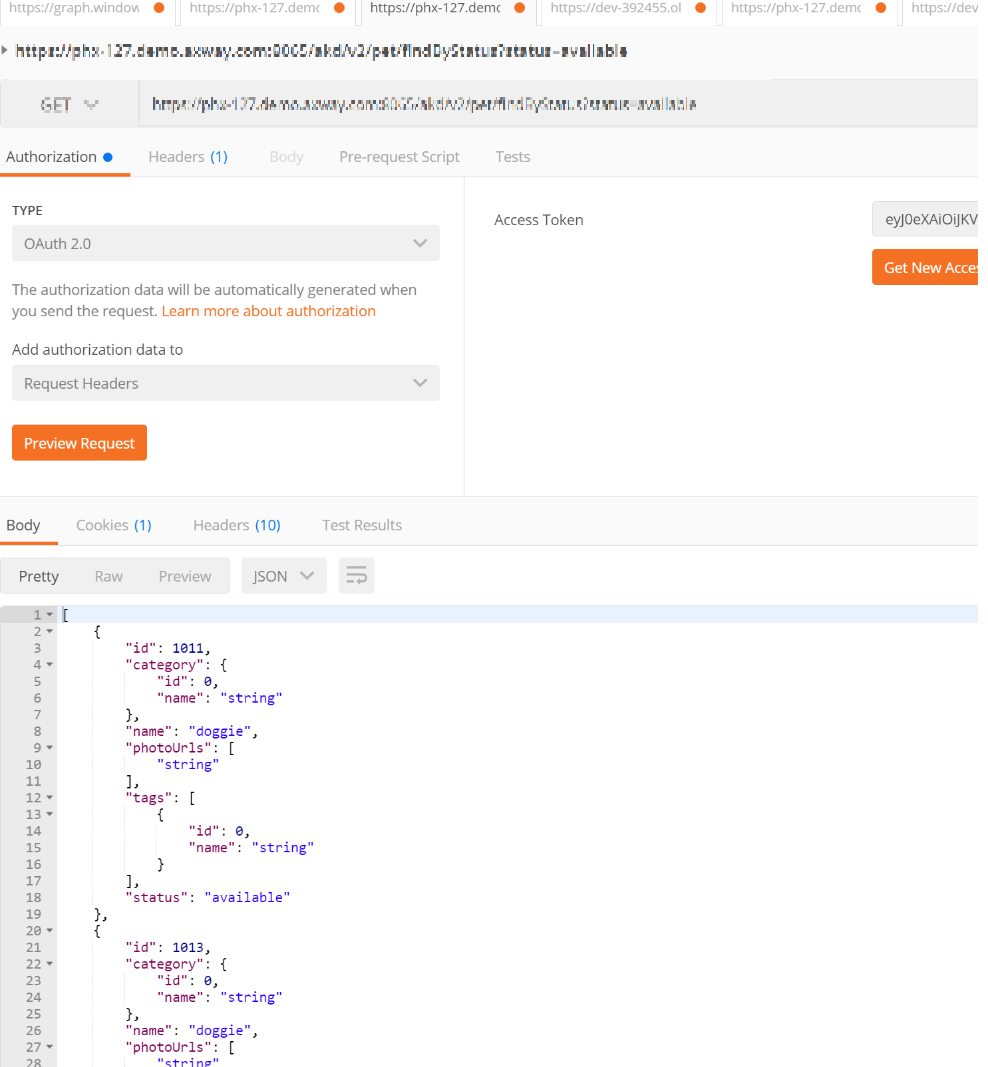
Finally, check the API Gateway to review the results