In this blog post, we will look at how to discover APIs (OAS & WSDL) within your git repos and to publish them in the Unified Catalog so you can help drive consumption and reuse of your existing APIs.
The steps to achieve this are as follows:
- Set up the Axway CLI with the GitHub extension.
- Configure the Axway CLI GitHub extension.
- Run the CLI GitHub extension to generate resource files.
- Push the resource files to AMPLIFY Unified Catalog.
Step 1. Set up the Axway CLI with the GitHub extension
This step assumes that you already have Node.js and npm installed.
You may already have the Axway platform CLI and AMPLIFY Central plugin installed. This can be confirmed by running the following command and checking the table to see if it has an entry for ‘’@axway/amplify-central-cli”:
amplify pm list

If you do have the “@axway/amplify-central-cli” already installed jump to step 3 below:
- Install the Axway platform’s CLI:
npm install -g @axway/amplify-cli
- Using the newly installed AMPLIFY CLI you can Install the AMPLIFY Central plugin:
amplify pm install @axway/amplify-central-cli
- Install the CLI extension that discovers API definitions in github:
npm install @axway/amplify-central-github-extension
- Update the Central plugin to point to the location of the github extension:
amplify central config set extensions.github ./node_modules/@axway/amplify-central-github-extension
Confirm that the extension has been set by running the command:
amplify central config list
The result should look like this:
{
extensions: { github: ‘./node_modules/@axway/amplify-central-github-extension’ }
Step 2. Configure the Axway CLI GitHub extension
Now that the CLI and plugins have been installed, we need to configure the GitHub extension so that it can discover API definitions in your repositories.
Set the name of the repository to be searched:
amplify central github-extension config set –repo swagger-petstore
Set the branch of the repository:
amplify central github-extension config set –branch master
Set your GitHub username (replace XXXXXX with you GitHub username):
amplify central github-extension config set –git-user-name XXXXXX
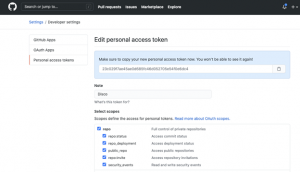
Provide your GitHub access token. To generate a new git token, go to github.com > Profile > Developer settings > Personal access tokens > Generate a new token.
Set your GitHub token (replace XXXXXX with your git token):
amplify central github-extension config set –git-token XXXXXX
Set the environment name which you wish to appear in Central “environments”:
amplify central github-extension config set –environment-name swagger-petstore
To confirm your settings run the following command to review the configuration of the GitHub extension run the command:
amplify central github-extension config list
Which results in the following output
{
repo: ‘swagger-petstore’,
branch: ‘master’,
gitUserName: ‘XXXXXX’,
gitToken: ‘XXXXXX’,
environmentName: ‘swagger-petstore’
}
Step 3. Run the CLI GitHub extension to generate resource files
Now, that the CLI has been configured, we can kick off the auto-discovery of APIs in GitHub.
The CLI will connect to GitHub over its REST API and will look for API definitions (OAS, WSDL) in the repositories.
When it finds an API definition it will create files to disk in the ./resources directory. The files that are created are generated can be uploaded to AMPLIFY Central to register the discovered APIs in the Catalog.
To kick off the auto-discovery run the following command:
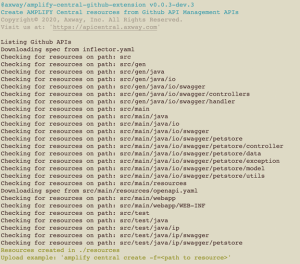
amplify central github-extension resources generate
The “generate” command will result in the following output:
Step 4. Push the resource files to AMPLIFY Unified Catalog
The CLI will generate a file to represent the “Environment” and then a “Consumer” file for each API that has been discovered.
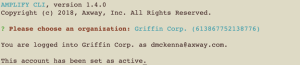
You need to create the “Environment” within Central first, to do this you use the CLI to apply the file. First step is to log in to the platform via the CLI:
amplify auth login
Now move into the resources directory and run the “apply” command for Central using the “Environment” file which will result in an Environment being created in Central:
cd resources
apply -f Environment-swagger-petstore.yaml
This will result in the following output:
![]()
And the following environment created with AMPLIFY Central:
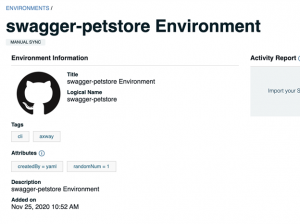
Now we can upload each of the resource files generated for each of the discovered APIs:
for i in ls -1 | grep Consumer; do amplify central apply -f=pwd/$i;done
Which results in the following output:
![]()
And the following services have been added to Central:
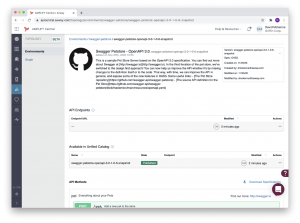
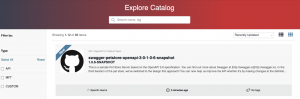
Which appears in the Unified Catalog for API Consumers to interact with: