

In Part 1 of this series, we saw how easy it was to quickly create an Integration Builder Connector by importing a swagger file for an API.
In this blog post, we’ll enhance the connector as follows:
- Move the version, format and api key into the instantiation step instead of requiring the user to enter this information each time the user wants to invoke the API (since it doesn’t change)
- Modify the API path from /v{version}/{format} to /geocode for clarity
- Only return the pertinent part of the response for our needs to make parsing easier
We’ll continue from where we left off in Part 1.
Since we will be modifying the connector from Part 1, first remove any flow instance that uses the connector instance and then remove the connector instance.
Add three new configuration parameters
Instead of requiring the user to enter the version, format and API Key every time they use the connector, we’ll move these three properties to the configuration so that when the user creates a connector instance, they can enter this information just once.
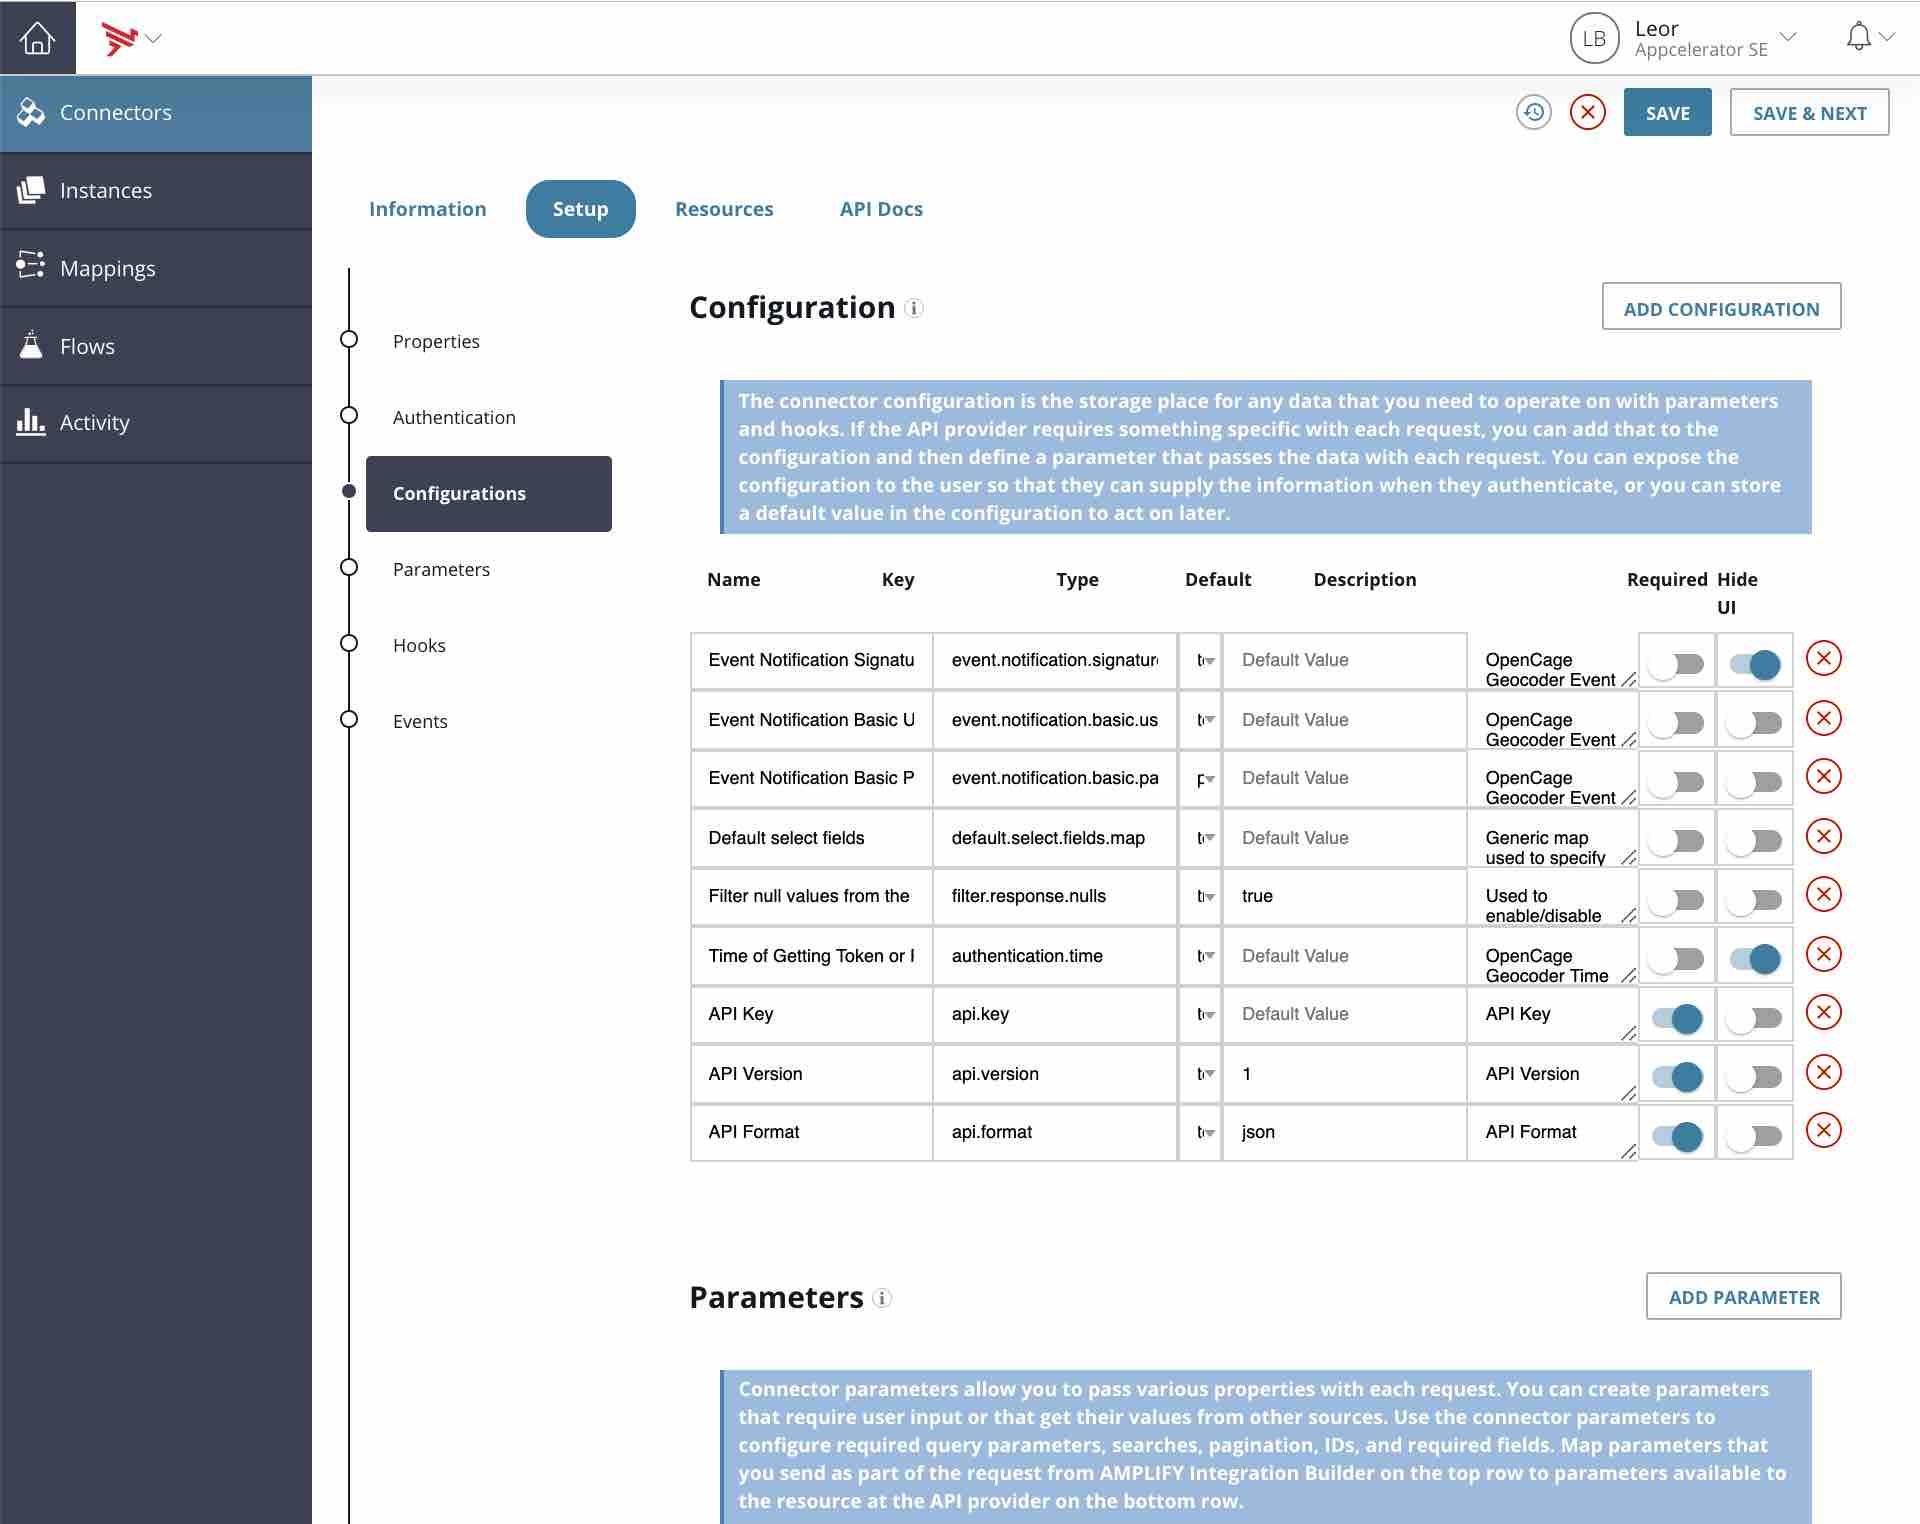
From the Connector Tab, find the OpenCage Connector, hover over its tile and click on configuration. Scroll down to the Configuration section and press Add Configuration -> blank three times as we’ll be adding version, format and api key to the configuration. Enable the required switch for all three.
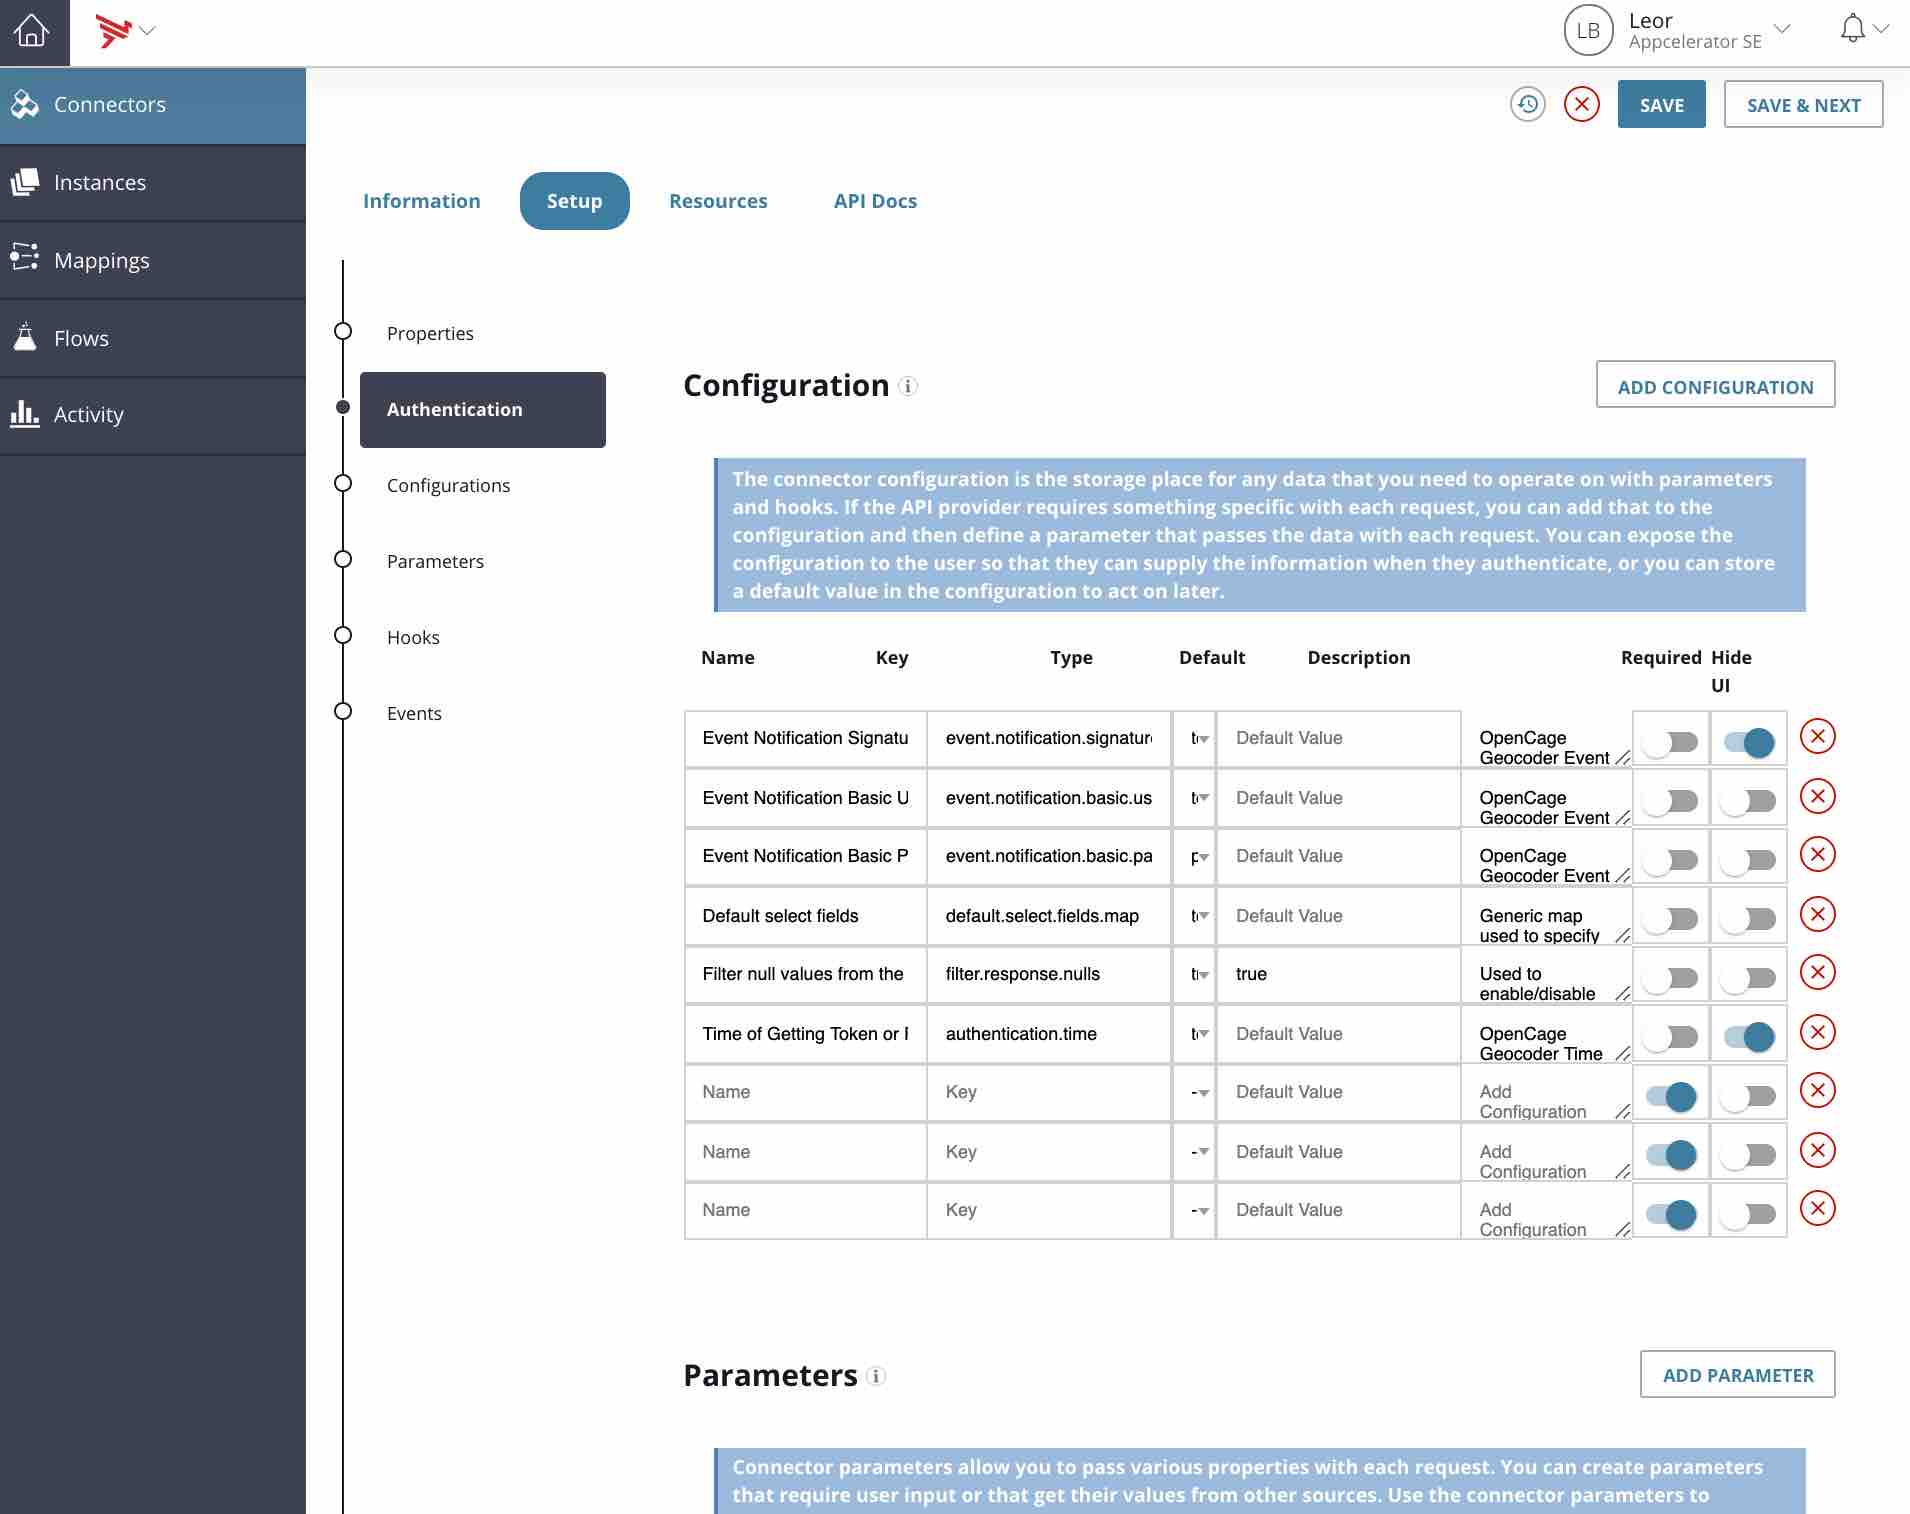
In the first new configuration item, enter API Key as the name, textarea as the type and leave Default empty.
In the second new configuration item, enter API Version as the name, textarea as the type and set Default to 1.
In the third new configuration item, enter API Format as the name, textarea as the type and set Default to json.
Press Save at the top.
Limit the OpenCage response JSON oayload
Click on Resources.
If you look at the response payload from OpenCage, we only really need results. So, let’s configure the connector to only return that sub-object.
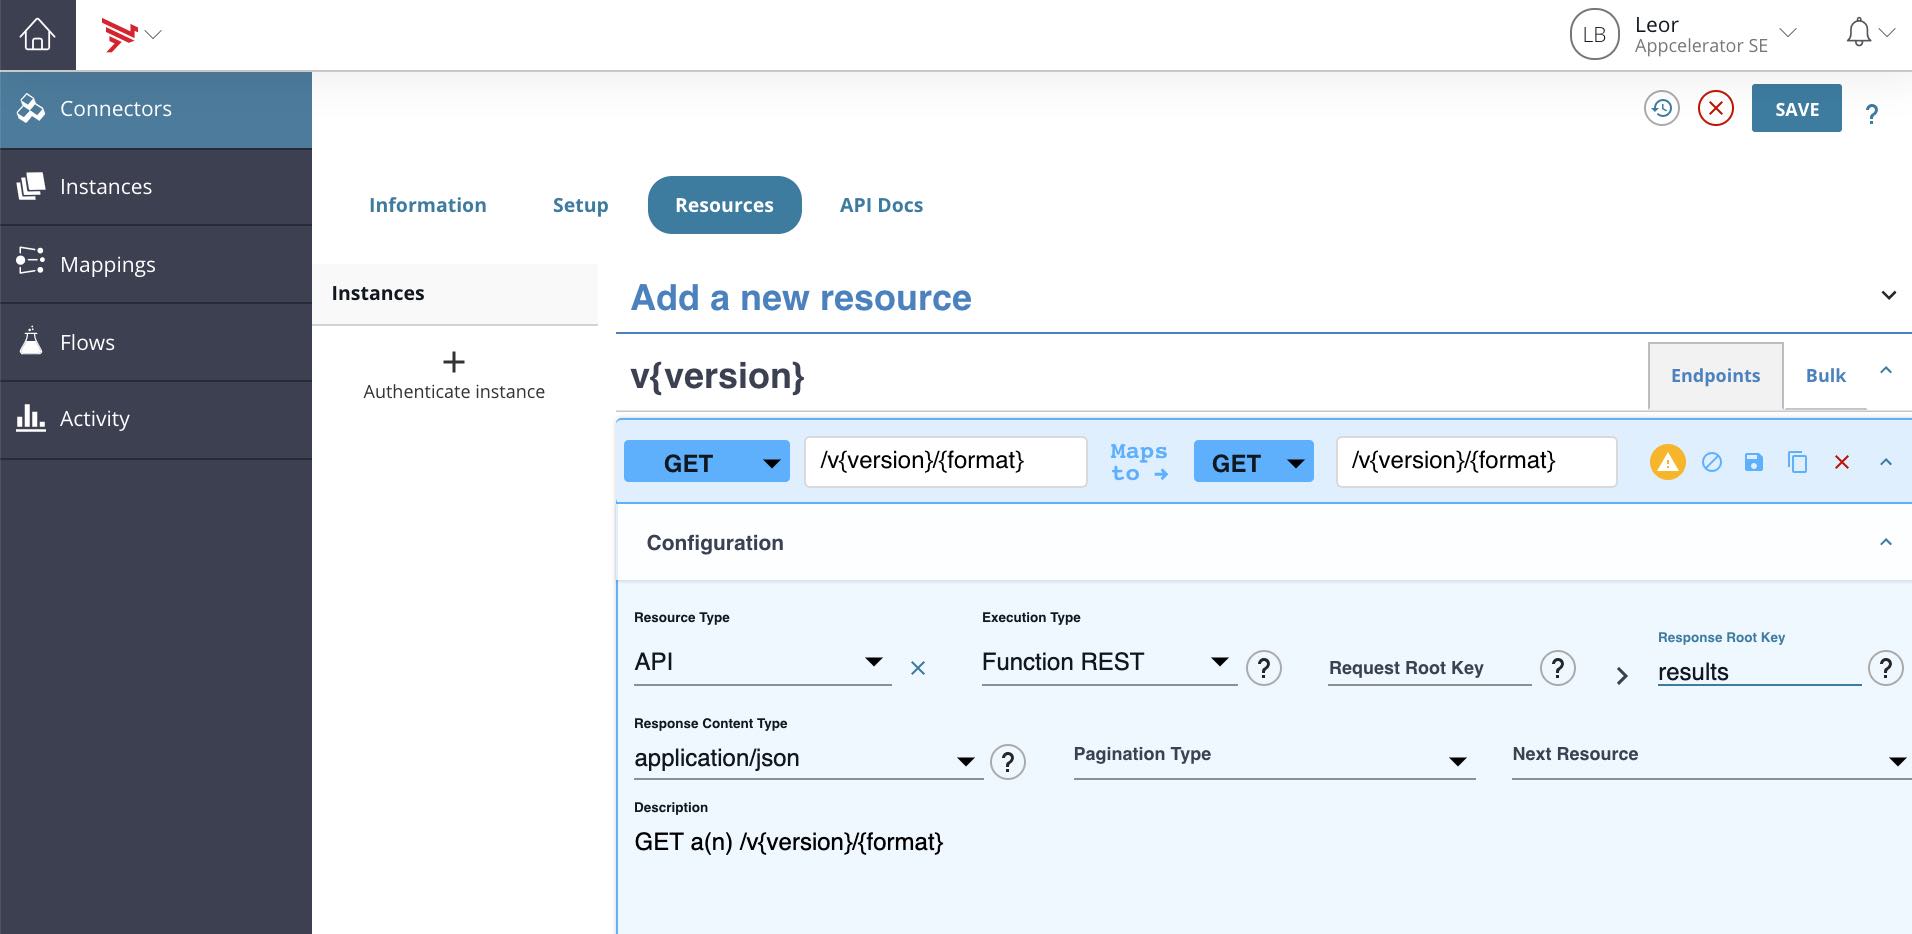
Click on Resources at the top of the page and click edit (pencil icon) for the one resource we have /v{version}/{format}.
Expand the Configuration section as shown below:
In the Response Root Key section, type results as follows:
Move version, format and api key into the configuration
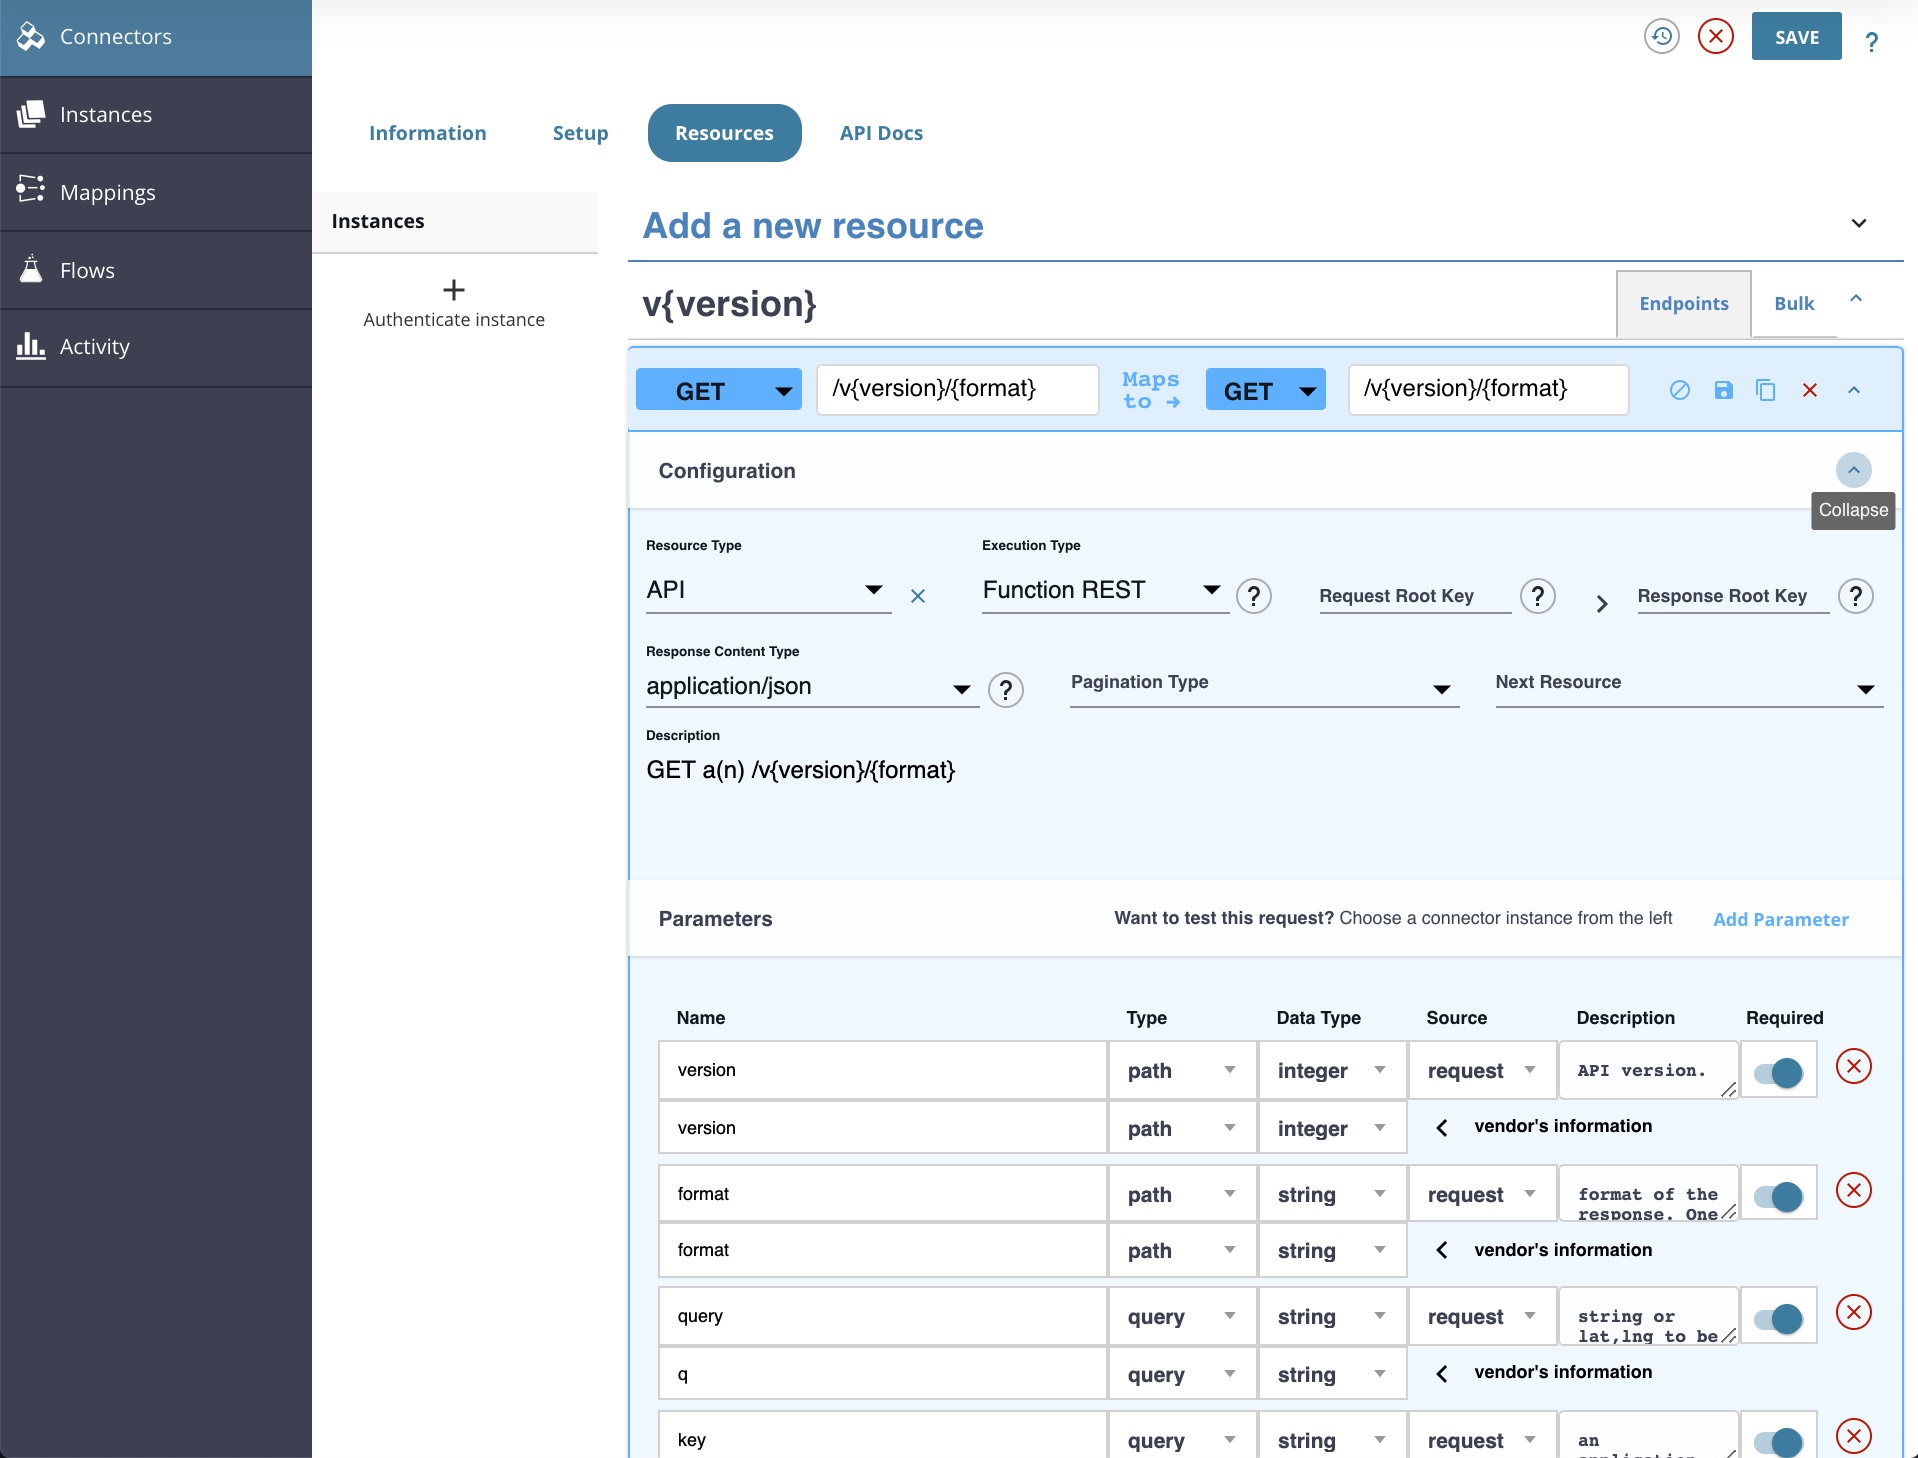
Scroll down a bit to the parameters section and find version, format and key. Rename to api.version, api.format and api.key as we set in the Configuration section at the beginning of this blog post. Also, set them all to type configuration. This will enable us to set these up once when a connector instance is created.
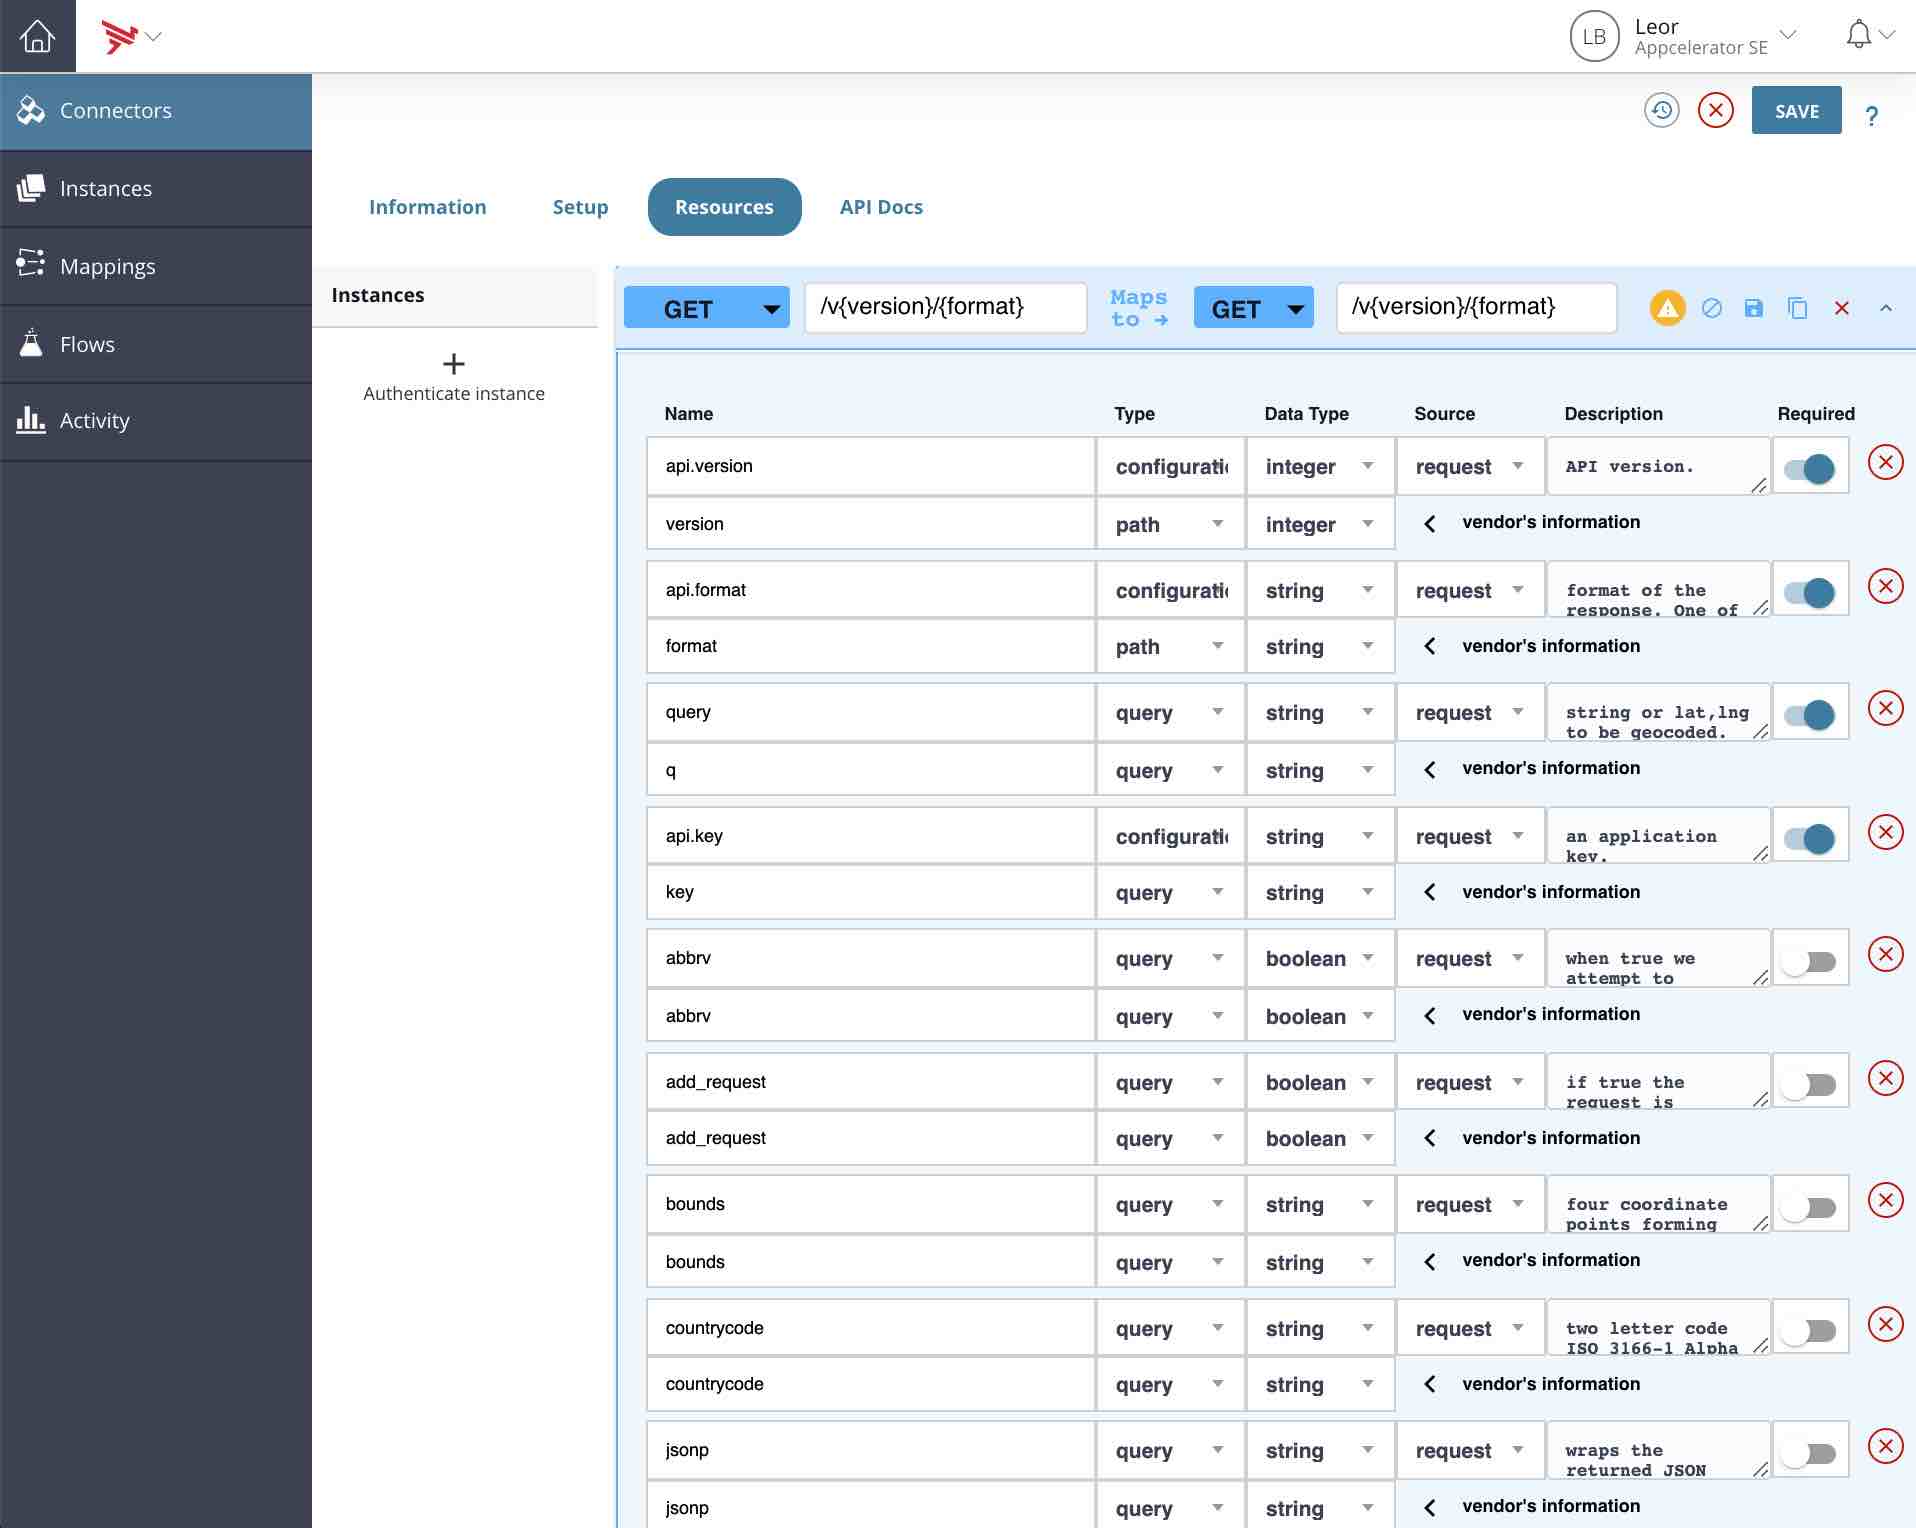
Press the save button (floppy disk icon) and then press save at the top of the screen.
Modify the API path
The path to this API is /v{version}/{format}. This is not very descriptive or intuitive. Furthermore, we are already setting these during connector instantiation. Let’s click on Resources and click the edit button (pencil icon) and change the left /v{version}/{format} to /geocode as follows:
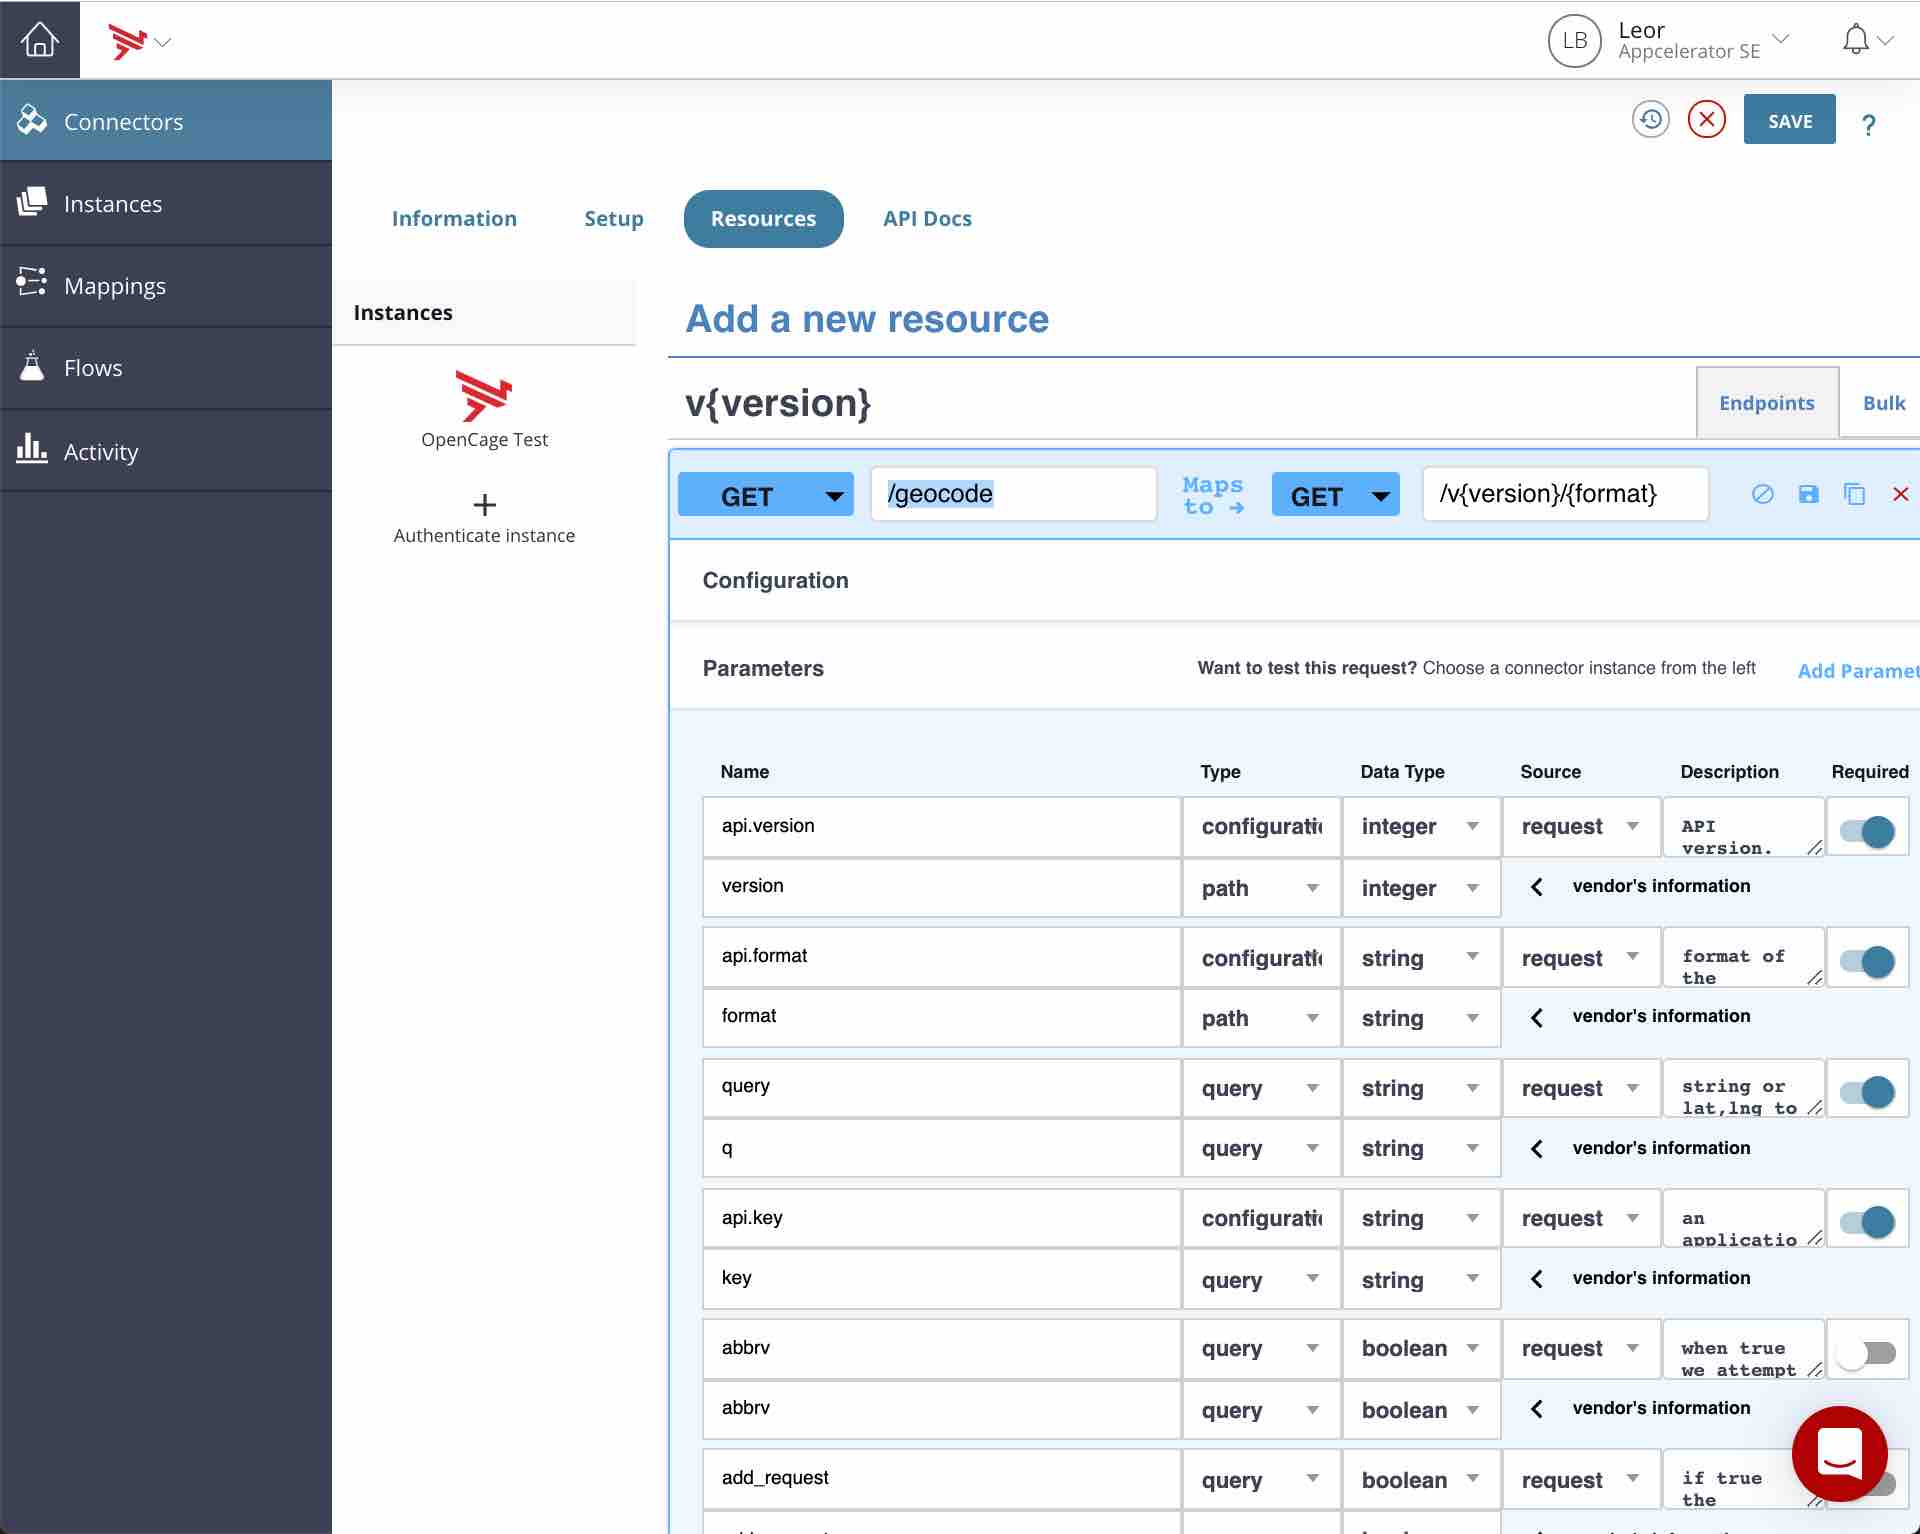
Press Save at the top of the screen.
Test the new connector
Press Authenticate when you hover your mouse on the OpenCage Connector to create an instance:

Enter your OpenCage API Key.
Press Create Instance.
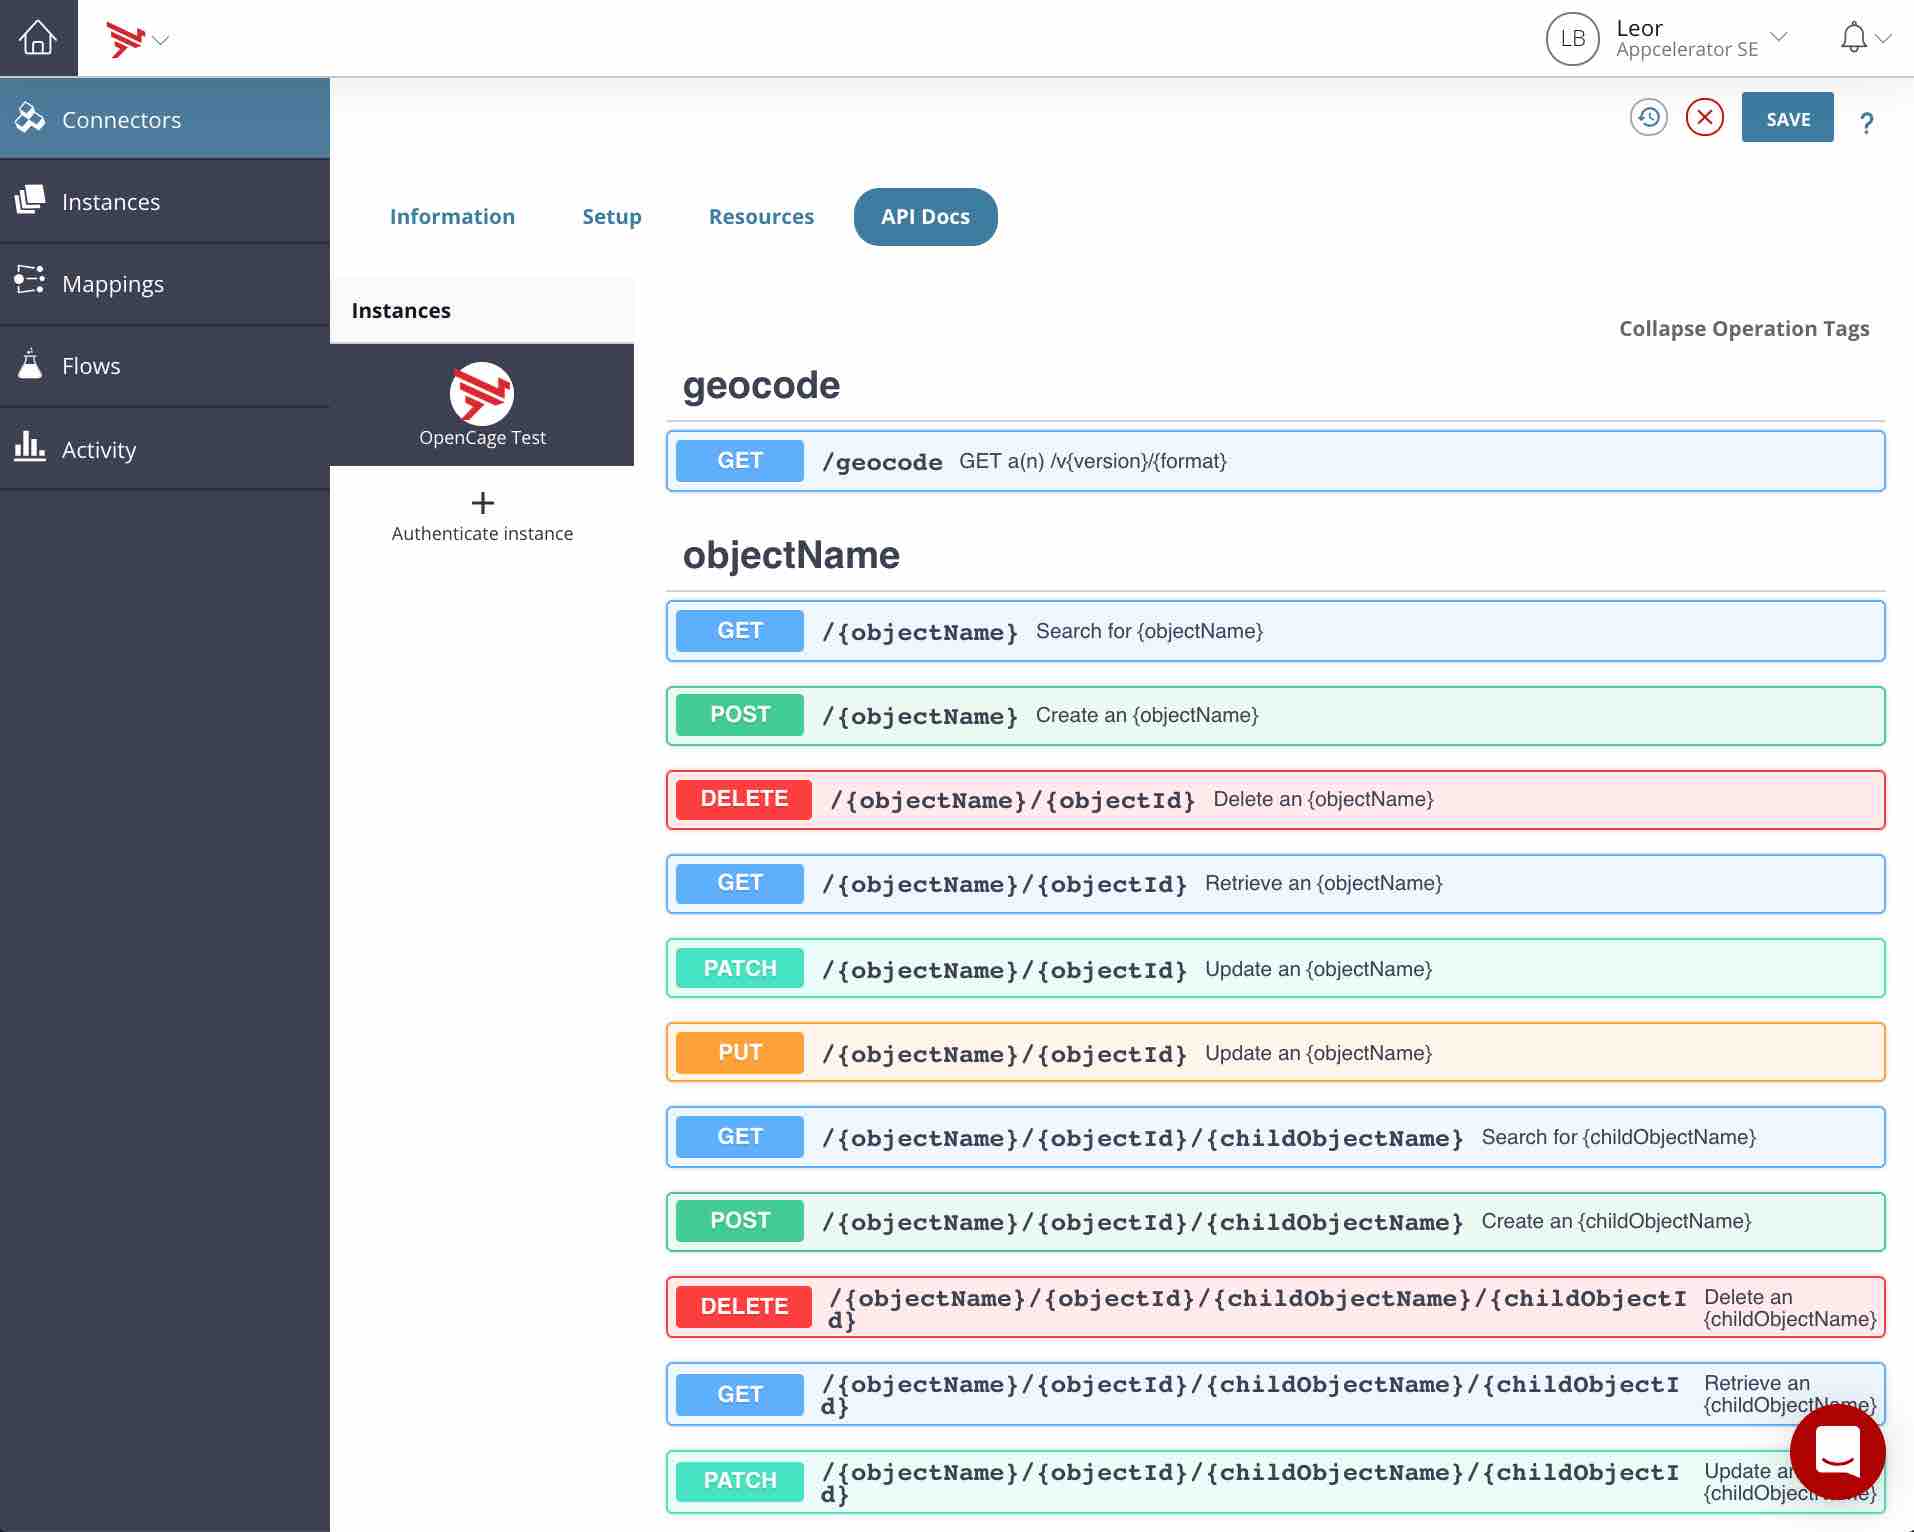
Click on Test in API Docs. You should see our endpoint /geocode. Expand it and click Try it out. See now that query is the only parameter we need to set – version and format are pre-populated with their default values, but can be overwritten if the need ever arises (i.e. new version released by OpenCage). I entered Boston for the query.
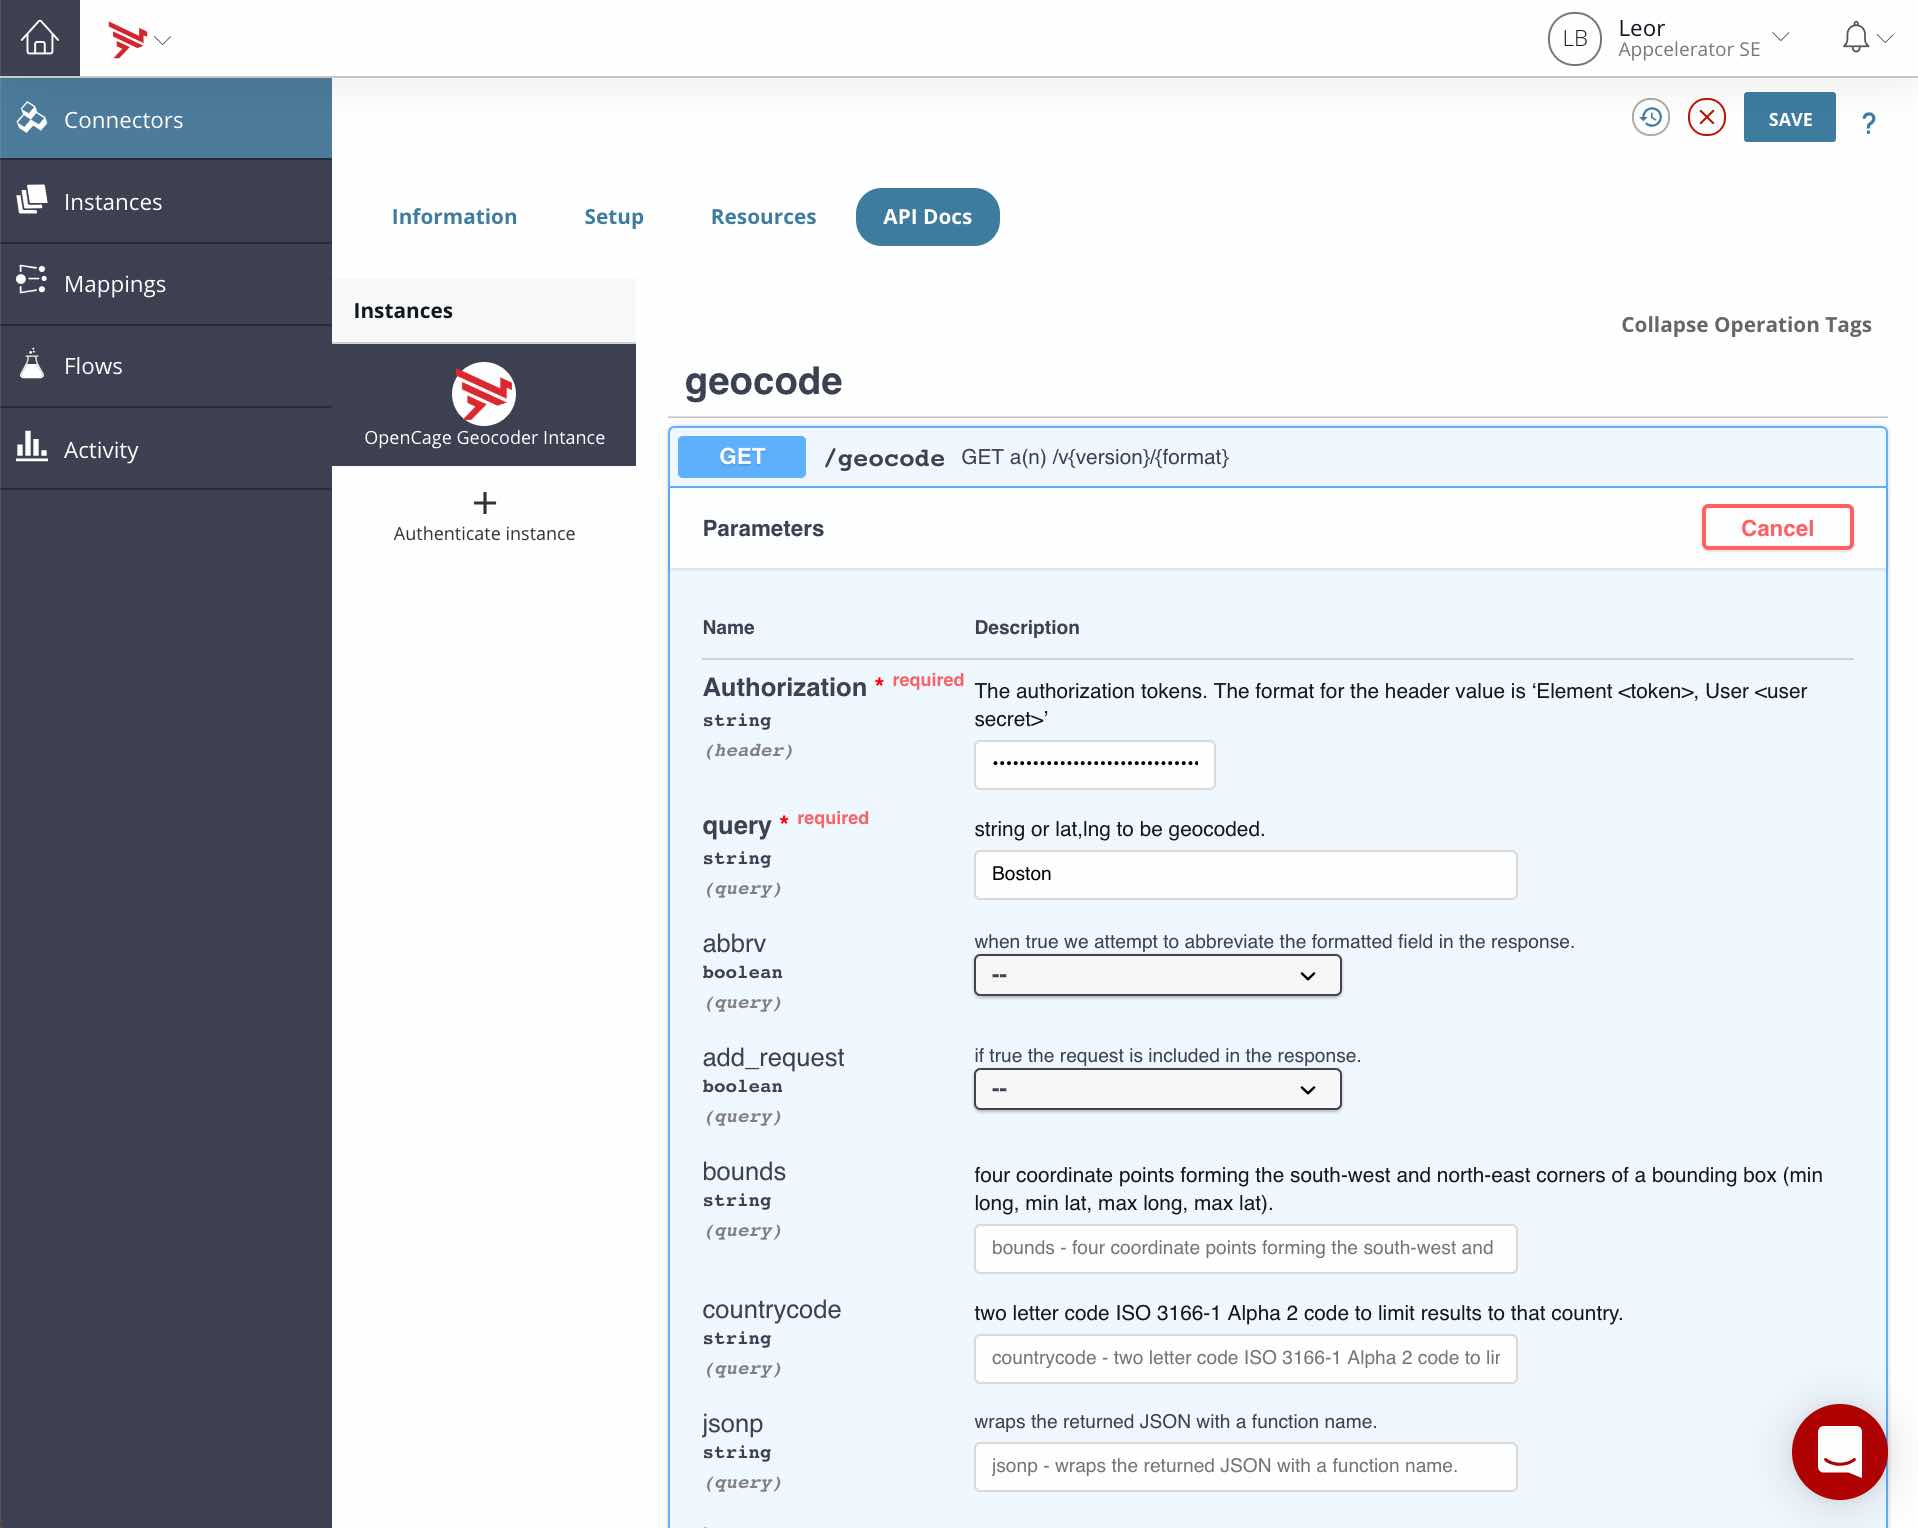
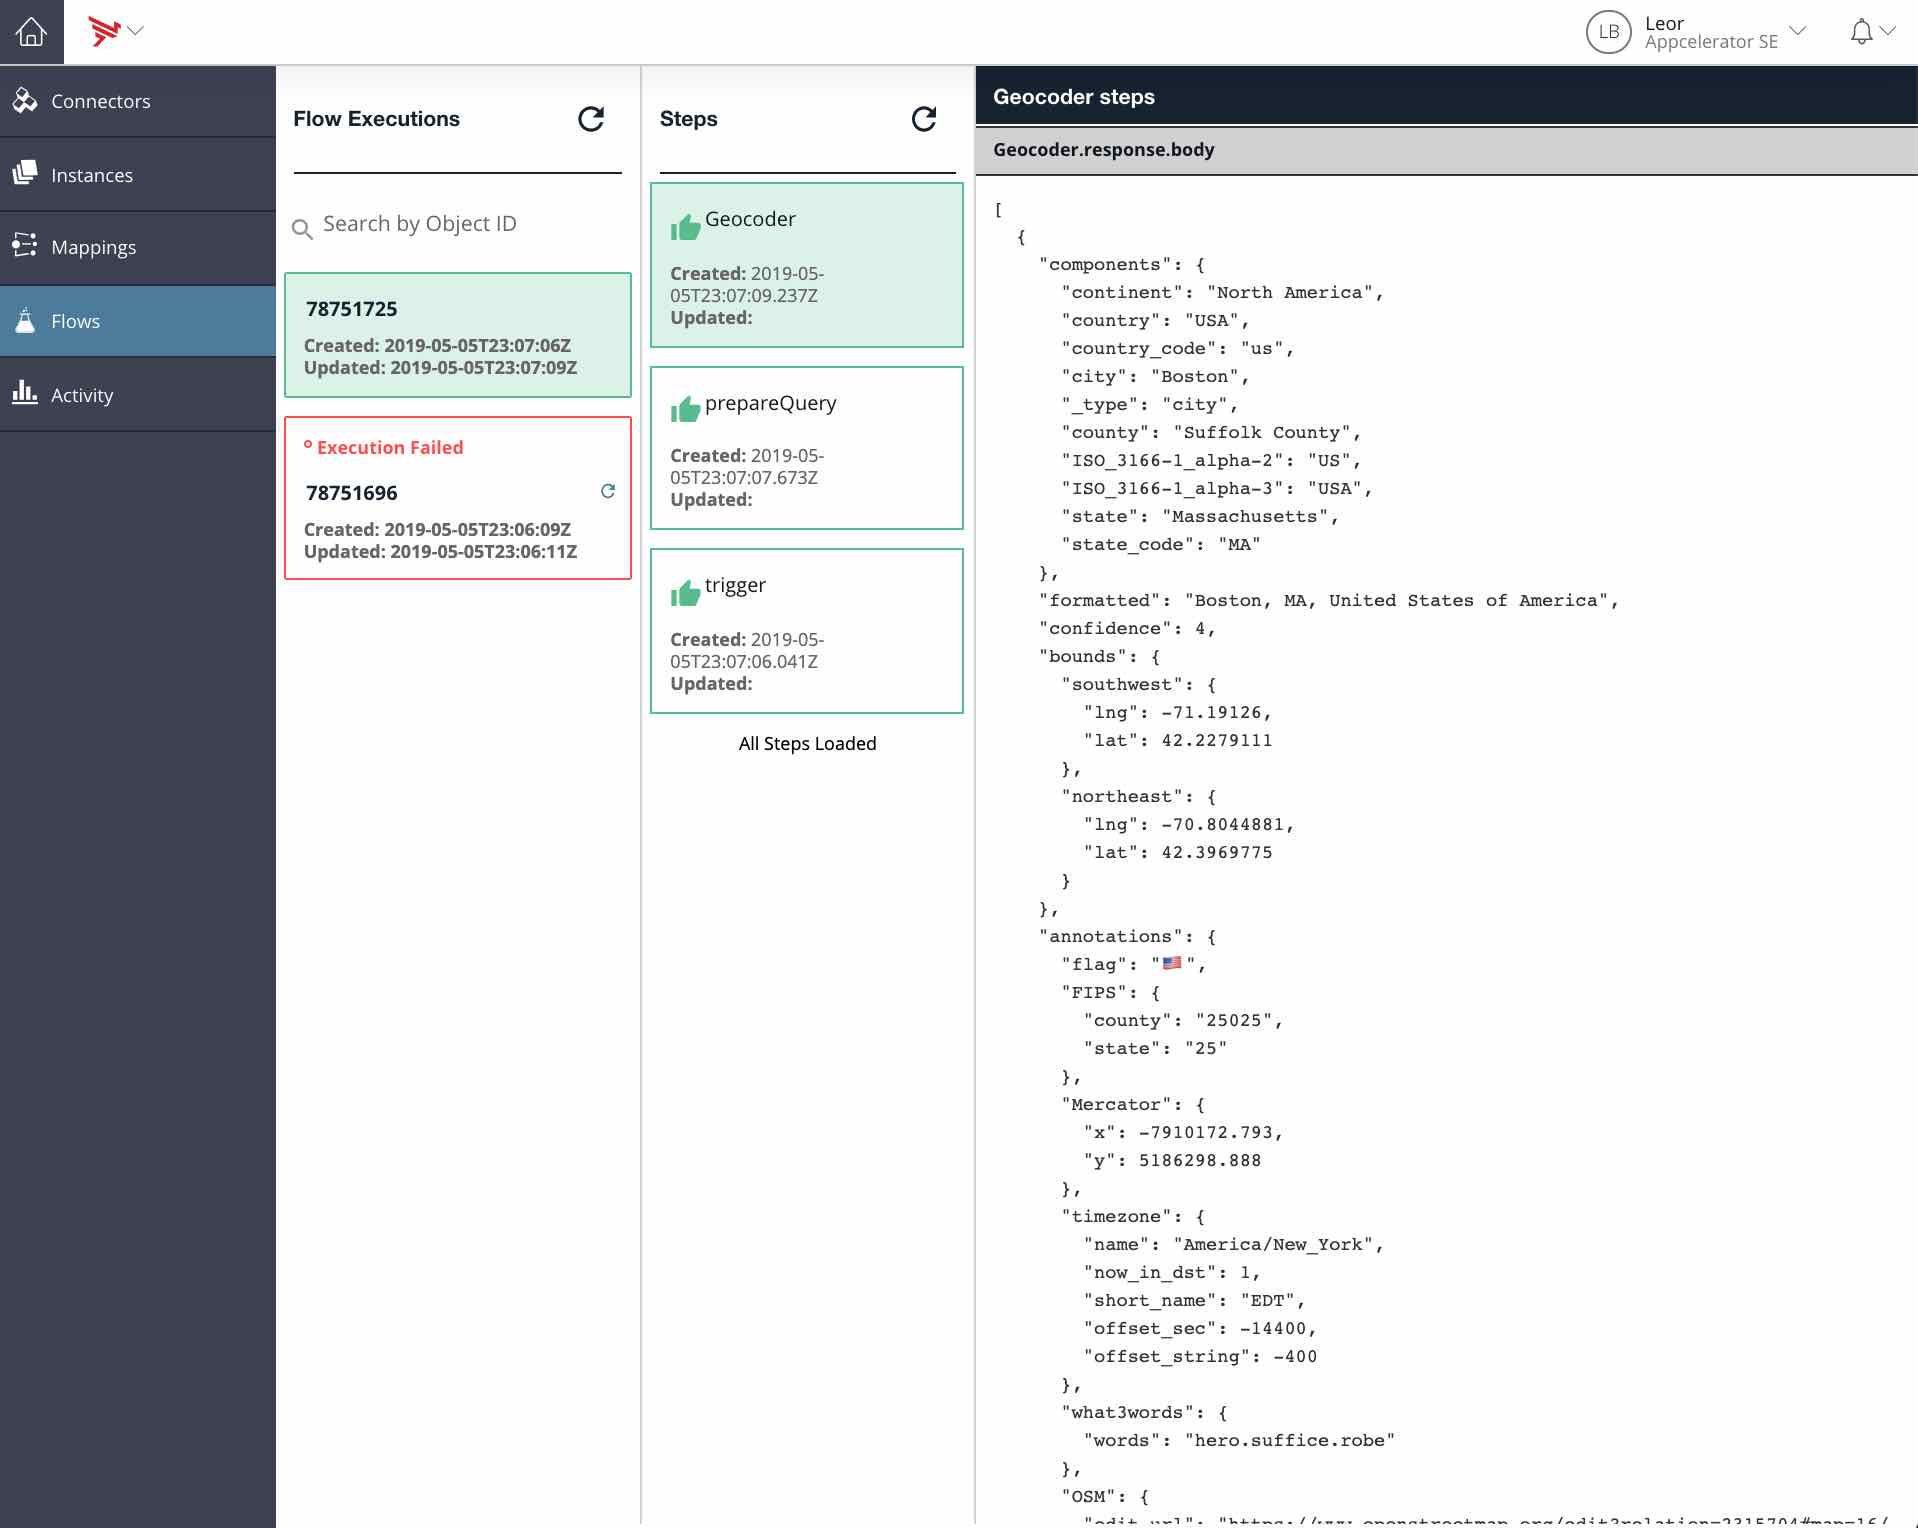
Scroll down and click on Execute to call the API and see the response:

It may be hard to tell but this is a reduced response from the full response that OpenCage provides because we configured the API to only return the results sub-object from the OpenCage response.
Use the Modified OpenCage Connector in a Flow
I’m assuming that you already know how to access a connector in a flow. If not, refer to the online docs or see this blog post for an example. In the following screenshot, you can see how to access the connector in a flow:
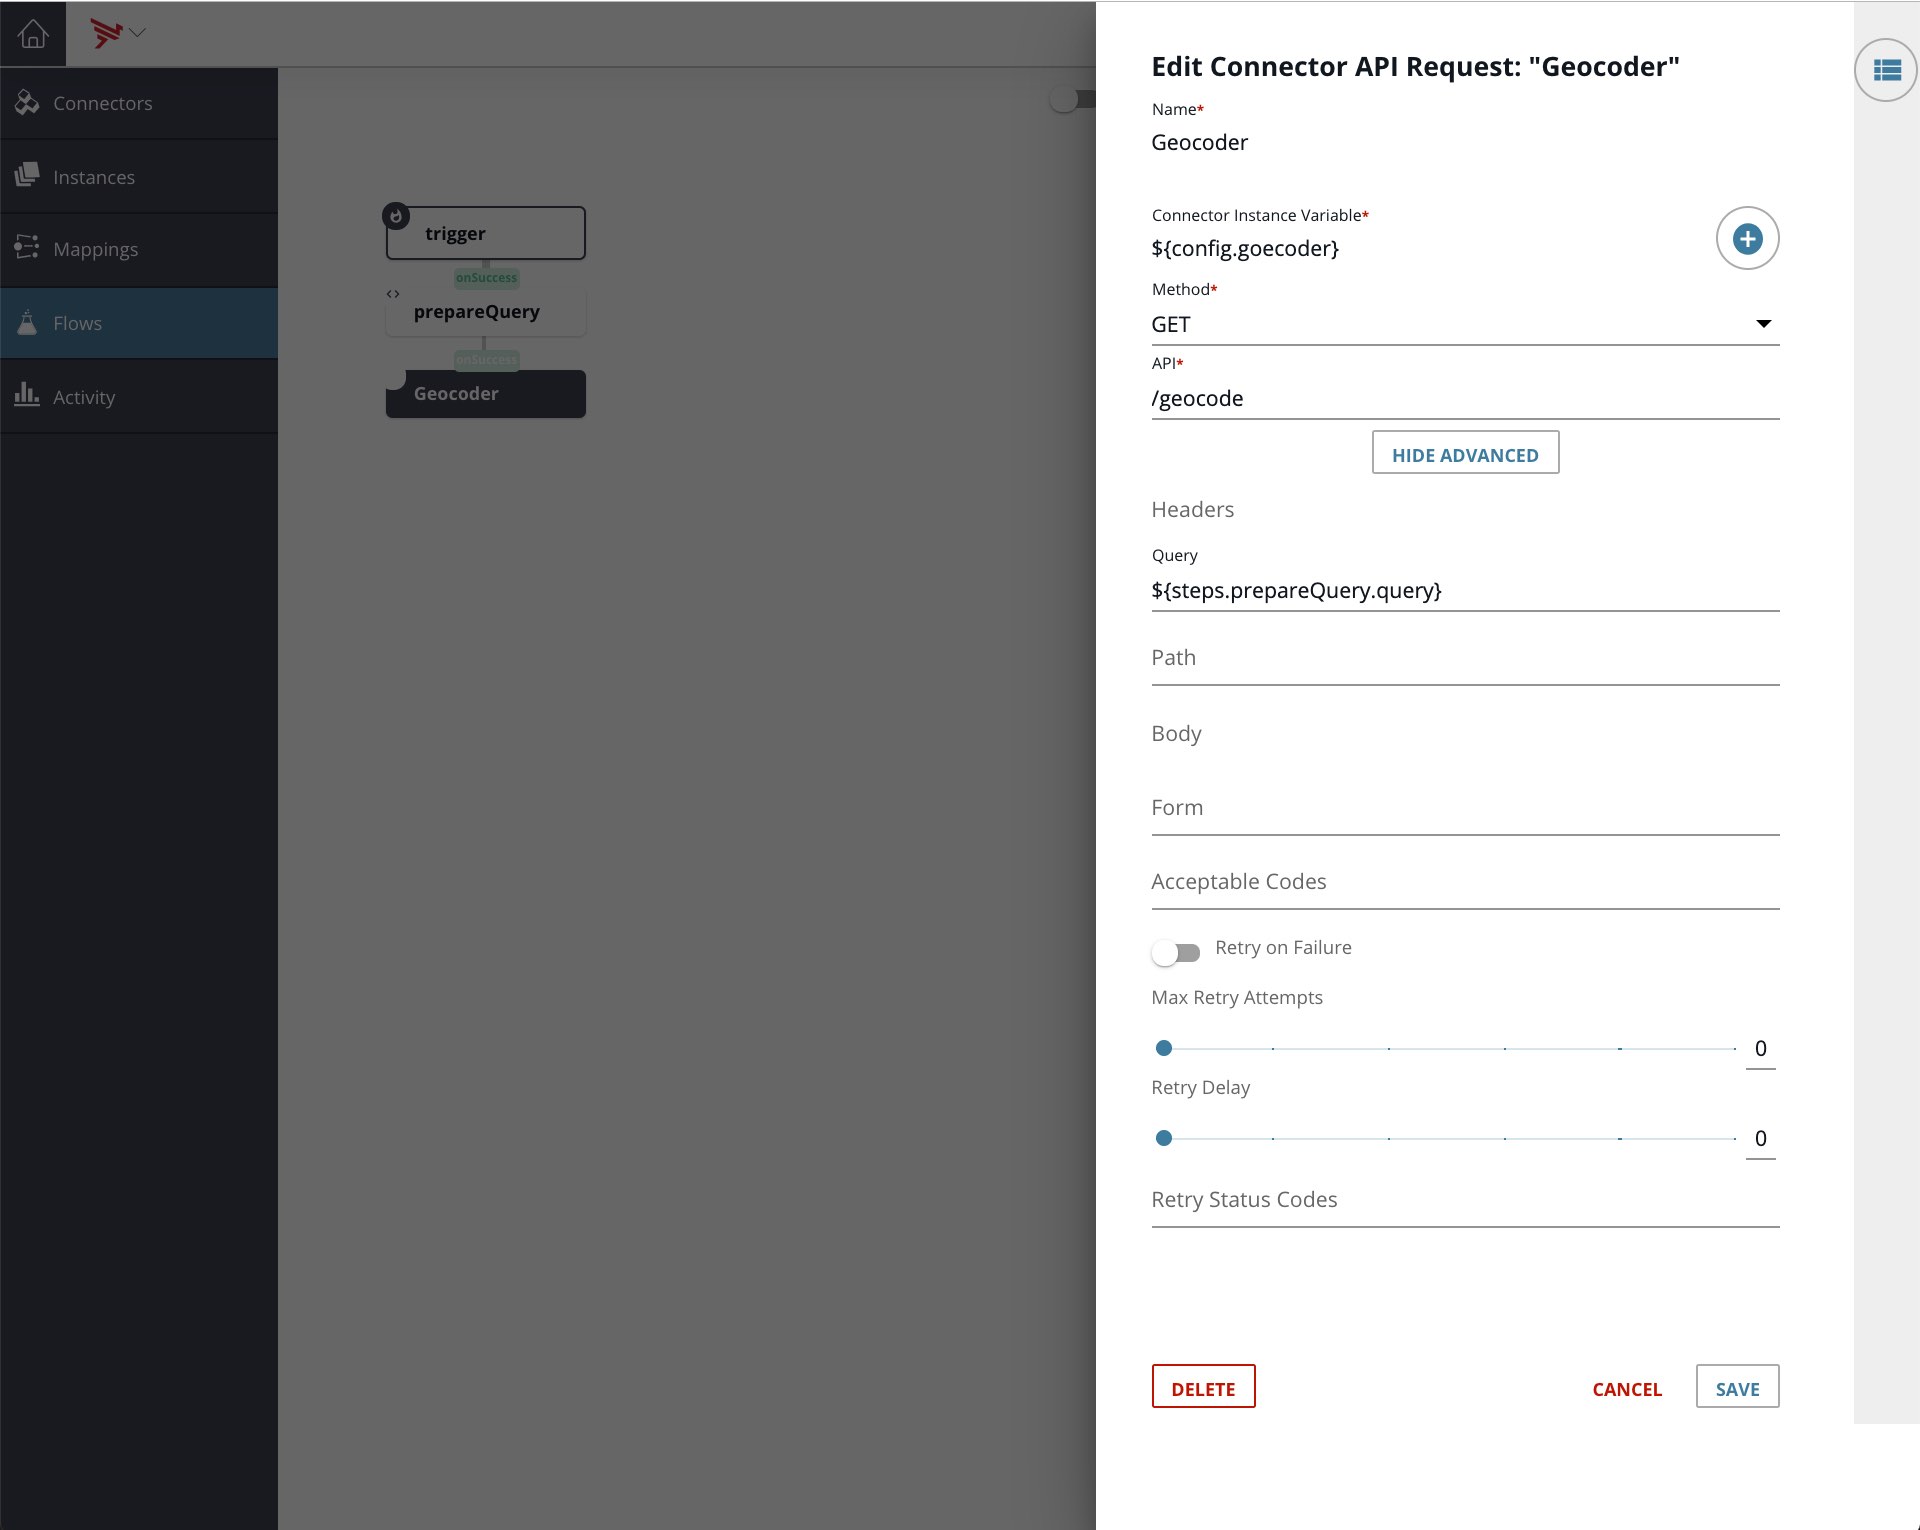
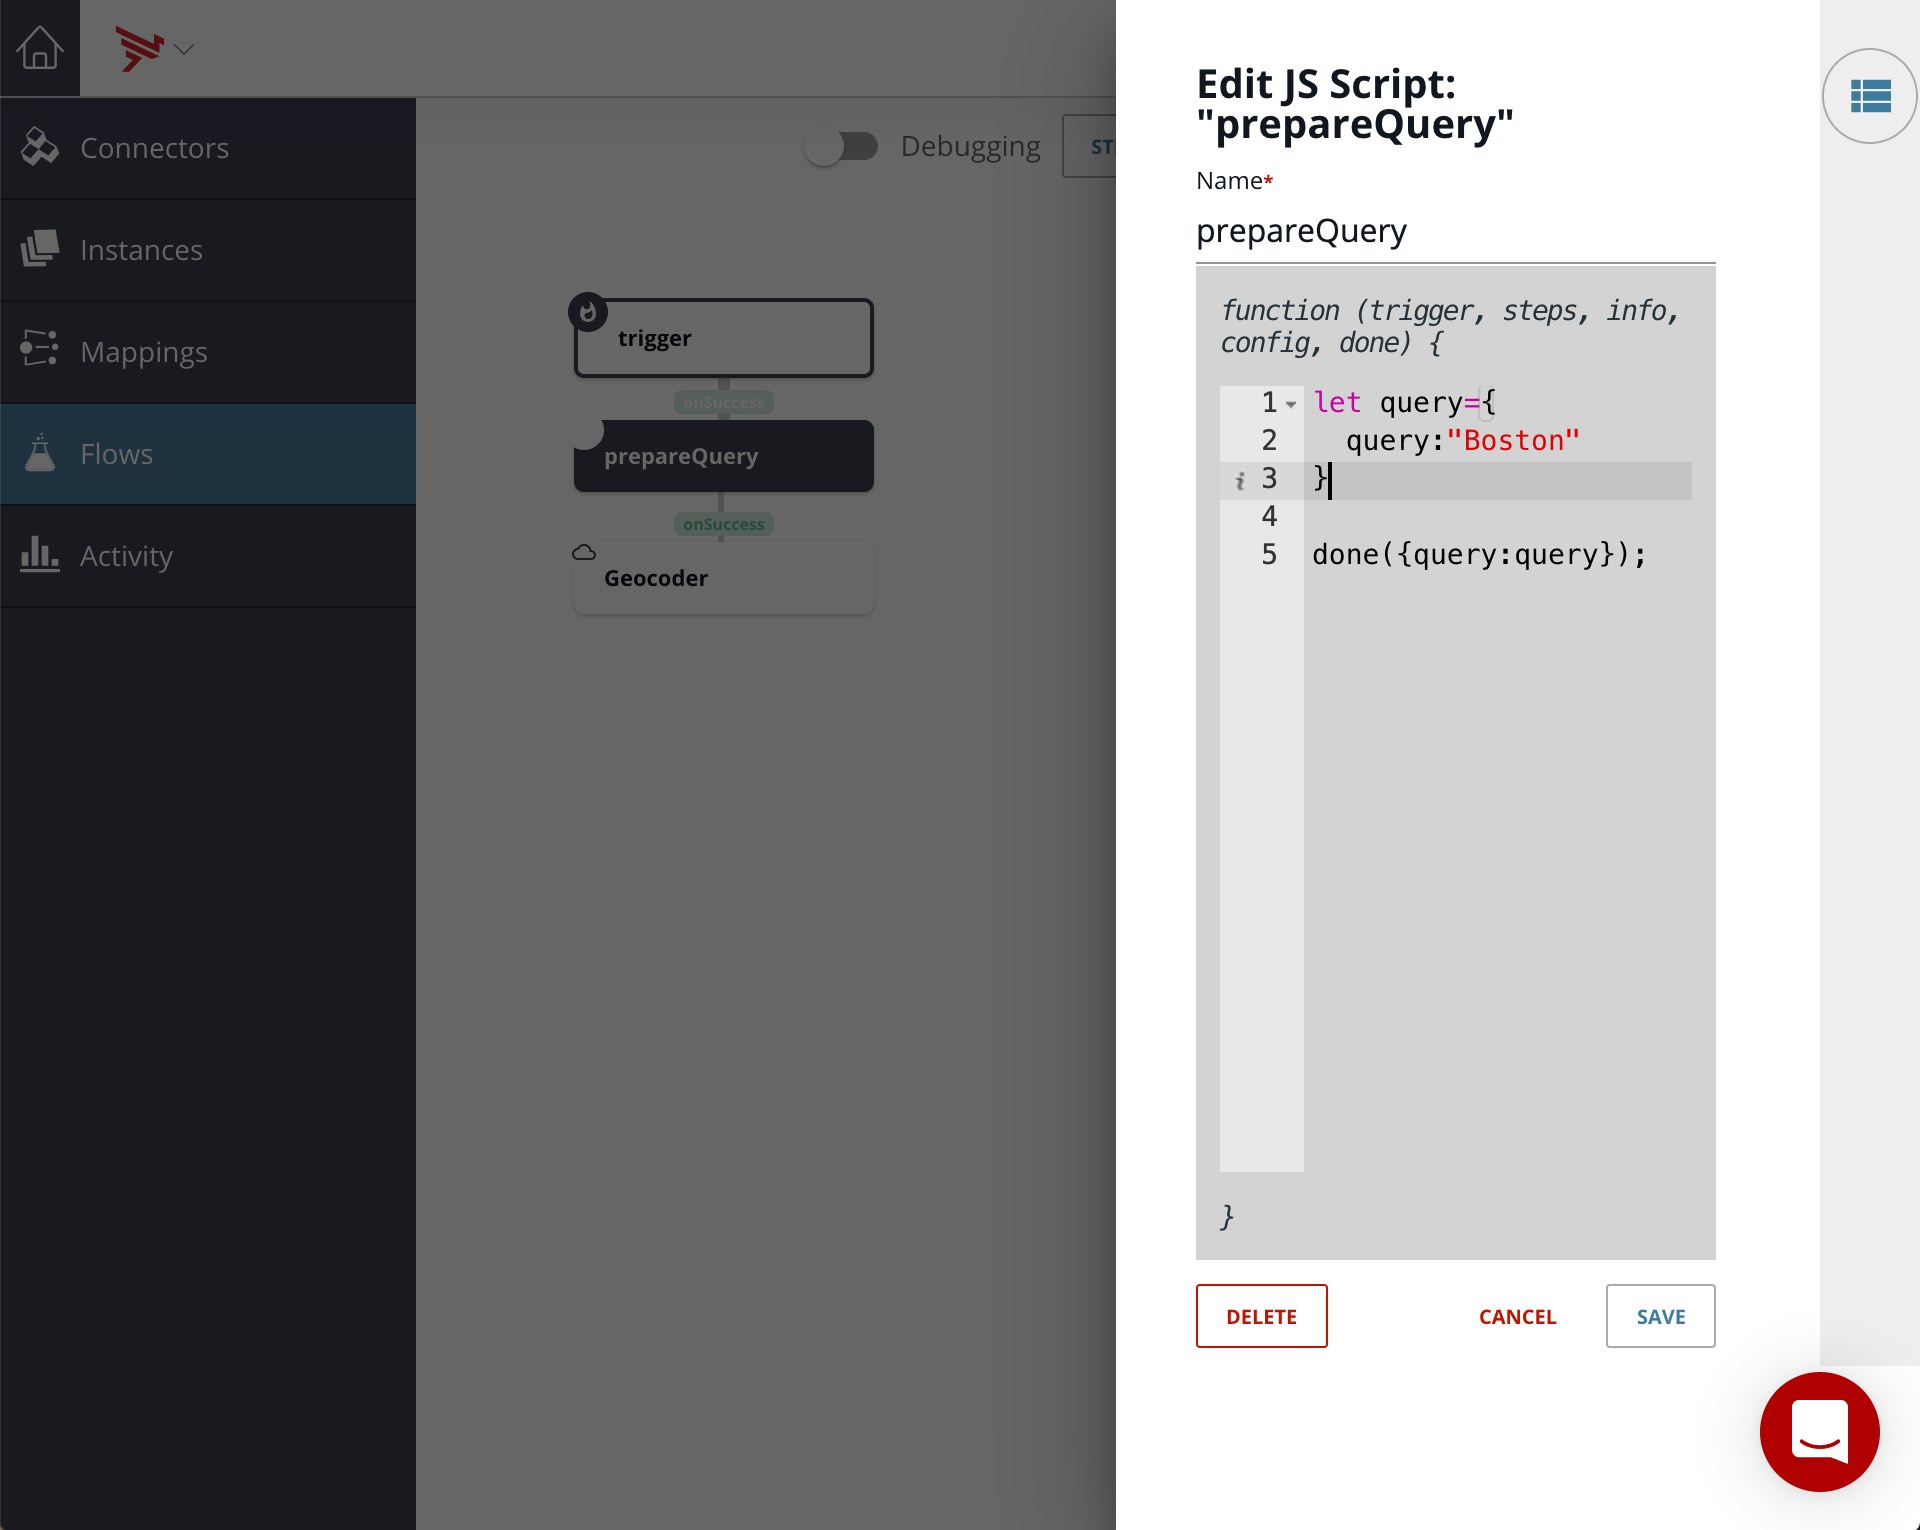
Note that the API is set to /geocode and the Query is set to ${steps.prepareQuery.query} which is computed in a prior step as shown in the screenshot below:
Summary
In this blog post, we saw more of the power of Integration Builder to optimize and customize our connector to reduce the amount of information required to use the connector in a flow.
The connector and test flow can be found here.
In the next blog post in this series, we’ll publish the OpenCage connector to AMPLIFY Central, so that we can secure it and make it available to other developers on our team for use in their applications.
Special thanks to Aleksandr Nartovich for his help on this blog post.