

API Builder Standalone is a tool that enables developers to rapidly create microservices with a low-code/no-code approach. One of the ways API Builder achieves this is by enabling you to develop a new microservice application around existing databases by using Object Relational Mapping (ORM).
Many IT companies are rapidly adopting microservices because they are finding that large, monolitic applications are difficult and costly to maintain. For new services, the adoption process is much less onerous than existing monoliths. API Builder Standalone can assist in breaking down the monolith by isolating independent services around data in existing databases.
With API Builder Standalone, it is possible to take existing database tables and use them to rapidly generate a robust and well documented REST API. This enables developers to slice off chunks of independent functionality from the monolith. The microservice can then be deployed alongside the monolith, and can eventually evolve into an independent service. When used within the Axway AMPLIFY platform, greater capabilities to build, deloy, run, and govern access to these microservices are provided.
In this post, we’ll explore API Builder’s database connector plugin and ORM. This blog post requires you are generally familiar with npm and databases.
Creating the microservice
The first thing to do is create a new API Builder Standalone project. For more detailed information, see the API Builder Getting Started Guide.
npx @axway/api-builder init database-demo
cd database-demo
npm install --no-optional
npm start
API Builder will now be running and accessible on https://localhost:8080/console.
Choose your database
API Builder Standalone provides ORM database connectors via plugins. The following database connectors plugins are available.
| Database | npm module |
|---|---|
| MongoDB | @axway/api-builder-plugin-dc-mongo |
| MySQL | @axway/api-builder-plugin-dc-mysql |
| Microsoft SQL Server | @axway/api-builder-plugin-dc-mssql |
| Oracle | @axway/api-builder-plugin-dc-oracle |
For this post, we’ll use the MySQL database connector. If your existing database is not MySQL, then the installation and configuration will be a little different. However, the concepts are the same, and you should be able to adapt them by following the documentation provided on their respective pages in the API Builder Connectors Documentation.
Install your database connector plugin
In the database-demo, project folder install the plugin:
npm install @axway/api-builder-plugin-dc-mysql
When the plugin has sucessfully installed, you will see the following information in your terminal to indicate that the configuration file mysql.default.js was also created:
================================================================================
[INFO] @axway/api-builder-plugin-dc-mysql:

mysql.default.js has been copied to your API Builder conf directory. You must configure the file located in /home/user/database-demo/conf
================================================================================
IMPORTANT: You must configure your database connection details before starting your application or it will fail to start. For additional configuration details, refer to the connector’s documentation in the links provided above. Note that each connector type requires slightly different configuration.
Configure the database connector plugin
Edit the database configuration file that is found in conf/mysql.default.js:
/*
 * Use this file to configure you mysql data connector
 *
 * By default, MYSQL username and password are environment variables.
 * username MYSQL_USER, password MYSQL_PASSWORD
 * Example setting of environment variables:
 * linux/mac: export MYSQL_PASSWORD=password
 * windows: setx MYSQL_PASSWORD 'password'
 */module.exports = {
connectors: {
mysql: {
connector: '@axway/api-builder-plugin-dc-mysql',
connectionPooling: true,
connectionLimit: 10,
host: 'localhost',
port: 3306,
database: 'test',
user: process.env.MYSQL_USER,
password: process.env.MYSQL_PASSWORD,

// Create models based on your schema that can be used in your API.
generateModelsFromSchema: true,

// Whether or not to generate APIs based on the methods in generated models.
modelAutogen: false
}
}
};
Note that the mysql key is a friendly name for the database. You can change the name if you wish. You will most-likely need to change the following values:
host– the hostname of the server where the database residesdatabase– the database instance nameuser– the username of the user with permissions to accessdatabasepassword– the user’s password
It’s also possible to add additional connections to separate database instances by giving another unique name (e.g. mysql2). For information on the other configuration options, you can refer to the MySQL Plugin documentation. However, for this post, generateModelsFromSchema must be true.
Note that the use of process.env.MYSQL_USER and process.env.MYSQL_PASSWORD are for security best-practices and to enable the service to be deployed in different environments. This post will not deal with Docker, but if you are interested, you can read how to Dockerize an API Builder Service.
We recommend that you do not add credentials to any configuration file. Instead, provide the credentials using the operating system host environment. For example using Bash (note that your shell may differ), you can pass the credentials directly to the service:
MYSQL_USER=user MYSQL_PASSWORD=password npm start
Alternatively, you can set them in the environment first:
export MYSQL_USER=user
export MYSQL_PASSWORD=password
npm start
API Builder should now be running and accessible on https://localhost:8080/console. If you have any errors on startup, it is most likely related to bad configuration in mysql.default.js, so check the configuration and any connectivity details in the error message before continuing.
API Builder Models
The database connector plugin will connect to your database, inspect the table schema, and will use the schema to automatically generate Models for each table that it finds. For SQL databases, each table will become a Model. For MongoDB, each collection becomes a Model. In API Builder, Models represent an object that can support database CRUD operations to manipulate data. You can read more about Models in our documentation.
For this post, I have defined a very simple users table in MySQL:
mysql> select * from users;
+----+-------+
| id | name  |
+----+-------+
|  1 | axway |
+----+-------+
1 row in set (0.00 sec)
To view the generated Model in the UI, navigate to the Models tab at https://localhost:8080/console/project/models. This is a list of all of the Models that are available to your application. The testuser exists on disk in models/testuser.js, but the mysql/users Model was generated directly from the database schema:
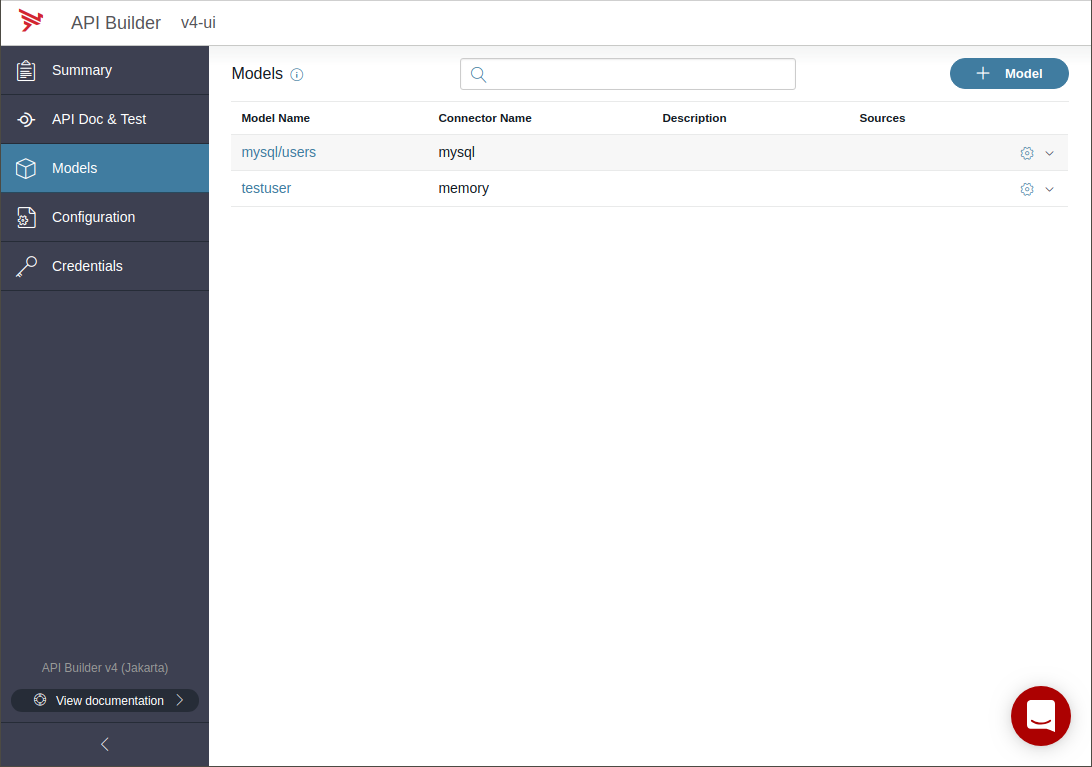
Clicking on the mysql/users Model, you can see a list of all the fields with their names and types transposed from the database schema:
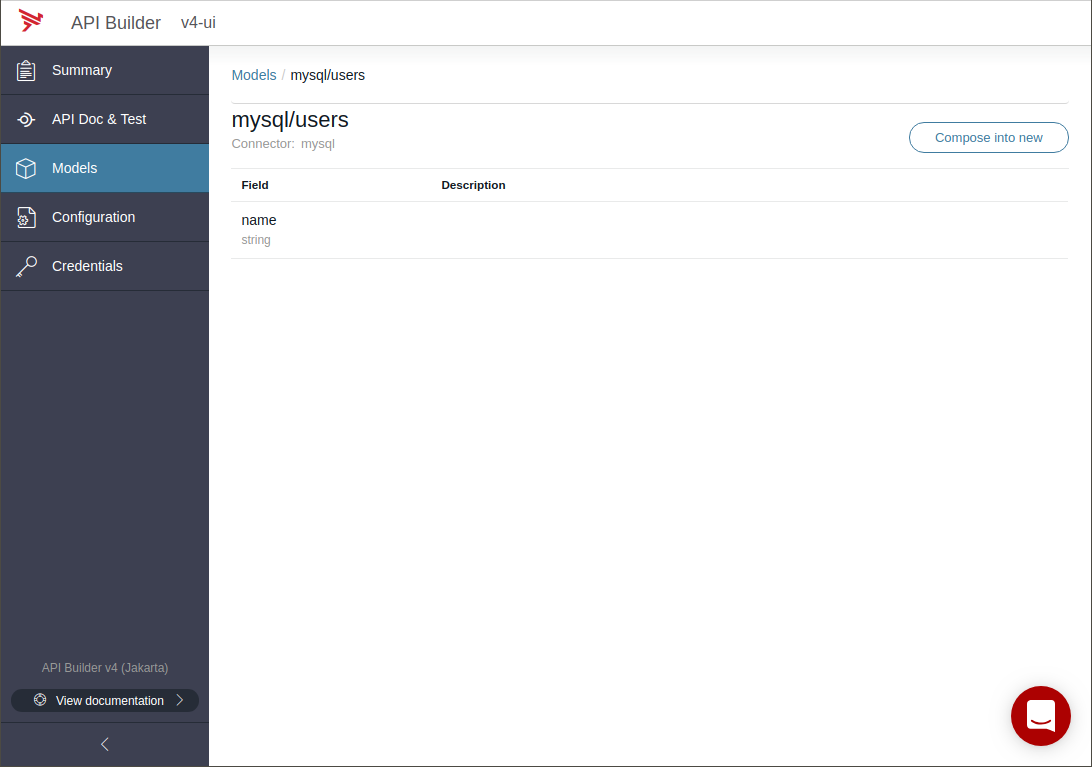
Notice that the primary key id is not shown.Also note that mysql/users is not editable. This is because it was generated and is read-only.
Generally speaking, we want to define an object model that is developer friendly. We’ll want to change the name of the model, add/remove fields, change field names, add descriptions and set field constraints. It is possible to compose a new model from mysql/users that is editable. The new model will be derived from the mysql/users, and CRUD operations on it will continue to operate on the users database table.
Compose a new model
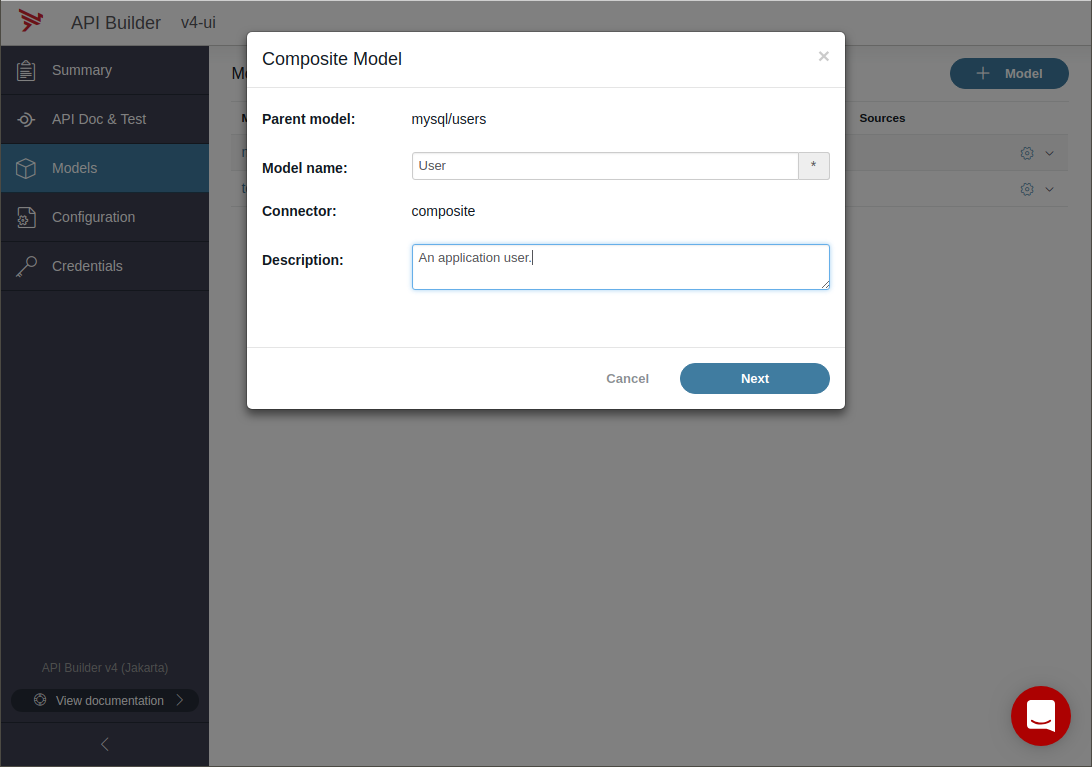
We want to compose mysql/users into a new model User. To edit, use the mysql/users drop-down menu and select Compose into new.

The following dialog allows you to rename and describe the model. Rename the model as a singular User because a Model describe an object, not a collection of objects, and give it a description.
This will then bring you to the edit Model wizard. This composite model is derived from mysql/user, but is now editable.
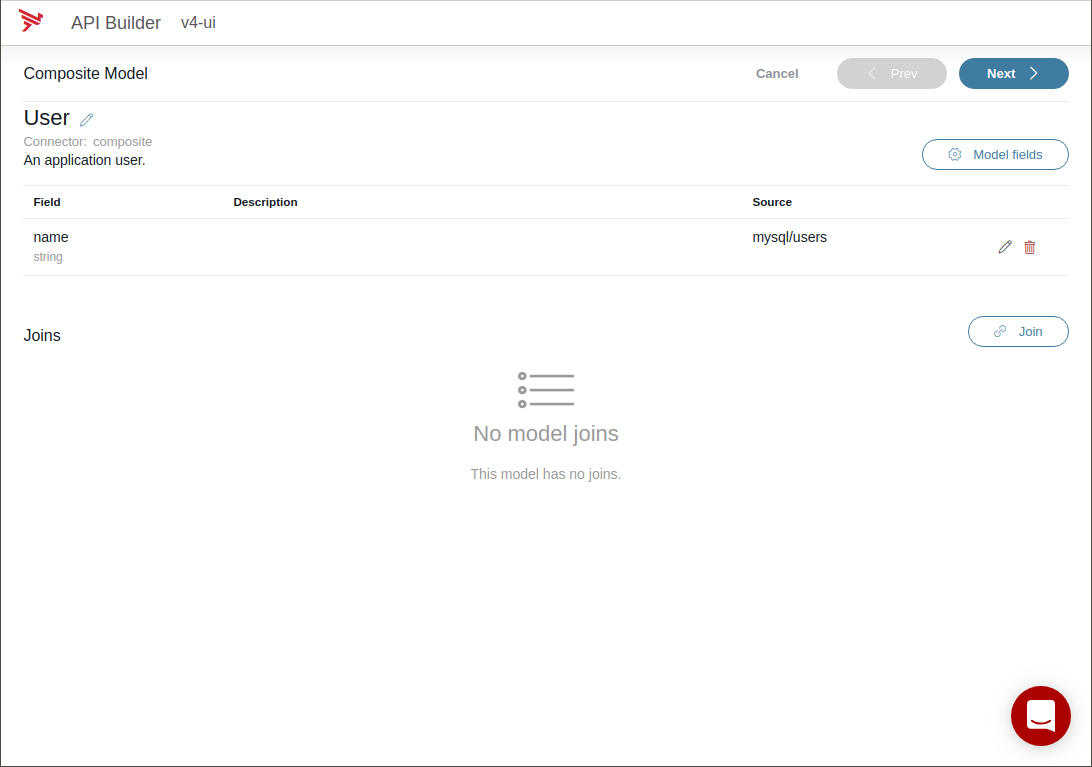
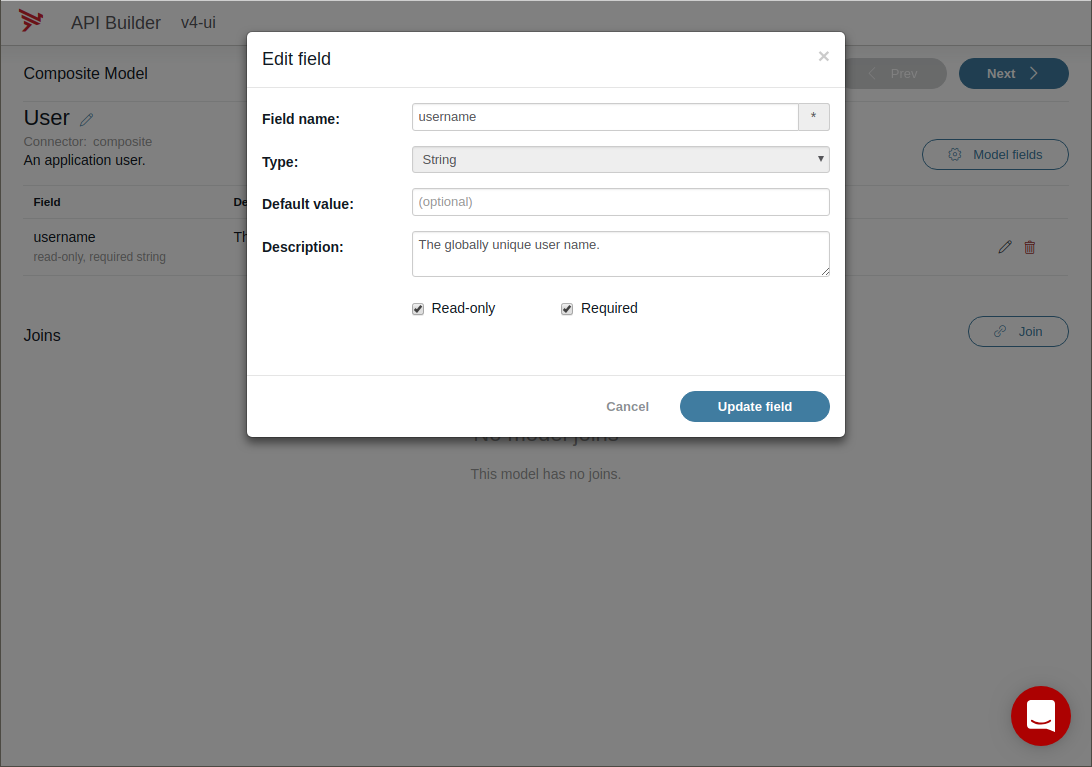
From here, you can hide fields (e.g. optional), rename fields, or even Join the model with other models, but for this post, we will limit it to renaming and adding some constraints and to ensure the values are read-only. On the field you want to edit, e.g. name, click on the pencil icon to open the edit field dialog, set approprivate value(s), and then click Update field when done.
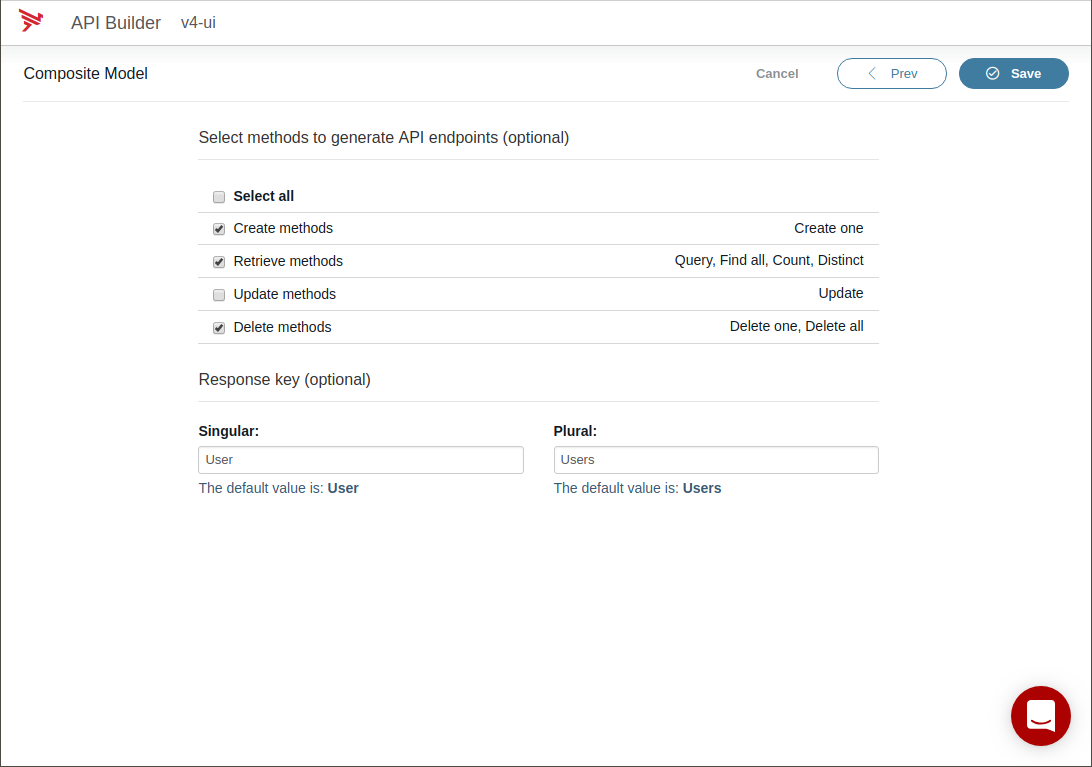
Expose model API endpoints
Now that the Model is renamed to User, fields have been renamed, and constraints applied, it is now possible to expose a rich REST API for the User Model. You can also choose to disable certain methods, e.g. to make a read-only API. Because my example User only has one field, and I marked the field as read-only and as a result, the Update methods will not work, so I will disable them by unchecking Update methods and click Save.
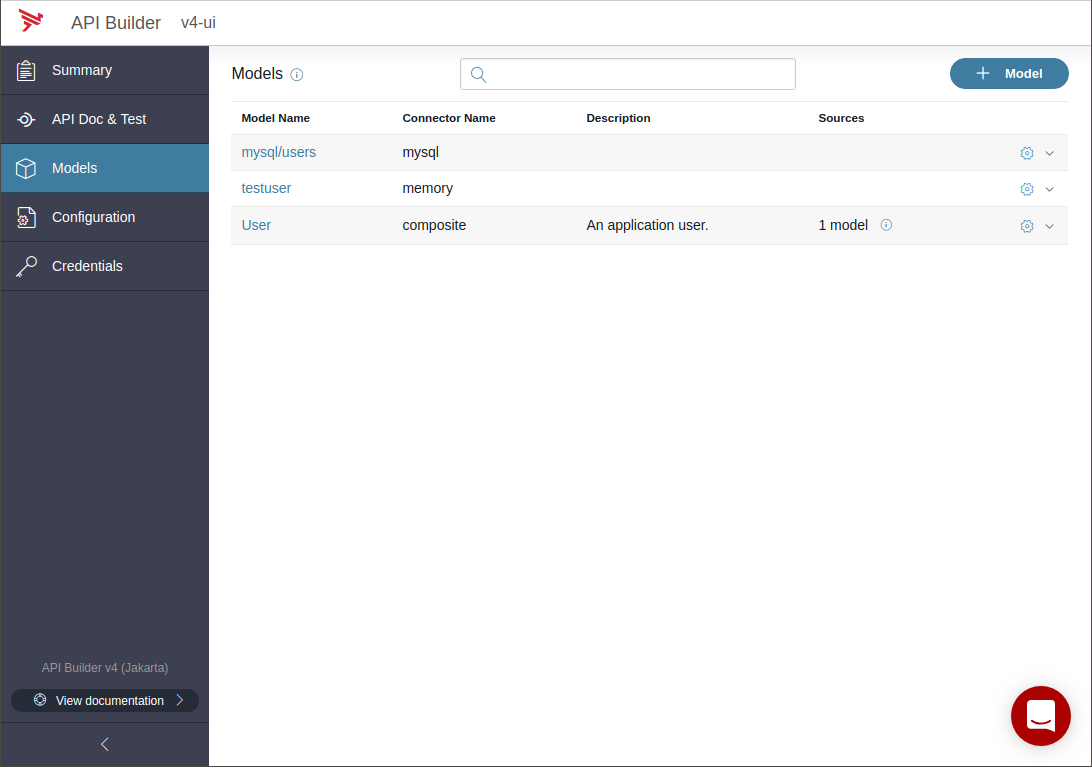
You chould now see a new model User that is sourced from mysql/users.
Inspecting the REST API
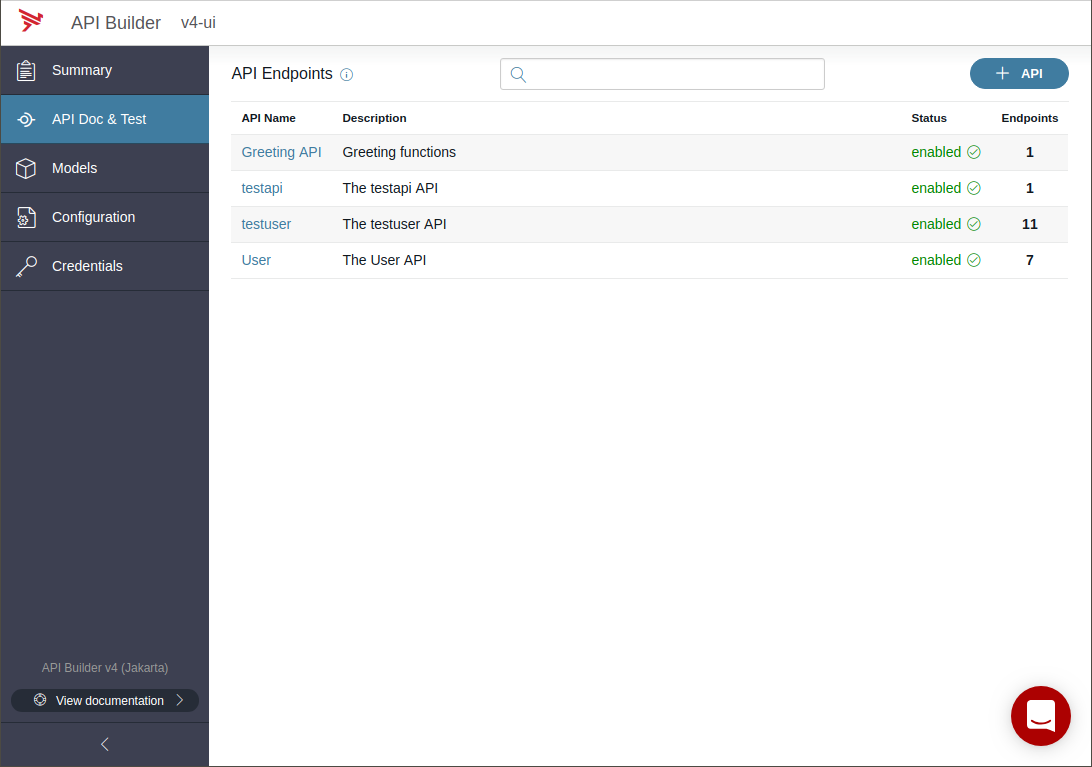
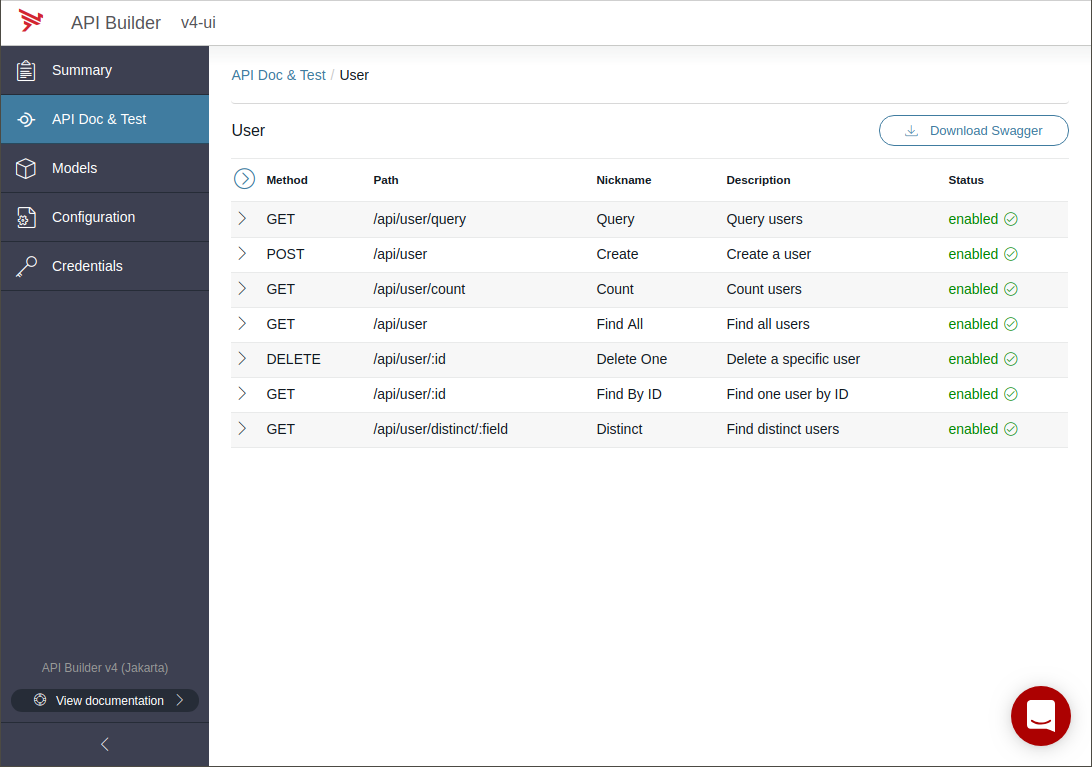
Click on API Doc & Test in the navigation menu. These are the API exposed by your application. You should see a new API endpoint group User that are a collection of API endpoints for operating on the User model, which ultimately operate on the MySQL users database table.
Clicking into the API endpoint group User reveals all of the REST APIs that API Builder generated.
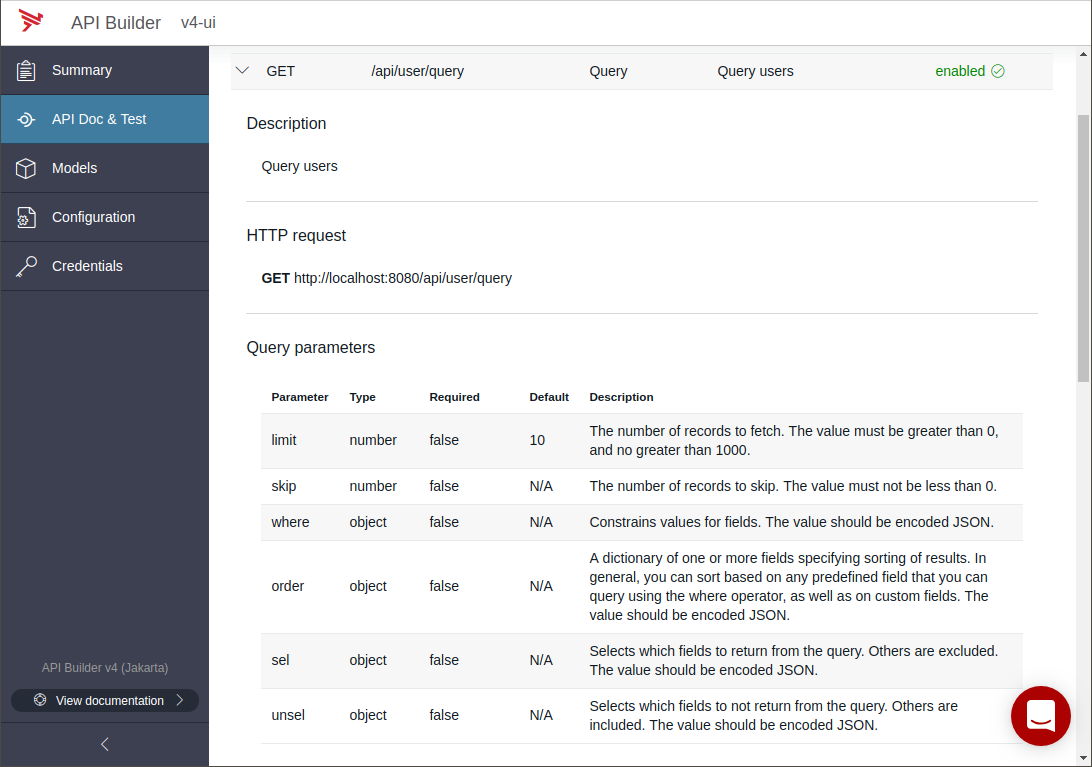
Expanding the GET /api/user/query API Query users, you will see that API Builder has abstracted the database into a developer-friendly REST API that can be used for queries, paging, and sorting.
Notice that there is no method to update User (i.e. PUT). This is because we disabled the generation of Update methods when creating the User model. You can edit the model to enable/disable methods as appropriate for your needs.
This is the Swagger that API Builder produced for the User endpoints.
Summary
API Builder Standalone can easily transform existing database tables into a fully functional and uniform REST API that is OpenAPI/Swagger 2.0 compliant, enabling you to rename tables and fields and provide additional documentation details for the developers that will consume your microservice.
This is only a simple example, but it enables direct REST API to database requirements, and is quite powerful. However, in some cases, applications may not directly manipulate database tables, as it would be very inefficient and “chatty”. In part 2 of this blog, we will demonstrate how to use Models in a complex orchestration Flow to utilize data from a database without directly exposing it as a REST API.