

Axway’s Integration Builder has over 200 connectors to various applications such as Salesforce, GitHub, SAP Hana, and many more. However, if a connector doesn’t exist, you can use Connector Builder to create one. The Connector Builder has many features to aid in the creation of a connector. One of them is Hooks.
Hooks enable you to execute custom JavaScript before an API request (pre-request hook), and after the API provider sends a response (post-response hook) in a connector. You can use two types of hooks when you create a connector: global hooks and resource hooks. Global hooks happen on every request or response, while resource hooks happen only on requests to and responses from specific endpoints.
Let’s look at an example of how to set up a connector to take an API Key and use a global hook to encode it and pass it as a custom header on every request. We’ll look at doing this two ways, one using a built-in Base64 encoding function and the other using the Node.js Crypto library sha256 hash function.
Create the Connector with API Key Authentication
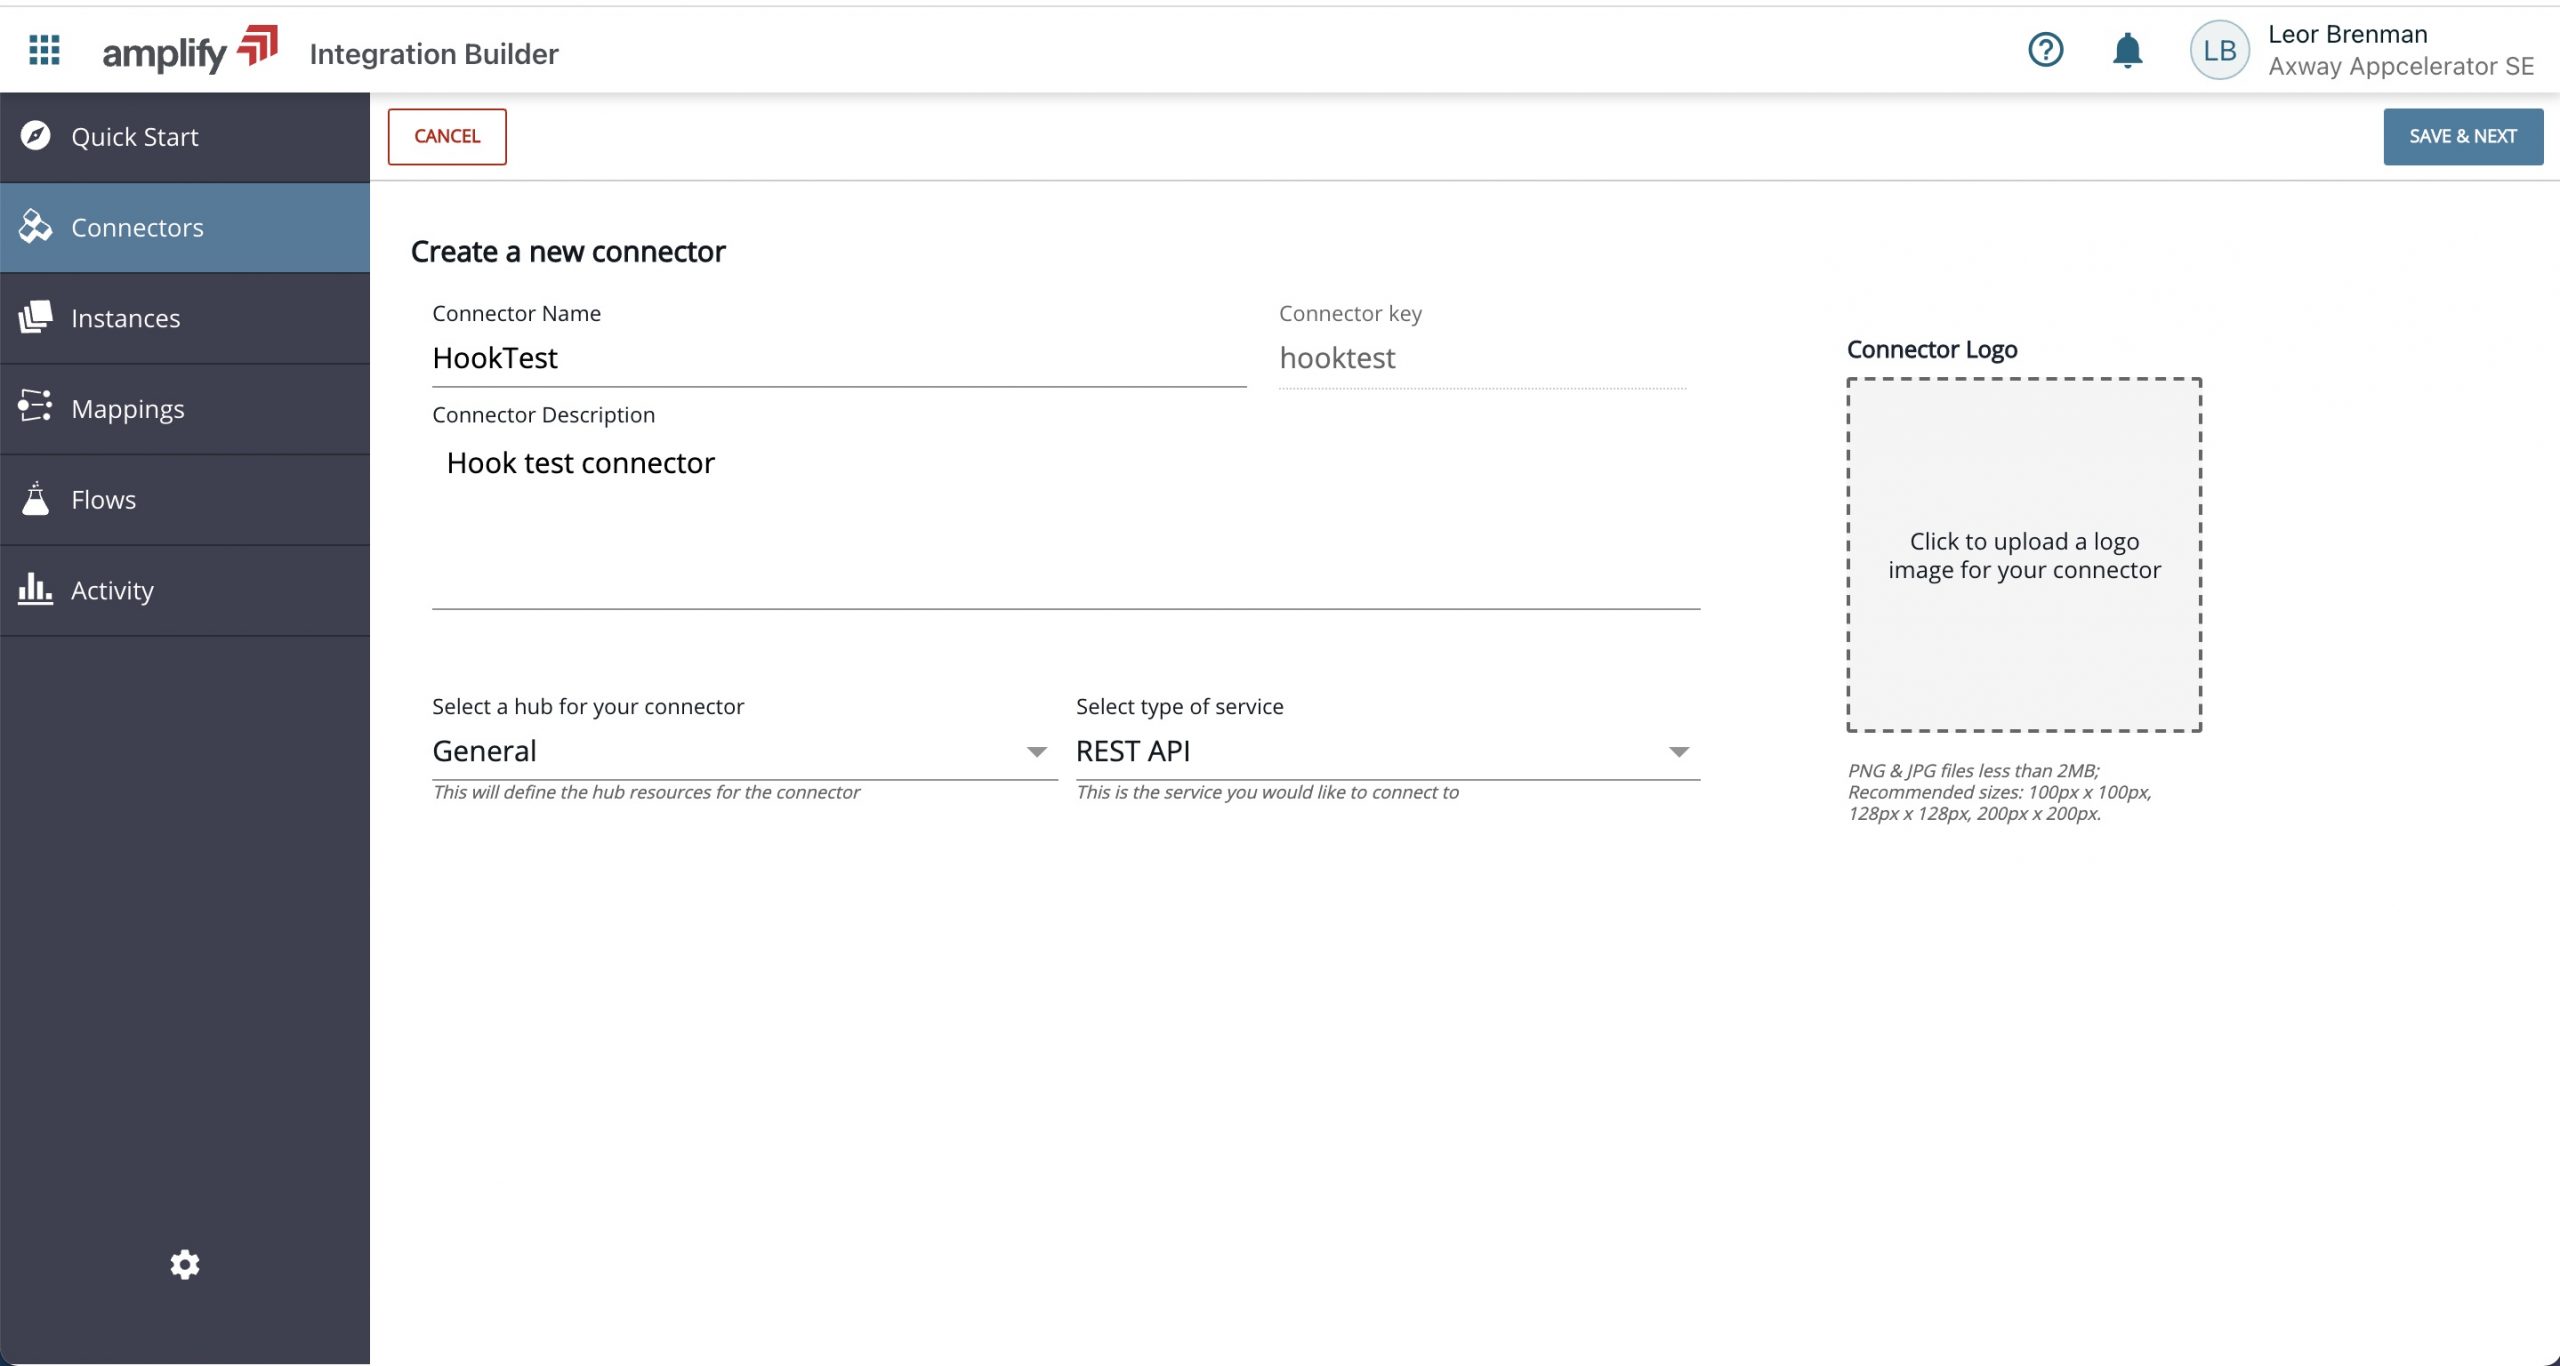
- In the Integration Builder Connectors tab, click on BUILD NEW CONNECTOR and select CREATE and fill in the Name, etc… and click SAVE & NEXT

- Enter the base URL of your backend API. I’m using https://webhook.site/ for now to debug my hook.
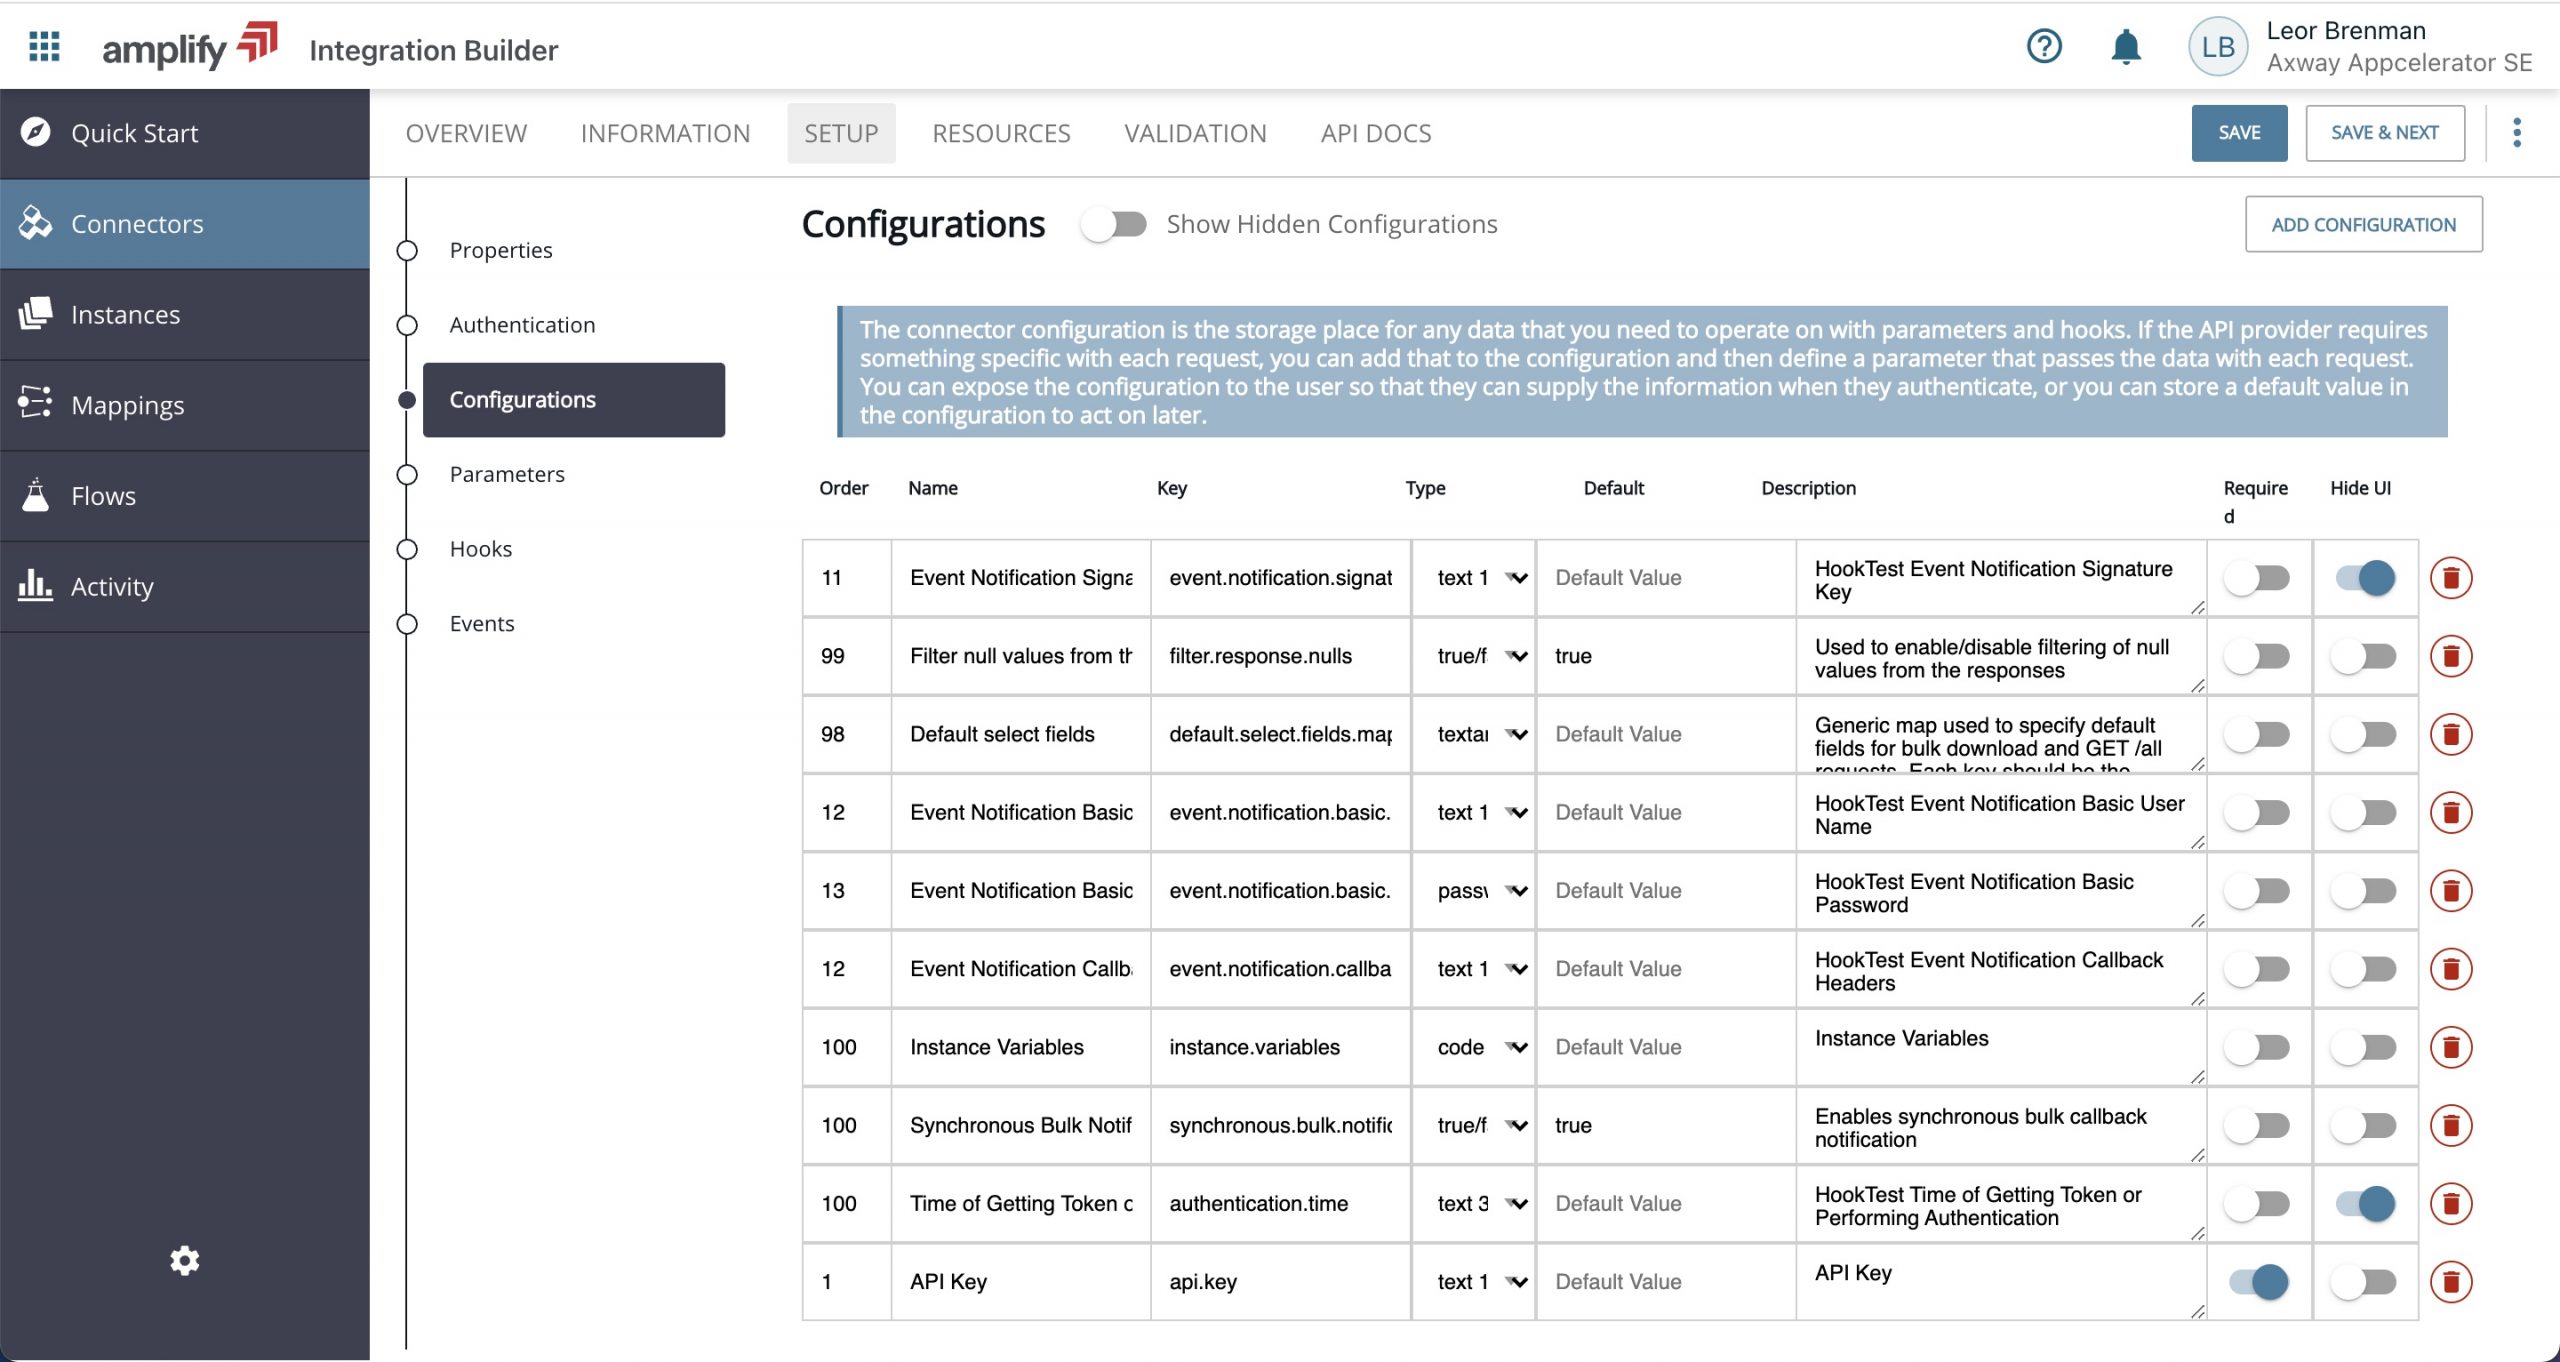
- Under Configuration add a required configuration named API Key with type Text128 to provide a means for the user to enter an API Key when they authenticate the connector.

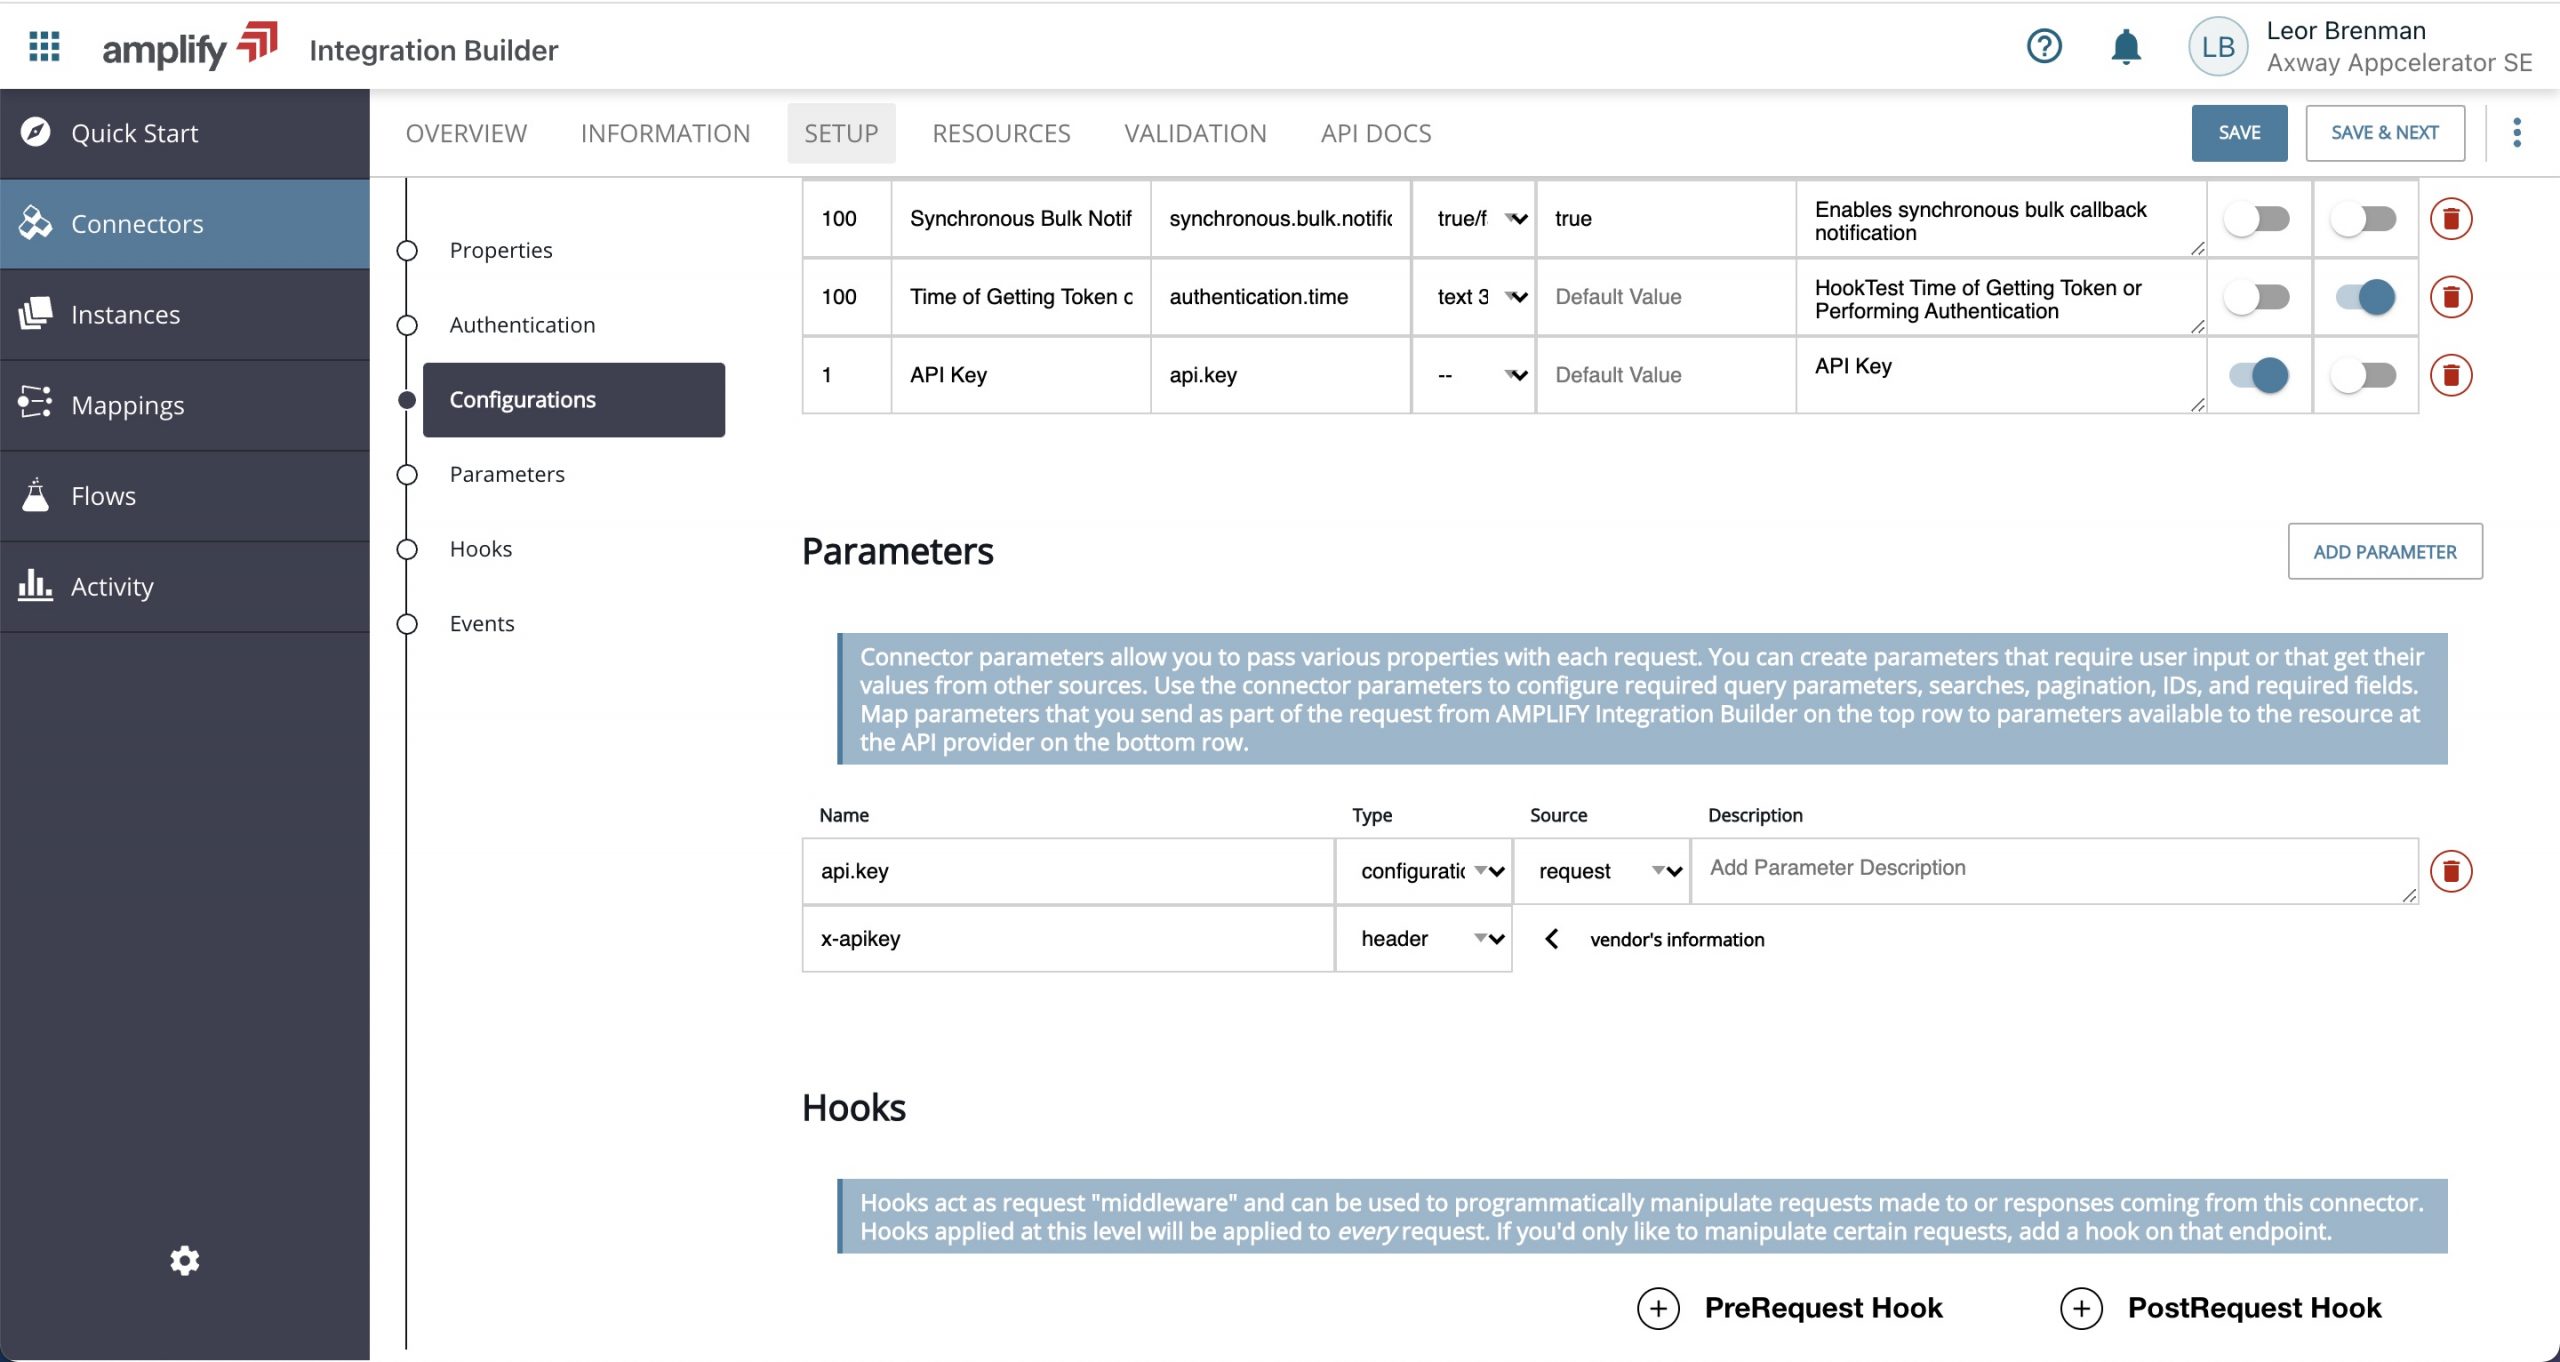
- Under Parameters, add a parameter and give it a name equal to the configuration key you added above (e.g. api.key) and set its type to configuration. For vendor name, provide a header name (e.g. x-apikey) with type header.
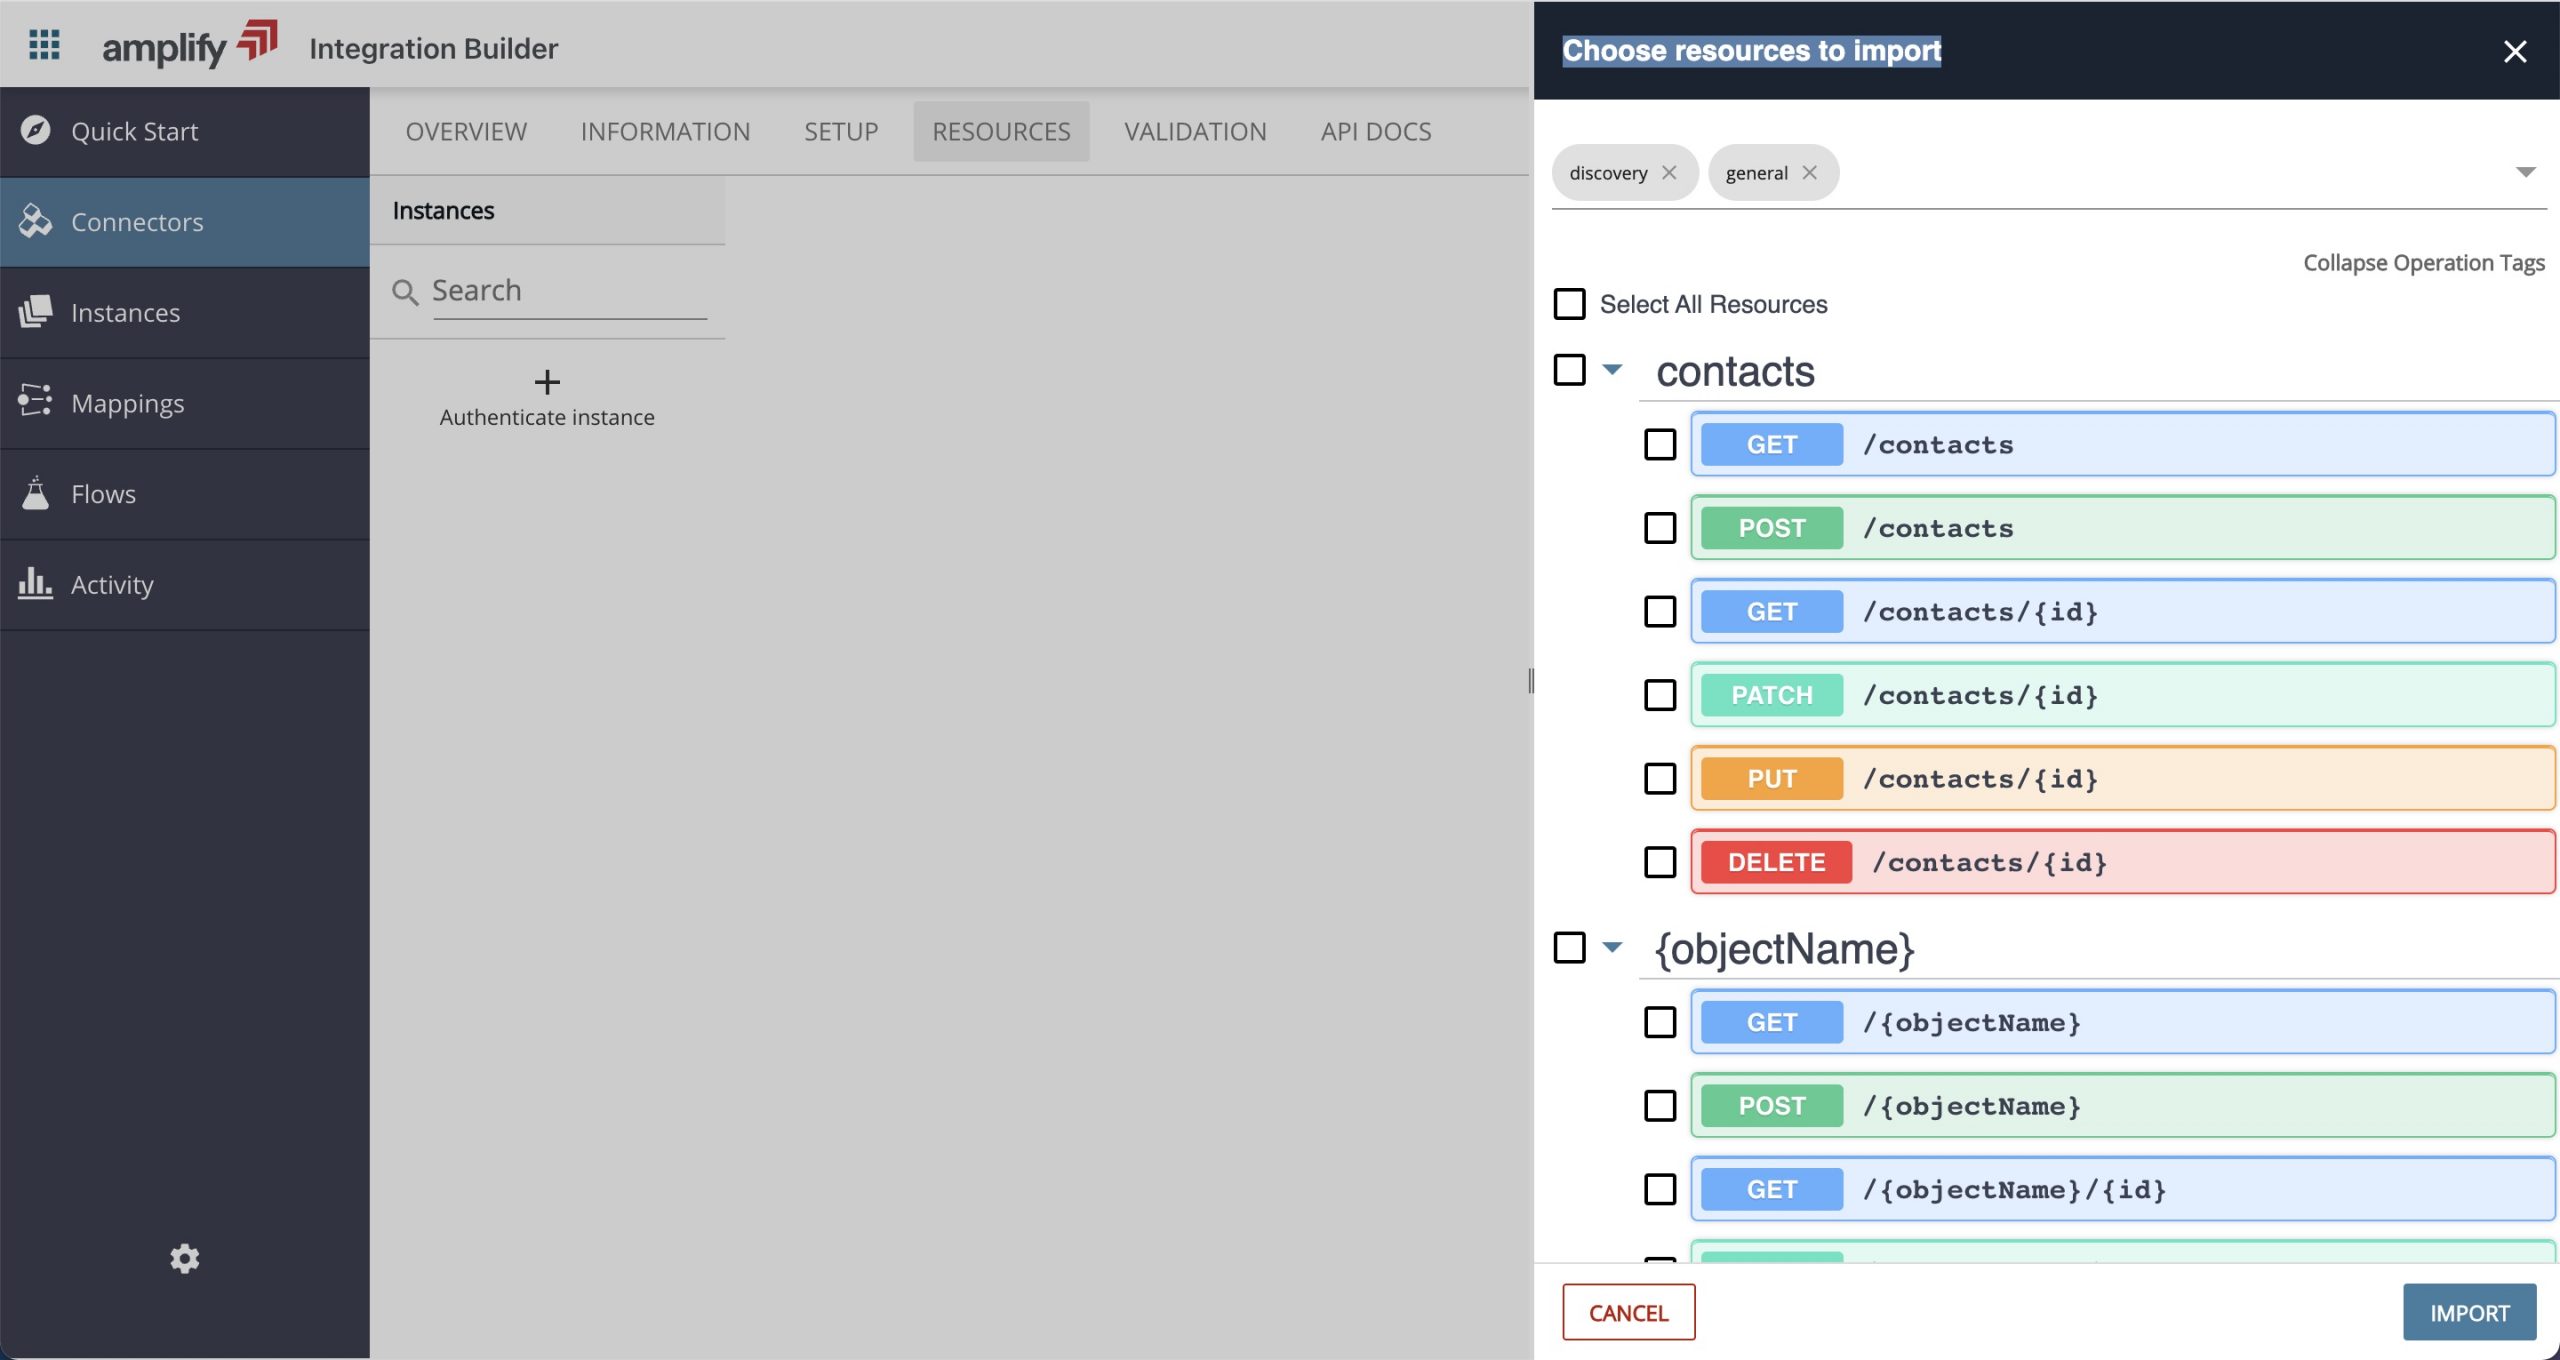
- Skip hooks for now and click SAVE & NEXT to go to the RESOURCES tab. Click CANCEL on the resource import flyout.

- Add a blank resource and give it a name /contacts and select only GET and click ADD RESOURCE.
- Click SAVE and go to the API Docs and click Authenticate Instance.
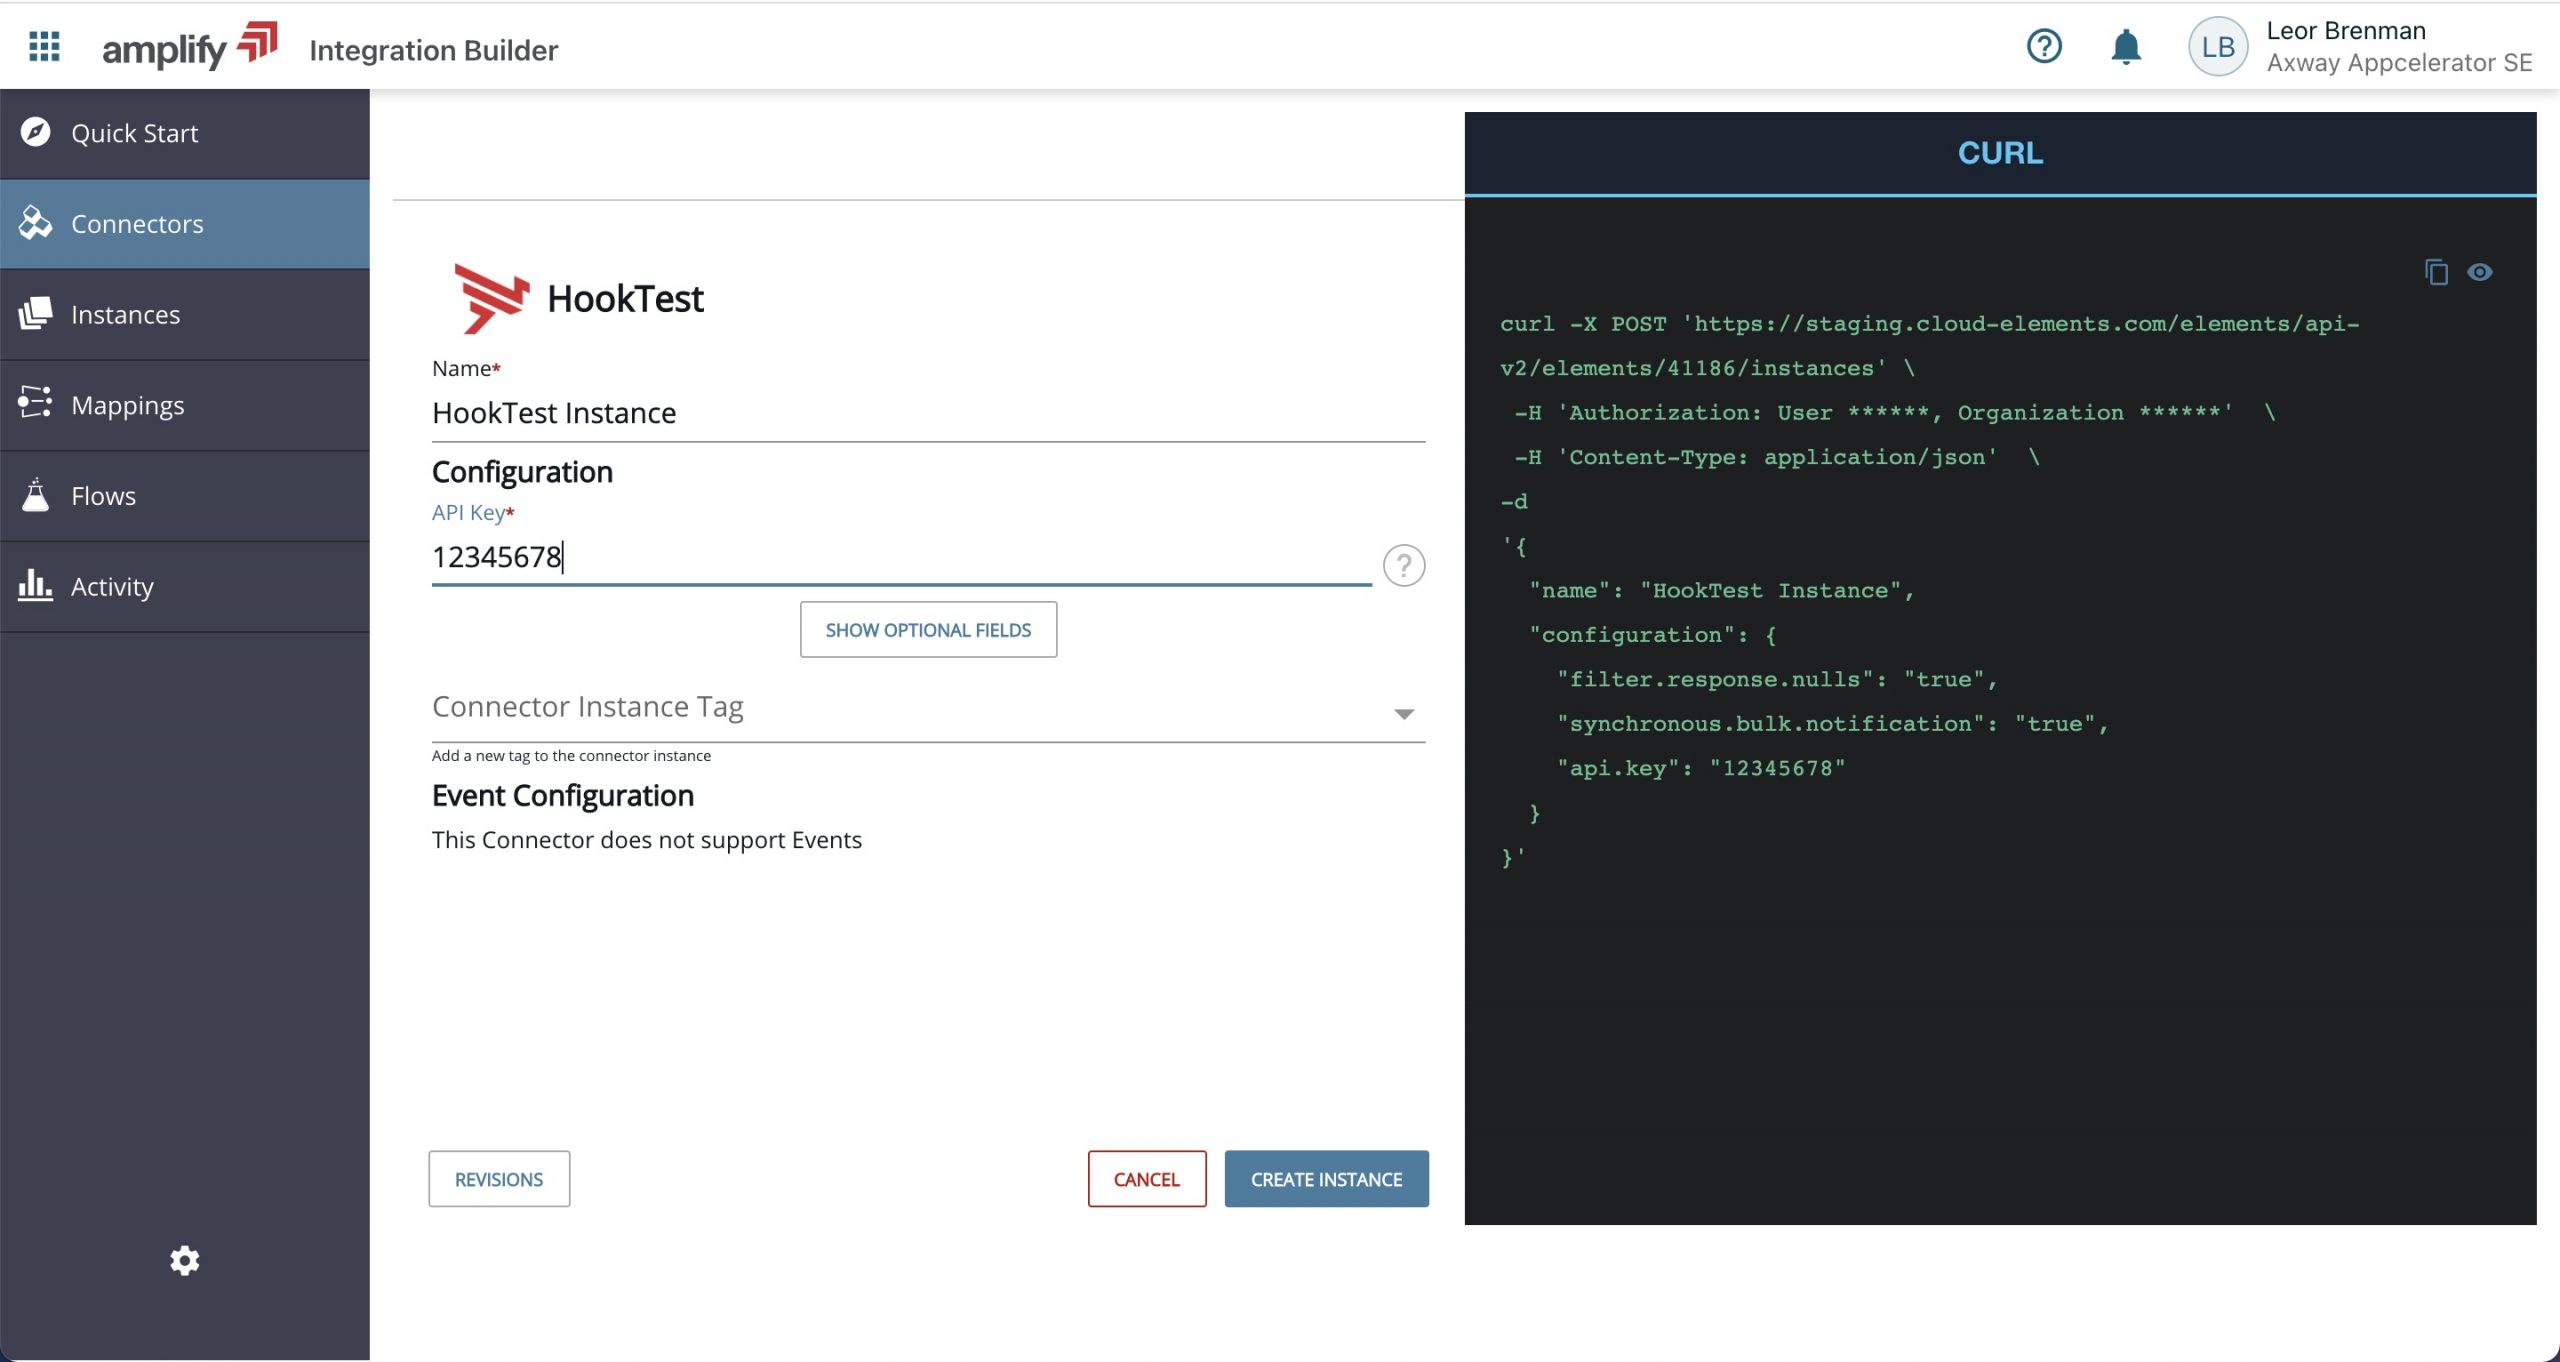
- Provide an instance name and provide an API Key (any value) and click CREATE INSTANCE.

- Go to the API Docs and test your API.
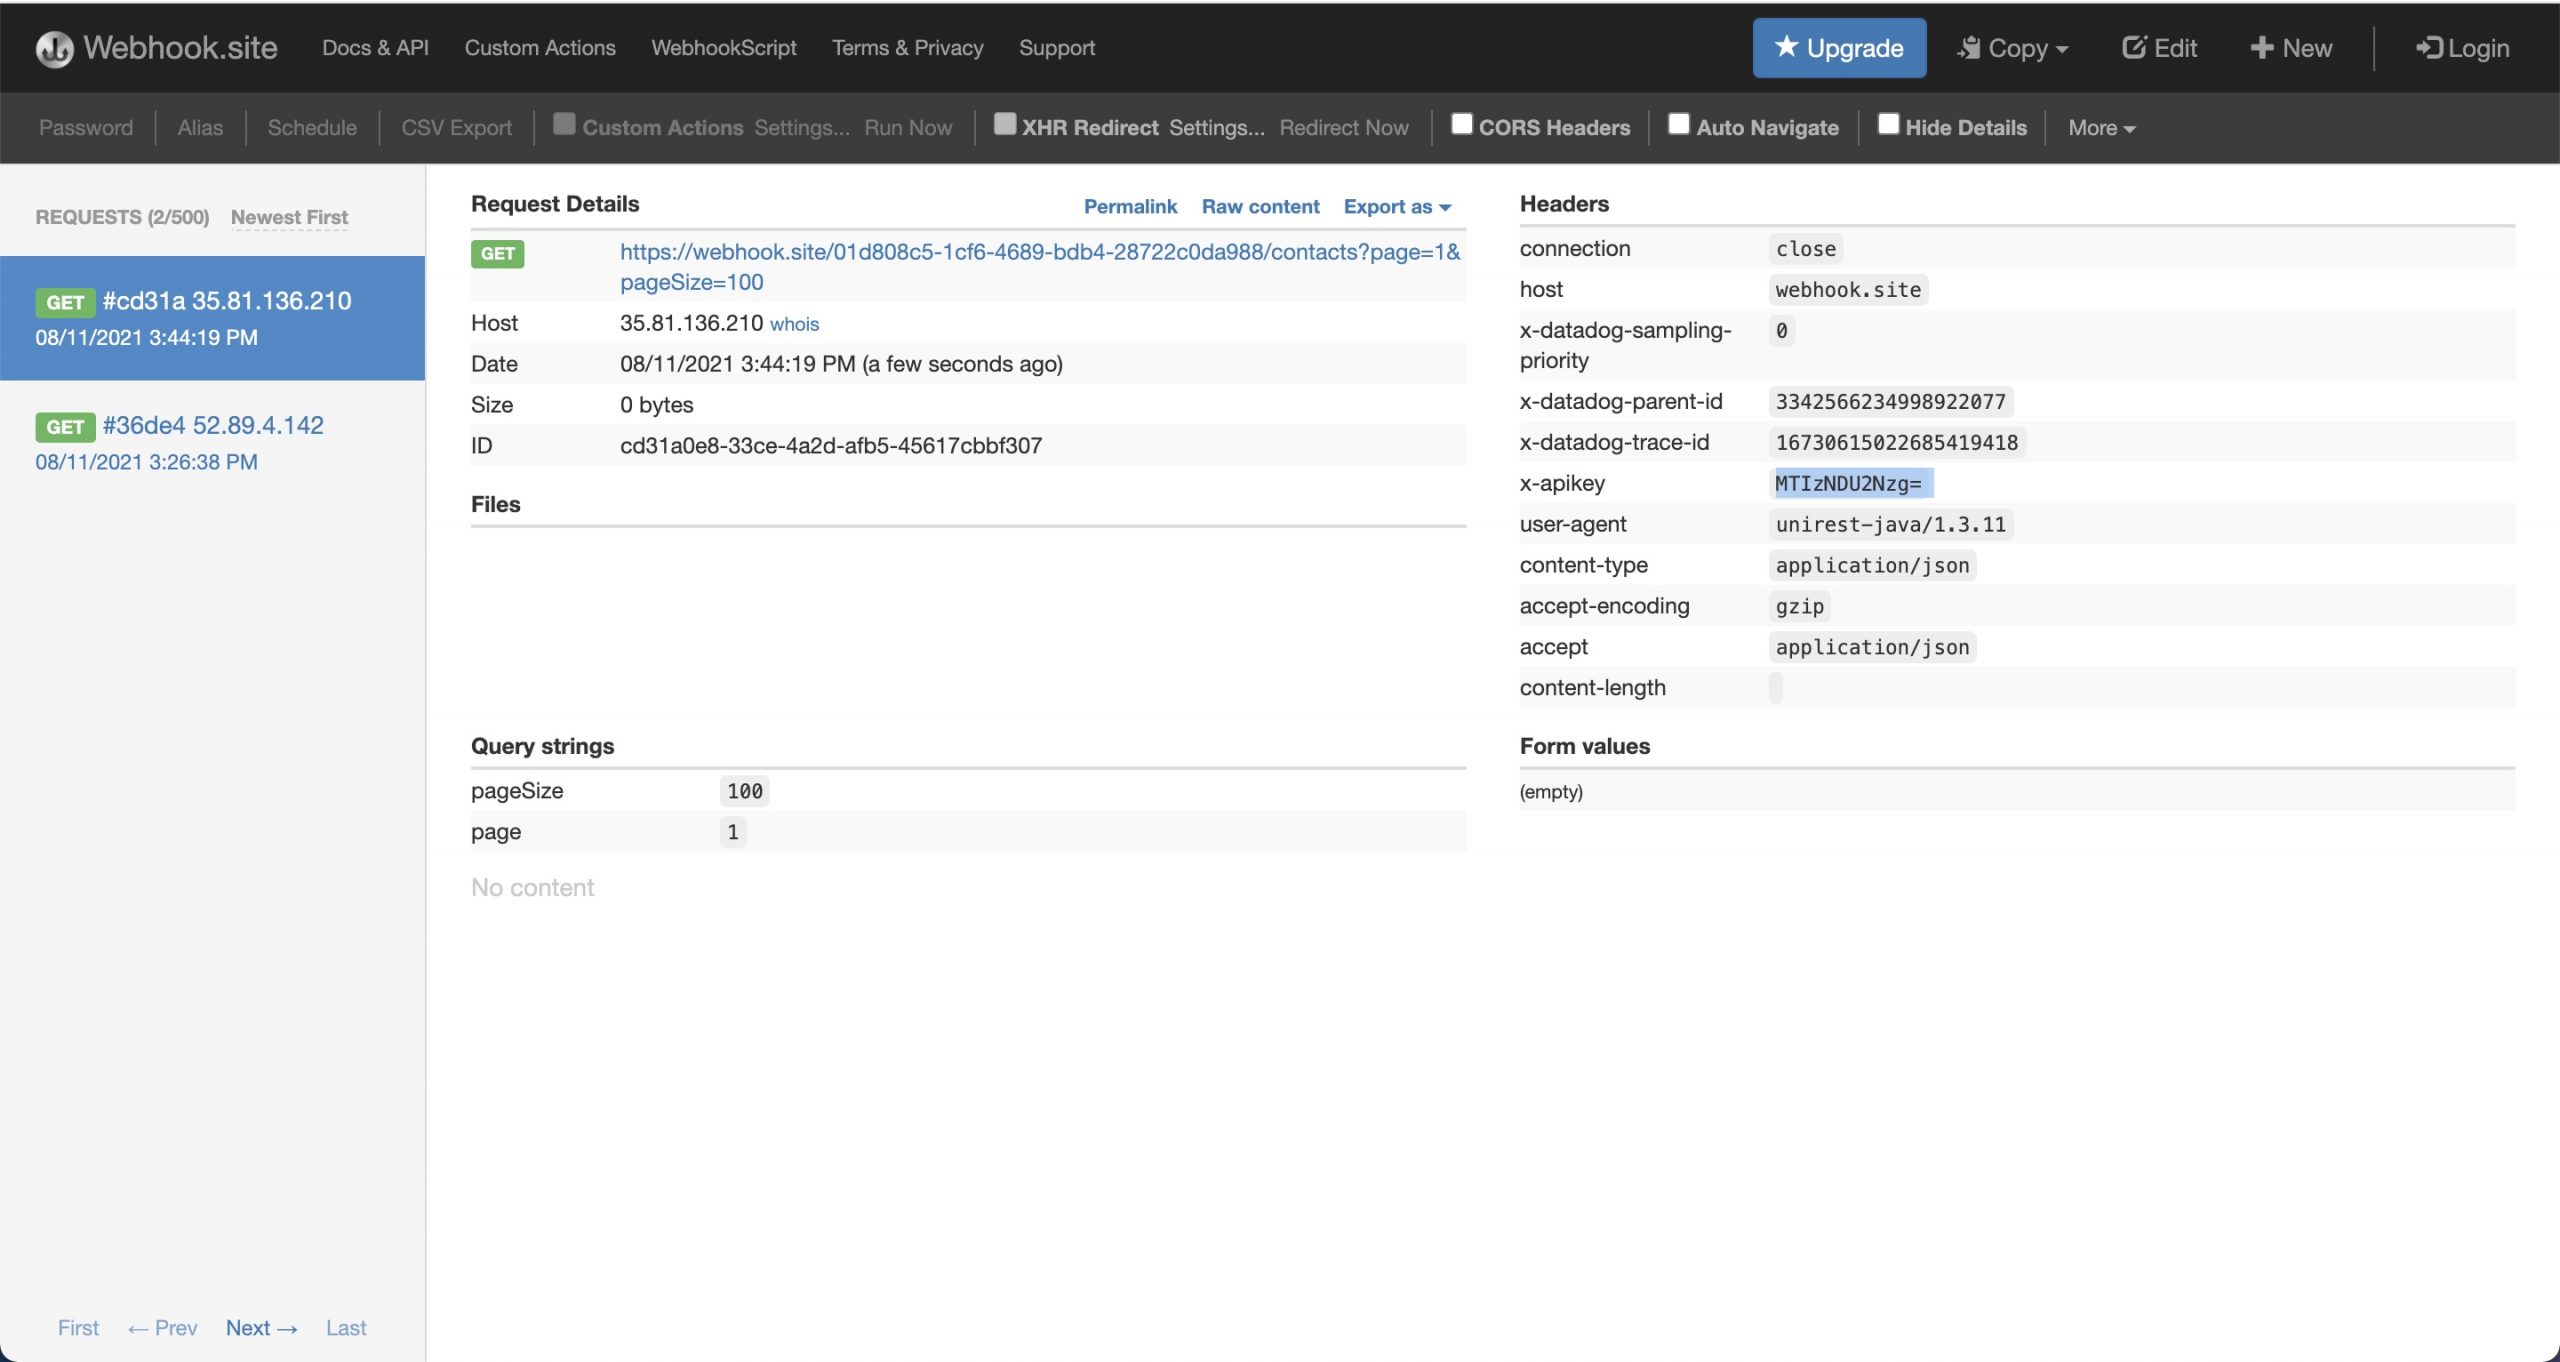
- Go to your https://webhook.site/ to your API Call details and notice the x-apikey header.
Add The Pre Hook
Now that we have our API built, let’s use a hook to encode the API Key using Base64 encoding.
- Click on the SETUP tab and scroll down to Hooks and click on PreRequest Hook.

- Paste in the following code:
let vendorHeaders = request_vendor_headers;

vendorHeaders['x-apikey'] = CE.b64(vendorHeaders['x-apikey']);

done({'request_vendor_headers': vendorHeaders});
Note that in the code above, we are simply retrieving the headers and using the built-in Base64 encoding function to encode the API Key header value
- Click SAVE and go to the API Docs and test your API again and see that your API Key is now Base64 encoded.
Now let’s change to using the Node.js Crypto library and the sha256 hash function.
- Replace your Hook code with the following:
const crypto = require('crypto');

const secret = 'abcdefg';

let vendorHeaders = request_vendor_headers;

const hash = crypto.createHmac('sha256', secret)
  .update(vendorHeaders['x-apikey'])
  .digest('hex');

vendorHeaders['x-apikey'] = hash;

done({'request_vendor_headers': vendorHeaders});
Note that in the code above, we are using a hard coded secret but this can be entered by the user, the same way that the API Key is, if desired, by following the same steps as we did for the API Key.
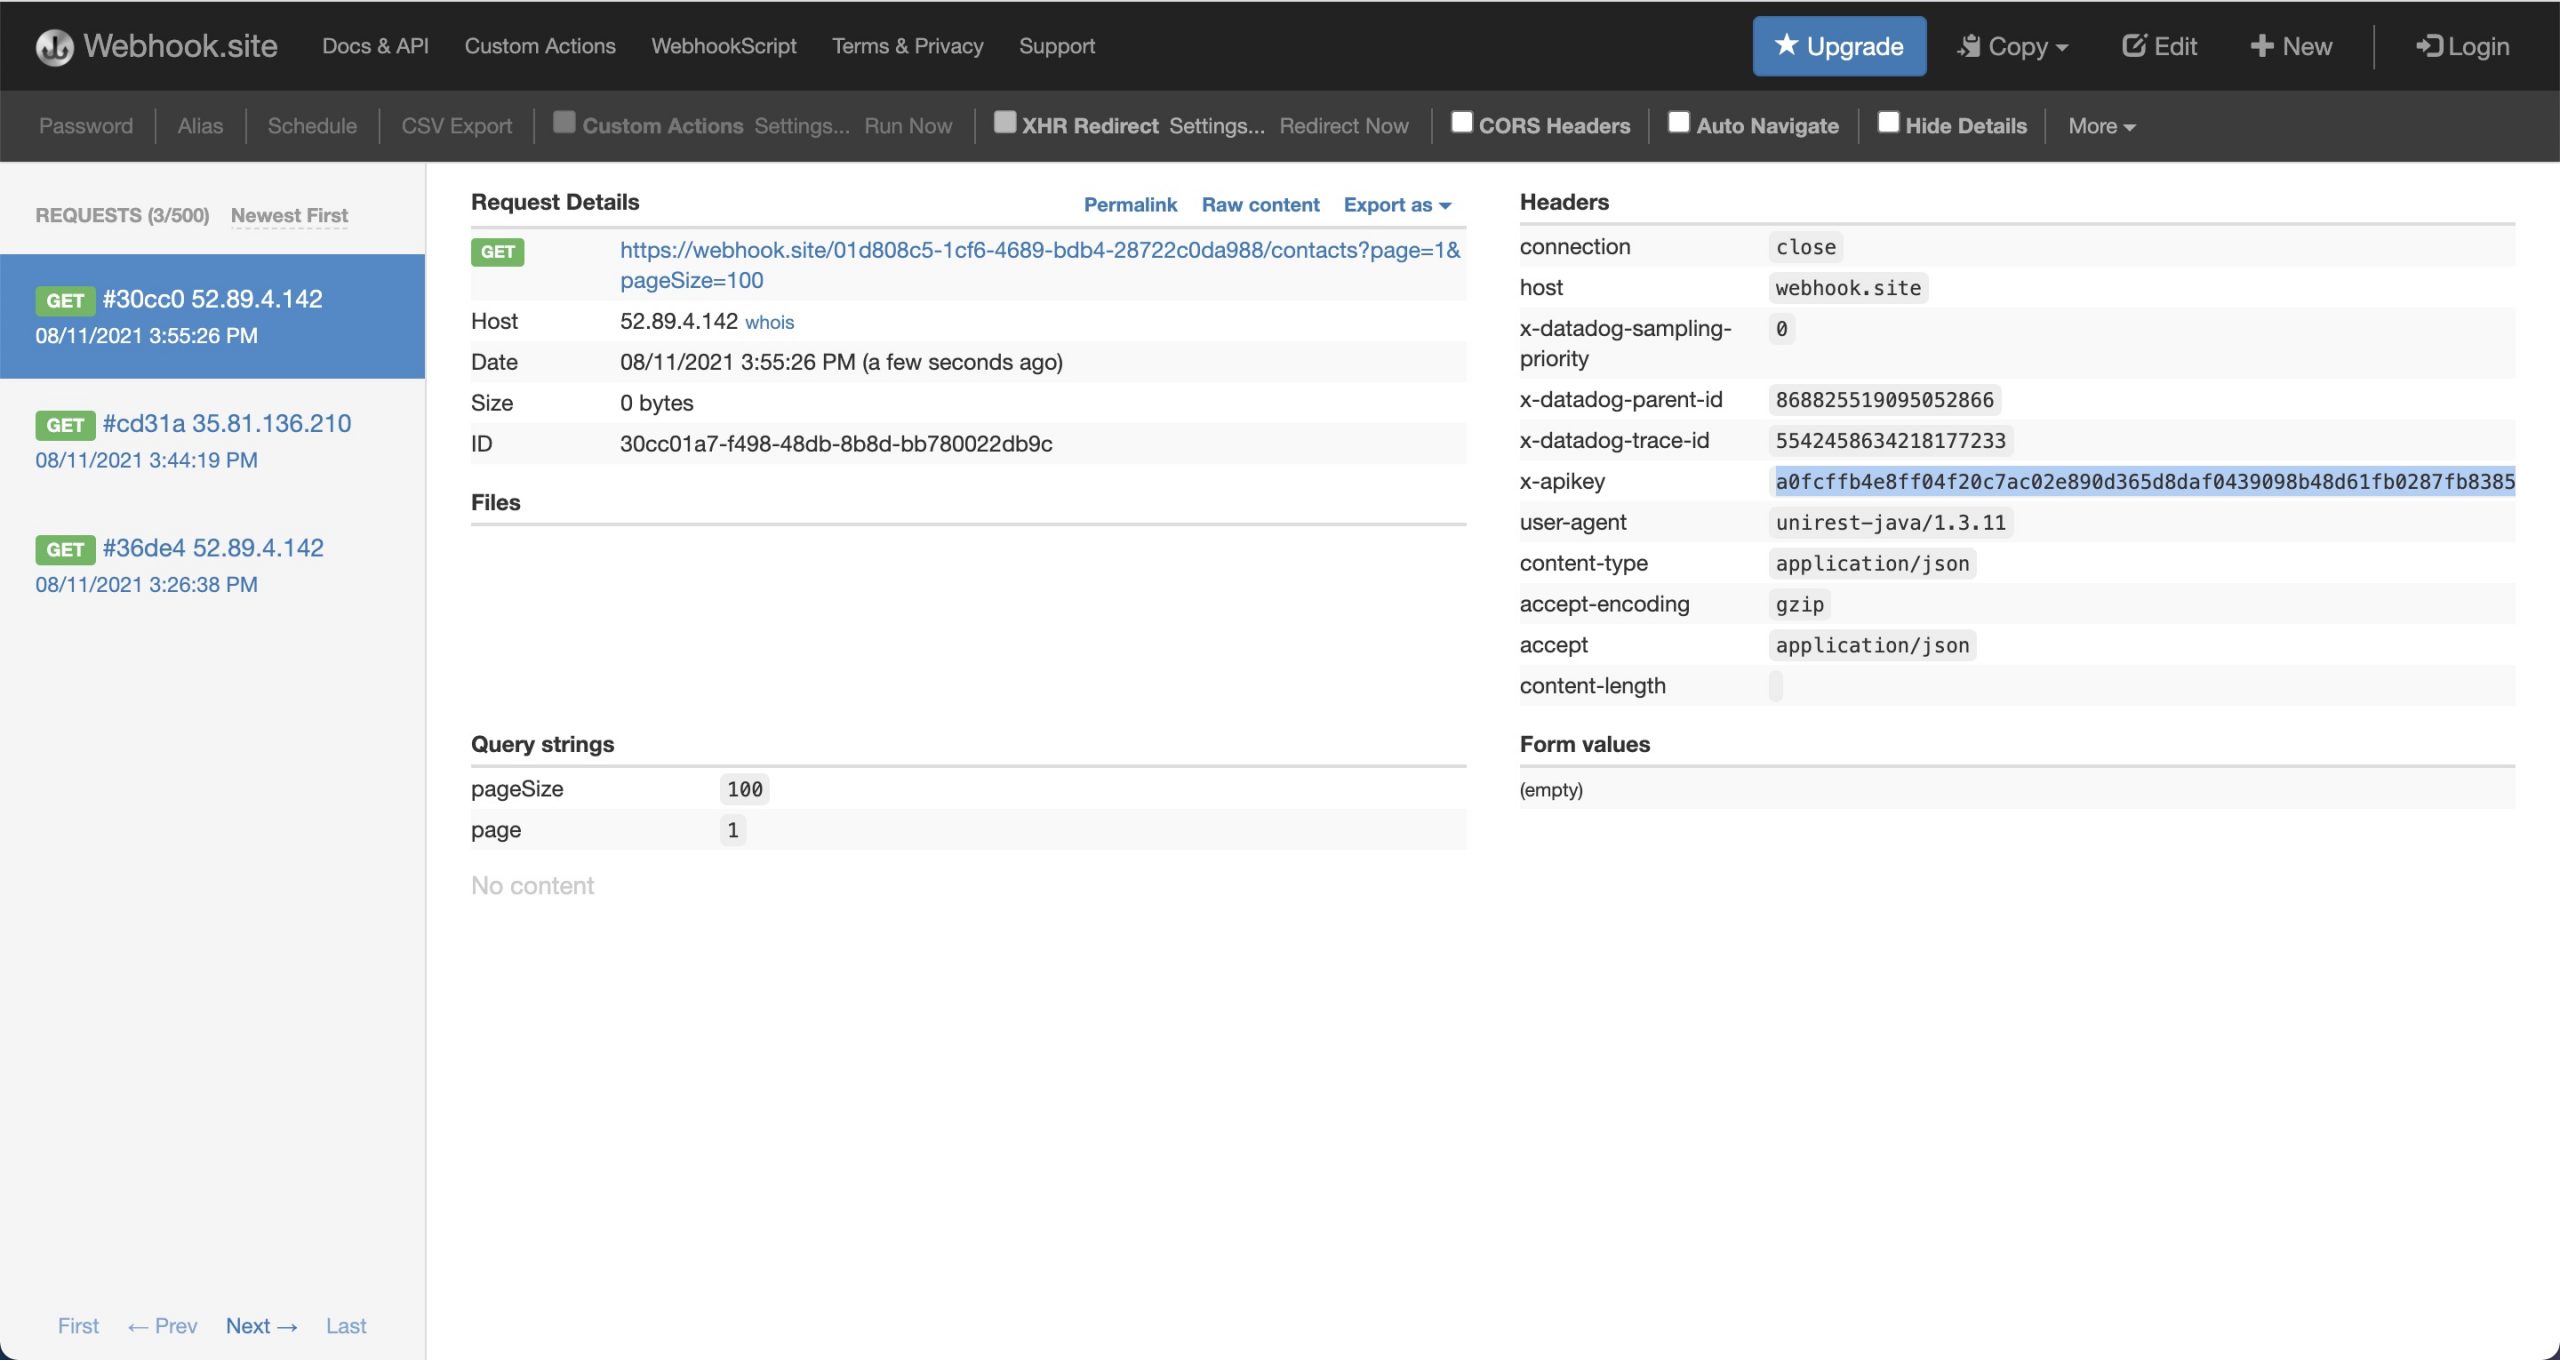
- Click SAVE and go to the API Docs and test your API again and see that your API Key is now sha256 encoded with the secret.
Summary
In this blog post, we saw how to use Hooks to run code before an API request in a Connector. In this case, we used a prehook to encode an API Key in two different ways, Base64, and sha256 secure hash.
Discover Amplify Integration Builder: How to create a GitHub Connector Instance.