In the Amplify Central Integration Webhooks — Basics blog post, we introduced Amplify Central Integration Webhooks and how to create them using APIs. In this blog post, we’ll create the same Integration Webhook using the Axway Central CLI and a YAML file that defines the Integration Webhook.
Prerequisites
* Axway Central CLI installed and working
* Access to Amplify Central
YAML File
We’ll use the following YAML file to define the resources: Integration, Secret, Webhook and Resource Hook. Copy and put in a file called *resources.yaml*. This will create an identical Integration that we created using APIs in the Amplify Central Integration Webhooks – Basics blog post.
name: myintegration
kind: Integration
apiVersion: v1alpha1
title: Integration
tags:
- cloud
spec:
    description: This is an integration.
---
name: webhooksecret
kind: Secret
apiVersion: v1alpha1
title: API Key Secret for Webhook reference
tags:
- saas
- axway
metadata:
  scope:
    kind: Integration
    name: myintegration
spec:
    data:
      apikey: Password123
---
name: webhook
kind: Webhook
apiVersion: v1alpha1
title: Webhook to invoke requestbin.com
tags:
- prod
- saas
- axway
attributes:
  release: 1.0.0
metadata:
  scope:
    kind: Integration
    name: myintegration
spec:
    enabled: true
    url: https://en9c5wvi5vta4.x.pipedream.net
    auth:
      secret:
        name: webhooksecret
        key: apikey
---
group: management
apiVersion: v1alpha1
kind: ResourceHook
name: environments-hook
title: Monitor Environment manualenv and all its resources
metadata:
  scope:
    kind: Integration
    name: myintegration
spec:
  triggers:
    - group: management
      kind: Environment
      name: manualenv
      type:
      - created
      - updated
      - deleted
    - group: management
      kind: "*"
      name: "*"
      type:
      - created
      - updated
      - deleted
      scope:
        kind: Environment
        name: manualenv
  webhooks:
    - webhook
Note that this Integration will trigger on any modification to my environment manualenv and any resources in that environment. Change the environment name to match your environment or replace manualenv with an asterisk (*) for all environments.
Create Integration
Use the CLI to log in and create the integration.
* Log in:
axway auth login
* Get list of existing integrations:
axway central get integ
with the following sample response
✔ Resource(s) successfully retrieved

NAME                            AGE           TITLE
apiscintegration                14 days ago   API Service Created Integration
newapiversionintegration        2 months ago  New API Version Integration
newconsumerinstanceintegration  a month ago   New Consumer Instance Integration
* Create the integration:
axway central create -f resources.yaml
with the following sample response:
✔ "integration/myintegration" has successfully been created.
✔ "secret/webhooksecret" has successfully been created.
✔ "webhook/webhook" has successfully been created.
✔ "resourcehook/environments-hook" has successfully been created.
* Check list of integrations:
axway central get integ
with the following sample response
✔ Resource(s) successfully retrieved

NAME                            AGE            TITLE
apiscintegration                14 days ago    API Service Created Integration
newapiversionintegration        2 months ago   New API Version Integration
newconsumerinstanceintegration  a month ago    New Consumer Instance Integration
myintegration                   2 minutes ago  Integration
Note the new integration, myintegration
Test the Integration Webhook
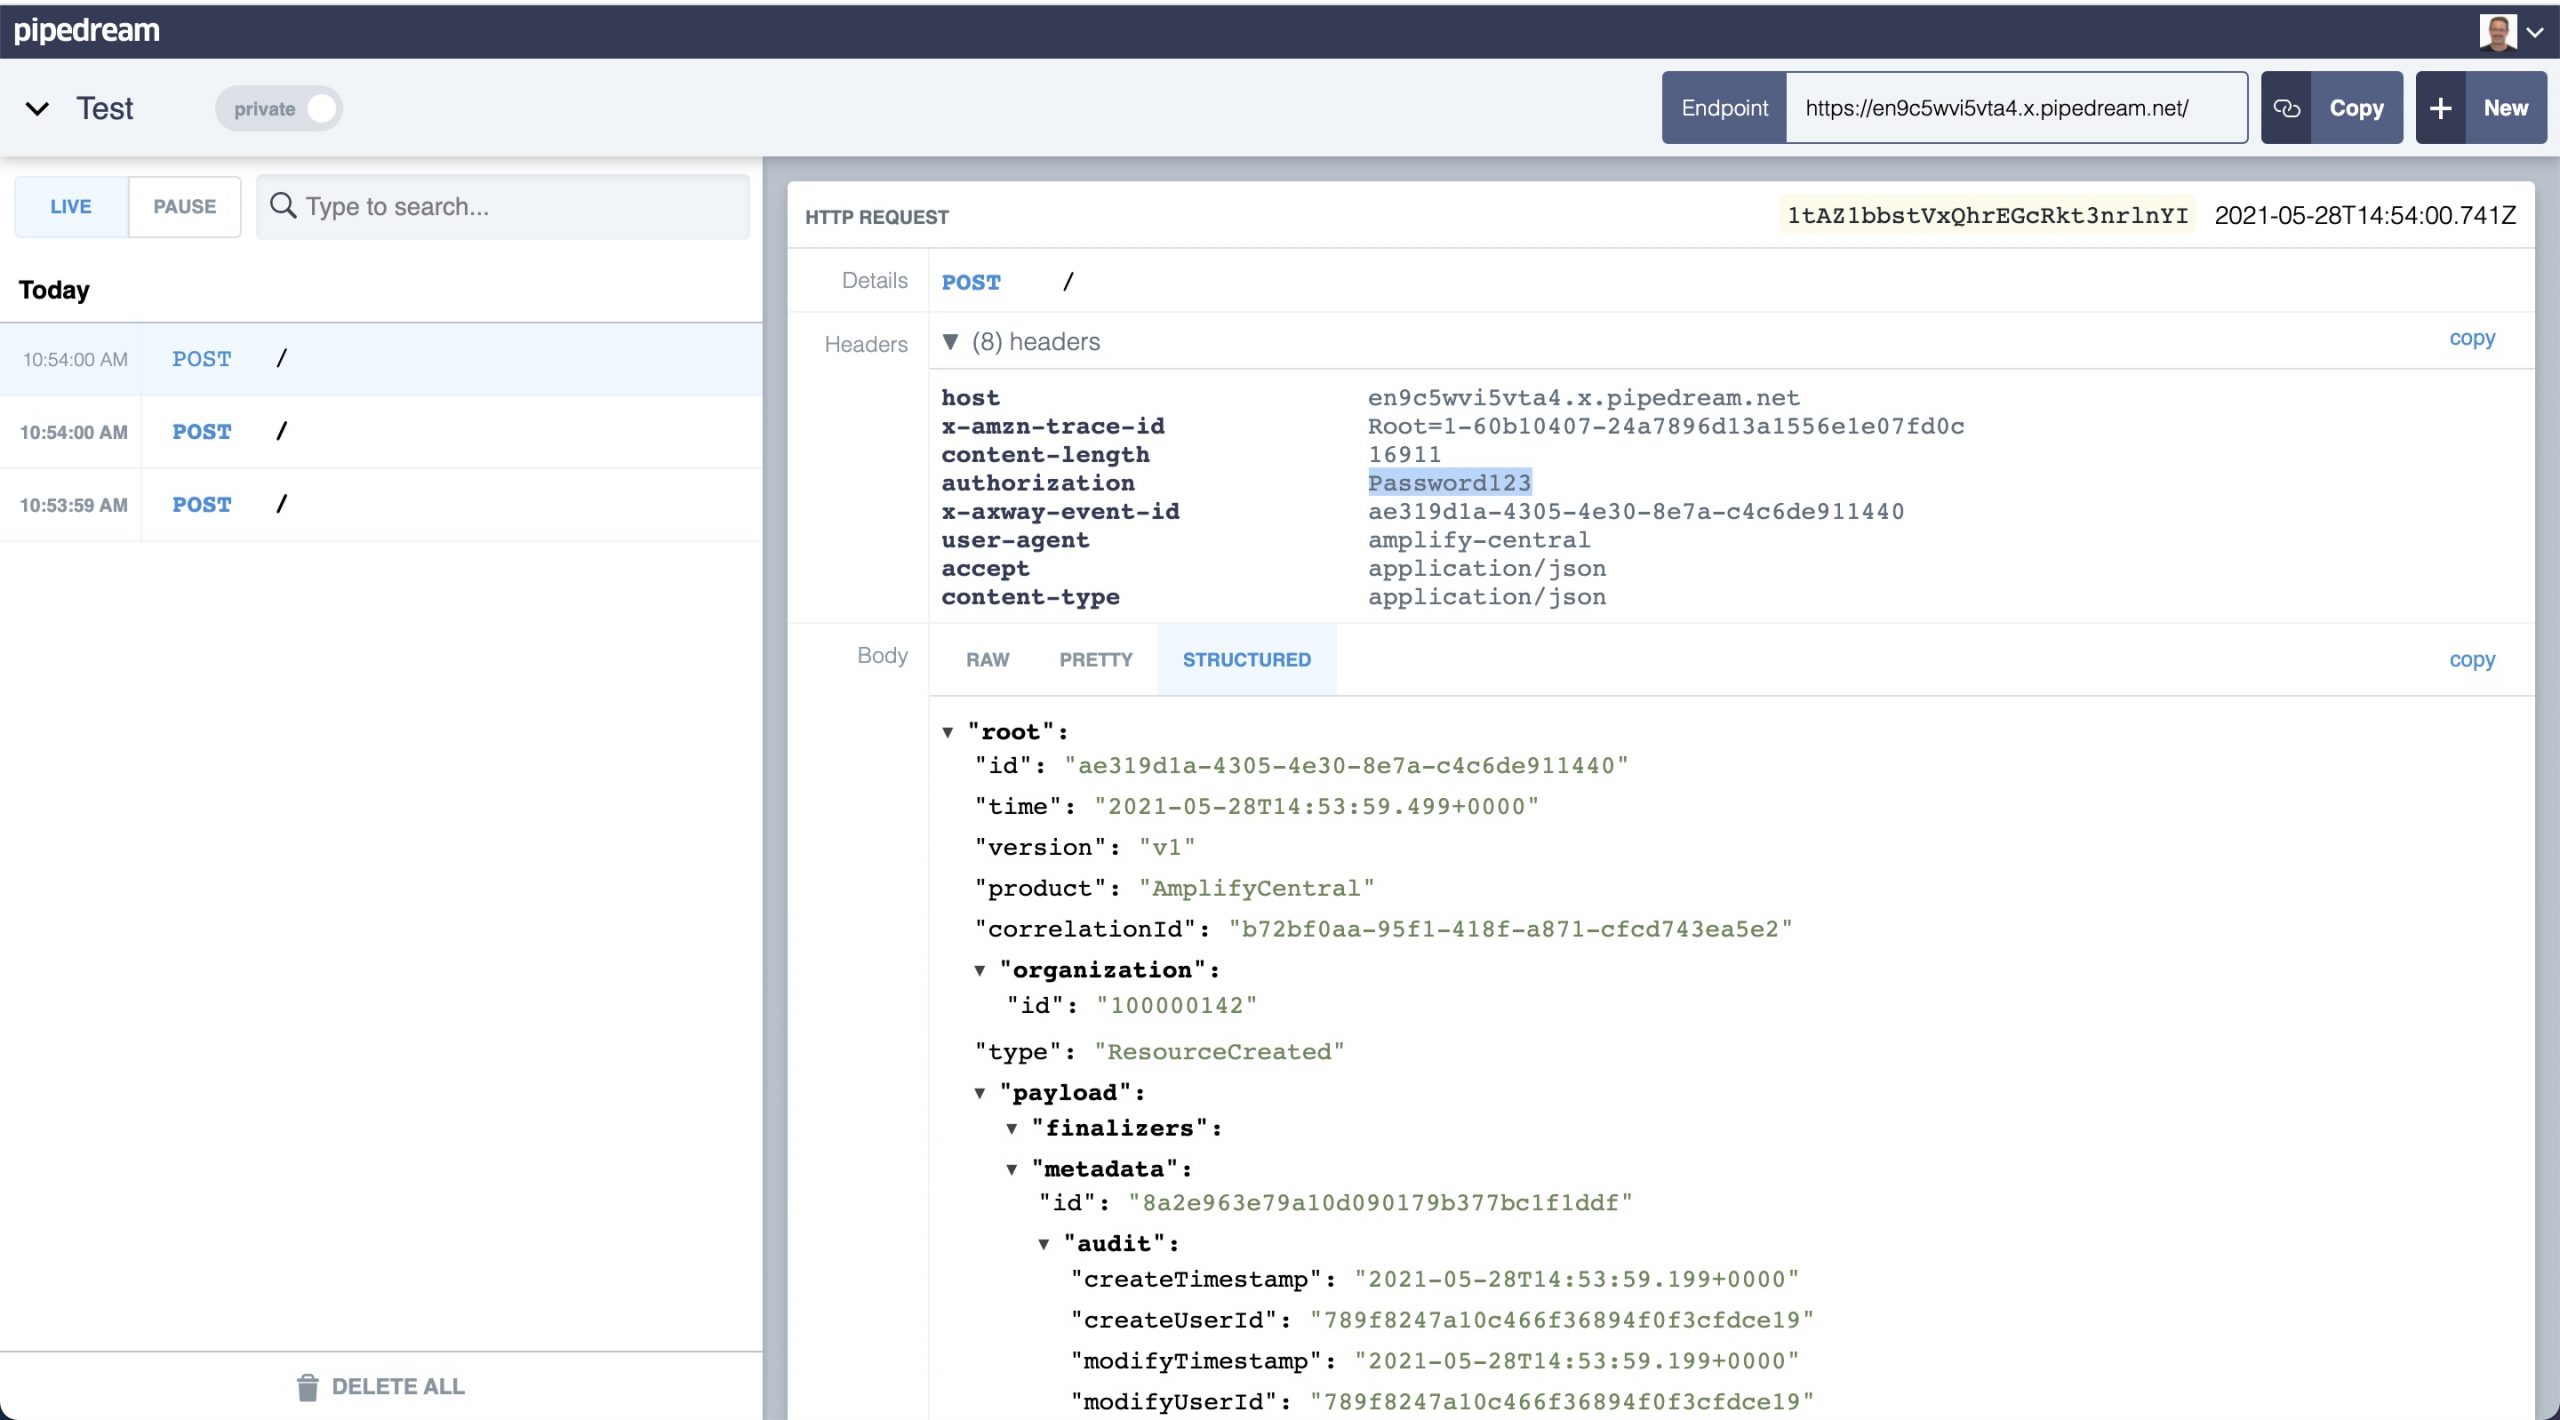
As in the prior blog post, I added an API to my manualenv environment and got the same three webhook calls to requestbin as shown below:

Note the secret (Password123) received as an authorization header
Summary
In this blog post, we saw how we can use the Axway Central CLI to create an Integration Webhook. This is the exact same Integration Webhook that we created via APIs in a prior blog post so you can see two ways to accomplish the same task depending on your preferences and use case.
Check out this blog post for an example of using Jira, Integration Builder, and Webhook Events as part of an Amplify Central/Unified Catalog API subscription approval workflow.

