

Amplify Fusion can help you create an MCP (Model Context Protocol) server to integrate agentic AI with your architecture. Using Fusion’s connectors, users can connect a CRM, like Salesforce, to an AI assistant, allowing them to ask questions and receive answers about their CRM data using natural language. Previously, we have covered what the Model Context Protocol is, the business value of creating an MCP server to access your data, and setting up an MCP server for your APIs.
Watch the full webinar on integrating AI with your architecture
In this example, we will build an MCP server in Amplify Fusion that allows a user to ask questions through an AI assistant that will be answered using data from a Salesforce instance. Specifically, we will be accessing the Contact and Order Apps within Salesforce.
Create an MCP server
In Amplify Fusion:
Create a new Project.
Give the Project a Name and Description.
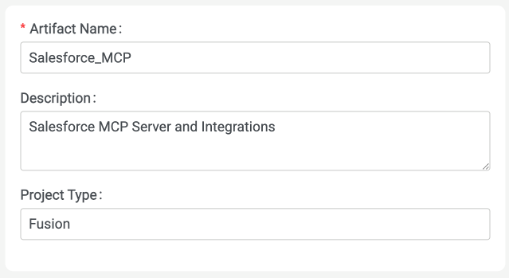
Click Create.
Create a new MCP server
Configure the server
Give the MCP server a Name.
Provide a detailed description of the purpose of the MCP server.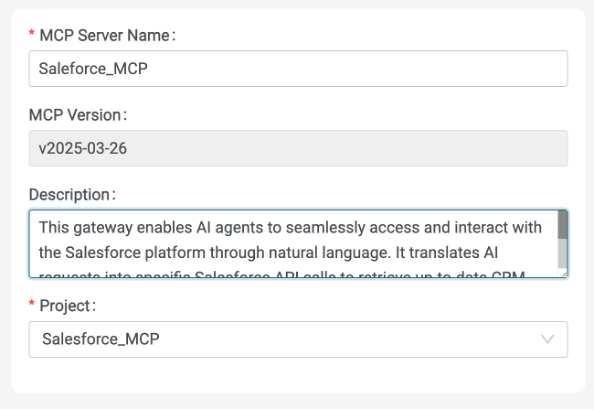
Click Create.
The description is crucial, as it defines to the AI Assistant what external data or tools the AI can access via the MCP server, enabling it to go beyond its base knowledge to perform specific tasks and provide contextual information.
For this example, the complete description used is:
This gateway enables AI agents to seamlessly access and interact with the Salesforce platform through natural language. It translates AI requests into specific Salesforce API calls to retrieve up-to-date CRM data, empowering the AI assistant to provide accurate, relevant answers and take action within the Salesforce ecosystem.
On the MCP server Configuration page, provide a unique Fronted Base Path for the server. This will be used when constructing the endpoint where the AI Assistant can find the MCP server.
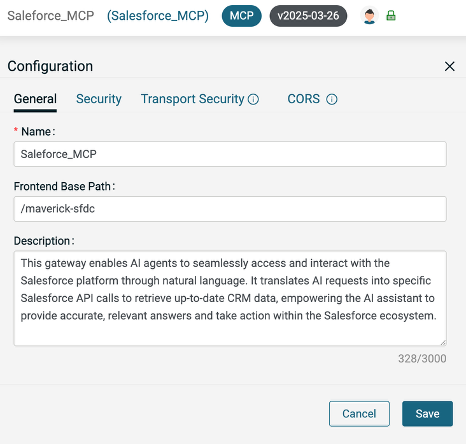
Click Save.
Create Tools
Before going any further, it is important to decide the types of questions the MCP server will be able to handle. In this example, we will focus on two specific types of questions.
“Show me the e-mail address for [Customer].”
“Show me the orders for [Account].”
While it is certainly possible to be more flexible, we will use these as specific examples to demonstrate exactly how to create an MCP server in Fusion, create an integration to collect the information to answer the question, and invoke it from an AI Assistant.
With this plan, we can now start defining the Tools the MCP server will provide. Tools provide a standardized interface for the AI Assistant to communicate with the MCP server.
Click the + Add Tool button.
Provide a name and description for the tool. Again, the description is important for the AI Assistant to understand how and when to use the tool.
An Input Schema is also required, which defines the structured contract for the data that the tool expects to receive when it is called.
Name: getEmailAddressFromName
Description: Retrieves a contact’s email address from the CRM using their first and last names
Input Schema:Click Create
{
"type": "object",
"properties": {
"firstName": {
"type": "string"
},
"lastName": {
"type": "string"
}
},
"required": [
"firstName",
"lastName"
]
}
Let’s take a moment to break down this Input Schema. What we are telling the AI Assistant is that to use this tool, it needs to send the MCP server a firstName and lastName. Naming is important as it instructs the AI Assistant to look in the chat for strings that appear to be a first and last name, extract them, and send them to the MCP server.
Add another tool for searching orders
Name: getOrdersByAccountName
Description: Retrieves all orders from the CRM for a given account name
Input Schema:And click Create.
{
"type": "object",
"properties": {
"account": {
"type": "string"
}
},
"required": [
"account"
]
}
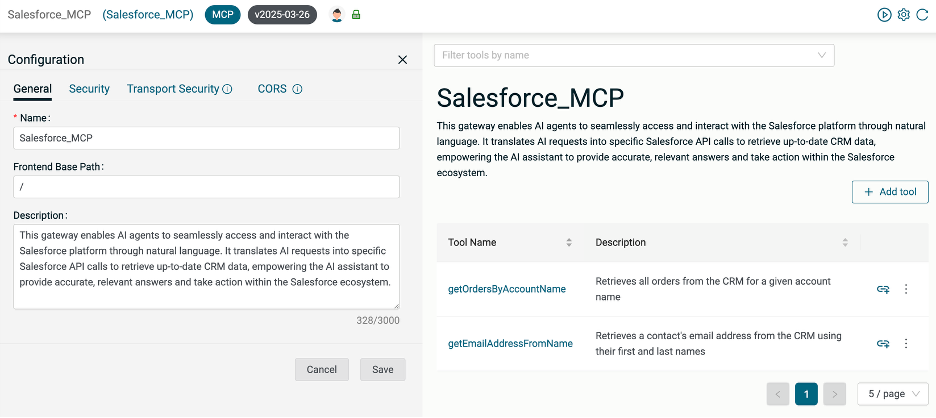
You should now have a configured MCP server with two tools defined.
Create Integrations
Get Email Address
Click the Add Link icon for the getEmailAddressFromName tool.

Click + Create New Integration.
Name: getEmailAddressFromName
Description: Retrieve contact email address from Salesforce
Project: [use current project]
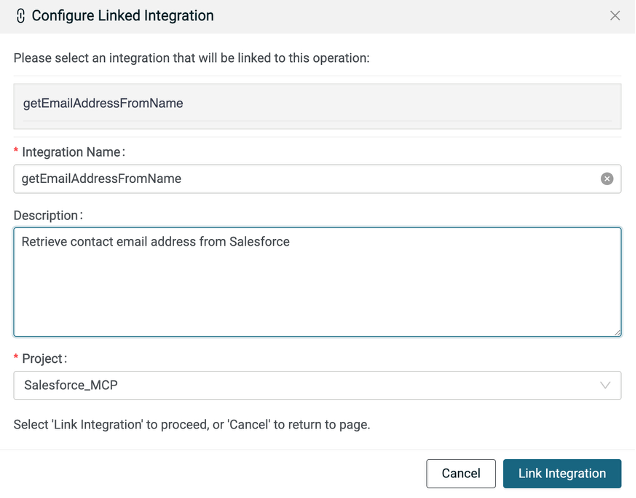
Click Link Integration.
Create Get Email Integration
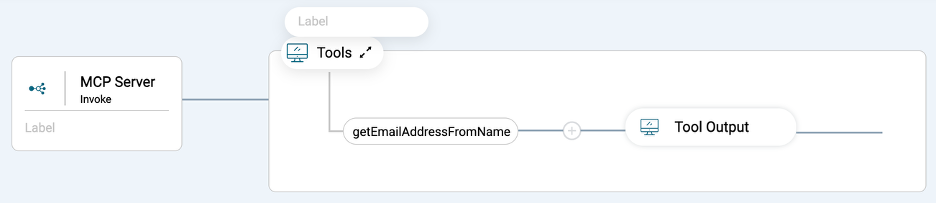
In the editor for the getEmailAddressFromName integration, expand the tools section.
Click the + icon between the getEmailAddressFromName and Tool Output step.
Add a Salesforce Connector step and select the Query All operation.
In the config for the Salesforce step, create or add an existing connection. The connection must have read access to Contacts in Salesforce.
In the Plugs section, click Add to create a new plug.

Give the plug a name.
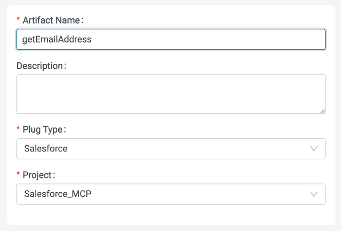
Click Create.
On the Plug Configure page, click Configure.

Select the data plane where you will run the integration.
Configure the Plug as shown below, using your Salesforce Connection.
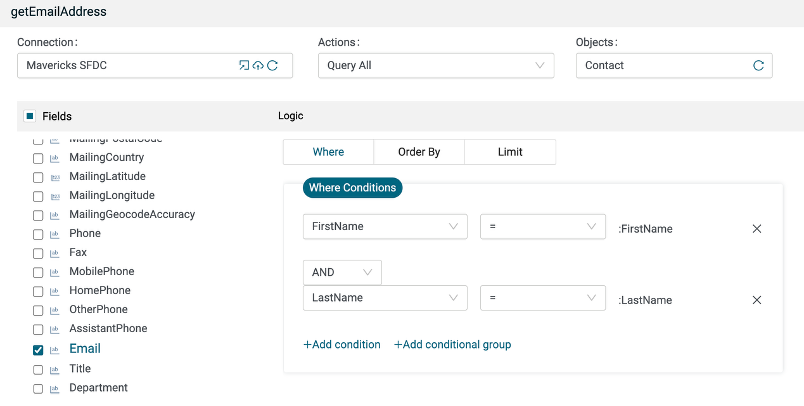
Click Generate.
Click Save.
If you like, you can test the Plug from here. Be sure to use a Contact name that exists in your Salesforce instance.
Close the Plug configuration tab and return to the Salesforce Step configuration.
Click the refresh button in the Plug field and select the new plug you just created.
Map the firstName and lastName from the MCPServerRequest into the appropriate fields in the query where clause. Note the fields in the MCPServerRequest came from the Input Schema used when creating the getEmailAddressFromName Tool in the MCP server. The object defined in the Input Schema will appear as the body in the MCPServerRequest.

Click Save.
Add a Map step after the Salesforce Query All step.
In the Map step configuration, right-click on the toolResponseType output field and select Set Value.
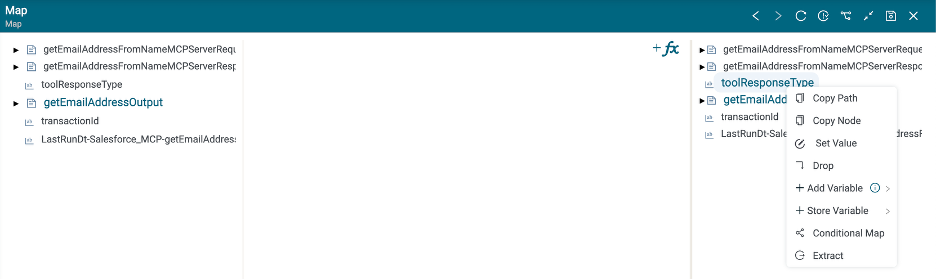
Set the value to TextContent and click Save.

Map the Salesforce Query response to the MCP Server Response.
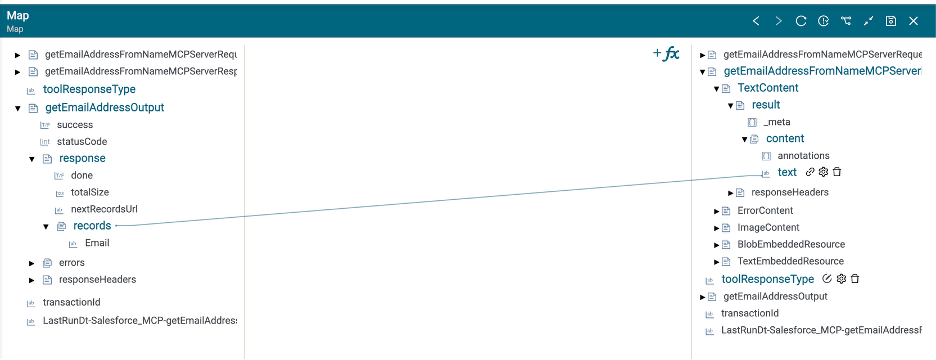
Click Save.
The complete getEmailAddressFromName integration should look like this.

Create Get Orders Integration
On the Salesforce_MCP server configuration page, click the Link icon for the getOrdersByAccountName tool and create a new integration.
Name: getOrdersByAccountName
Description: Retrieve order information from Salesforce
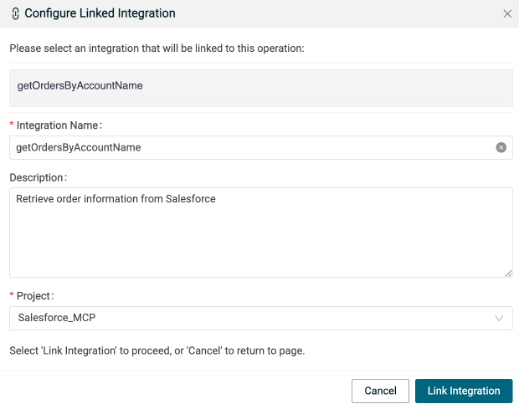
Click Link Integration.
When querying Salesforce Orders, you first need to get the account ID associated with the account name being queried. Once you have the account ID, you can search for all orders for that account.
Open the editor for the getOrdersByAccountName integration.
Add a Salesforce step with the Query All operation. This step will retrieve the Account ID for the account name entered into the AI Assistant chat.
Use the existing Salesforce Connection.
Create a Plug named getAccountIdByAccount.
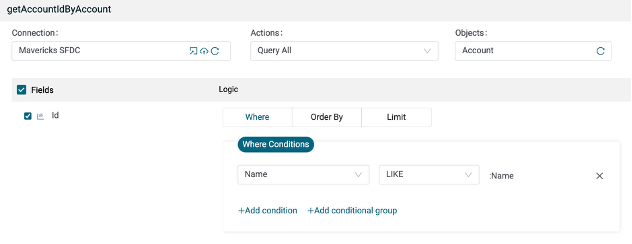
Map the account from the MCP Server Request into the Name field of where clause.

Create a second Salesforce step. This step will retrieve all Orders for the Account ID returned in the previous step.
Use the same Salesforce Connection.
Create a new plug named getOrdersByAccount.
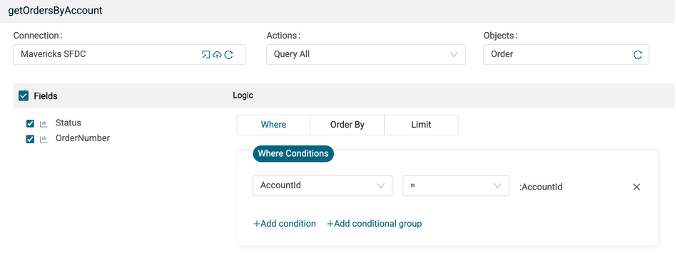
Map the id from the getAccountIdByAccountOutput into the AccountId field of the where clause.
Add a Map step.
As in the previous integration, set the value of toolResponseType to TextContext.
Map the result of the getOrdersByAccuntId Salesforce Query to the MCP Server Response.

Click Save.
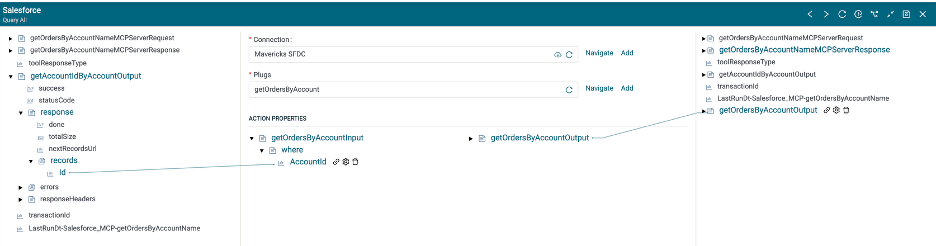
You should now have an integration that looks like this.

Deploy MCP server
Click the Manage Activations button on your MCP server.

Select the data plane to deploy to and Activate the MCP server.
Hover over the link icon, then copy the URL of the deployed server. This link will be used when configuring the AI Assistant.

Configure AI Assistant
For this example, we will use Claude Desktop. Instructions may vary for other AI Assistants.
Download and install Claude Desktop for your operating system.
Once Claude Desktop is running, click on your user avatar -> Settings -> Developer.
Click Edit Config.
You will be directed to the location of your claude_desktop_config.json file. Open it in your editor of choice.
Example Config:
{
"preferences": {
"quickEntryShortcut": "off",
"menuBarEnabled": false
},
"mcpServers": {
"getContactInfo": {
"command":"npx",
"args": [
"mcp-remote",
"[link copied from the MCP Server Activation step above]"
],
"env": {
"NODE_TLS_REJECT_UNAUTHORIZED" : "0"
}
}
}
}
The link should be in the form of https://server:port/endpoint.
Restart Claude Desktop.
Interact with the AI Assistant
Start asking the AI Assistant questions it can answer using the MCP server’s capabilities.
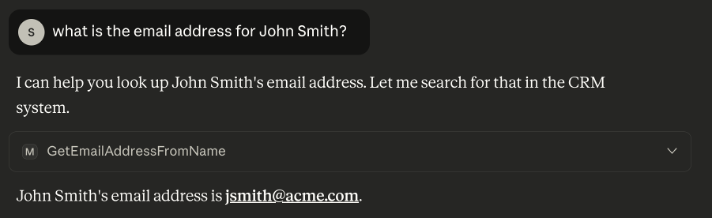
Note: The AI Assistant may ask for permission to use the MCP Tool. If so, grant it the permission.
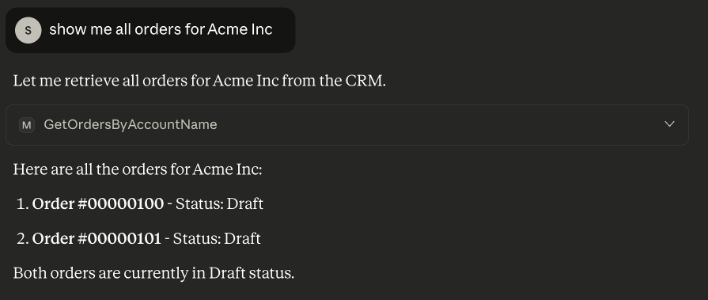
We can see here that the AI Assistant is comprehending the questions and knows how to address them. This is accomplished due to the descriptions for the MCP server and the Tools when they were configured in Fusion. Also, notice that we did not have to format the response in Fusion — we just sent the raw query response from Salesforce. The description helps here to as it provides the AI Assistant with the context it needs to intelligently format a response in the chat.
The Salesforce queries in this example are intentionally narrow since the purpose here is to demonstrate how to implement an MCP server in Fusion. As a result, the AI Assistant cannot answer more complex or multi-step questions. Use your understanding of Fusion MCP servers, integrations, and connectors to build a more functional MCP server that can answer questions like “Show me all the Orders associated with John Smith.”
By integrating Salesforce with Amplify Fusion via an MCP server, you empower AI Assistants to deliver real-time, contextual CRM insights directly in chat. This approach streamlines workflows, reduces manual data retrieval, and enhances customer engagement.
Ready to build your own intelligent assistant? Start by creating your MCP server in Amplify Fusion and connecting it to your enterprise systems. For deeper functionality, explore additional tools and integrations to support more complex queries. Reach out to your Axway team for guidance or share your use case with the community!
Looking for more hands-off tips on how to set up an MCP server using Amplify Fusion?