

In a prior blog post, we learned about Amplify Central Integration Webhooks for integrating Amplify Central with external applications.
In this blog post, we’ll look at a real-world example of an external application that will detect when a new version of an API is discovered (by a discovery agent) and email any subscribers to the API so that they can be aware of this new revision in case it can impact their use of the API.
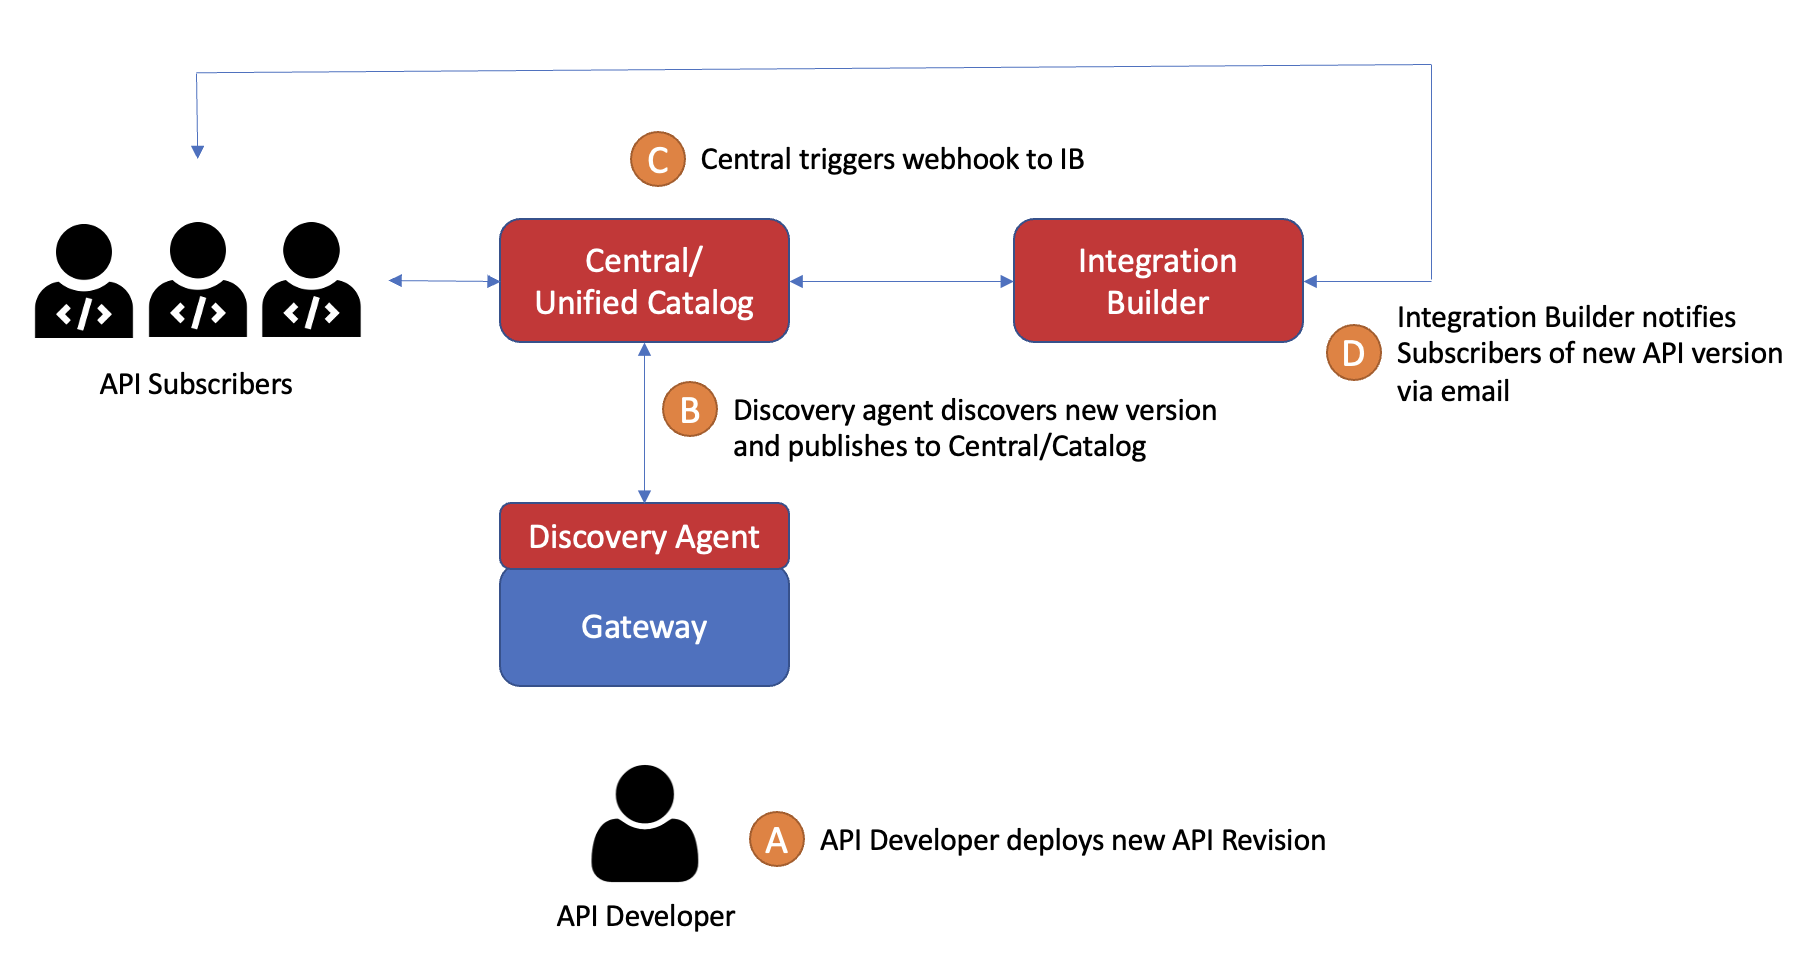
The application is built using Axway Amplify Integration Builder and will be triggered by the Amplify Central Integration Webhook that is configured to trigger whenever a Unified Catalog API has a new revision. This is illustrated in the diagram below:
We’ll review how to set up the Integration Webhook and how to create the Integration Builder flow.
Note that before you create your Integration Webhook, you should create a manually triggered Integration Builder Flow and flow instance and make sure you can trigger it via API call. You will need the API URL and Headers for creating your integration webhook. For example, my Integration Builder flow is invoked as follows:
curl -X POST "https://staging.cloud-elements.com/elements/api-v2/formulas/instances/469913/executions" -H "accept: application/json" -H "Authorization: User IPJGvi.........v869NW4==, Organization 79eb3.........c2a05" -H "Content-Type: application/json" -d "{}"Create an Integration Webhook
Integration Webhooks can be configured using the Axway CLI or via API calls. In this blog post series I’ll be using APIs.
In the following API calls, {{apiCentralUrl}} is the Amplify Central base address for API calls. By default, it is https://apicentral.axway.com but could be different based on your region. Also, in all of the API calls below, you need to pass in the following headers as described here:
'Authorization': `Bearer <YOUR ACCESS_TOKEN>`,
'Content-Type': 'application/json'
Create the Integration
Use the following API call to create an integration called myintegration.
POST {{apiCentralUrl}}/apis/management/v1alpha1/integrations
Body:
{
    "name": "myintegration",
    "title": "Integration",
    "tags": [
        "cloud"
    ],
    "attributes": {},
    "spec": {
        "description": "This is an integration."
    }
}
Create a Webhook Secret
Use the following API call to create a webhook secret for the Integration Builder API call Authorization header.
POST {{apiCentralUrl}}/apis/management/v1alpha1/integrations/myintegration/secrets
Body:
{
    "name": "webhooksecretib",
    "title": "API Key Secret for Webhook reference IB Auth Header",
    "tags": [
        "saas",
        "axway"
    ],
    "attributes": {
    },
    "spec": {
        "data": {
            "apikey": "User IPJGvi.........v869NW4=,Organization 79eb3.........c2a05"
        }
    }
}
Note that in this example, my Integration named myintegration is part of the API path (
/apis/management/v1alpha1/integrations/{{IntegrationName}}/secrets). This is the name given to the Integration in the prior API call. We’ll see this in the following two API calls below.
Create a Webhook
Let’s create a webhook in this integration. The webhook will make a POST to my Integration Builder flow using the url specified in the body: https://staging.cloud-elements.com/elements/api-v2/formulas/instances/469913/executions. Note that my URL is for my staging environment and my flow instance. You should replace this URL with the URL that triggers your Integration Builder Flow instance.
The webhook will use the webhook secret to send the specified Authorization Header, User IPJG.......NW4=,Organization 79e.........ac2a0, as described above. Obviously, my Integration Builder flow has already been created and instantiated in order to be able to trigger it via API call prior to creating the Webhook below.
POST /apis/management/v1alpha1/integrations/myintegration/webhooks
Body:
{
    "name": "webhookib",
    "title": "Webhook to invoke IB Flow",
    "tags": [
        "prod",
        "saas",
        "axway"
    ],
    "attributes": {
        "release": "1.0.0"
    },
    "spec": {
        "enabled": true,
        "url": "https://staging.cloud-elements.com/elements/api-v2/formulas/instances/469913/executions",
        "auth": {
            "secret": {
                "name": "webhooksecretib",
                "key": "apikey"
            }
        }
    }
}
Create a Resource Hook
The resource hook will tell the integration when to invoke the webhook. In this case, we will generate a webhook call whenever there is an update to any APIServiceInstance (e.g. API Revision) in my aws environment.
POST /apis/management/v1alpha1/integrations/myintegration/resourcehooks/
Body:
{
   "group": "management",
   "apiVersion": "v1alpha1",
   "kind": "ResourceHook",
   "name": "environments-hook",
   "title": "Monitor Environment aws for API Service Instance Update in Environment aws",
   "metadata": {
      "scope": {
         "kind": "Integration",
         "name": "myintegration"
      }
   },
   "spec": {
      "triggers": [
         {
            "group": "management",
            "kind": "APIServiceInstance",
            "name": "*",
            "type": [
               "updated"
            ],
            "scope": {
               "kind": "Environment",
               "name": "aws"
            }
         }
      ],
      "webhooks": [
         "webhookib"
      ]
   }
}
Webhook Payloads
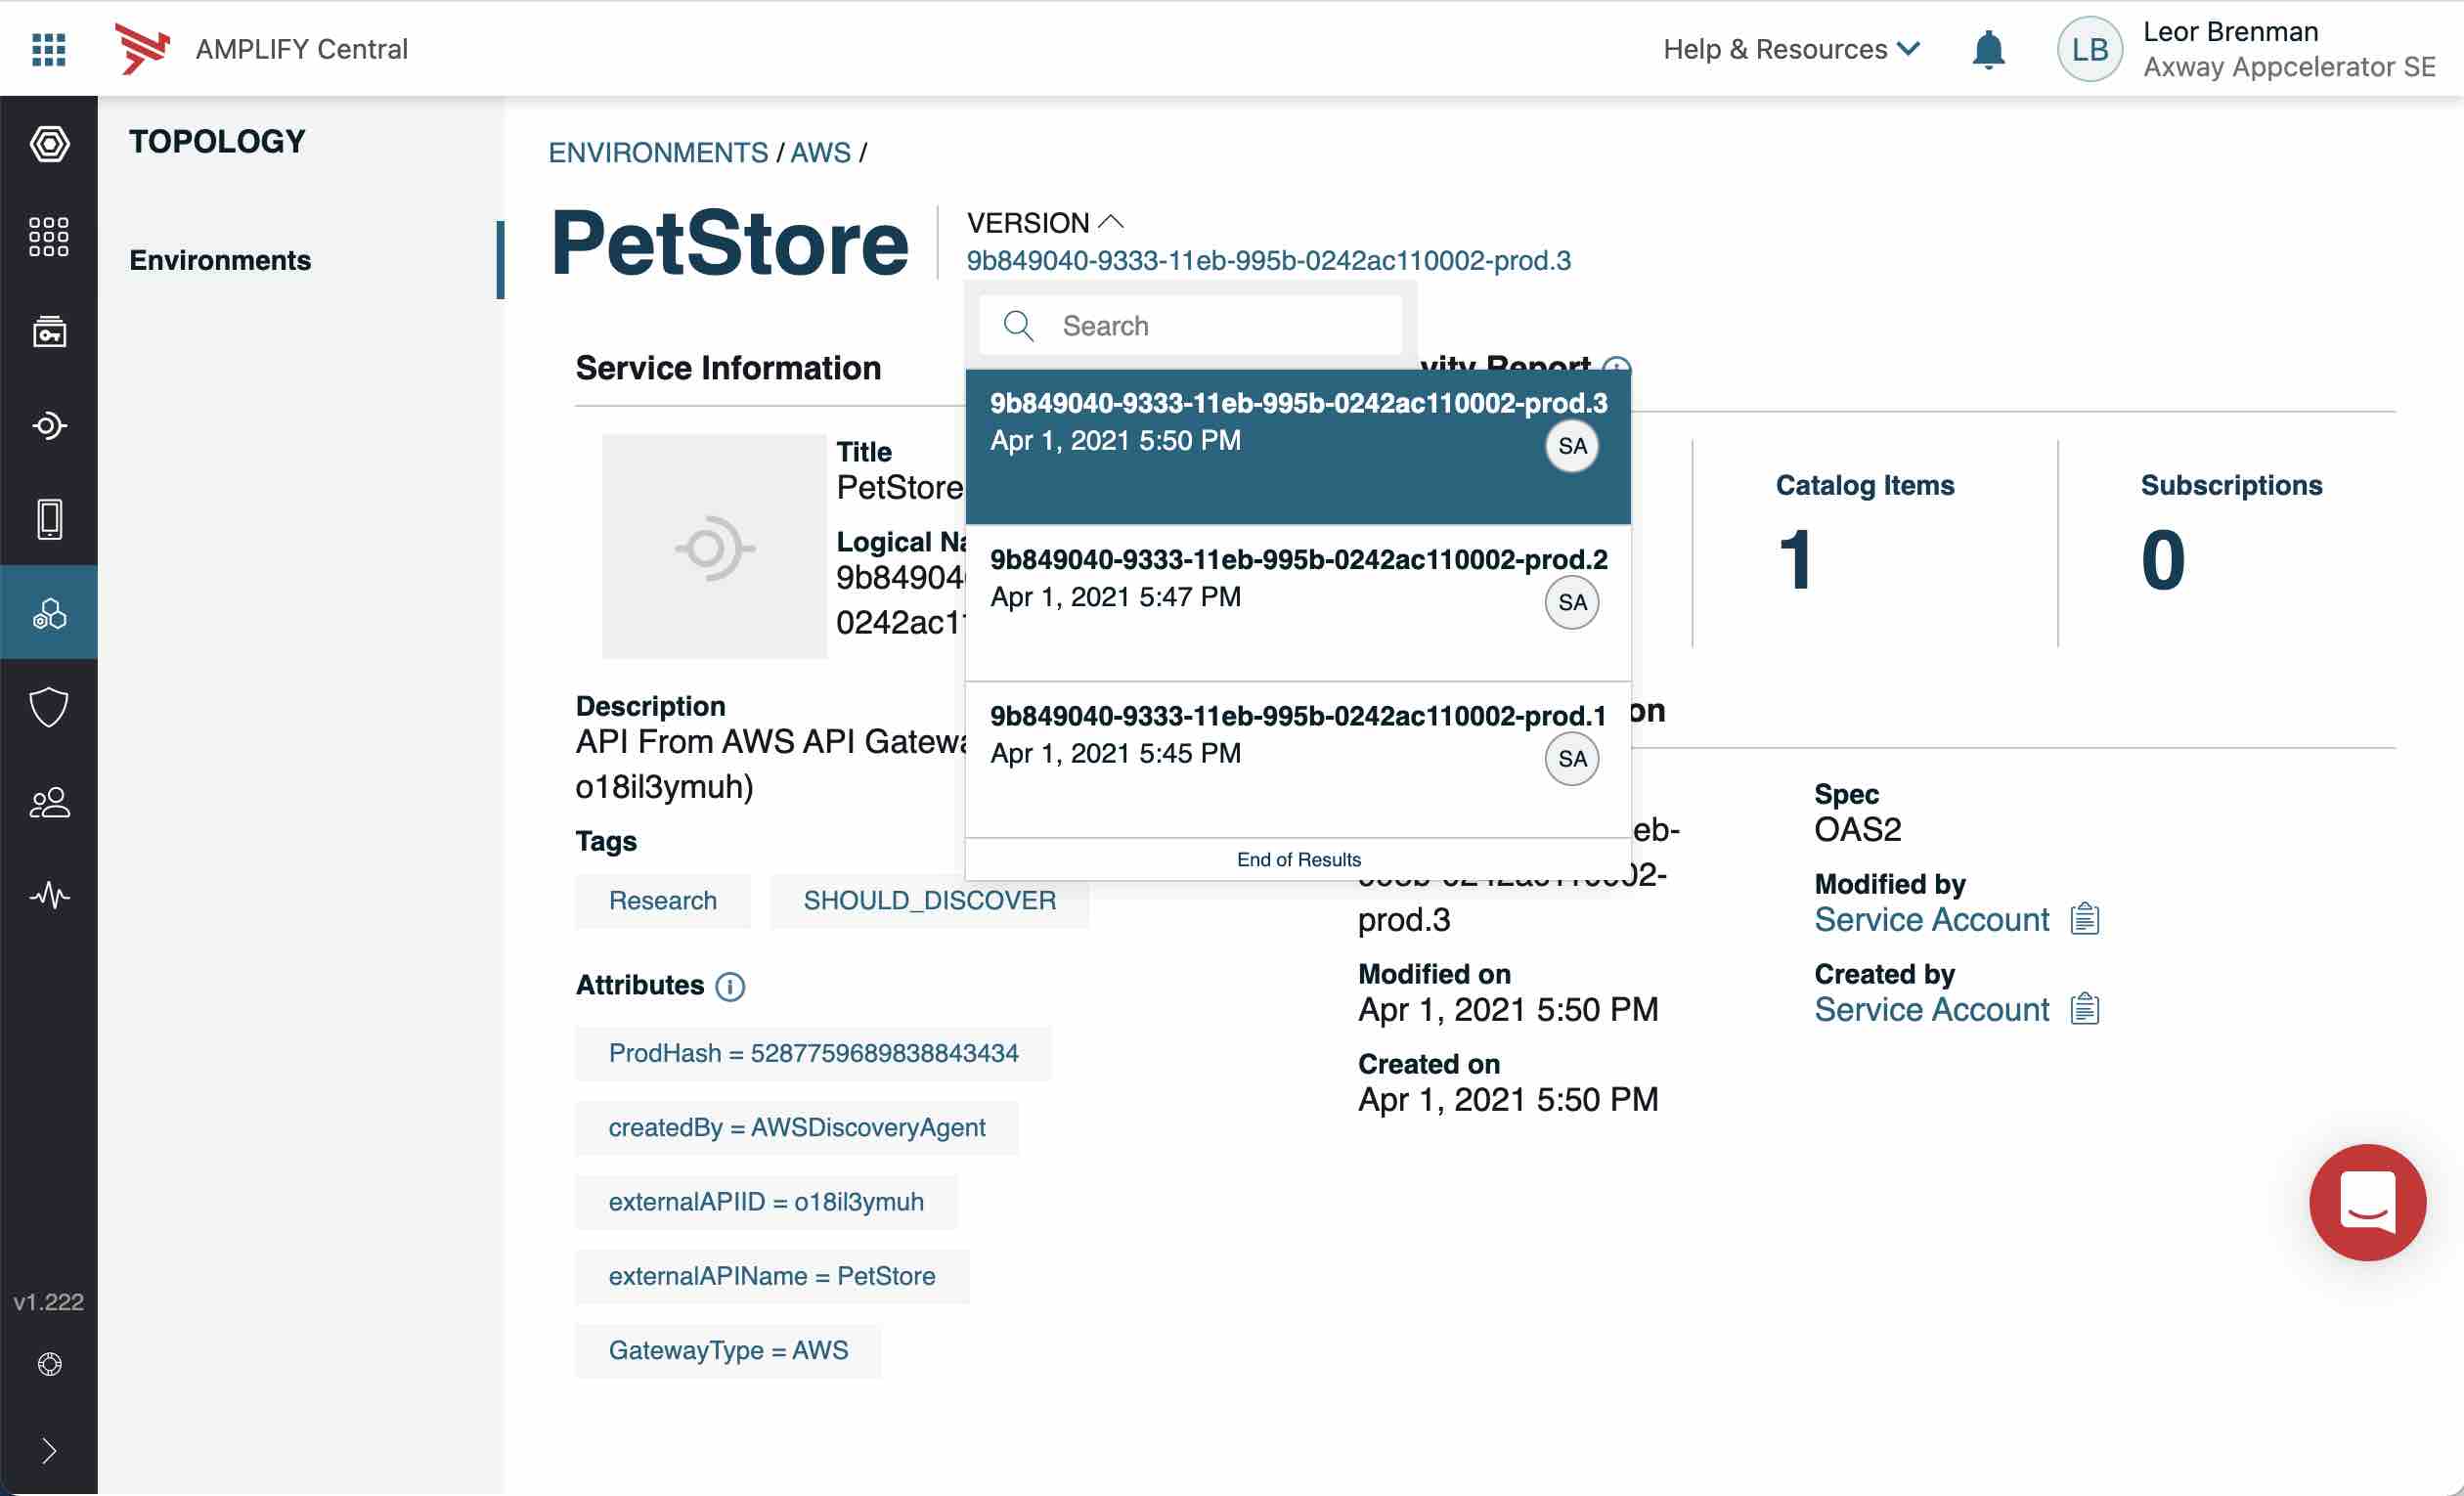
In the screenshot below, you can see that a new API version was discovered in my aws environment in Amplify Central:
Based on the Integration Webhook setup above, this action triggered a webhook to my Integration Builder flow with the following payload (body):
{
  "product": "AmplifyCentral",
  "payload": {
    "finalizers": [],
    "metadata": {
      "references": [
        {
          "id": "8a2e83617870fa000178933c501d11e3",
          "kind": "APIServiceRevision",
          "name": "cbc7572e-93c8-11eb-a218-0242ac110002-prod.4",
          "selfLink": "/management/v1alpha1/environments/aws/apiservicerevisions/cbc7572e-93c8-11eb-a218-0242ac110002-prod.4",
          "type": "hard"
        }
      ],
      "audit": {
        "modifyUserId": "DOSA_50e7481fc643403cbc031315cfa013ab",
        "createUserId": "DOSA_50e7481fc643403cbc031315cfa013ab",
        "createTimestamp": "2021-04-02T15:33:39.361+0000",
        "modifyTimestamp": "2021-04-02T15:38:26.979+0000"
      },
      "resourceVersion": "287006",
      "scope": {
        "name": "aws",
        "id": "8a2e862d779860e20177a6888d450233",
        "kind": "Environment",
        "selfLink": "/management/v1alpha1/environments/aws"
      },
      "id": "8a2e83617870fa0001789337eda111d8",
      "selfLink": "/management/v1alpha1/environments/aws/apiserviceinstances/cbc7572e-93c8-11eb-a218-0242ac110002-prod.1"
    },
    "kind": "APIServiceInstance",
    "title": "PetStore (Stage: Prod)",
    "spec": {
      "endpoint": [
        {
          "host": "o18il3ymuh.execute-api.us-east-1.amazonaws.com",
          "port": 443,
          "protocol": "https",
          "routing": {
            "basePath": "/Prod"
          }
        }
      ],
      "apiServiceRevision": "cbc7572e-93c8-11eb-a218-0242ac110002-prod.4"
    },
    "tags": [
      "Research",
      "SHOULD_DISCOVER"
    ],
    "apiVersion": "v1alpha1",
    "name": "cbc7572e-93c8-11eb-a218-0242ac110002-prod.1",
    "attributes": {
      "ProdHash": "16783656617888060872",
      "createdBy": "AWSDiscoveryAgent",
      "externalAPIID": "o18il3ymuh",
      "externalAPIName": "PetStore",
      "GatewayType": "AWS",
      "externalAPIStage": "Prod"
    },
    "group": "management"
  },
  "organization": {
    "id": "100000142"
  },
  "correlationId": "8aa5b7cd-c004-4e10-8f6b-b75a414697d9",
  "id": "605e93ce-9a71-4817-8f3e-e3d7e069cc81",
  "time": "2021-04-02T15:38:27.310+0000",
  "type": "ResourceUpdated",
  "version": "v1"
}
Now let’s look at the Integration Builder flow.
Integration Builder Flow
The Integration Builder manual triggered flow will be triggered by this webhook call and do the following:
- Get an array of Catalog Items related to the API Service Instance (i.e. revised API)
- Loop through the Catalog Items array and for each Catalog Items do the following:
- Get an array of Subscriptions for each Catalog Item
- For each Subscription get the Subscriber details (name and email address) and send an email
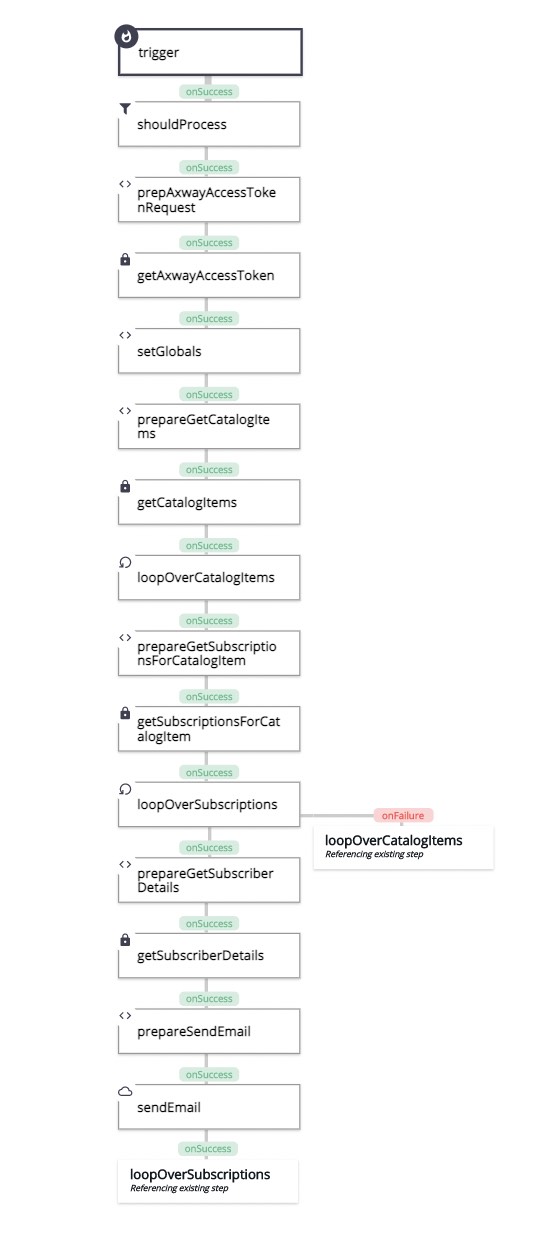
The Integration Builder flow is shown below:
The flow instance is shown below:
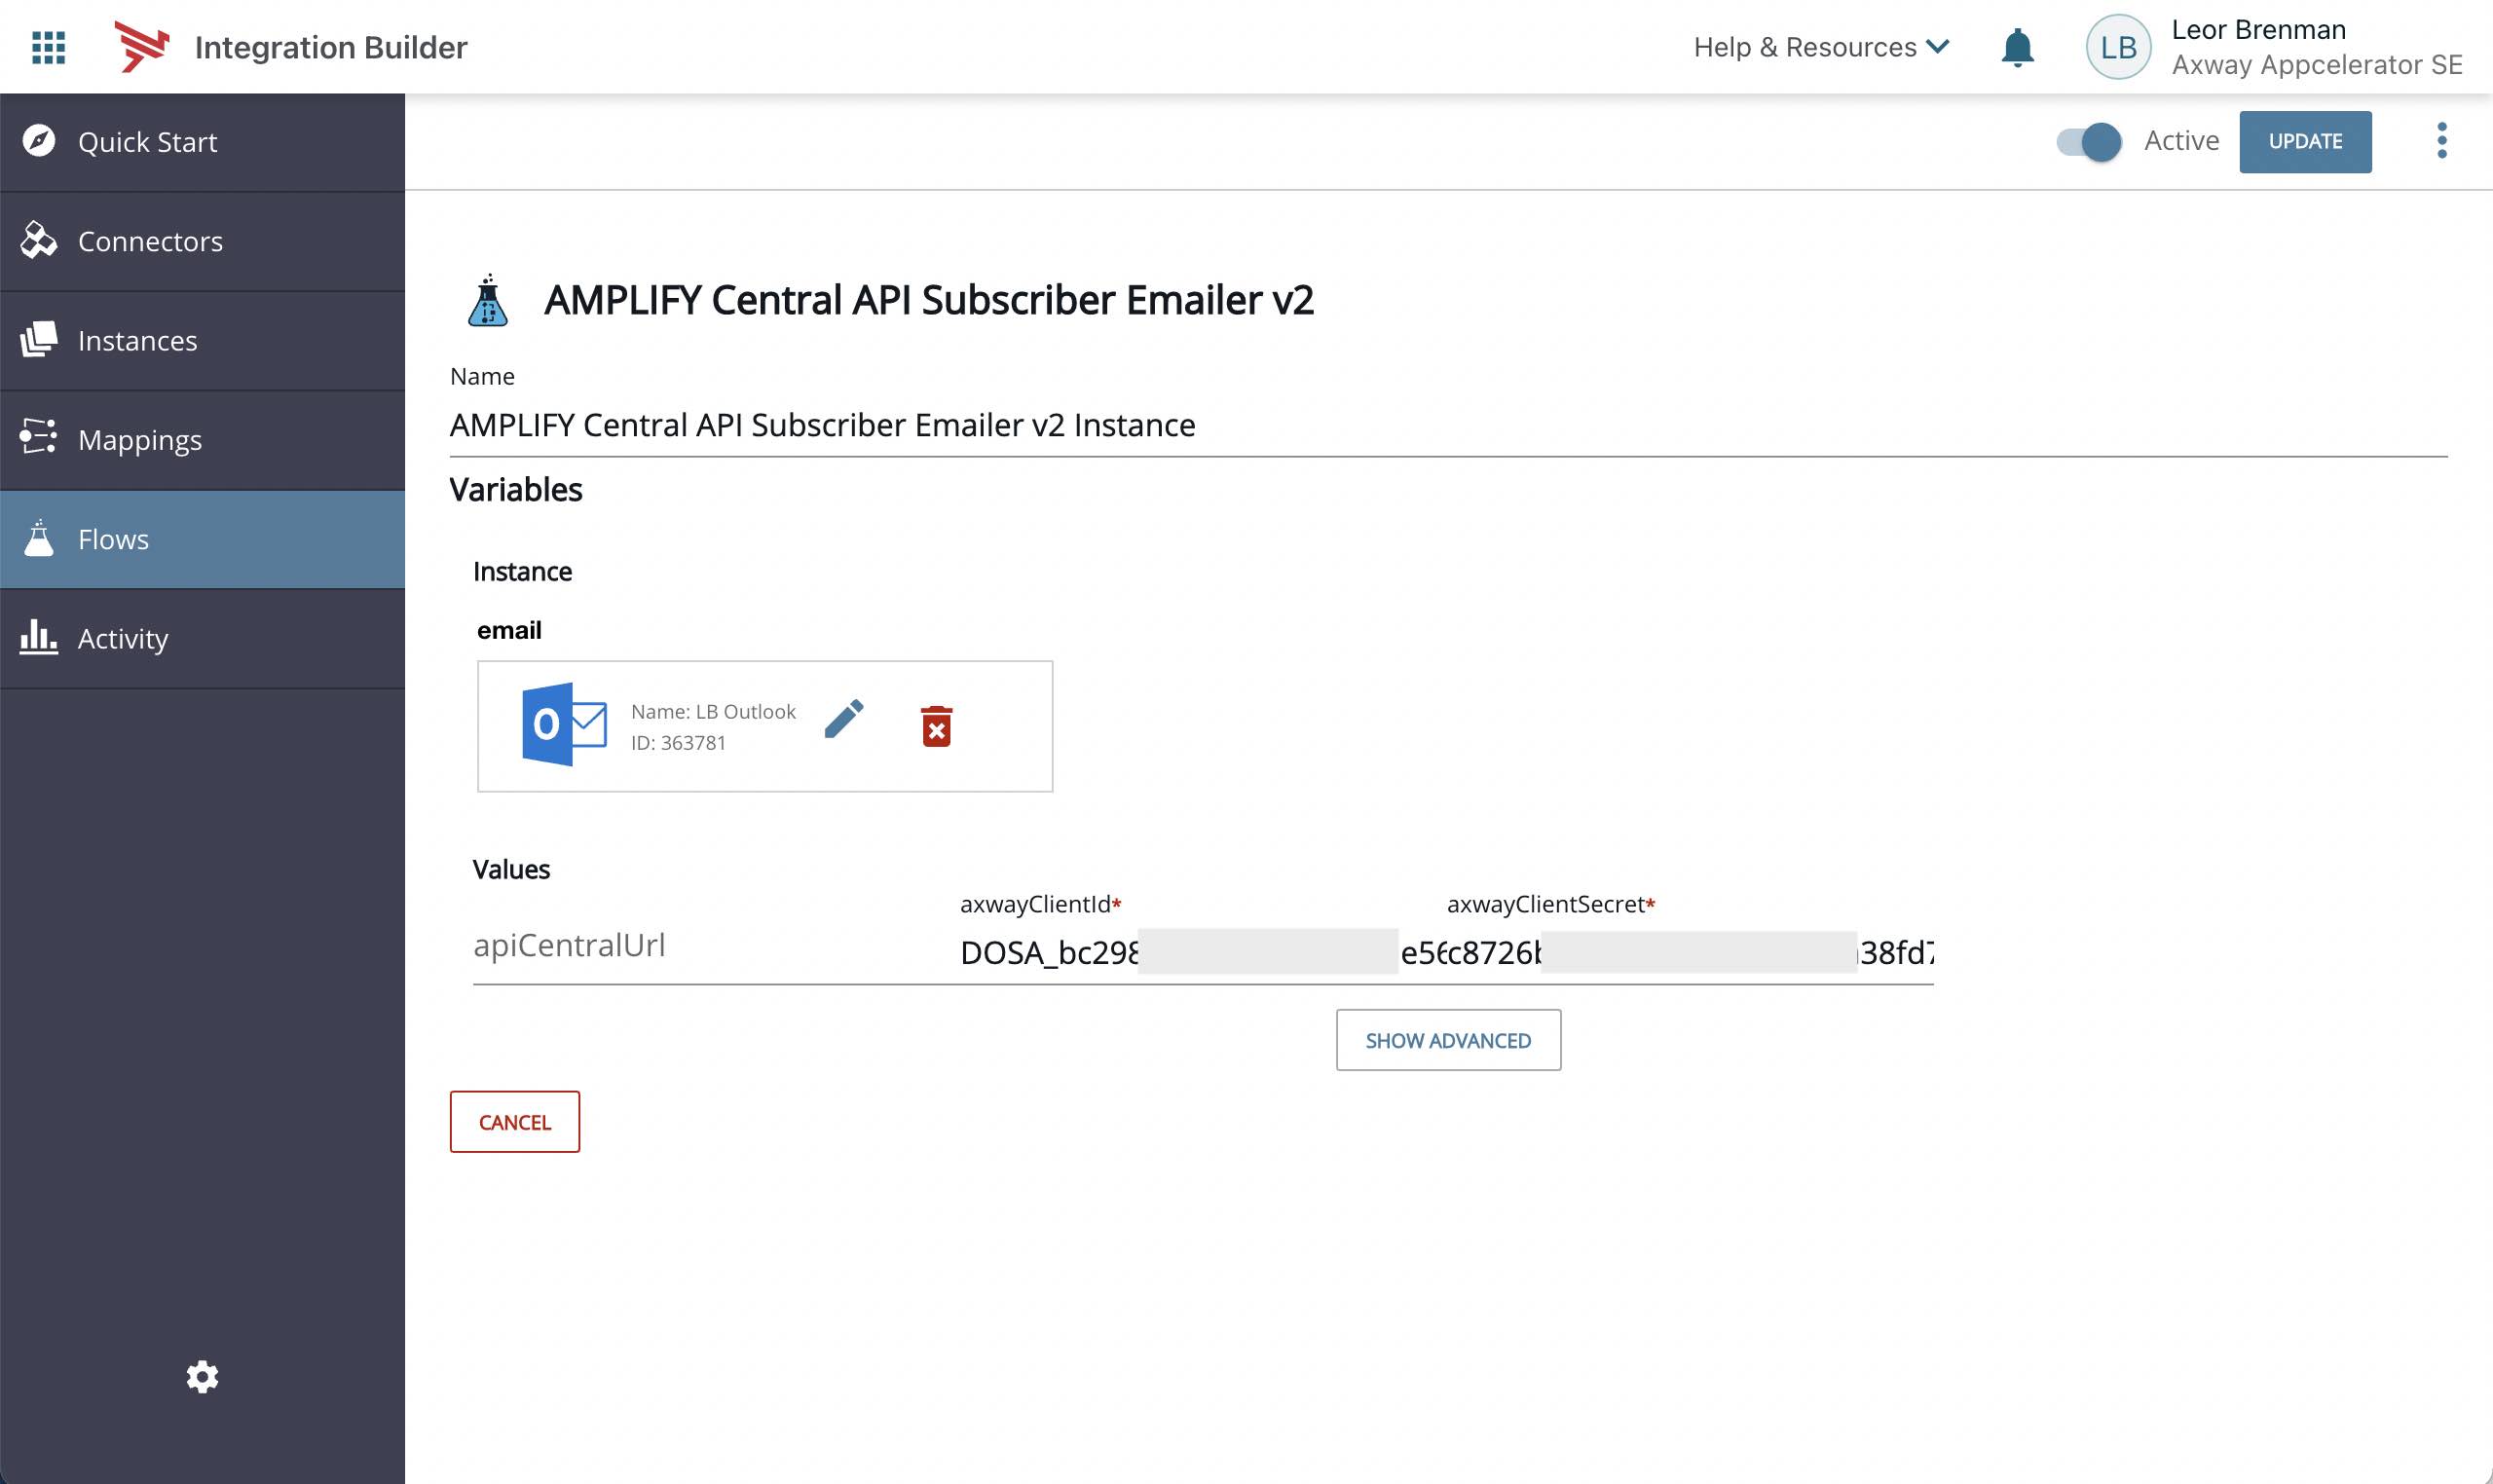
You can see that there is an Outlook email connector, LB Outlook, for sending the email to the subscribers, a variable, apiCentralUrl, for overriding the default base address of Amplify Central (https://apicentral.axway.com) for different regions and variables for the clientId and clientSecret as described here.
Let’s go through the steps.
Should Process
The first step in the flow is a JS Filter Step to make sure that the trigger relates an APIServiceInstance event by checking the kind property of the webhook payload.
done(trigger.args.payload.kind === 'APIServiceInstance');
Get Axway Access Token
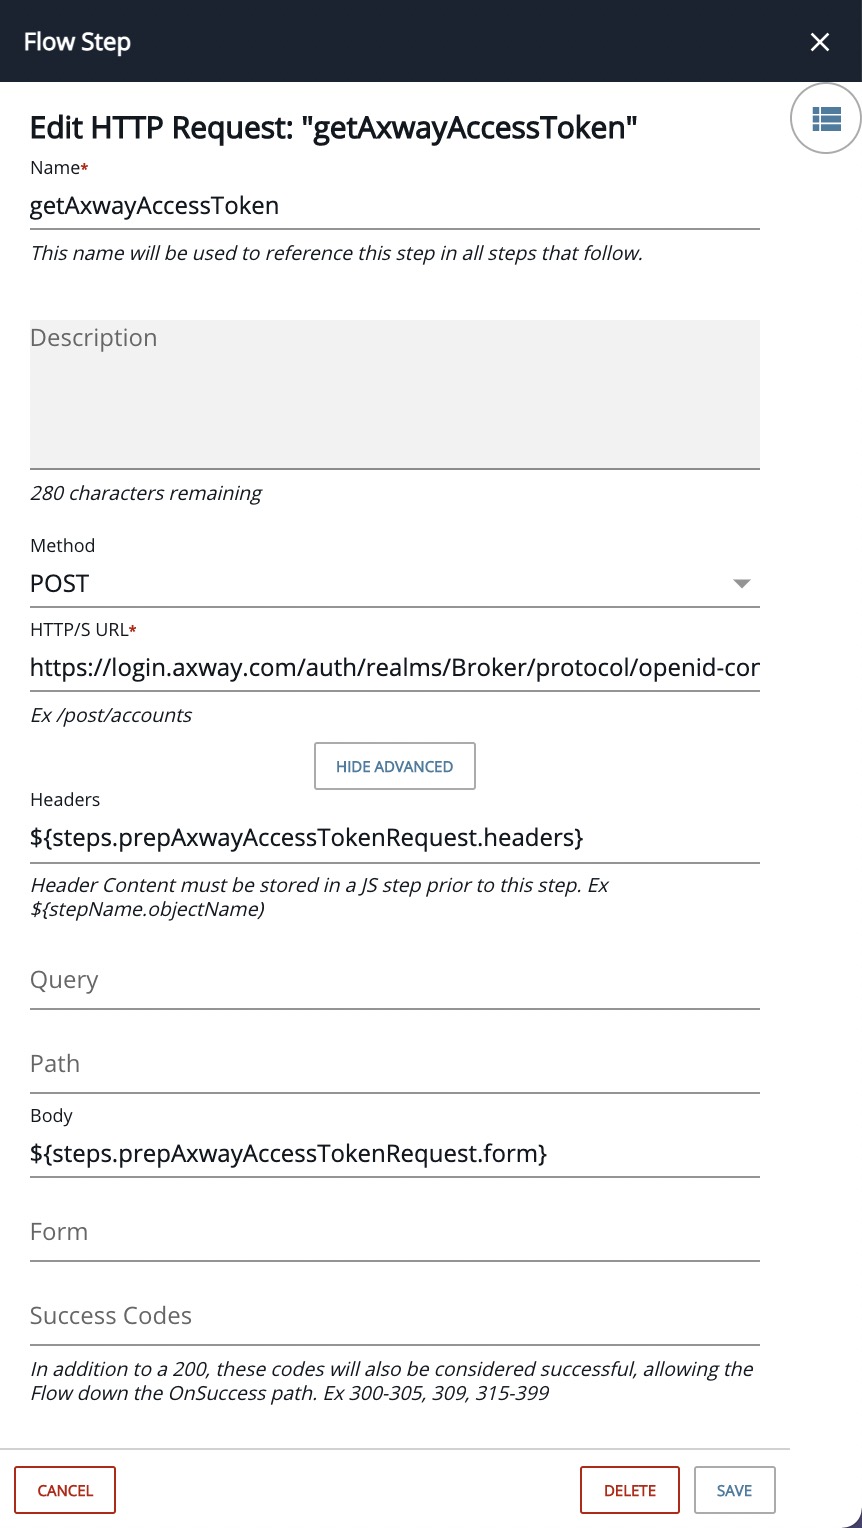
The next pair of steps: prepAxwayAccessTokenRequest and getAxwayAccessToken retrieve an access token for subsequent Amplify Central API calls. This was covered in a prior post
prepAxwayAccessTokenRequest is a JS Script Step with the following content that outputs headers and form for the getAxwayAccessToken HTTP Request Step.
done({
  'headers': {
      Authorization: 'Basic ' + CE.b64(config.axwayClientId + ':' + config.axwayClientSecret),
      'Content-Type': 'application/x-www-form-urlencoded'
  },
  form: 'grant_type=client_credentials'
});
getAxwayAccessToken is an HTTP Request Step to url https://login.axway.com/auth/realms/Broker/protocol/openid-connect/token`as follows:
Set Global Variables
The access token and Amplify Central API base address are stored as global variables in the setGlobals JS Script Step:
let apiServerHeaders = {
  'Authorization': `Bearer ${steps.getAxwayAccessToken.response.body.access_token}`,
  'Content-Type': 'application/json'
}

let apicentralUrl = config.apiCentralUrl ? config.apiCentralUrl : 'https://apicentral.axway.com';

let globals = {
  apicentralUrl: apicentralUrl,
  apiServerHeaders: apiServerHeaders
}

done({globals});
Get Catalog Items
The next pair of steps: prepareGetCatalogItems and getCatalogItems retrieve the Catalog Items related to the API Service Instance.
prepareGetCatalogItems is a JS Script Step with the following contents:
const url = steps.setGlobals.globals.apicentralUrl + '/api/unifiedCatalog/v1/catalogItems?pageSize=500&query=relationships.type==API_SERVER_SERVICE_INSTANCE_ID;relationships.value=='+trigger.args.payload.metadata.id

done({url:url});
This step constructs the URL to retrieve the Catalog Items, for example:
https://apicentral.axway.com/api/unifiedCatalog/v1/catalogItems?pageSize=500&query=relationships.type==API_SERVER_SERVICE_INSTANCE_ID;relationships.value==8a2e83617870fa0001789337eda111d8
getCatalogItems is an HTTP Request Step as follows:
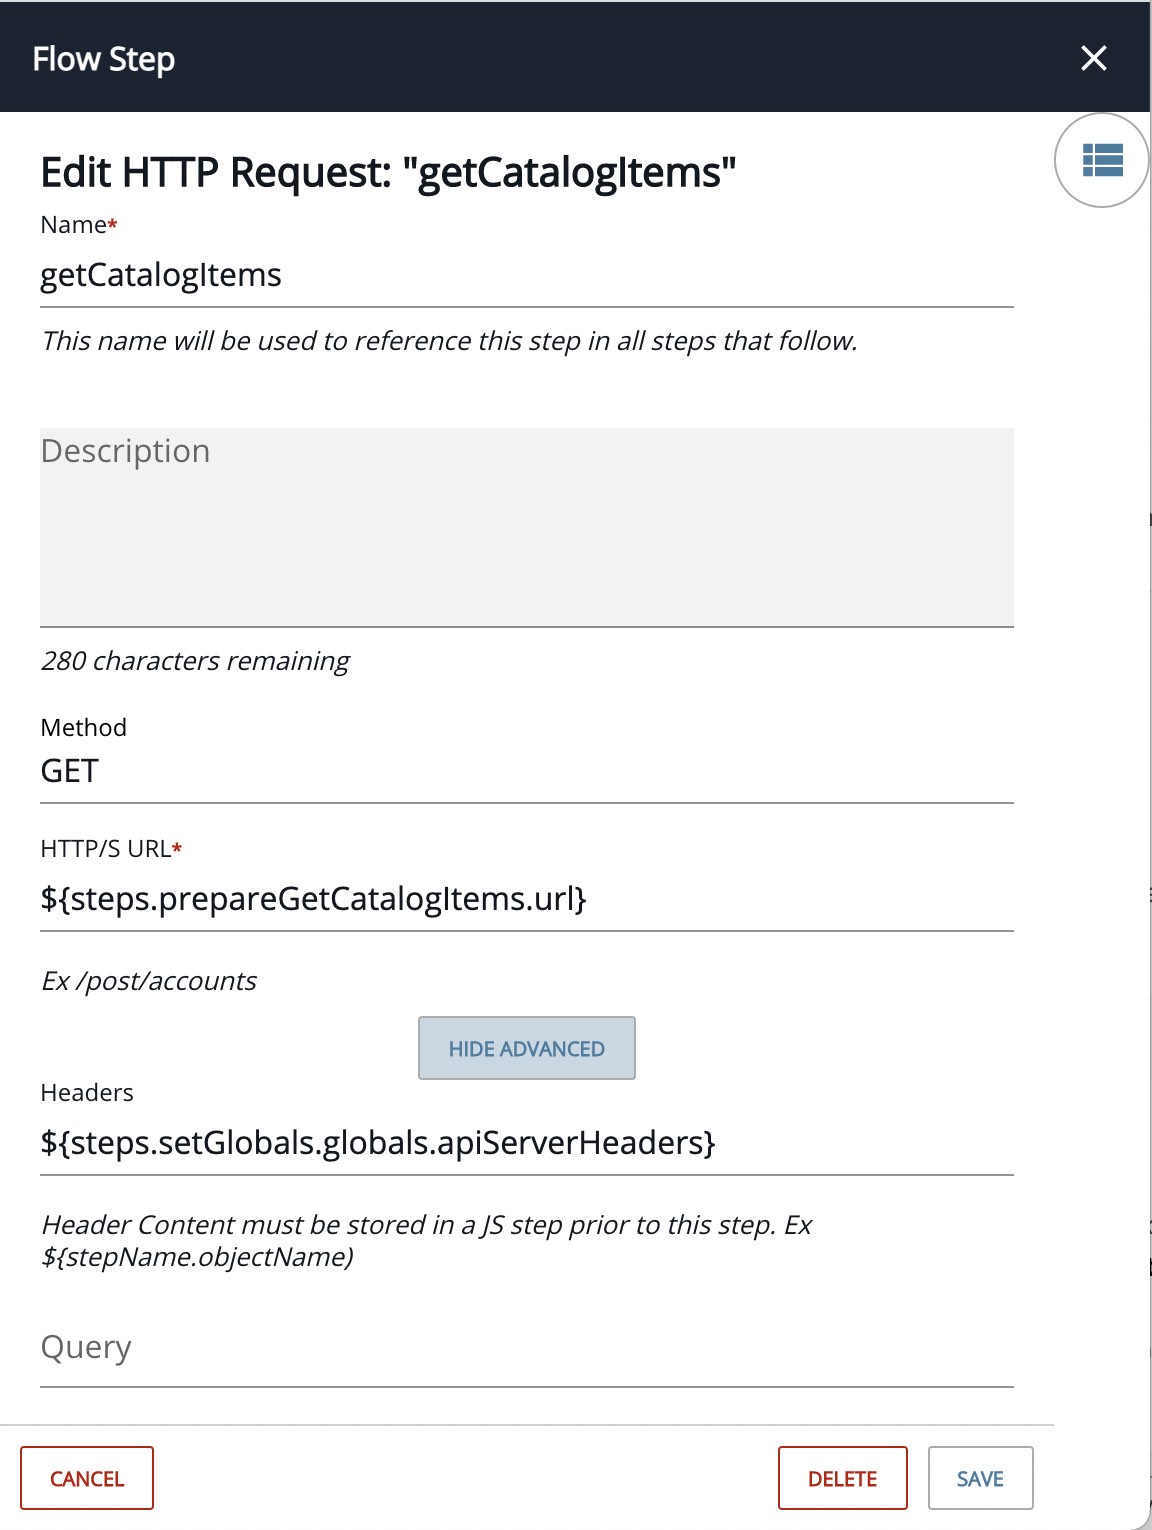
It returns an array of Catalog Items.
Loop Over Catalog Items
We then loop over the catalog items using the loopOverCatalogItems Loop Step and the array: ${steps.getCatalogItems.response.body}
Get Subscriptions
The next pair of steps: prepareGetSubscriptionsForCatalogItem and getSubscriptionsForCatalogItem retrieve the subscriptions for the consumer instances we are looping over.
prepareGetSubscriptionsForCatalogItem is a JS Script Step with the following contents:
const url = steps.setGlobals.globals.apicentralUrl + '/api/unifiedCatalog/v1/catalogItems/'+steps.loopOverCatalogItems.entry.id+'/subscriptions';

done({url:url});
This step constructs the URL to retrieve the instances, for example:
https://apicentral.axway.com/api/unifiedCatalog/v1/catalogItems/8a2e91907870014001789337f0725280/subscriptions
getSubscriptionsForCatalogItem is an HTTP Request Step as follows:

It returns an array of subscriptions.
Loop Over Subscriptions
We then loop over the subscriptions using the loopOverSubscriptions Loop Step and the array: ${steps.getSubscriptionsForCatalogItem.response.body}
Get SubscriberDetails
The next pair of steps: prepareGetSubscriberDetails and getSubscriberDetails retrieve the subscriber details such as the subscriber’s name and email address so we can send the subscriber an email.
prepareGetSubscriberDetails is a JS Script Step with the following contents:
const url = 'https://platform.axway.com/api/v1/user/'+steps.loopOverSubscriptions.entry.metadata.createUserId

done({url:url});
This step constructs the URL to retrieve the subscriber details, for example:
https://platform.axway.com/api/v1/user/8c27302c-c69a-41ab-855a-b90faad590ad
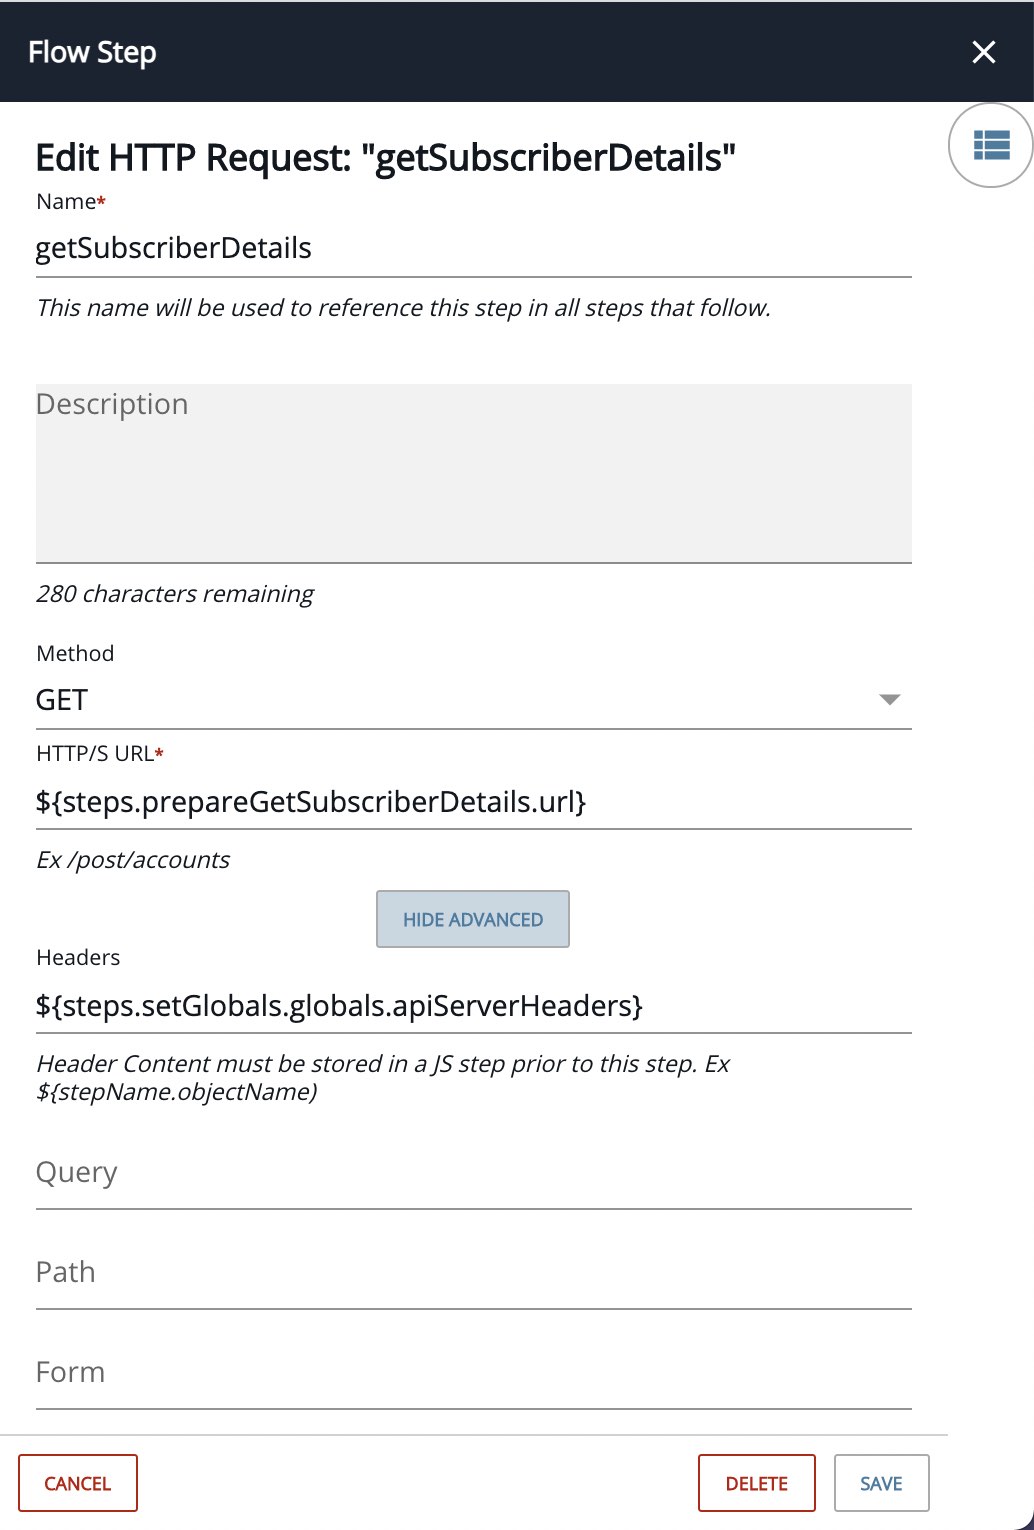
getSubscriberDetails is an HTTP Request Step as follows:
Send Email to Each Subscriber
The next pair of steps: prepareSendEmail and sendEmail uses the email connector to send an email to each subscriber.
prepareSendEmail is a JS Script Step with the following contents:
let url = 'messages'

let message = '<p>Hi '+steps.getSubscriberDetails.response.body.result.firstname+',<br><br>Catalog Item <b><a href="'+steps.setGlobals.globals.apicentralUrl+'/catalog/explore/'+steps.loopOverCatalogItems.entry.id+'"> '+steps.loopOverCatalogItems.entry.name+'</a></b> was updated for your subscription: <b><a href="'+steps.setGlobals.globals.apicentralUrl+'/catalog/'+steps.loopOverCatalogItems.entry.id+'/subscriptions/'+steps.loopOverSubscriptions.entry.id+'"> '+steps.loopOverSubscriptions.entry.name+'</a>.</b><br><br>Best Regards,<br><a href="https://platform.axway.com">Axway Amplify Platform</a>';

let body = {
    "Subject":"Catalog item "+steps.loopOverCatalogItems.entry.name+" was updated",
    "Importance":"Normal",
    "Body":{
        "ContentType":"HTML",
        "Content": message
    },
    "ToRecipients":[
        {
            "EmailAddress":{
                "Address":steps.getSubscriberDetails.response.body.result.email
            }
        }
    ]
}

done({url:url, body:body})
This step constructs the email message.
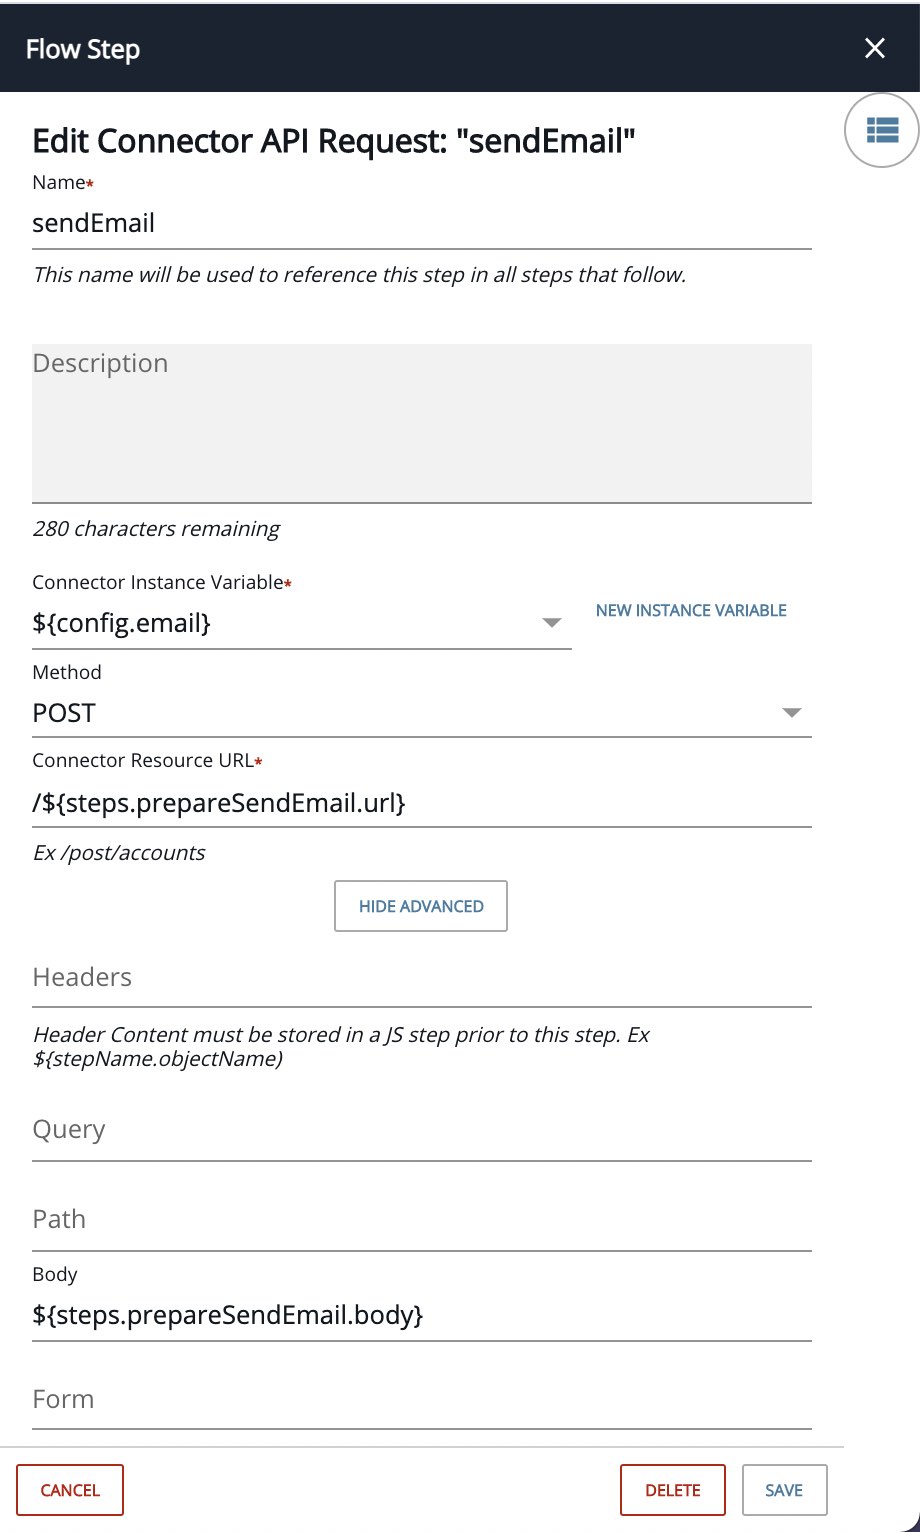
sendEmail is a Connector API Request as follows:
A sample email message is shown below:
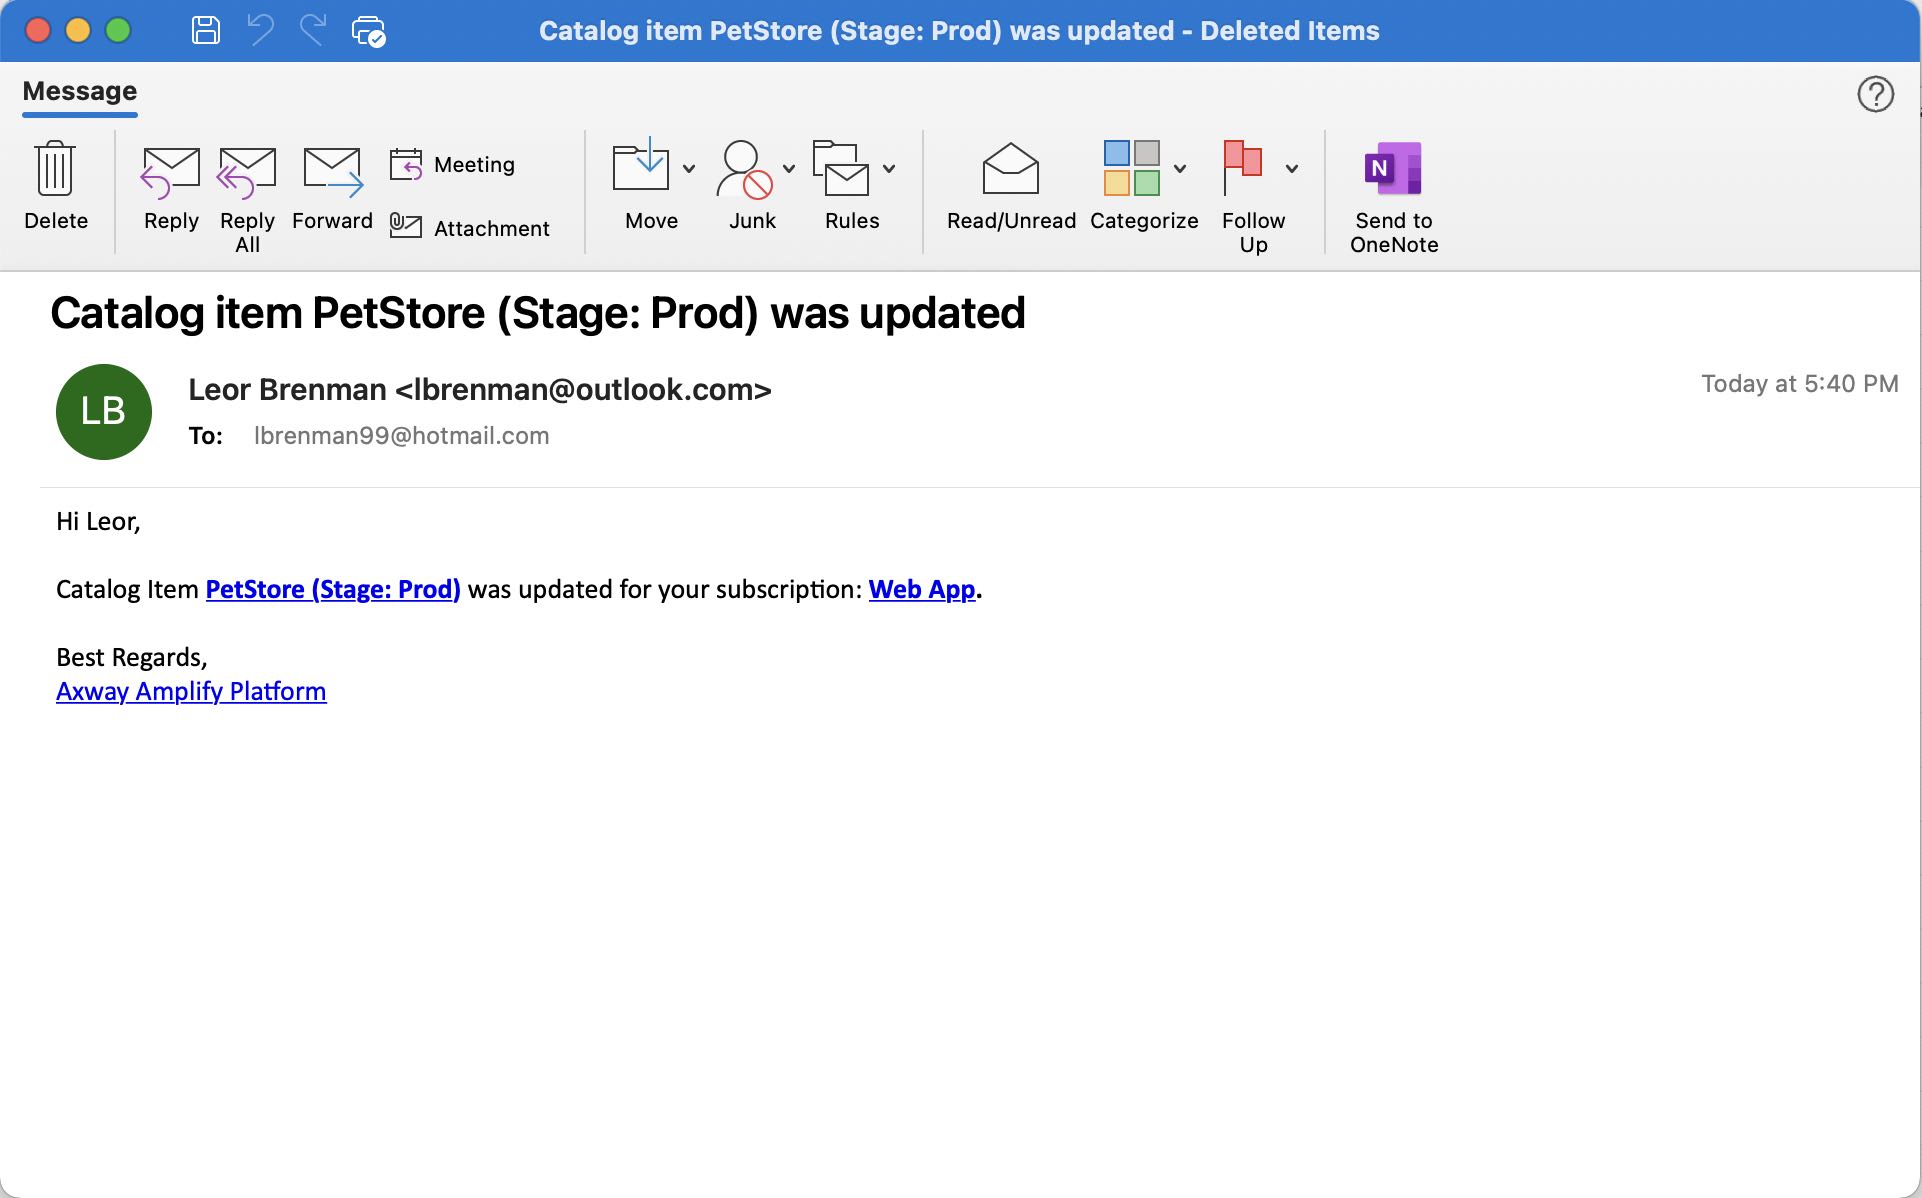
Note that there is a link to the Catalog Item (Petstore API) and the Subscription (Web App) in the email to help the subscriber get to the assets.
The Integration Builder flow can be downloaded here.
Summary
In this blog post, we looked at an example application, created with Amplify’s Integration Builder, that leverages Amplify Central Integration Webhooks to extend platform functionality.
We created an Integration and an application that detects when new API Revisions are discovered and pushed to Amplify Central (using the discovery agents) and sends an email to each subscriber so that they can be aware of potential API changes.
In future blog posts, we’ll look at other use cases.
Discover more information and learn about Amplify Central.