

Real-time data animation in your Apple Watch with Streamdata.io
A few months back, I demonstrated how to animate data in Real-Time in your iOS applications using Streamdata.io and Server Sent Events with a New York Times API (see my blog post here). With the growing success of smartwatches and the launch of the Apple Watch a couple of years ago, a lot of companies that already have an iOS application on the Store are considering adding an Apple Watch extension to it. So let’s do it too!
In this article, I’ll present a step-by-step tutorial on how to create an Apple Watch extension for your iOS application using Streamdata.io.
1- The Mock API
First thing, we need is an API to get some changing data to display. We could use the New York Times API again, but I need something more basic as I want us to focus on adding the Apple Watch extension. We will use the StockMarket Mock API instead. This API is a test component created by Streamdata.io in order to simulate the behavior of almost any API. In its public version, the API call responds with a JSON array of 15 records, each one composed of a field “title” with values “Value 0” to “Value 14,” and a field “price” whose value is a random integer between 0 and 99.
You can access the API via the following URL: (no parameters or headers required)
2- The starter iOS project
Second, we need an iOS application to which we can add the Apple Watch extension. Once again, we have created a very basic iOS application in demonstrating how easy it is to integrate Streamdata.io in an iOS project, called the streamdataio-iOS project. This project uses the StockMarket Mock API in order to display an ever changing table of values.
Start by downloading the streamdataio-iOS starter project from our GitHub here for this tutorial and opening it in XCode.
On line 28 of the ViewController.m file, replace @”YOUR_TOKEN-HERE” by your Streamdata.io API token. For this, all you have to do is create a free account on Streamdata.io and get your app token, as simple as that.
Then run the project on an emulator or a phone. The app should start and display a TableView of pairs title/price, ordered by price in ascending order, getting updated every 5 seconds.
3- Adding the Watch App extension to an existing iOS app
Now that we are ready, let’s add the Watch App extension to our iOS project!
Select File > New > Target, navigate to the watchOS section, then select “WatchKit App” and click Next.
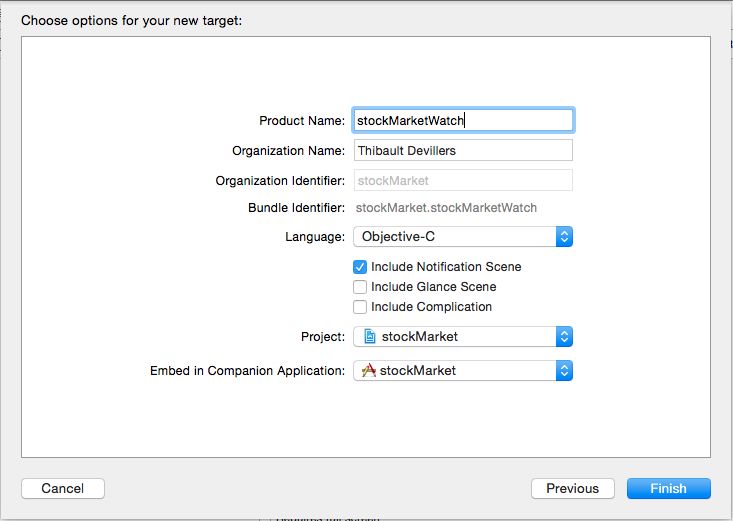
In the next screen, set a product name for the target. To keep things simple, let’s not check the Glance Scene and Complication boxes. If you intend to implement a glance or complication, then you should check the appropriate checkbox. Then click Finish.
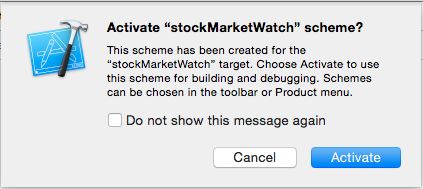
In the next pop-up window, click Activate in order to activate your watch scheme.
Congratulation, you have just created your first Apple Watch app!
If you look more closely at your Project Navigator (see below), you’ll notice that it created two new targets with two corresponding groups. This is because the code of a watch app doesn’t actually run on the watch, but as an extension bundled within the phone app.
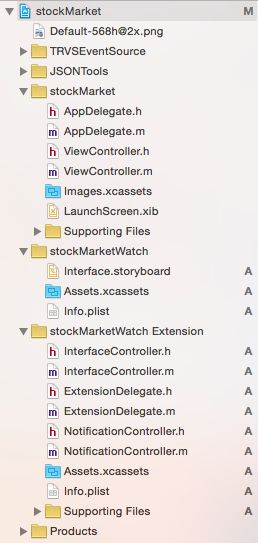
The watch group contains the watch app storyboard, and the WatchKit extension contains the classes created by the target template.
If you run this on the emulator (using the StockMarketWatch target), you will see that not one but two emulators are launched, the first one for the phone and the second for the watch. And in that second emulator, the name of your app and the time will appear.
4- The Watch app storyboard
Now let’s display a TableView, or a table (of type WKInterfaceTable) to be precise, in our watch app the same way it is done for the phone app.

The Interface controller is pretty much empty right now, so first we’re going to add a group container and inside this container a label for our title. Then below the group, we add a table that will hold our TableView content. The group inside the table row container will hold our row definition, so let’s add inside three labels aligned horizontally, the first one for the row title, the second for the separator, and the third for the price. Voilà!
Now that the storyboard has been created, we can add the corresponding outlets in the WatchKit Extension. The first one is the table outlet, which has to be added in the Interface controller class:
@property (weak, nonatomic) IBOutlet WKInterfaceTable *watchTableView;For the title and the price, we need to add a new class in the WatchKit Extension that will define a table row. Right-click on the Watch Extension group in the Project Navigator and select New File. Then select watchOS > Source > WatchKit Class and click Next.
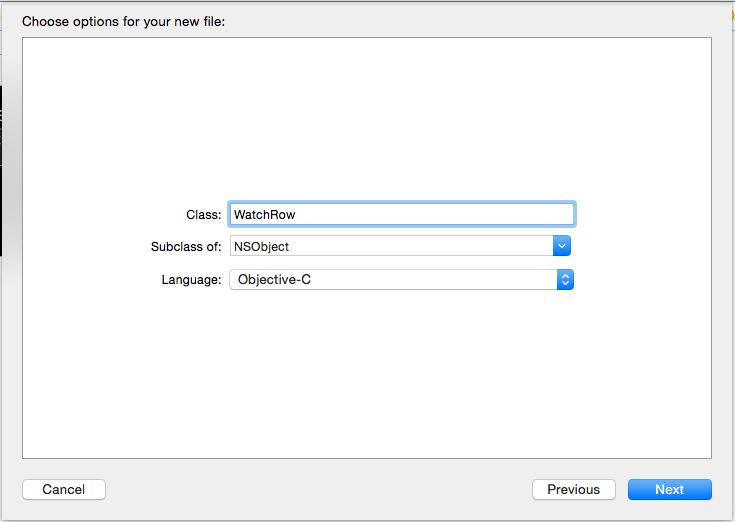
Name the new class WatchRow, make it a subclass of NSObject and set the language to Objective-C. Click Next, then Create. In the Interface storyboard, change the class of the Table Row Controller from NSObject to WatchRow, and also name its identifier WatchRow. Finally, add the label outlets for the Title and Price labels in the WatchRow class:
@property (unsafe_unretained, nonatomic) IBOutlet WKInterfaceLabel *rowTitle;
@property (unsafe_unretained, nonatomic) IBOutlet WKInterfaceLabel *rowPrice;
Don’t forget to import the WatchKit class in the WatchRow.h file:
#import <WatchKit/WatchKit.h>5- Data sharing from your iPhone to your Apple Watch
Once the user interface for the watch is ready, we need to populate it with data. To keep things simple in this example, our goal is to display the exact same data in the watch as in the phone. It would be easy to modify this and have a specific display on the watch.
The data to be displayed is received by the iPhone app in a JSON format and stored in a mutable array. It is this array that needs to be shared between the iPhone app and the WatchKit extension.
With WatchOS 1, we had to use a shared “App Group” in order to communicate between the iPhone app and the WatchKit extension. This App Group enables both applications to read and write data in a shared container at runtime. Then we had to notify the Apple Watch when new data had been written to the shared container.
In WatchOS 2, this communication is now provided in a much simpler way by the WatchConnectivity framework, which defines methods for sending and receiving messages.
a. Add a WatchConnectivity session to the main View Controller of the iPhone app.
The first step is to declare a WatchConnectivity session in the ViewController of the iPhone app.
In the ViewController.h file, import the WatchConnectivity class and add a declaration to implement the WCSessionDelegate protocol, then add a property watchSession to hold the WatchConnectivity session:
#import <WatchConnectivity/WatchConnectivity.h>

@interface ViewController : UIViewController <TRVSEventSourceDelegate, UITableViewDataSource, WCSessionDelegate>

@property (nonatomic) WCSession* watchSession;
Finally initialize and activate the session in the viewDidLoad method of the ViewController:
// If this device can support a WatchConnectivity session, activate this session.
if ([WCSession isSupported])
{
    self.watchSession = [WCSession defaultSession];
    self.watchSession.delegate = self;
    [self.watchSession activateSession];
}
b. Add a WatchConnectivity session to the Interface Controller of the WatchKit Extension.
All we have to do is replicate this in the WatchKit Extension.
First declare the WatchConnectivity session in the InterfaceController.h file:
#import <WatchConnectivity/WatchConnectivity.h>@interface InterfaceController : WKInterfaceController <WCSessionDelegate>@property (nonatomic) WCSession* watchSession;
Then initialize and activate the session in the willActivate method of the InterfaceController:
// If this device can support a WatchConnectivity session, activate this session.
if ([WCSession isSupported])
{
    self.watchSession = [WCSession defaultSession];
    self.watchSession.delegate = self;
    [self.watchSession activateSession];
}
c. Send a message with the current data to the Watch app.
Now that the session has been defined, let’s send the data we want to share from the iPhone app to the Watch app. For this, we create the following function sendDataObject:myDataObject that creates a dictionary with the data and sends it to the Watch app using the WatchConnectivity method sendMessage:replyHandler:errorHandler: when the watch is reachable:
-(void)sendDataObject:(NSArray *)myDataObject
{
    if ([self.watchSession isReachable])
    {
        NSDictionary *applicationDict = @{@"dataObject":myDataObject};
        [self.watchSession sendMessage:applicationDict
                  replyHandler:^(NSDictionary *replyHandler) { }
                  errorHandler:^(NSError *error) { }
        ];
    }
}
Finally, we call the function every time the data changes:
[self sendDataObject:dataObject];
This is done inside the main View Controller, in the TRVSEventSource method eventSource:didReceiveEvent: handling the reception of a new event, after storing the JSON data received from Streamdata.io and before reloading the TableView content.
d. Read data in the WatchKit extension app when receiving a message.
At the other end, we read the data inside the Interface Controller of the WatchKit Extension and use it to update the Table of the Watch app.
This is done in the WatchConnectivity method session:didReceiveMessage that is called when a new message is received from the iPhone app via the WatchConnectivity session.
- (void)session:(nonnull WCSession *)session didReceiveMessage:(nonnull NSDictionary *)message
{
    dataObject = [message objectForKey:@"dataObject"];

    [self setupTable];
}
Initially, I used background transfers via the Application Context to send the messages with the Watch Connectivity, where content is queued up for transfer. This was interesting because any information waiting in the transfer queue would get overridden by the latest data, sending only the most up-to-date content. However, it seems that with WatchOS 2.2, data would only get sent the first time. To fix this and be more in line with real-time, I decided to use interactive messaging with sendMessage and didReceiveMessage instead.
setupTable called above is used to insert the data in the table of the Watch app. It is equivalent to the tableView:cellForRowAtIndexPath: method of a classical TableView.
- (void)setupTable
{
    NSArray *sortedData = [dataObject sortedArrayUsingComparator:
                           ^NSComparisonResult(id obj1, id obj2)
                           {
                               if ([[obj1 objectForKey:@"price"] integerValue] < [[obj2 objectForKey:@"price"] integerValue])
                               { return NSOrderedDescending; }
                               else if ([[obj1 objectForKey:@"price"] integerValue] > [[obj2 objectForKey:@"price"] integerValue])
                               { return NSOrderedAscending; }
                               else
                               { return NSOrderedSame;}
                           }];

    [self.watchTableView setNumberOfRows:sortedData.count withRowType:@"WatchRow"];

    for (NSInteger i = 0; i < self.watchTableView.numberOfRows; i++)
    {
        WatchRow *row = [self.watchTableView rowControllerAtIndex:i];

        [row.rowTitle setText:[[sortedData objectAtIndex:i] objectForKey:@"title"]];

        NSString *price = [NSString stringWithFormat:@"%@", [[sortedData objectAtIndex:i] objectForKey:@"price"]];
        [row.rowPrice setText:price];
    }
}
Don’t forget to import the WatchRow.h file to be able to access the WatchRow data in the setupTable method.
6- Run the project
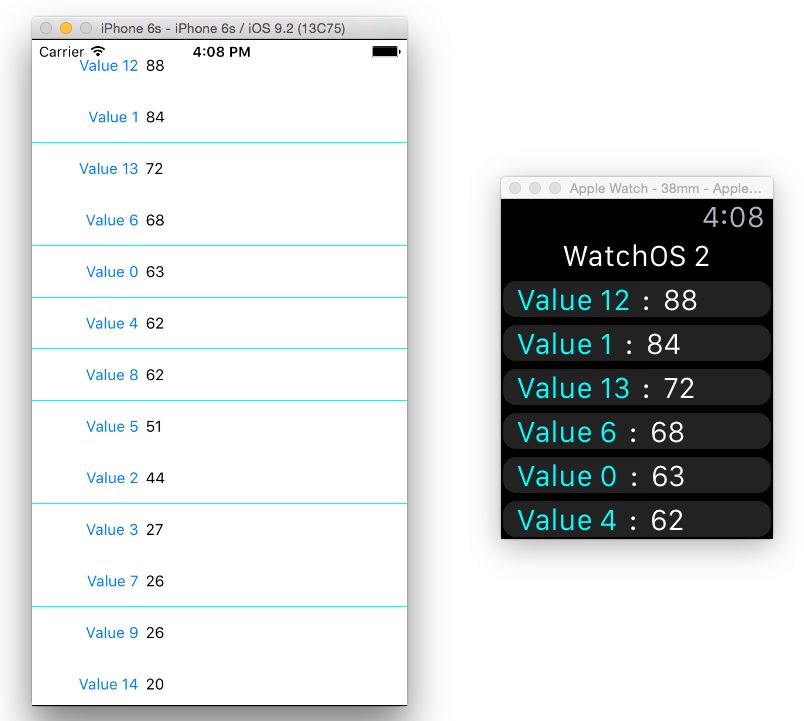
If you run the project in the emulator using the StockMarketWatch target, the Watch app should start in the watch emulator displaying the title label. Once you see the title, launch the iPhone app from the phone simulator. After the app launches and displays the table with the values updating every 5 seconds, the table should also appear on the watch emulator, displaying synchronized values, as shown in the image below.
Conclusion
In this article, we have learned how to add the Apple Watch extension to our basic streaming iOS application using the Streamdata.io proxy, in order to stream the content of a frequently updated API and display this data on the Apple Watch. This is done using Server Sent Events.
To keep things simple and really focus on adding the extension in this article, I have kept complexity to a bare minimum. From here, you could easily optimize data transfer between the phone and the watch by sending only the patches received on the phone and doing the patching operation on the watch, or automatically open the iPhone app in the background when the Watch app is launched to initiate the data streaming, for example. It’s all up to your imagination or your needs!
That’s all for now!