In this blog post we’ll use API Builder to create an image label detection API using an API First approach. Specifically, we’ll design our API using Stoplight and then we’ll leverage the no-code/low-code features of API Builder to create the API. We’ll also leverage the API Builder Plugin for AWS Rekognition for Image Analysis.
The image label detection API detects instances of real-world entities within an image provided as input as a Base64 encoded text. This includes objects like flower, tree, and table; events like wedding, graduation, and birthday party; and concepts like landscape, evening, and nature. For example, you can create an application that alerts you when a person approaches your video doorbell instead of an animal.
The API we’ll create is shown below:
POST /detectlabels
with the following body:
{
  "image": <Base64 encoded image>
}
which results in the following sample response:
{
    "Labels": [
        {
            "Name": "Car",
            "Confidence": 98.41893005371094,
            "Instances": [
                {
                    "BoundingBox": {
                        "Width": 0.9095886945724487,
                        "Height": 0.4260041415691376,
                        "Left": 0.044332683086395264,
                        "Top": 0.37117668986320496
                    },
                    "Confidence": 98.41893005371094
                }
            ],
            "Parents": [
                {
                    "Name": "Vehicle"
                },
                {
                    "Name": "Transportation"
                }
            ]
        },
        {
            "Name": "Automobile",
            "Confidence": 98.41893005371094,
            "Instances": [],
            "Parents": [
                {
                    "Name": "Vehicle"
                },
                {
                    "Name": "Transportation"
                }
            ]
        },
        .
        .
        .
        {
            "Name": "Jaguar Car",
            "Confidence": 57.534969329833984,
            "Instances": [],
            "Parents": [
                {
                    "Name": "Car"
                },
                {
                    "Name": "Vehicle"
                },
                {
                    "Name": "Transportation"
                }
            ]
        }
    ],
    "LabelModelVersion": "2.0"
}
For the example above, I use this Base64 encoded data for the car image shown below:

Since we already described using API Builder and Stoplight for API First API creation in prior blog posts we’ll skim over some of the detailed instructions.
Stoplight
Again, we’ll use Stoplight to design the OpenAPI 3.0 specification for our API. Then we’ll export the spec and import it into API Builder to build the API.
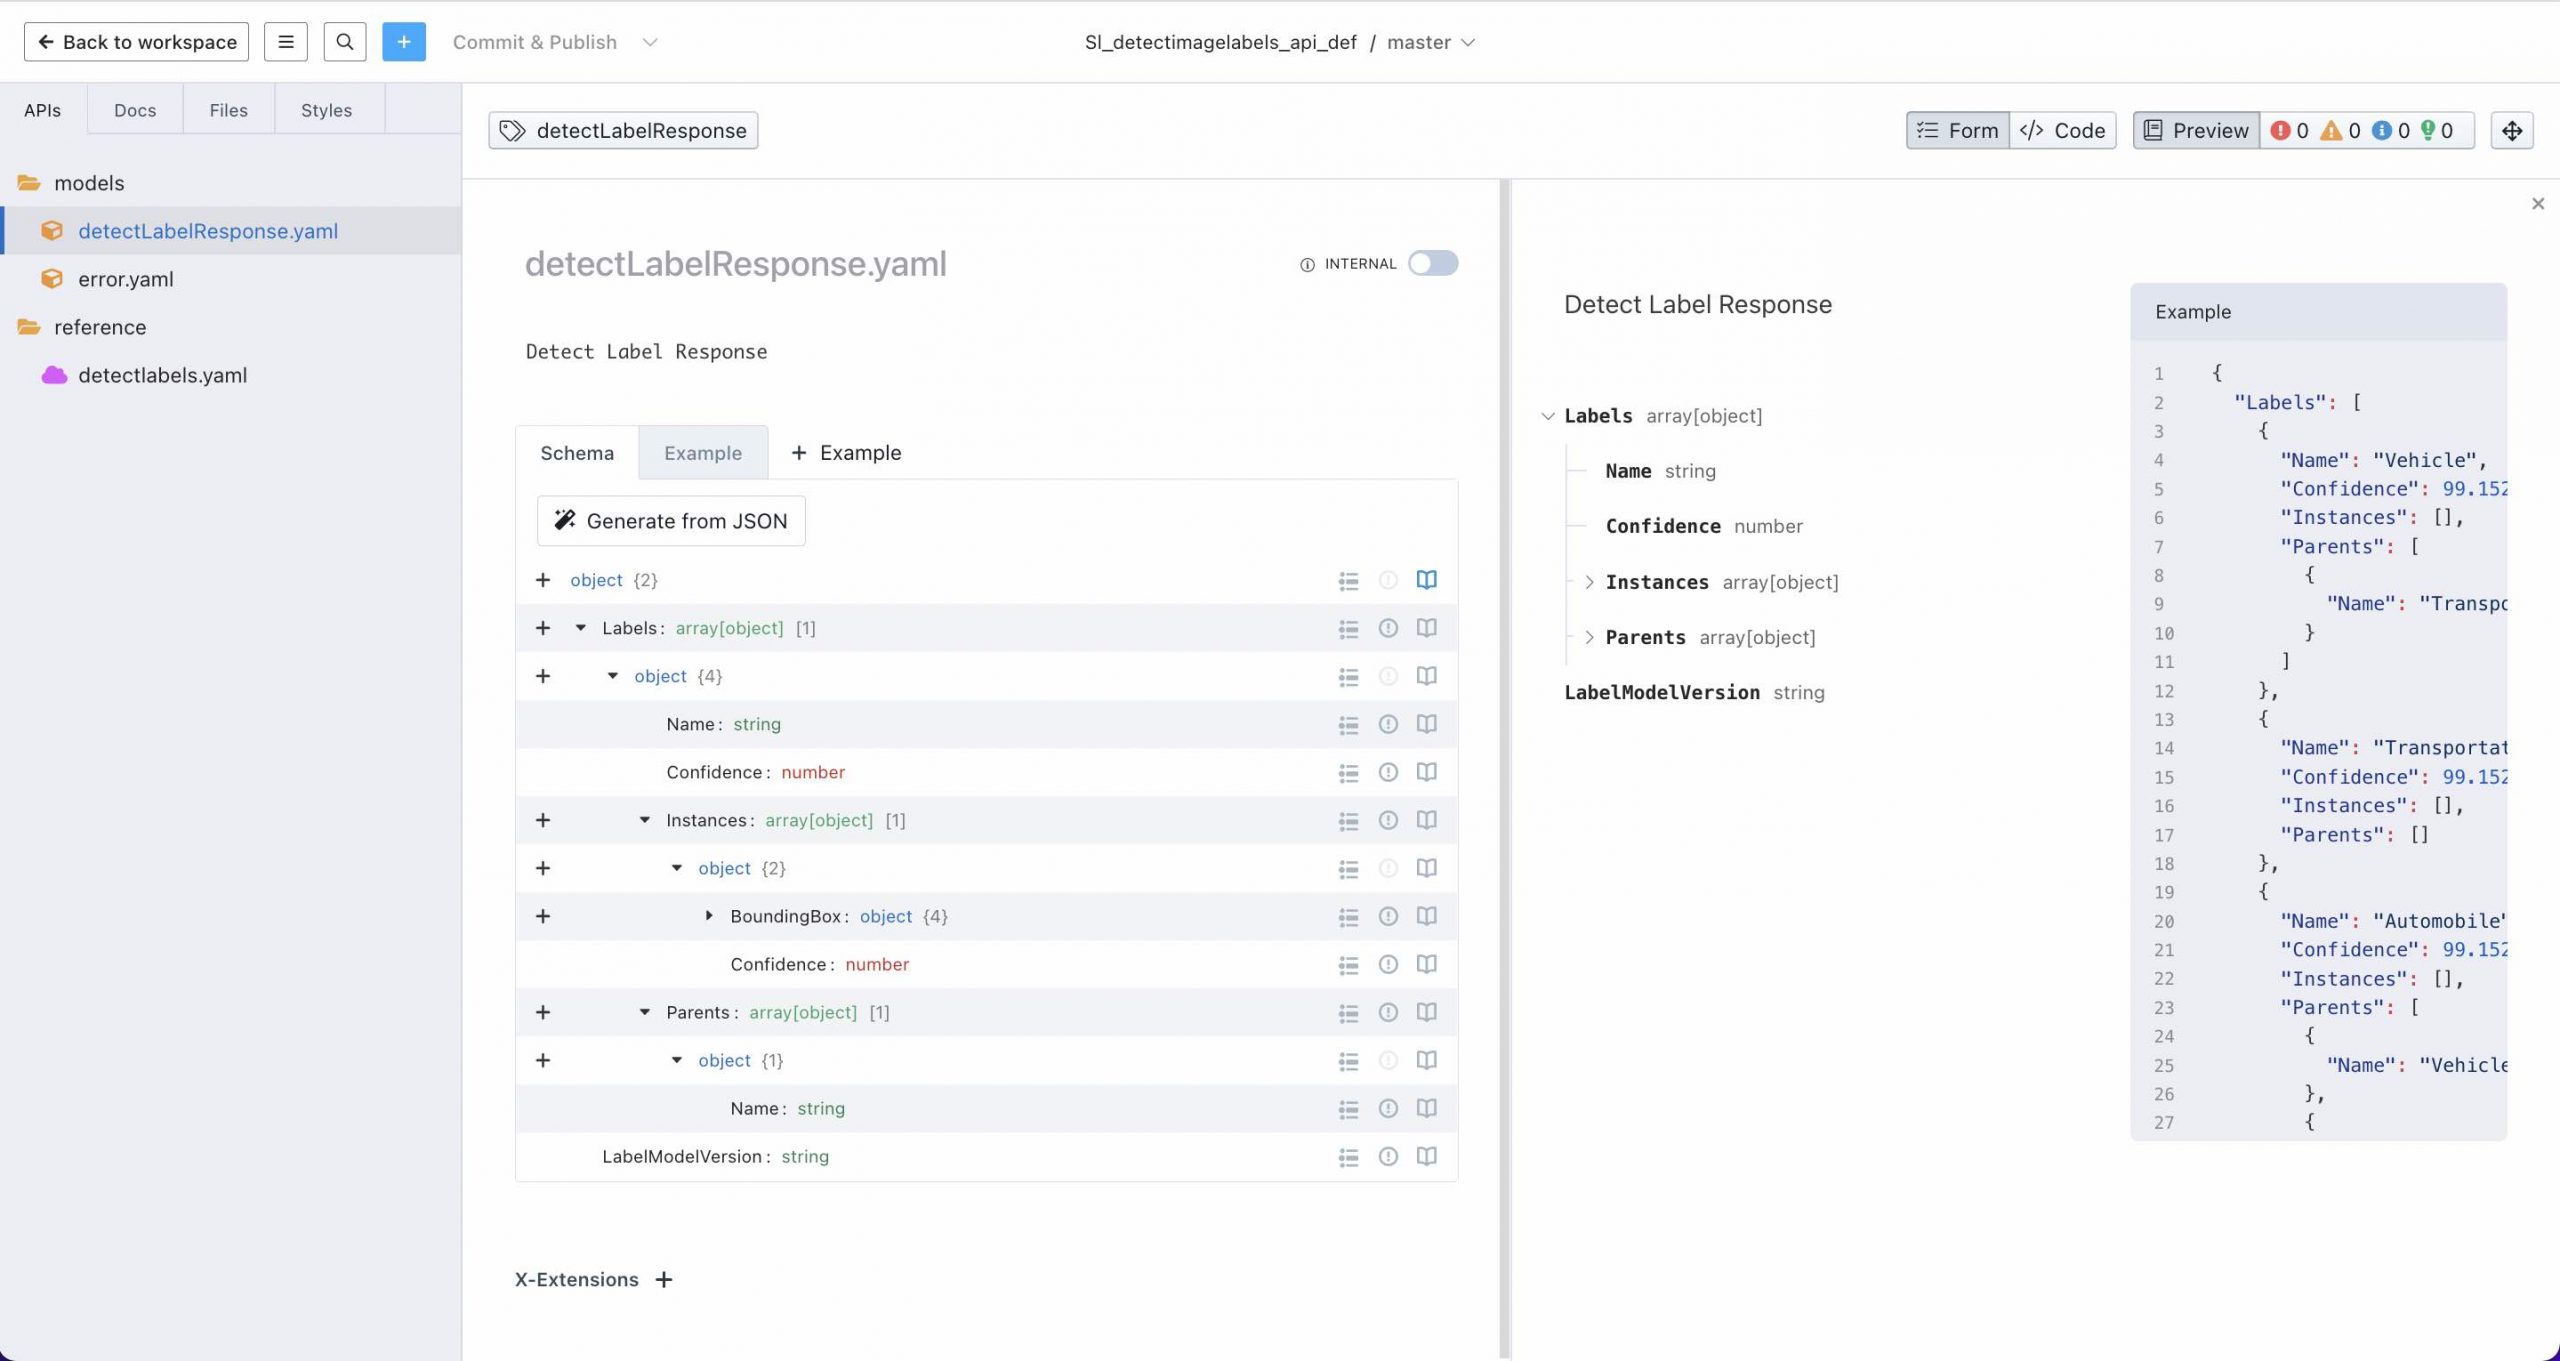
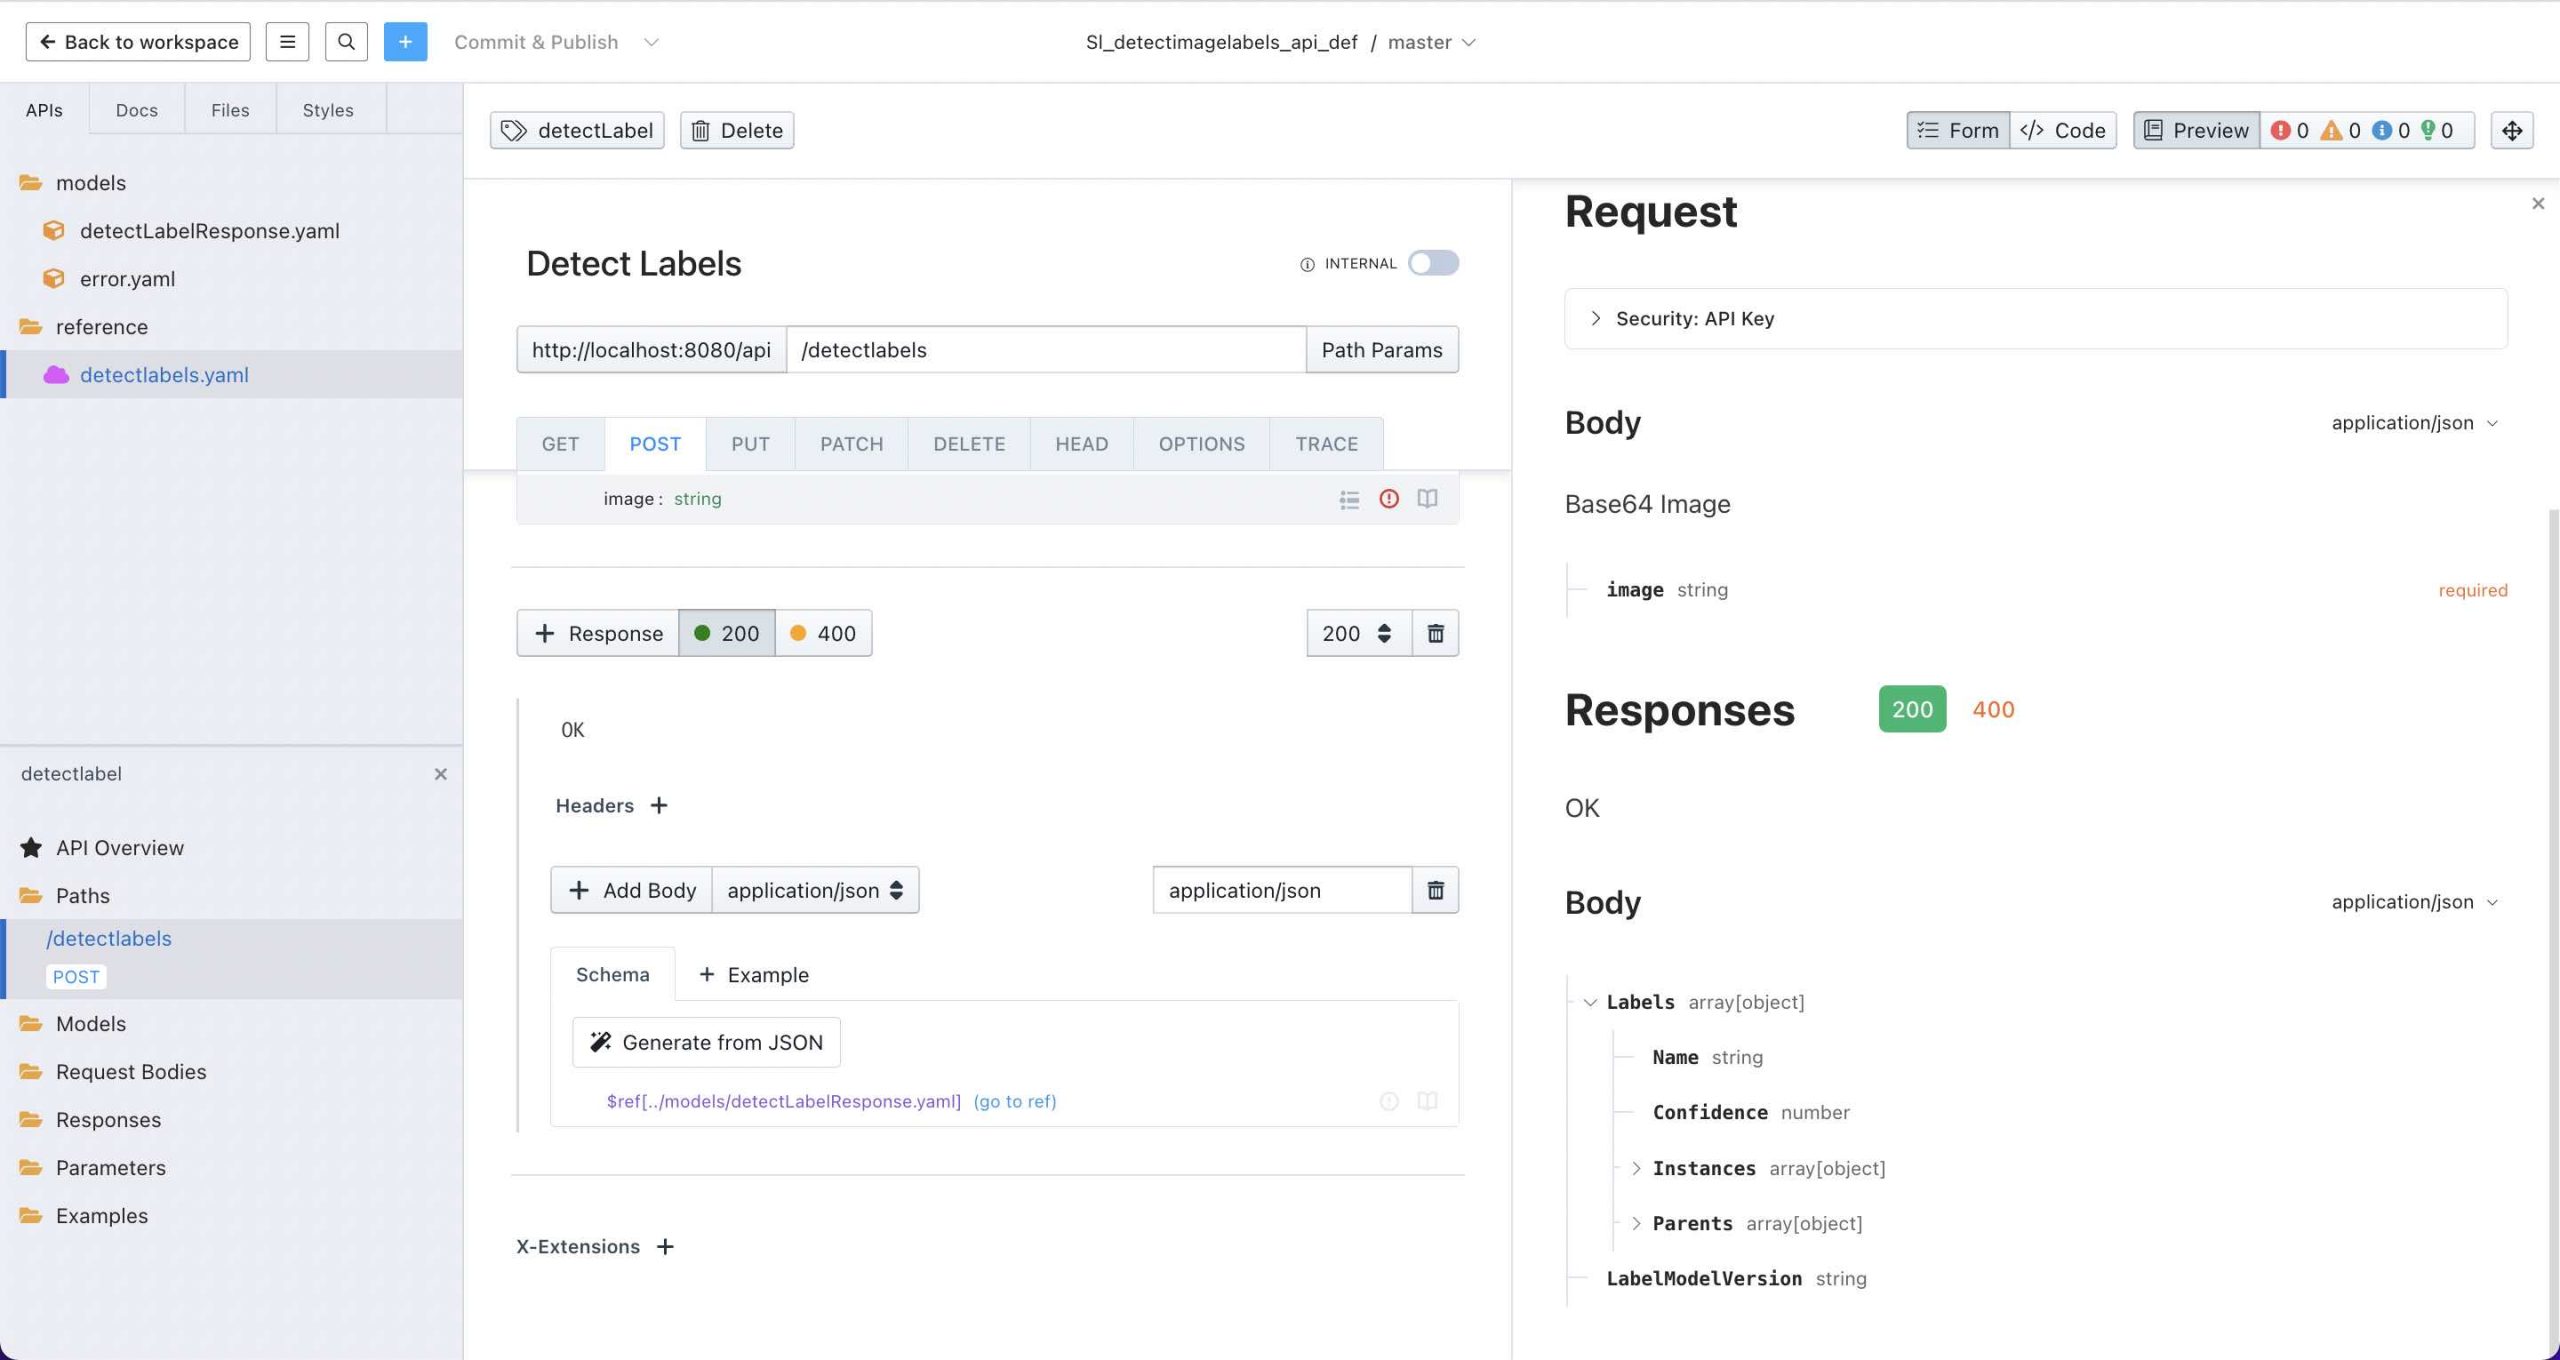
The API design is quite simple. First, we’ll define a detectLabelResponse model based on the response shown above:
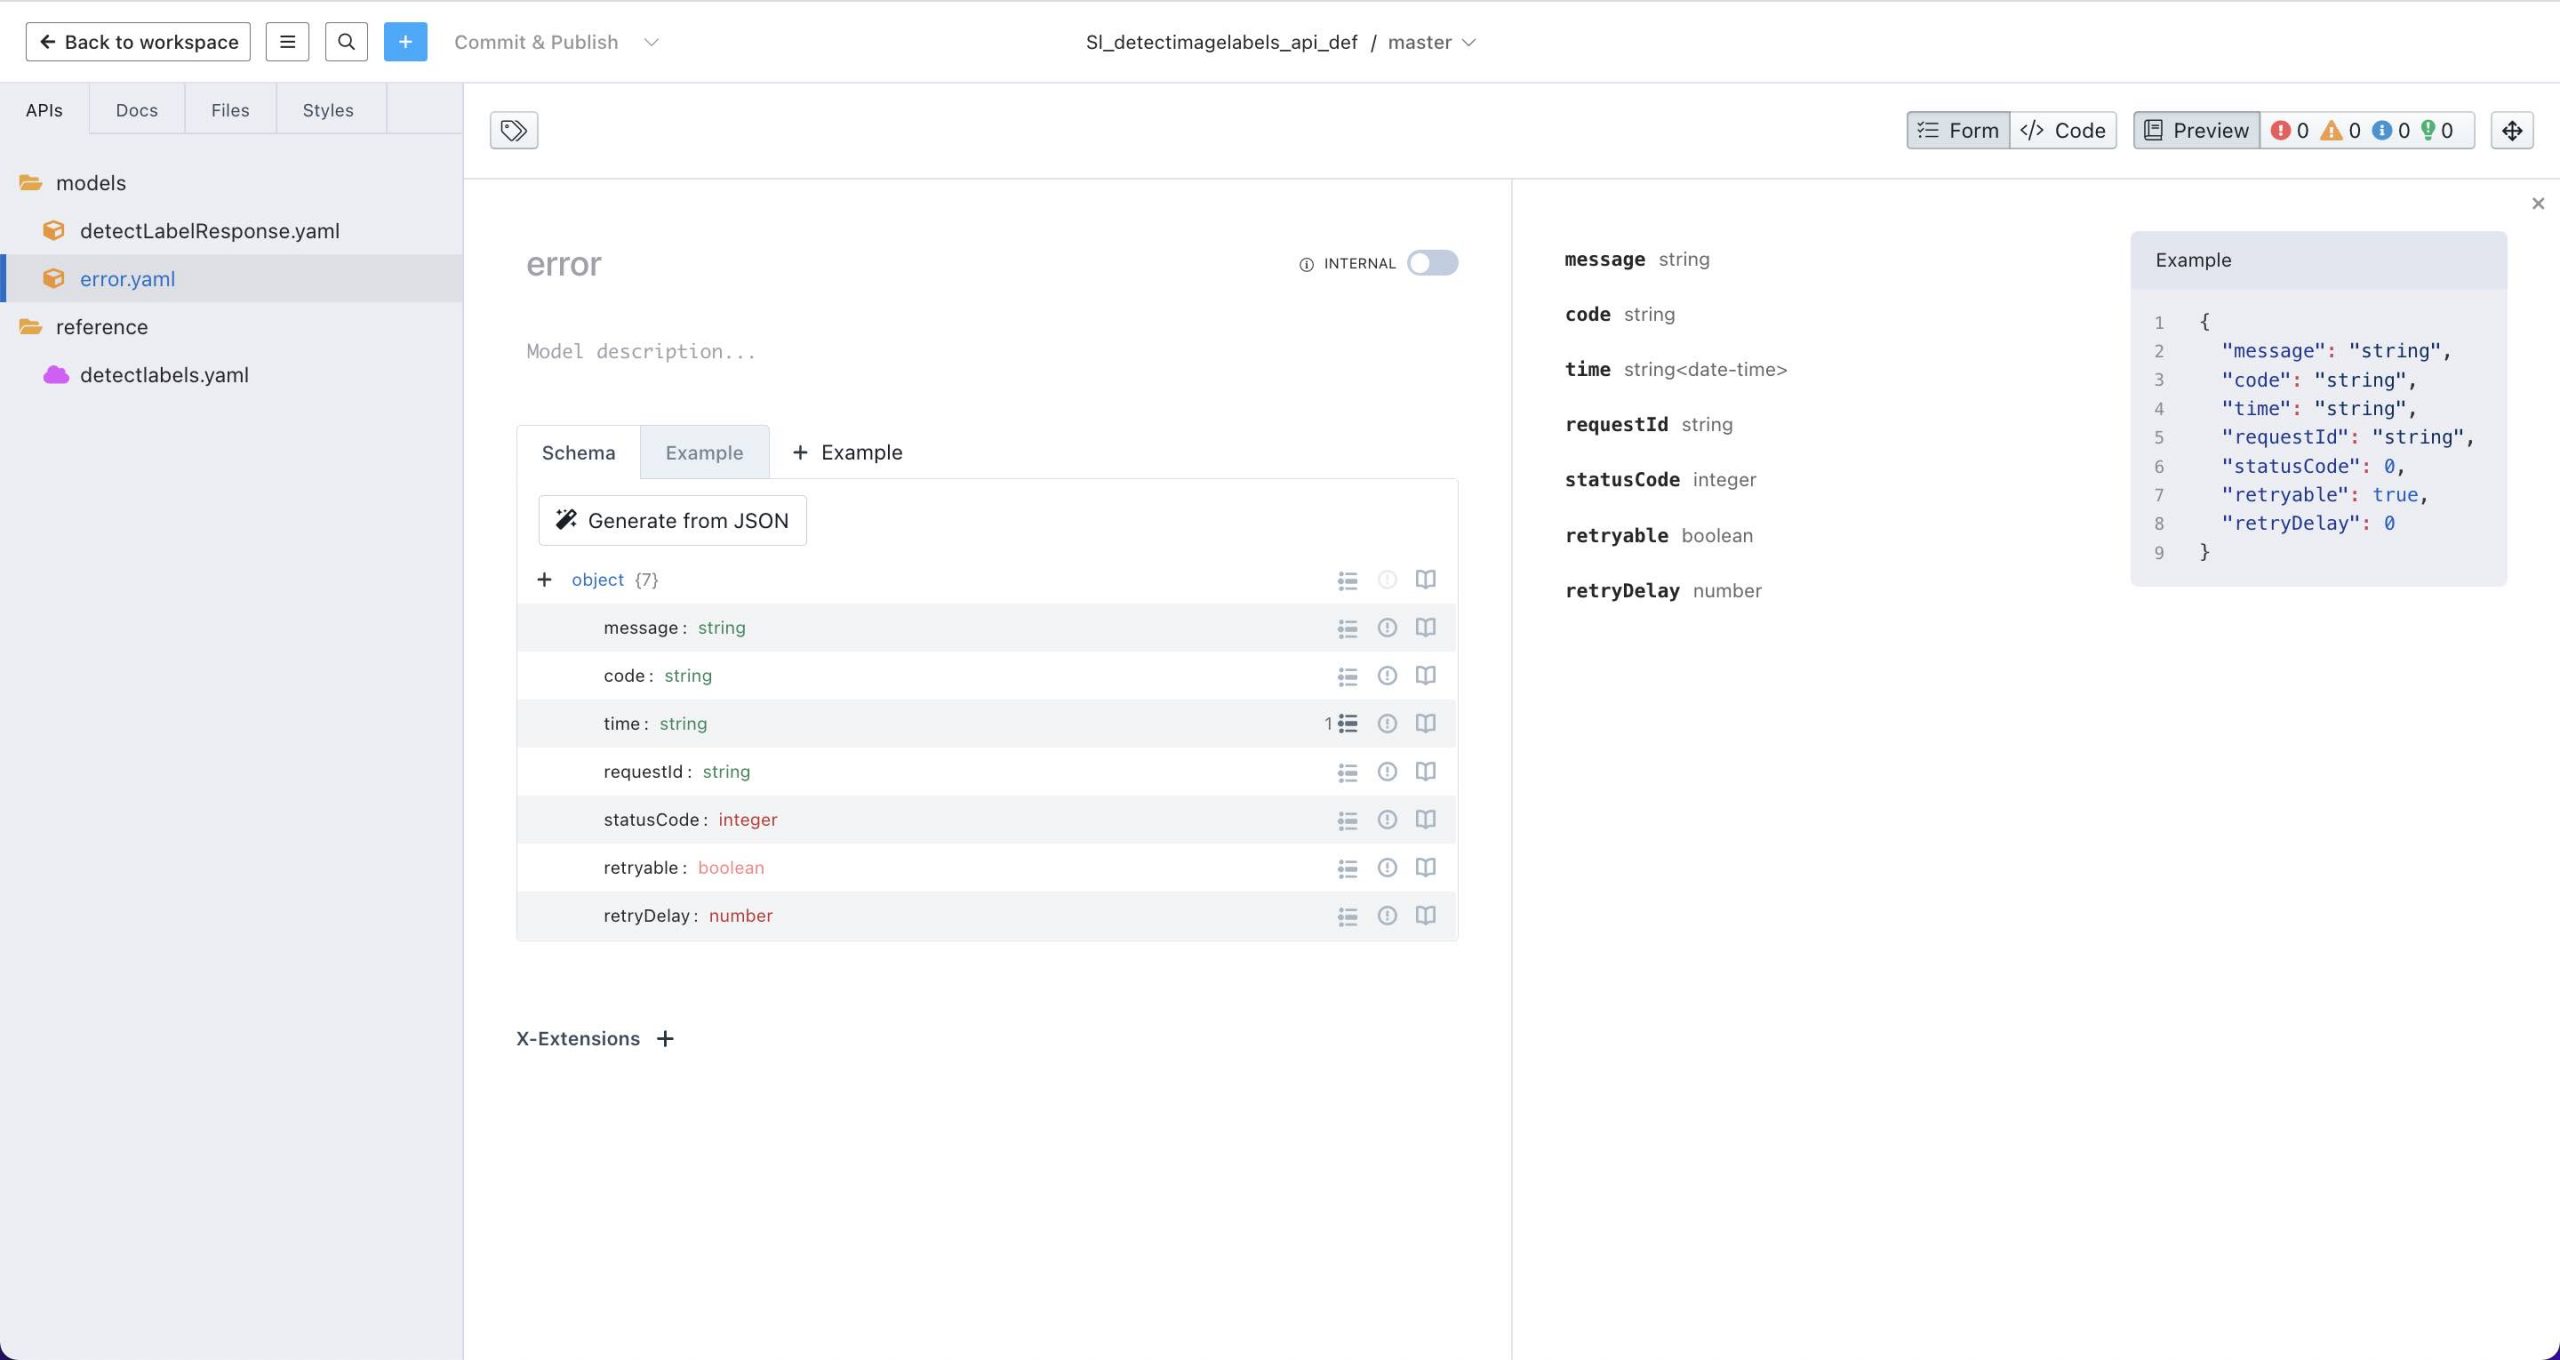
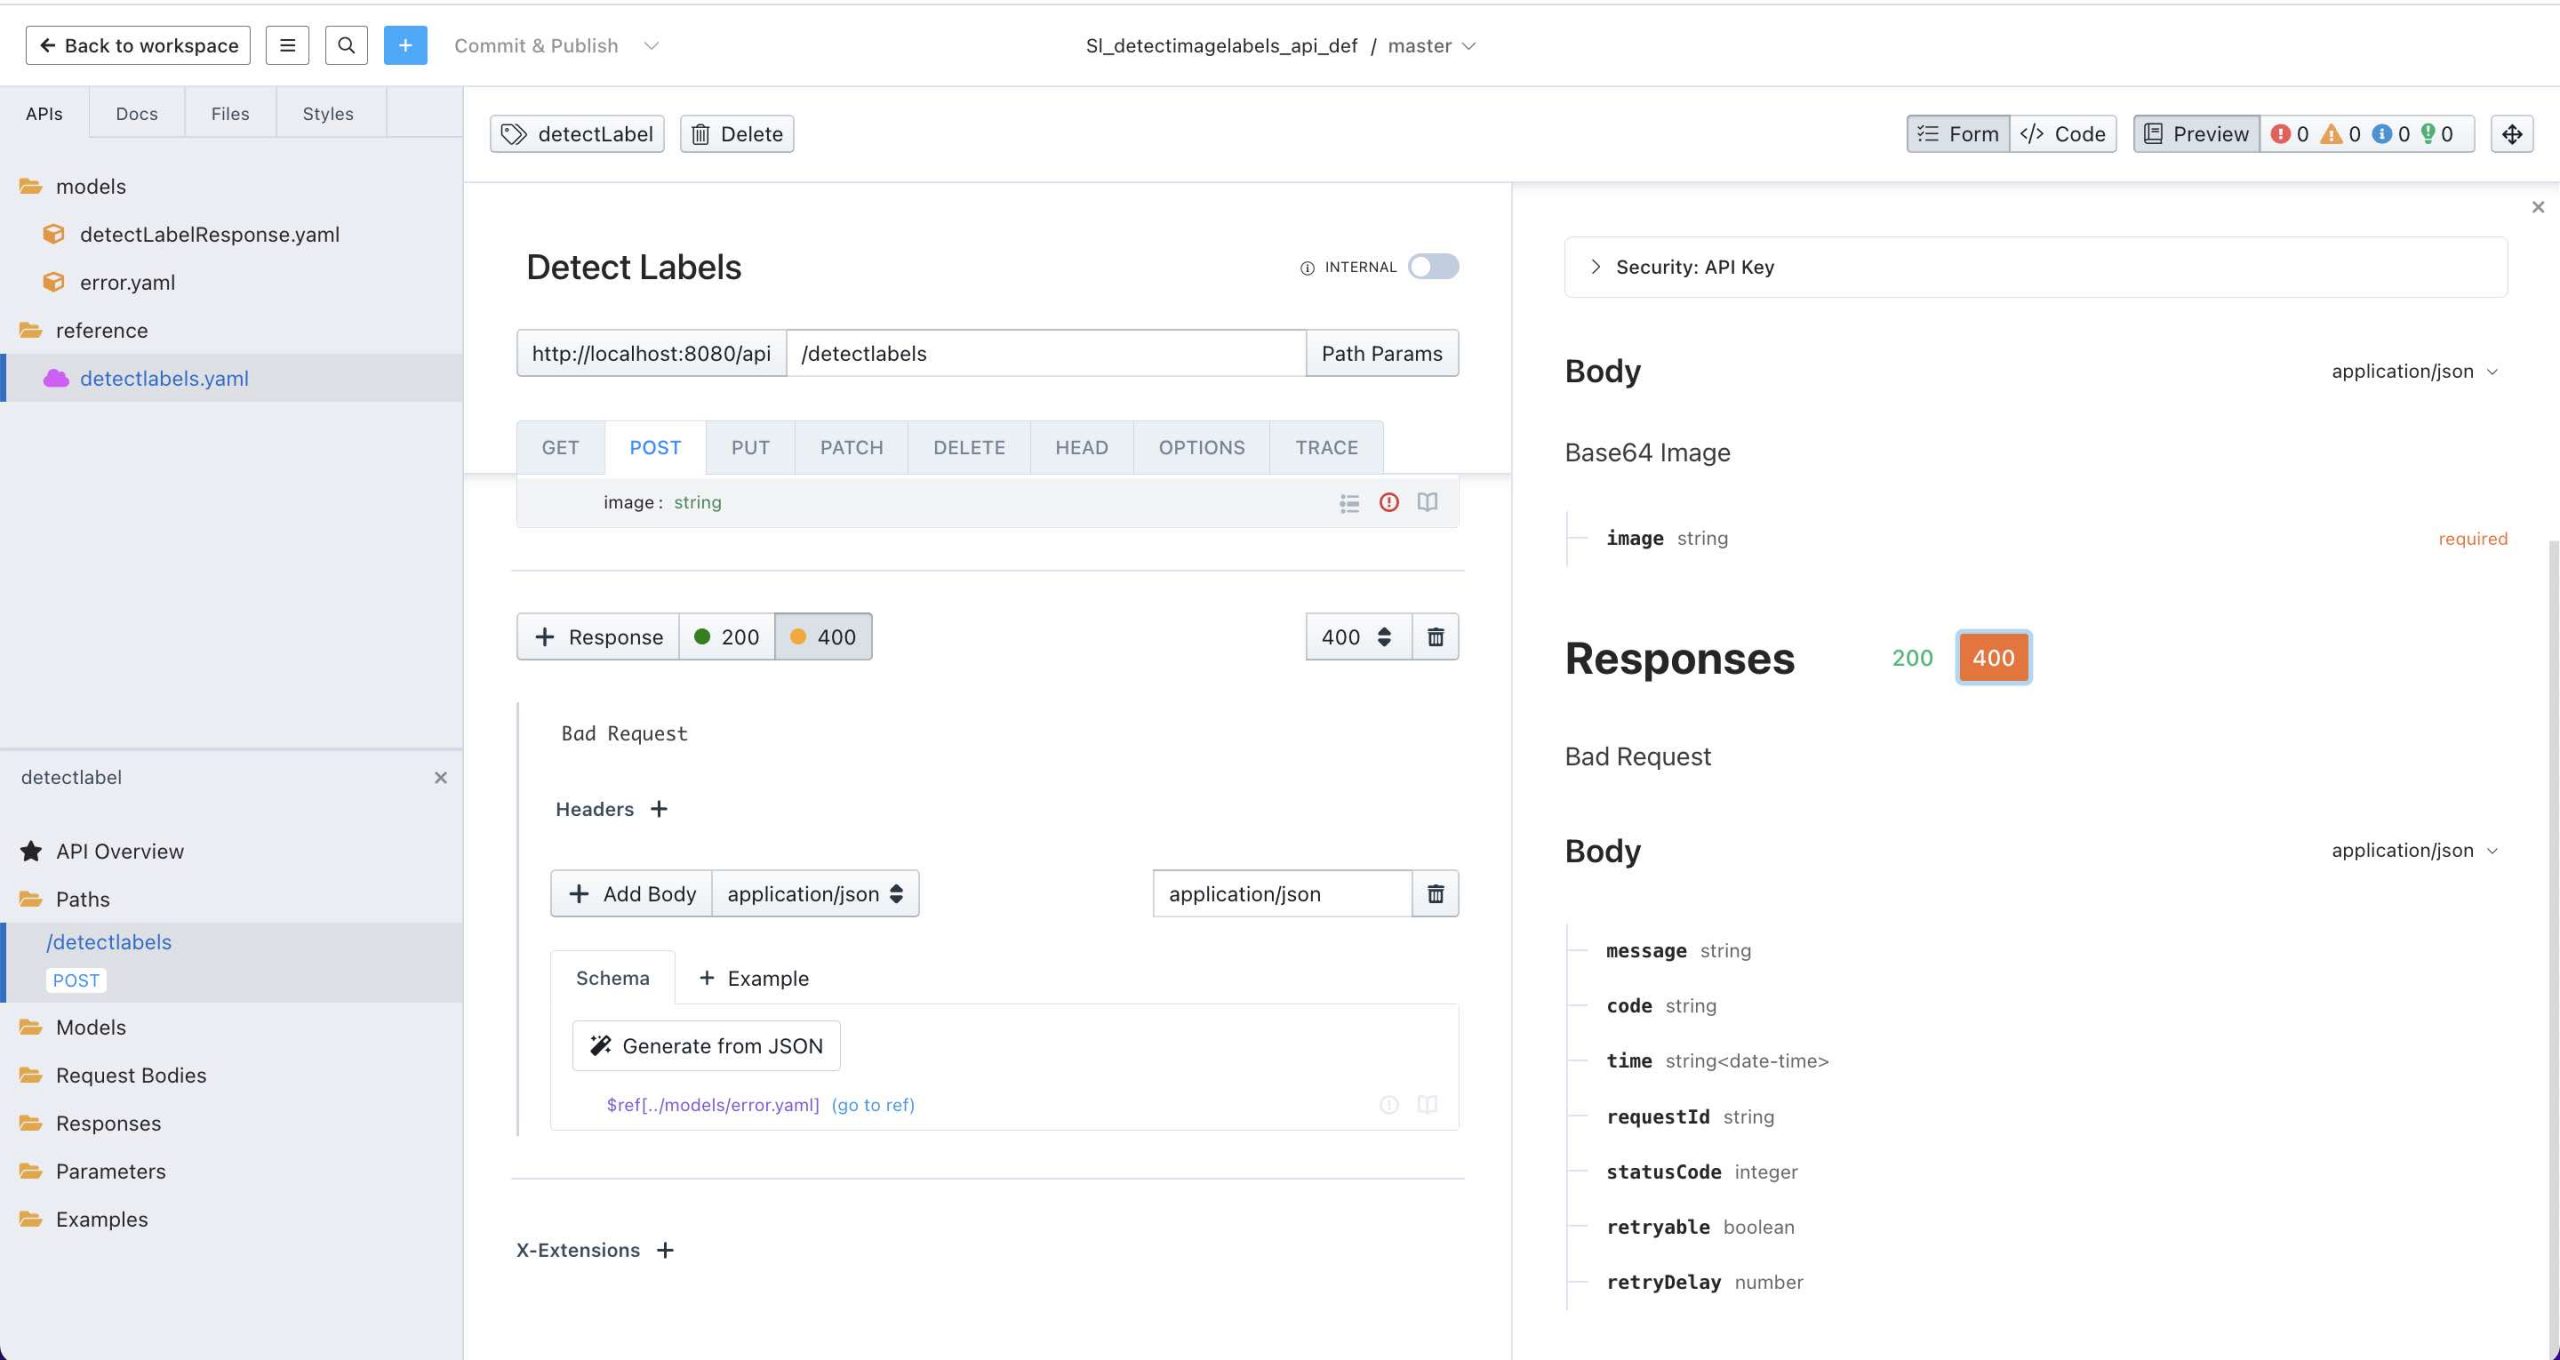
Then we’ll define an error model for the error response shown below:
{
    "message": "Request has invalid image format",
    "code": "InvalidImageFormatException",
    "time": "2022-06-02T12:52:15.032Z",
    "requestId": "7bcf4bdf-e4f1-4e0b-af98-eb8b0d1ef224",
    "statusCode": 400,
    "retryable": false,
    "retryDelay": 1.198782217849681
}
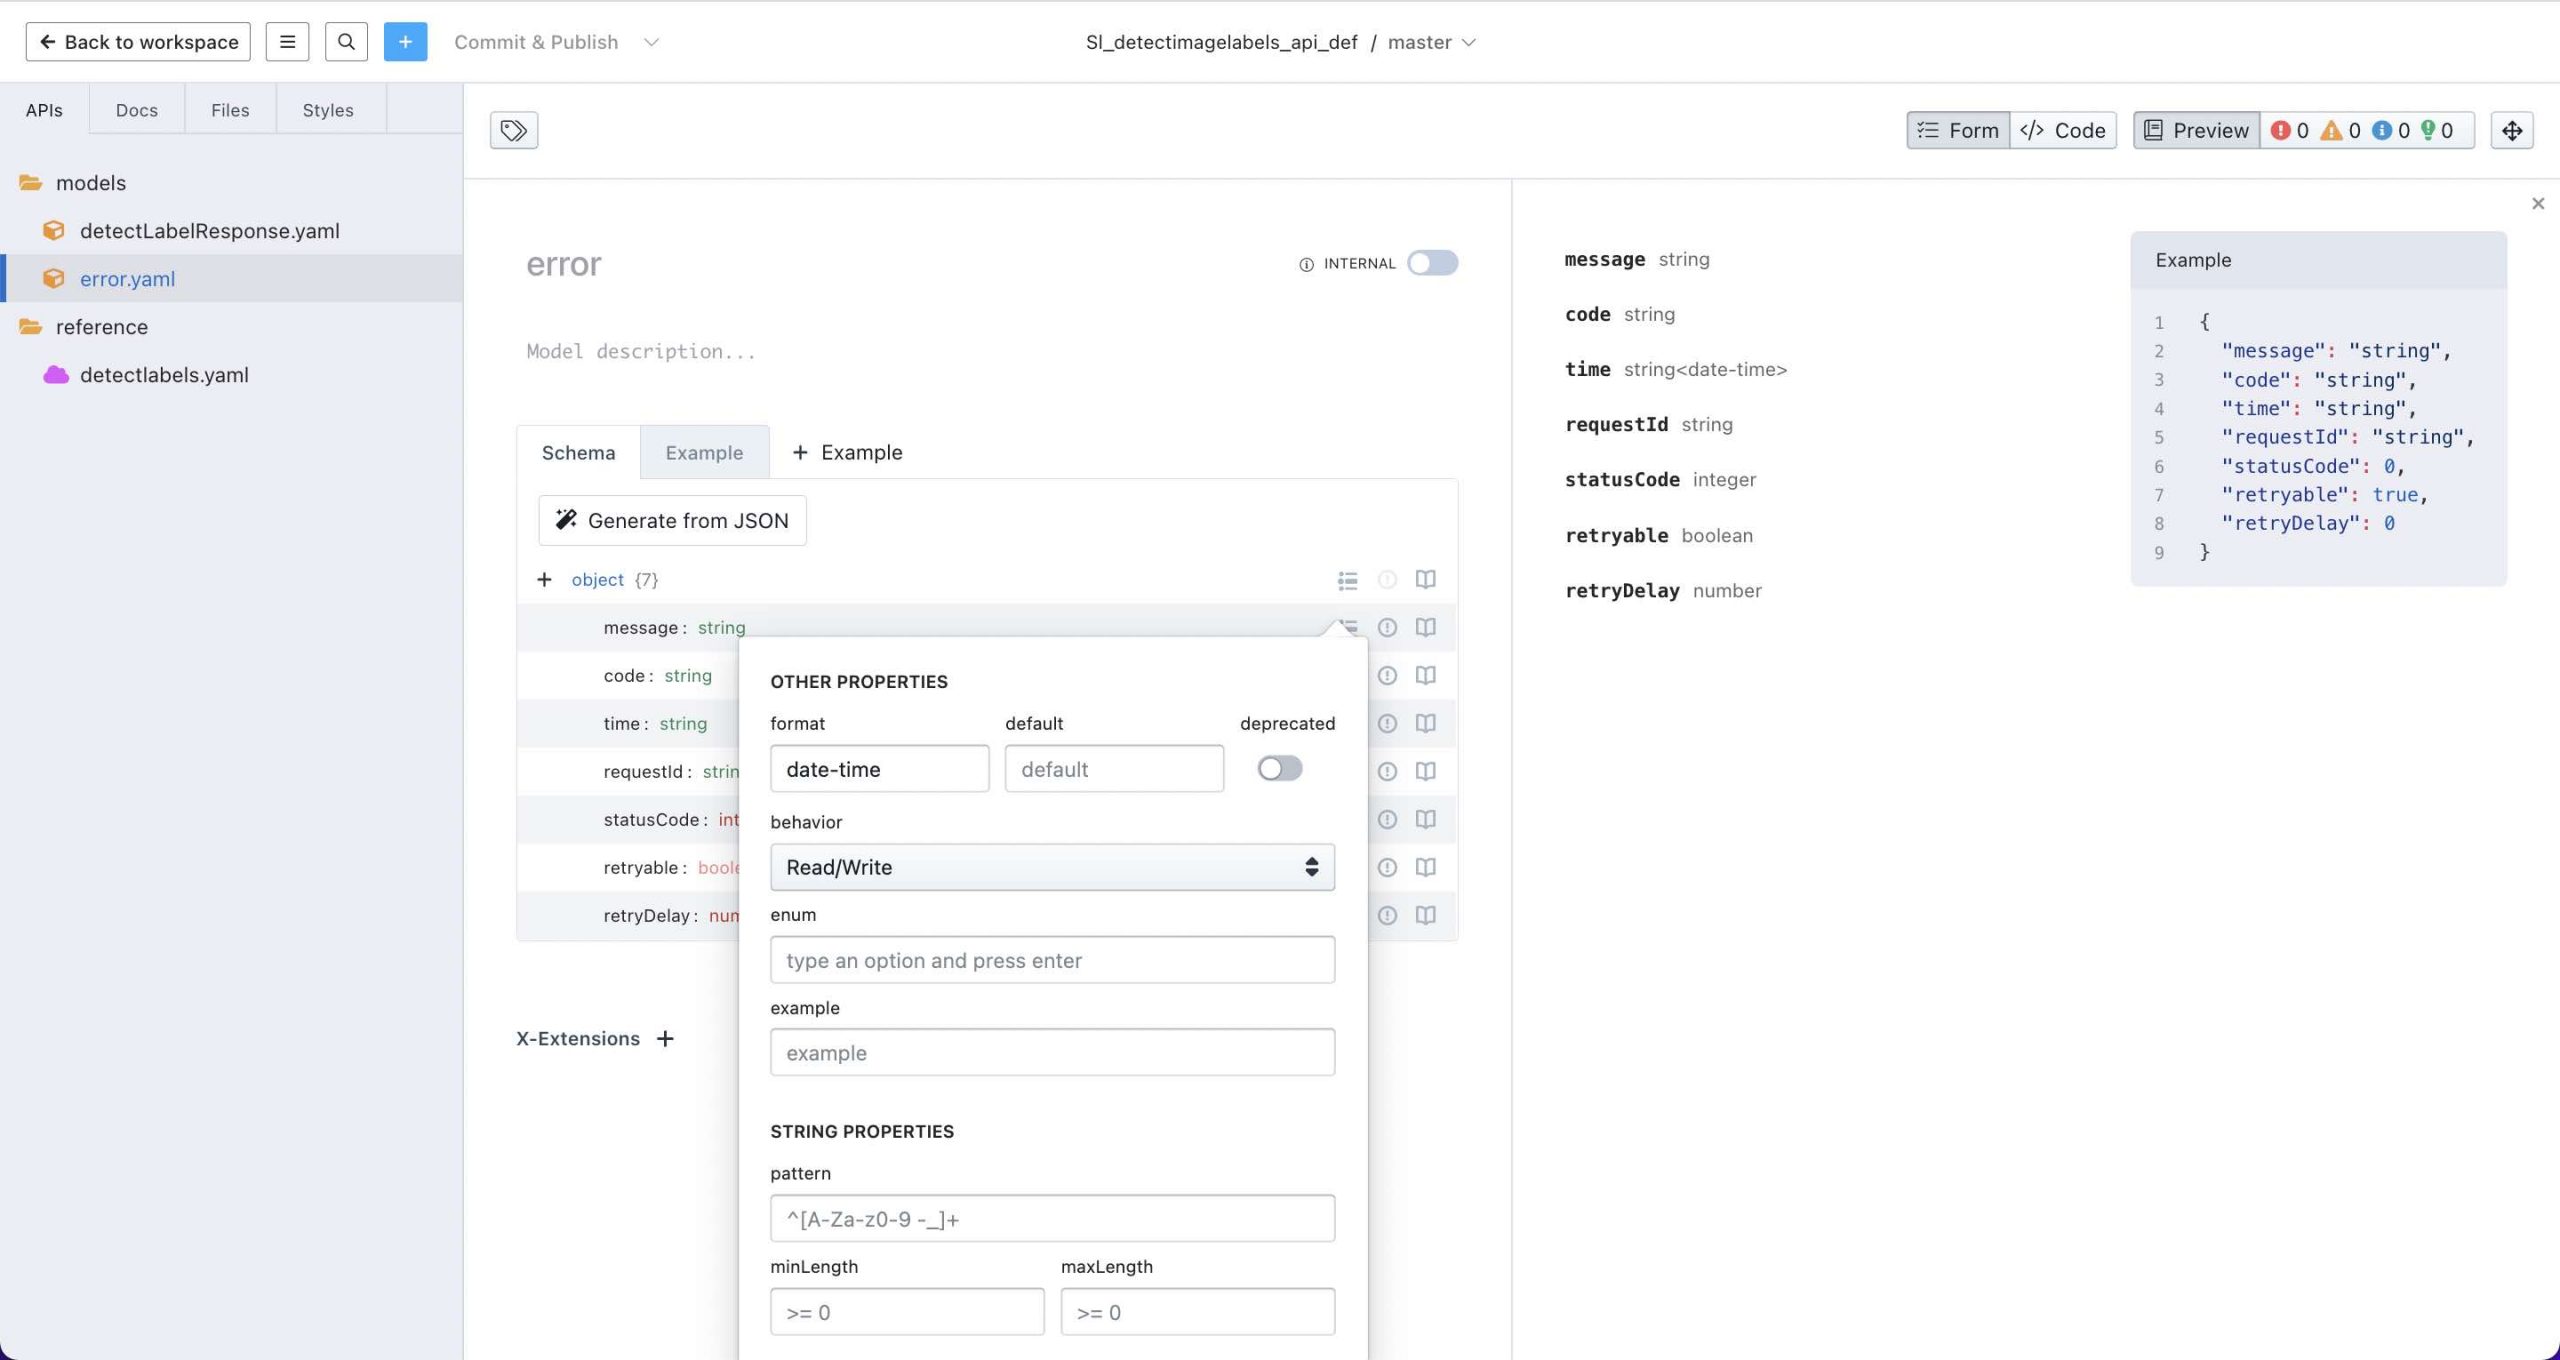
Note that the time property’s schema is set to date-time
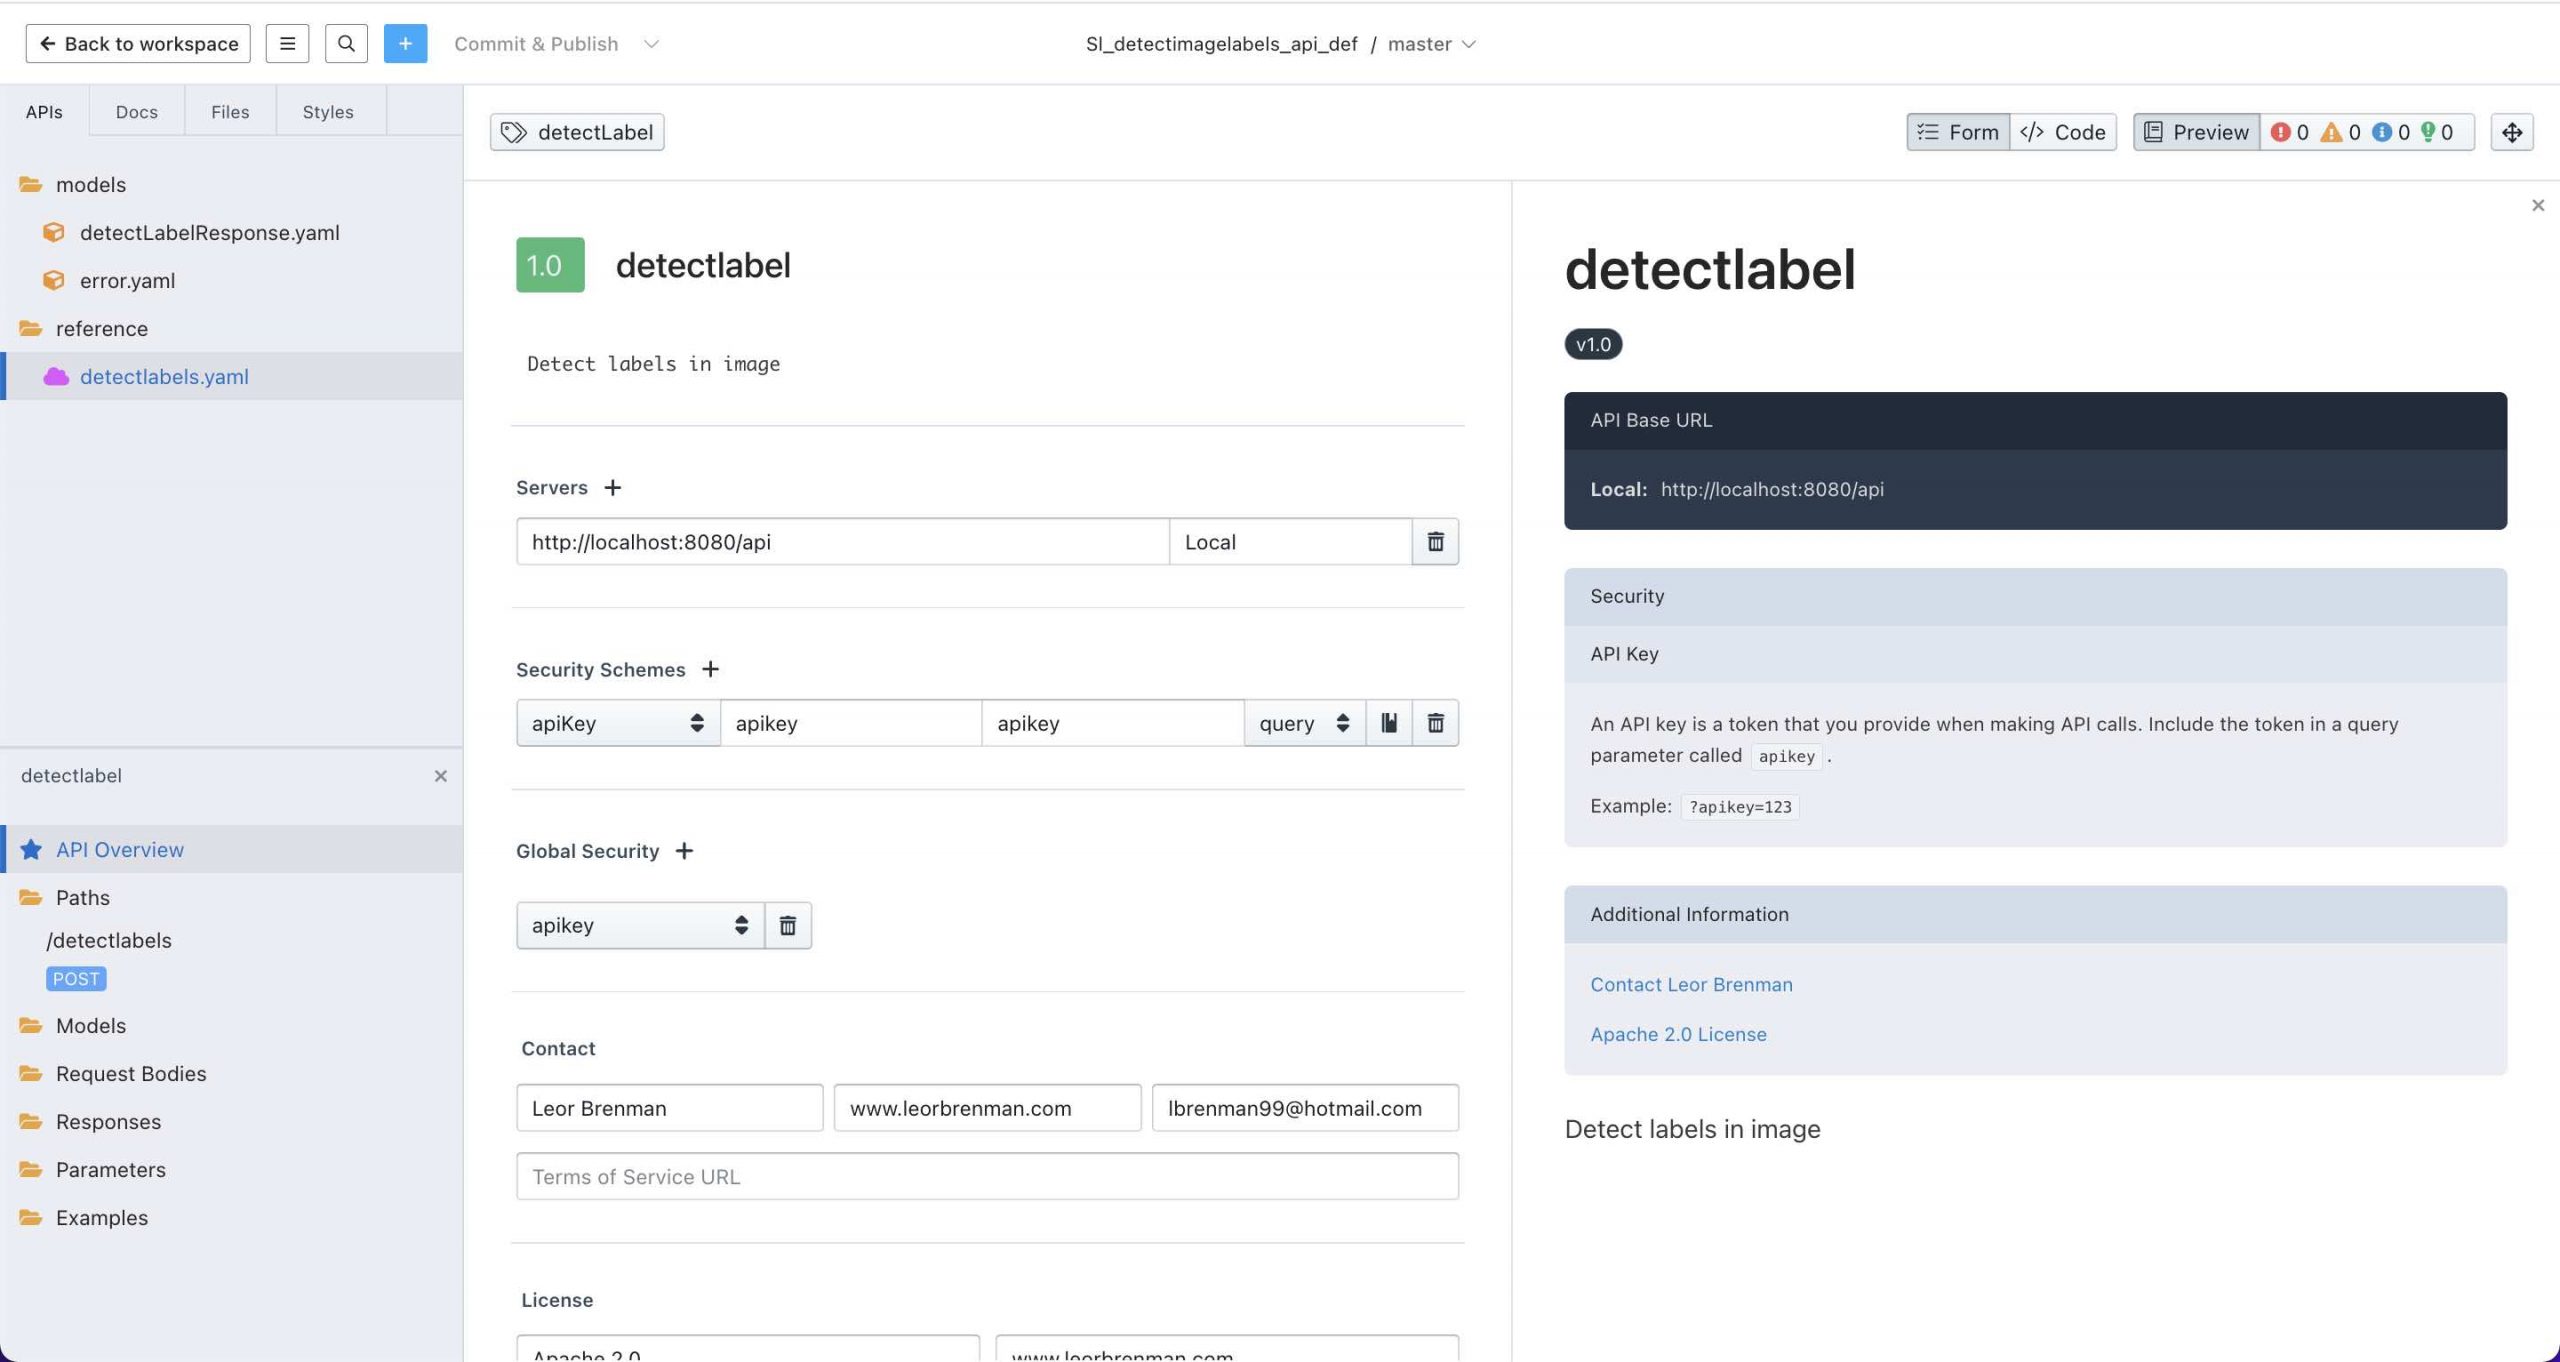
The API detectLabels is defined to have a /api in the base path as is required for API Builder API’s. Also, I specified an API Key called apikey for the API Builder API security.
Then we can design the method, POST /detectLabels with the body described in the introduction:
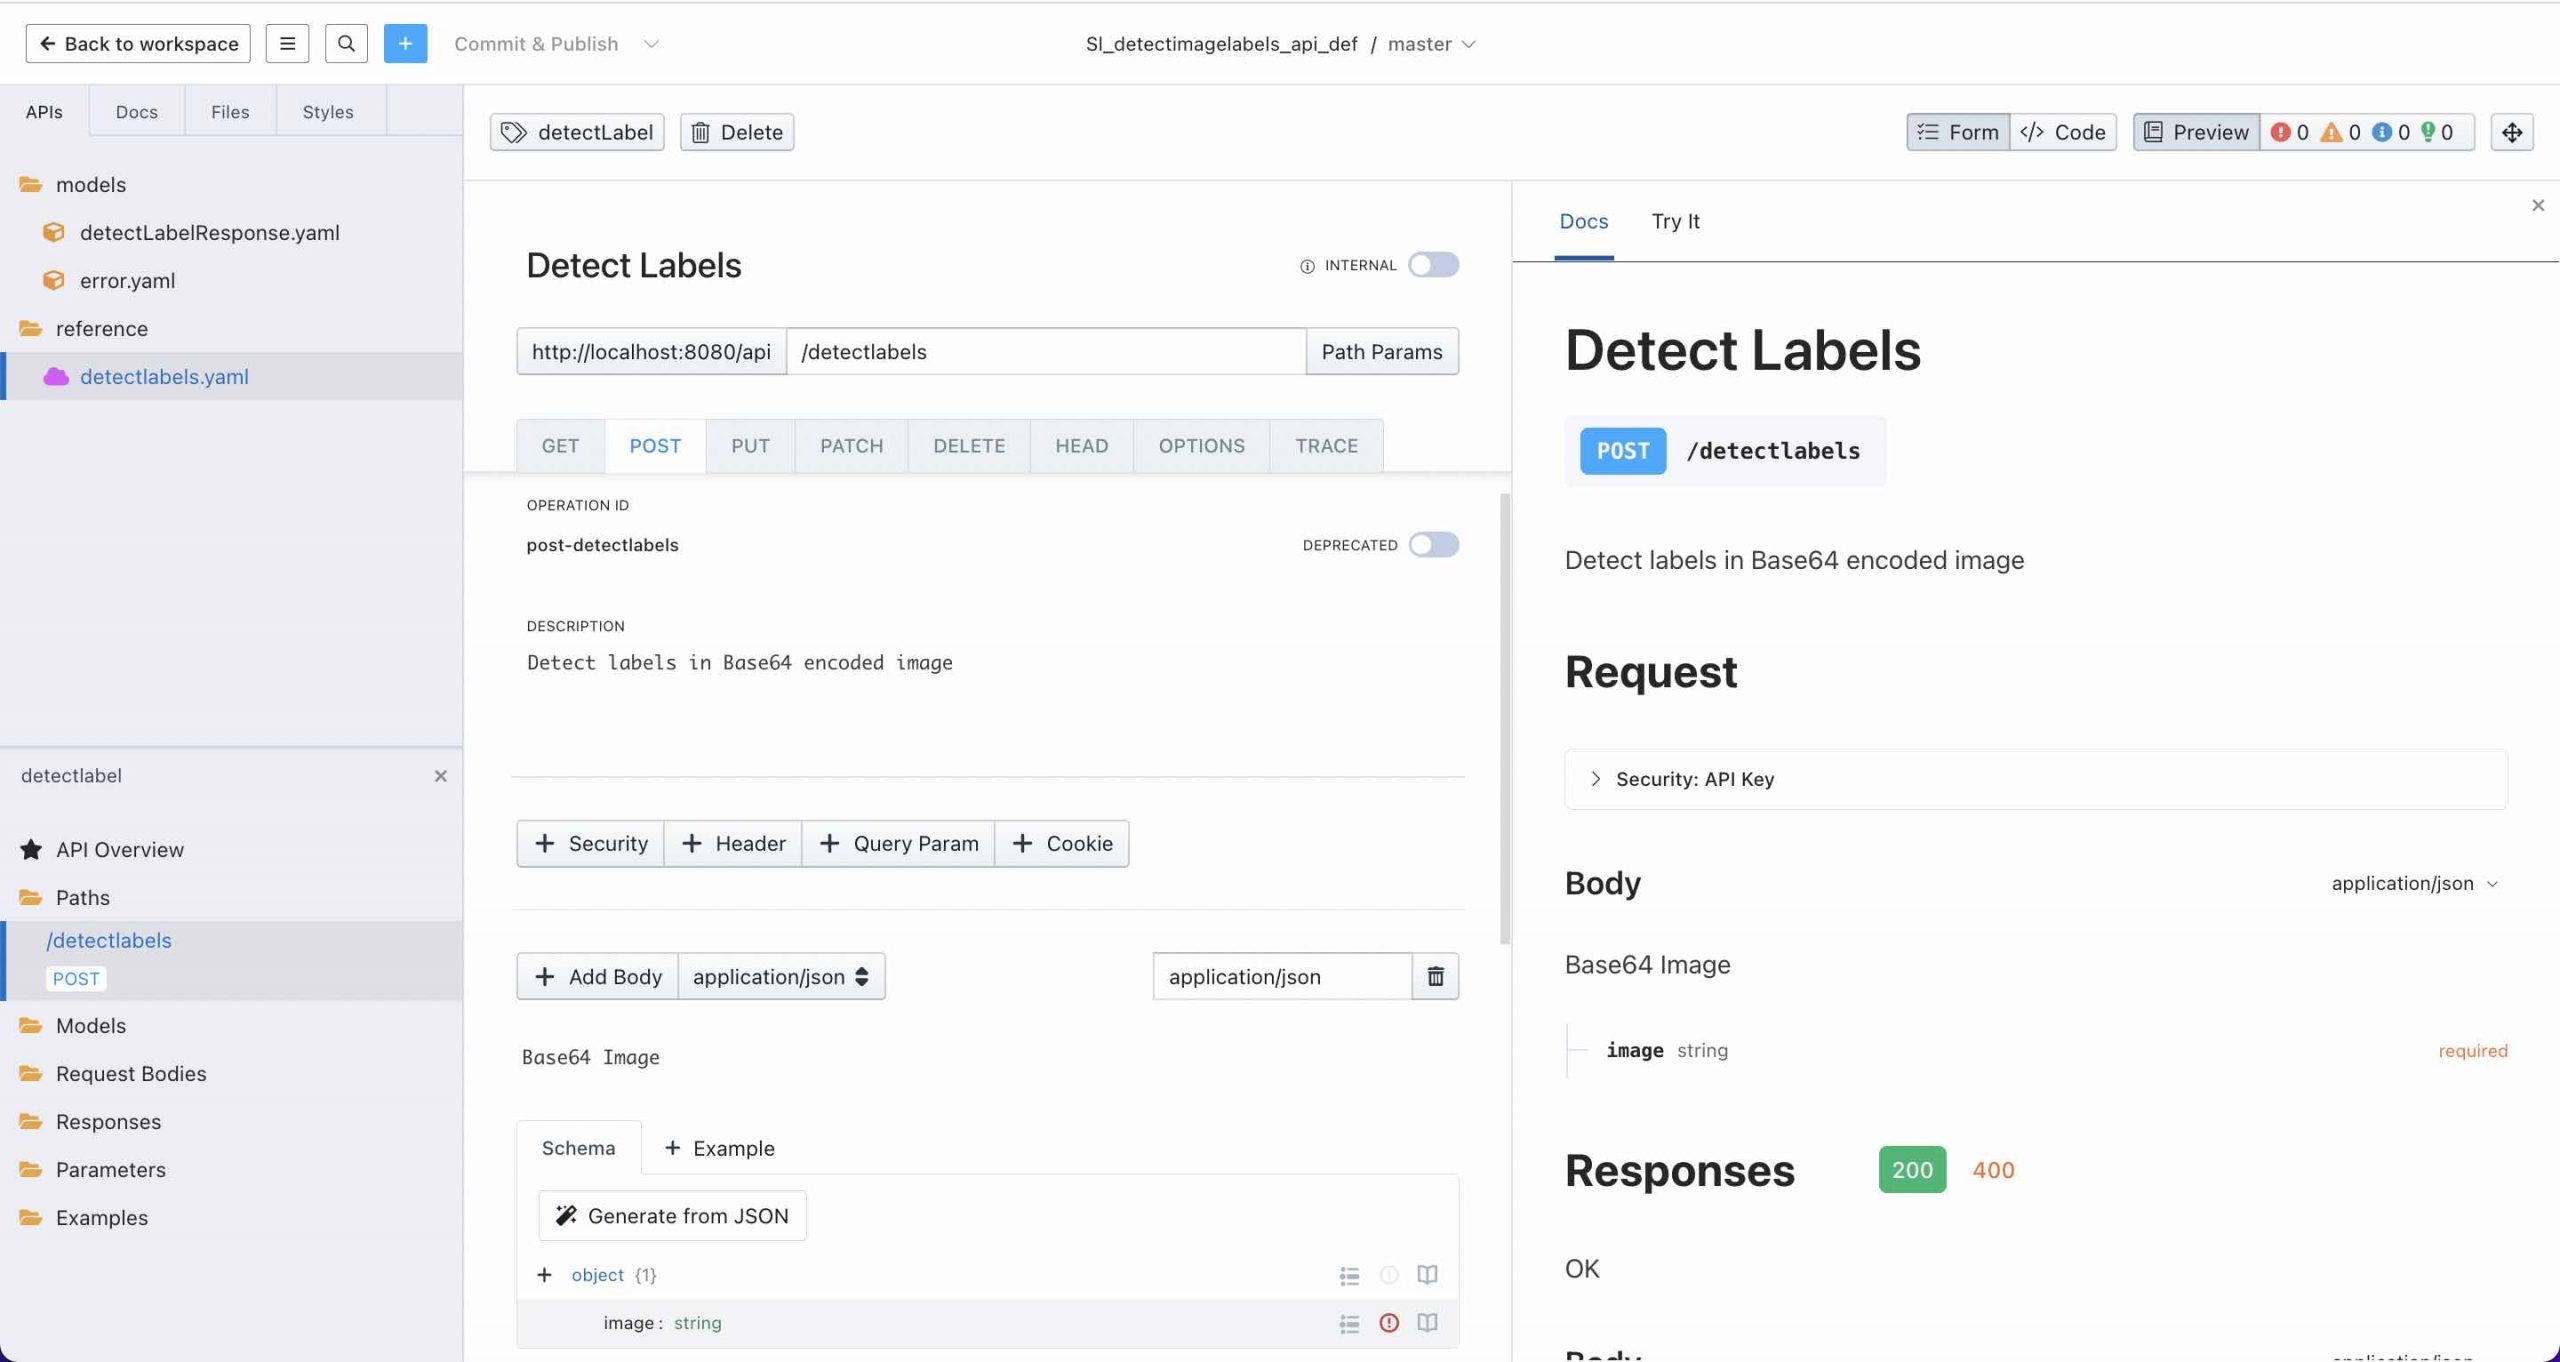
and reference the detectLabelResponse model for the 200 response of the method:
The 400 response will be an error object referencing the error model:
These responses are the raw response from AWS Rekognition API described here.
The Stoplight Github repo can be found here.
API Builder
The API Builder project was created as follows:
- I created a new APIB project, apib_detectlabels
- I changed to API Key authentication and environmentalized the API Key as API_KEY and added to the
/conf/.envfile - I installed the API Builder Plugin for AWS Rekognition for Image Analysis using:
npm i api-builder-plugin-rekognition
- I added the following two AWS SDK environment variables to the
/conf/.envfile:- AWS_ACCESS_KEY_ID
- AWS_SECRET_ACCESS_KEY
- I added the following to
/conf/default.jsin order to support larger images:
bodyParser: {
  limit: '5mb'
},- I imported the Open API 3.0 spec from the Stoplight Sl_detectimagelabels_api_def project
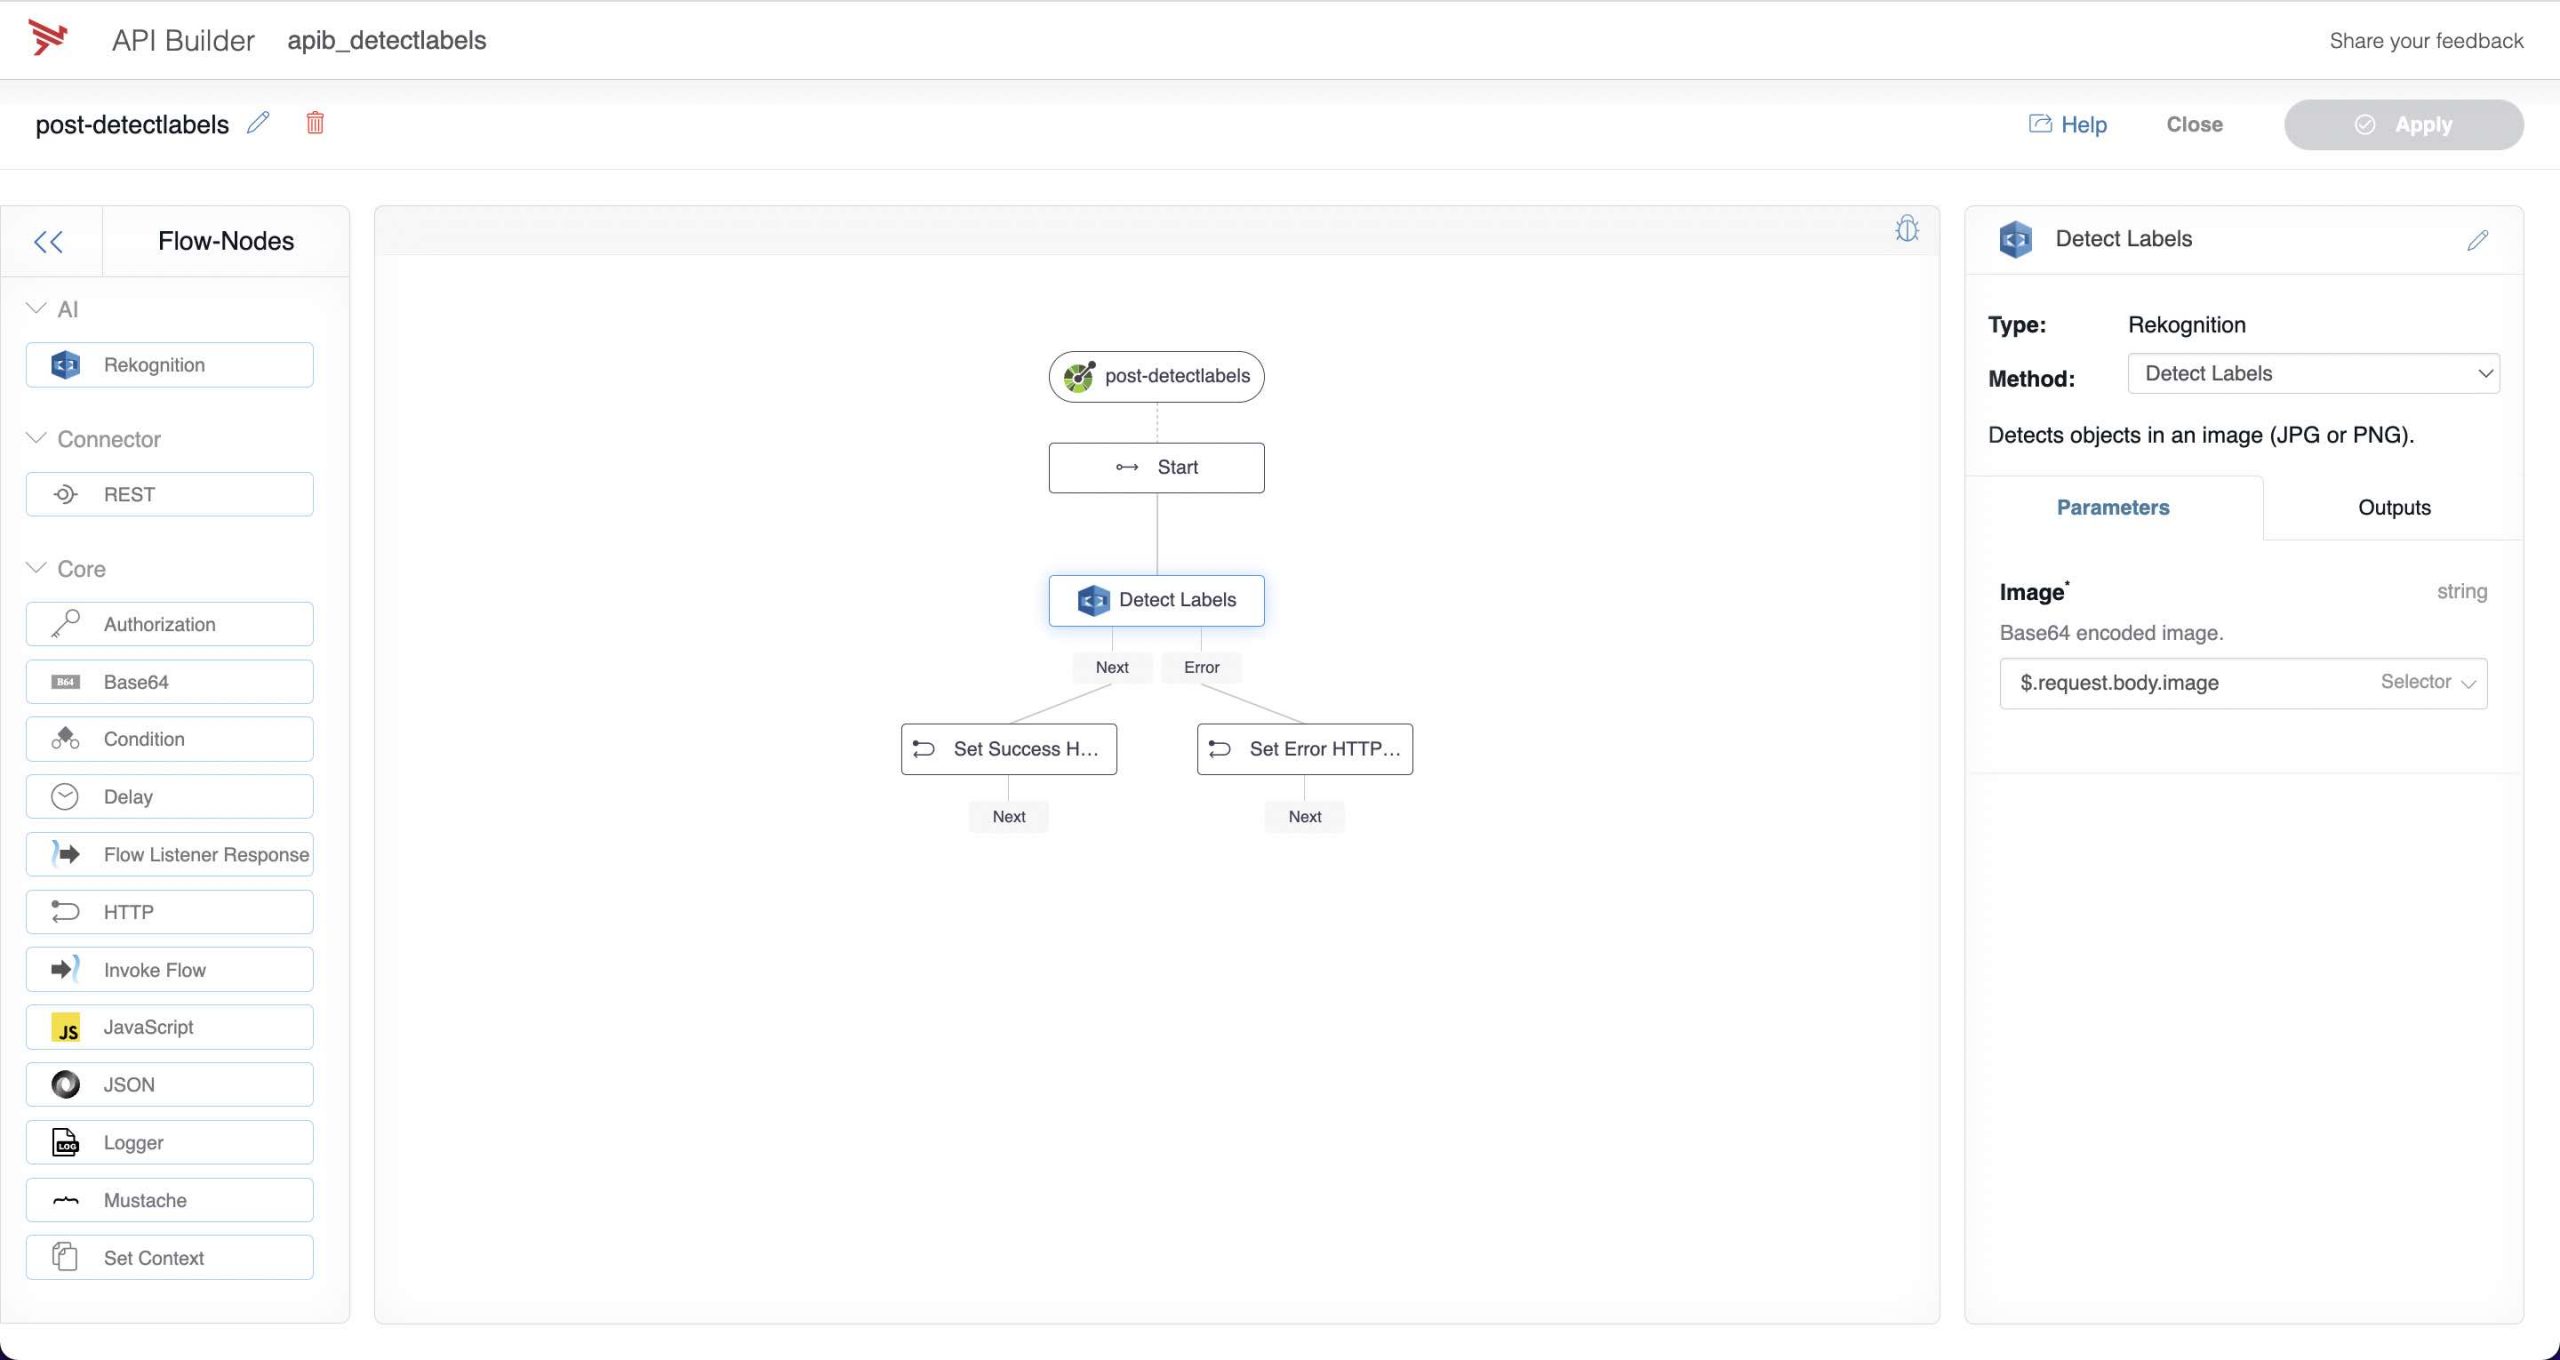
- I used the Rekognition flow-node Detect Labels method to detect the label of the supplied image.
- I connected Next and Error outputs to success and error HTTP responses
- The flow looks like this:
API Builder Flow - My `/conf/.env` file is shown below:
PORT=8080 LOG_LEVEL=debug API_KEY=<AN API KEY THAT YOU PROVIDE> AWS_ACCESS_KEY=<YOUR AWS ACCESS KEY> AWS_SECRET_ACCESS_KEY=<YOUR AWS SECRET> - The API can be called using curl as follows:
curl --location --request POST 'http://localhost:8080/api/detectlabels' --header 'accept: application/json' --header 'apikey: <THE API KEY THAT YOU PROVIDED>' --header 'Content-Type: application/json' --data-raw '{"image":"<YOUR BASE64 ENCODED IMAGE>"}'and the response should be similar to the one shown in the intro.
Now that my API is designed, created and tested, I can dockerize it using this guide and publish to my container (e.g. Kubernetes) environment.
The API Builder Github repo can be found here.
A docker container can be found here.
You can run the Docker Hub container image as follows:
docker run --name apib_detectlabels -e API_KEY=<AN API KEY THAT YOU CAN CREATE> -e AWS_ACCESS_KEY_ID=<YOUR AWS ACCESS KEY> -e AWS_SECRET_ACCESS_KEY=<YOUR AWS SECRET> -p 8080:8080 --rm lbrenman/apib_detectlabelsThen you can test it using the same curl command (and response) as above.
Summary
In this blog post, we saw how we can use API Builder and Stoplight to easily create a sentiment analysis API using API-First principles with little to no code.
Need help with API Builder? Extend your skills with Axway University.

