In this blog post, we’ll look at how to make an API call to a REST API service, the NASA APIs, using the HTTP/S Client Connection. You should always check to see if the REST API service has an Open API document or Swagger document associated with it. If so, you can use the Amplify Fusion OpenAPI Client Connection.
In this case, our REST API does not so we’ll use an Amplify Fusion HTTP/S Client Connection. This is similar to the Getting Started with Amplify Fusion – HTTPS Client Connection blog post, so refer to that as we will not replicate all of the instructions.
This blog post is the sixth in the “Getting Started with Amplify Fusion” blog post series and builds on the knowledge gained prior. As such not all steps will be explicitly called out since they are already covered in prior posts.
You can view the technical online documentation for Amplify Fusion here and you can register for a free Introduction to Amplify Fusion online course at Axway University here.
In order to follow this blog post, you will need access to Amplify Fusion.
Create An Integration
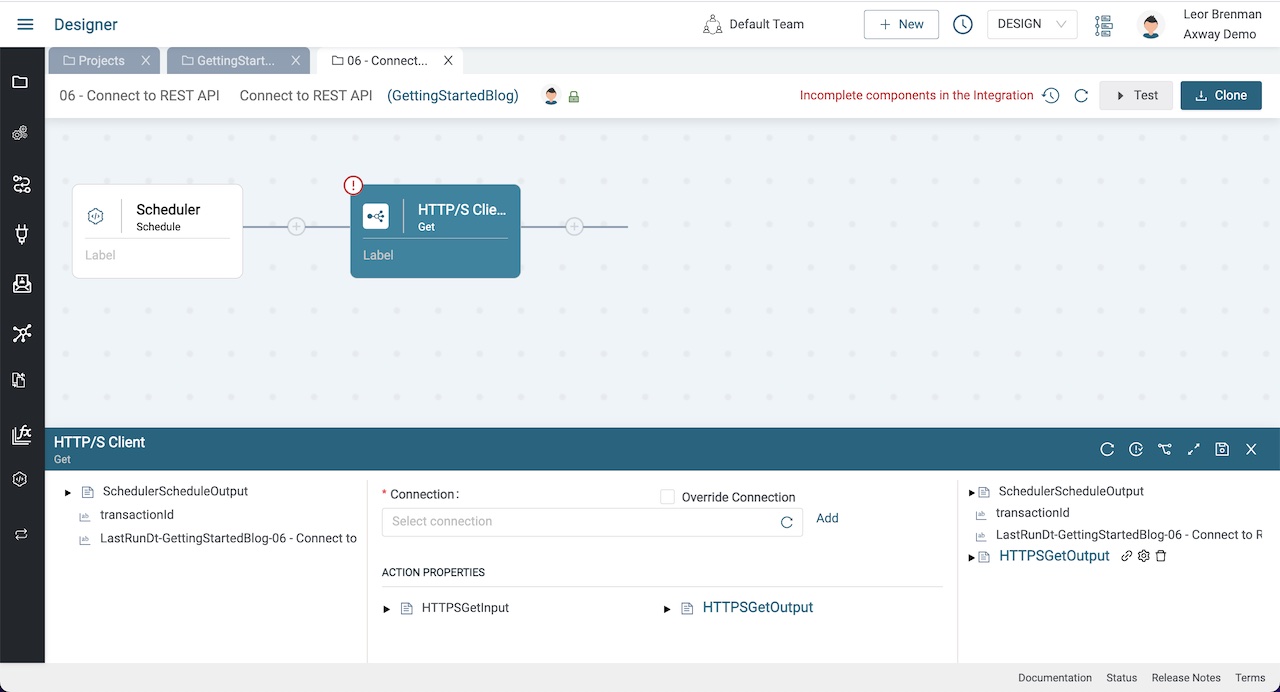
- Create an integration with a 60 second Scheduler event trigger and add an HTTP/S Get Client component
- Expand the bottom panel and click Add next to Connection to add a new HTTP/S Client Connection
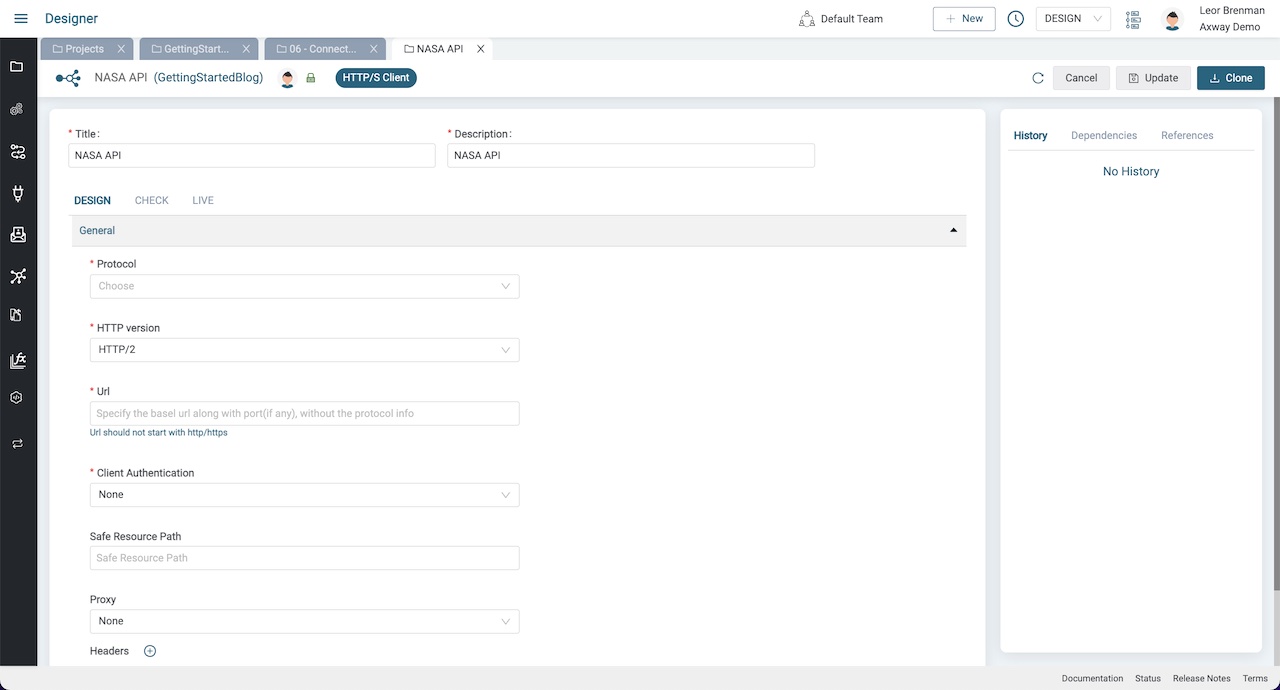
- Give the Connection a name and description (e.g. NASA API)
Head on over to the NASA API at https://api.nasa.gov and review the documentation and get an API Key.
Click on Browse APIs and look at the APOD (Astronomy Picture of the Day) API.
The URL for the API call is https://api.nasa.gov/planetary/apod.
Review the query parameters that can be sent. Note that the API Key is sent as a query parameter. This is not uncommon but also not best practice.
A sample query is https://api.nasa.gov/planetary/apod?api_key=DEMO_KEY.
Now we have the info we need to setup the HTTP/S Client Connection and use it in an HTTP/S Client Get component to call the API.
Configure the Connection
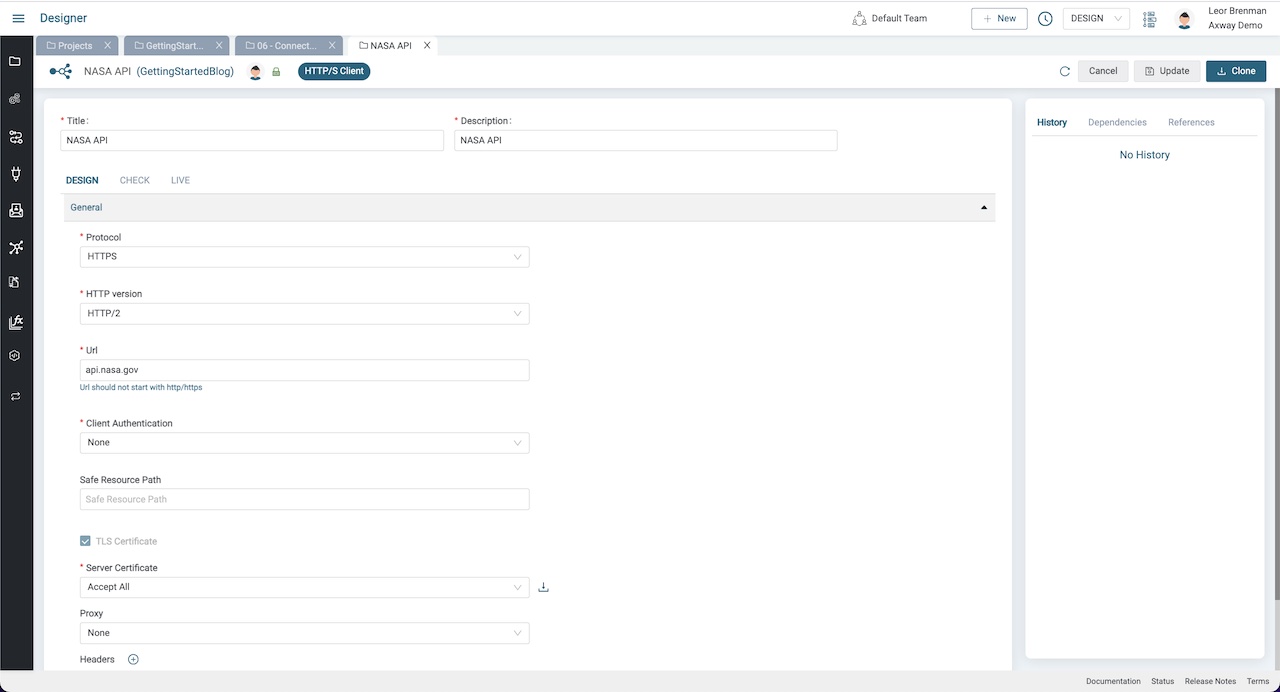
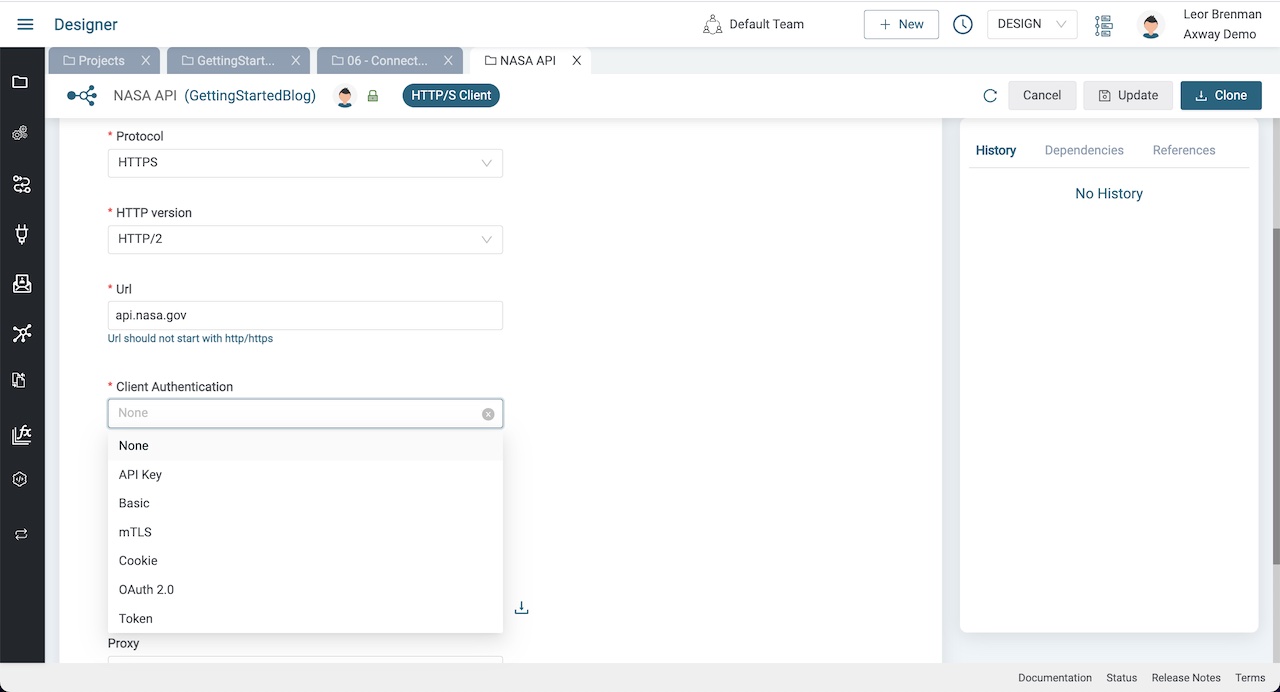
- Set Protocol to
HTTPS Set HTTP version toHTTP/2Enterapi.nasa.govfor Url- Leave Client Authentication as
None Set Server Certificate toAccept AllClick Update and Test
Configure the HTTP/S Client Get Component
Return to the integration and click on the HTTP/S Client Get Component and expand the bottom panel
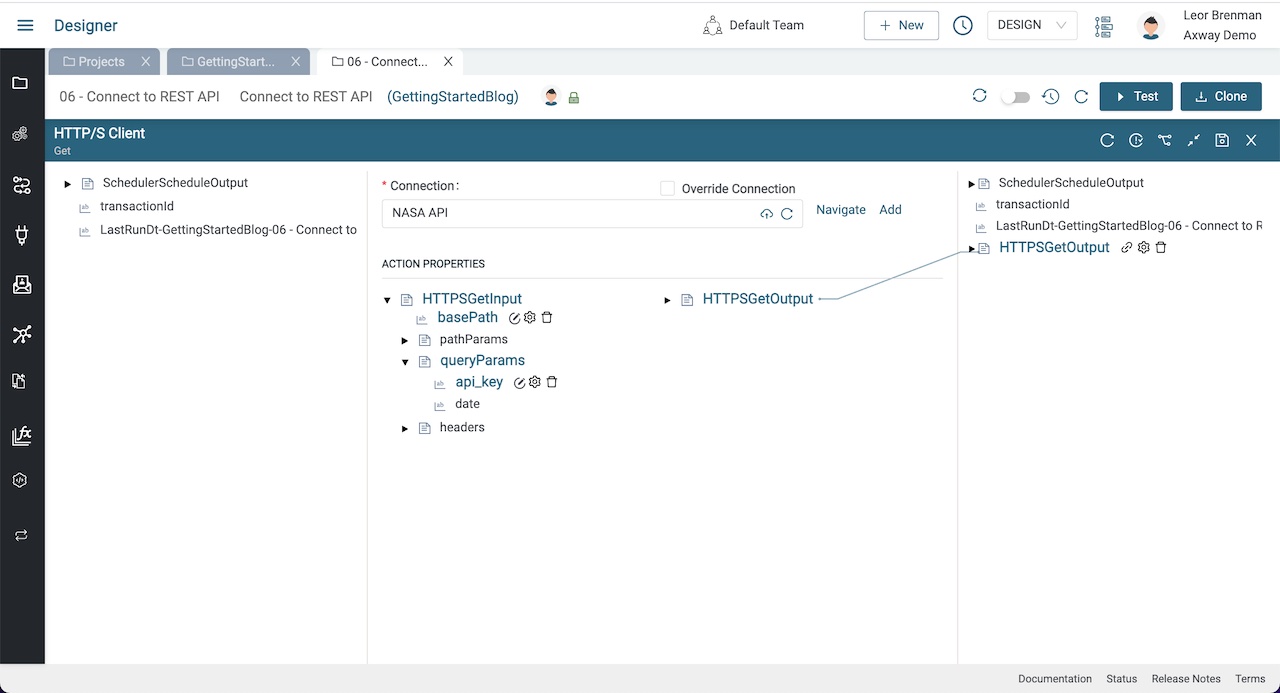
- Refresh the Connection picker and select the NASA API HTTP/S Client Connection we just created above
- Expand the HTTPSGetInput Action Properties and set the basePath to
/planetary/apod Right click on queryParams and select Add Variable -> String -> Inside and name the variableapi_keySet the value of theapi_keyquery parameter to your NASA API Key- Repeat to add a a query parameter called
date. You can leavedateempty for now since the default value is today (as per the API Docs) - Click Save
Test The Integration
Click the Test button to test your integration. Click on the HTTP/S Client Get step of the transaction in the Monitor tab that automatically opened when you clicked test to view the results of our API call.
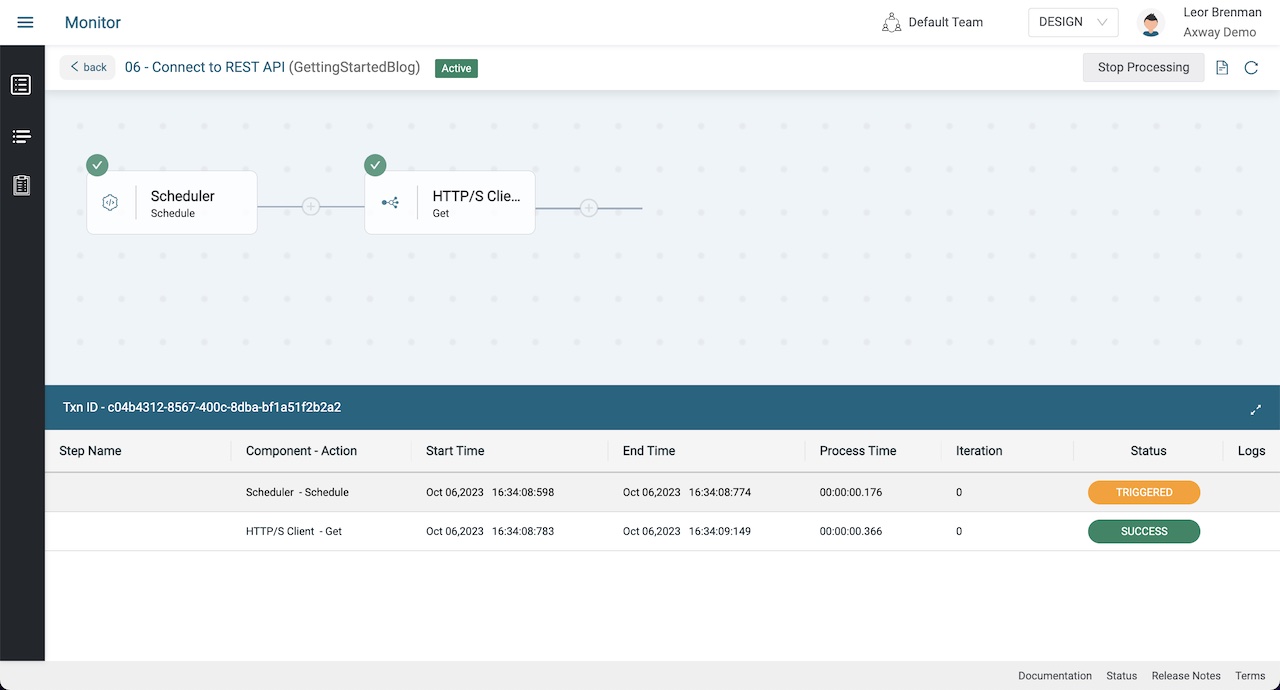
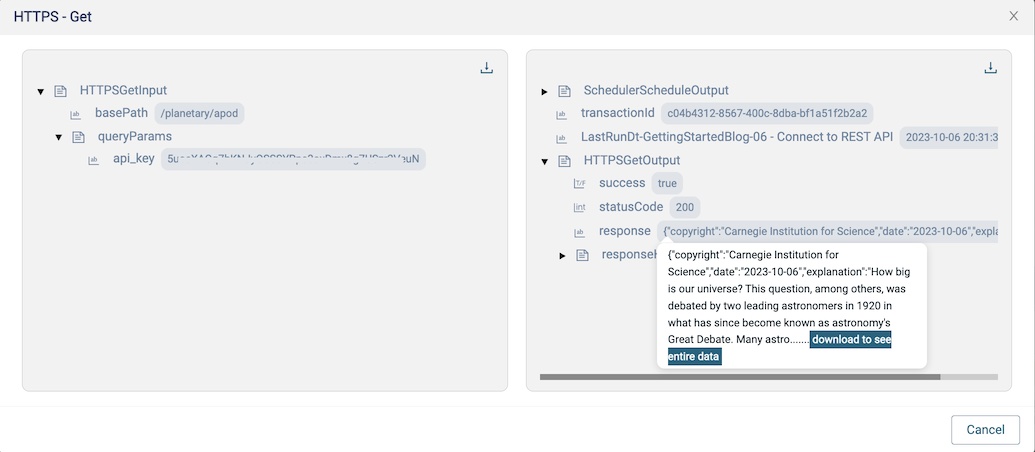
You can set the value of the date query parameter to any past date using the format YYYY-MM-DD and test again to see a different response.
Parse the Response
If we use this API in an integration we will need to parse the response. We covered JSON parsing in the Getting Started with Amplify Fusion – Parse JSON Data blog post. Review that blog post if you have not read it.
A sample response from the NASA APOD API is shown below.
{
  "copyright": "Carnegie Institution for Science",
  "date": "2023-10-06",
  "explanation": "How big is our universe? This question, among others, was debated by two ... gazed knowingly, for the first time, into a surprisingly vast cosmos.",
  "hdurl": "https://apod.nasa.gov/apod/image/2004/HubbleVarOrig_Carnegie_2880.jpg",
  "media_type": "image",
  "service_version": "v1",
  "title": "Edwin Hubble Discovers the Universe",
  "url": "https://apod.nasa.gov/apod/image/2004/HubbleVarOrig_Carnegie_960.jpg"
}
Let’s parse our response as follows:
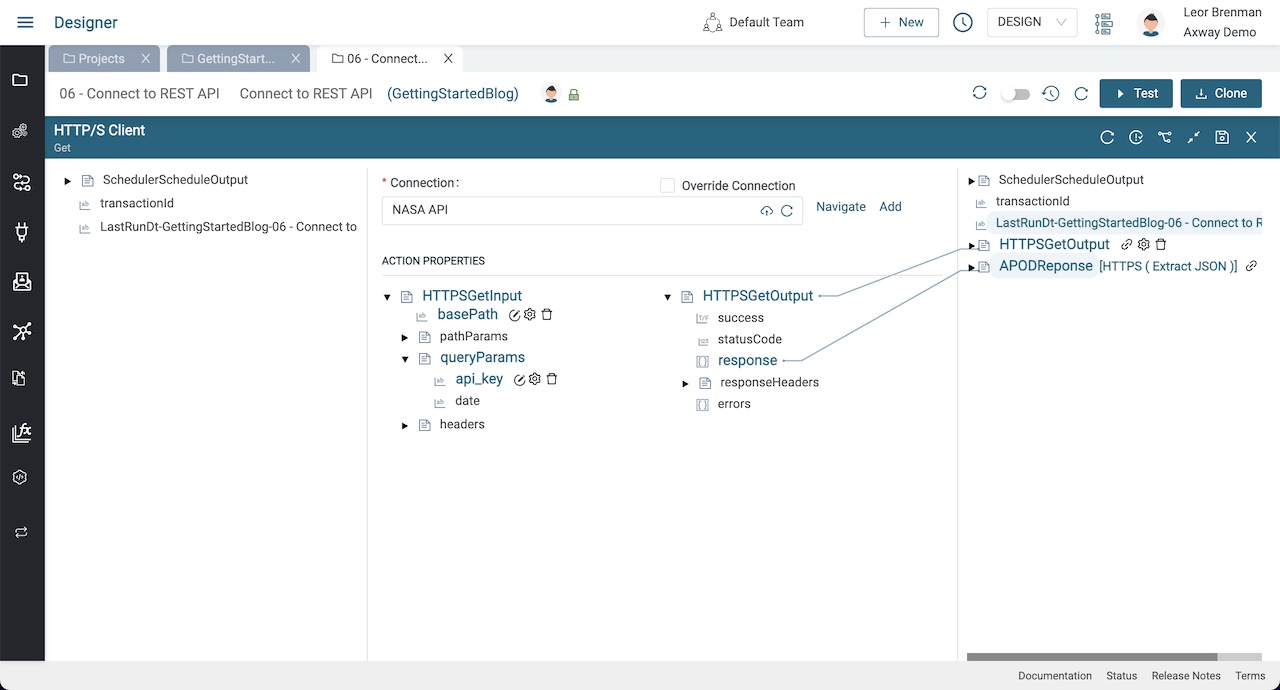
- Expand the bottom panel of the HTTP/S Client Get component
- Add an Extract variable using the JSON sample above and name it
APODReponse - Drag a line from Action Property
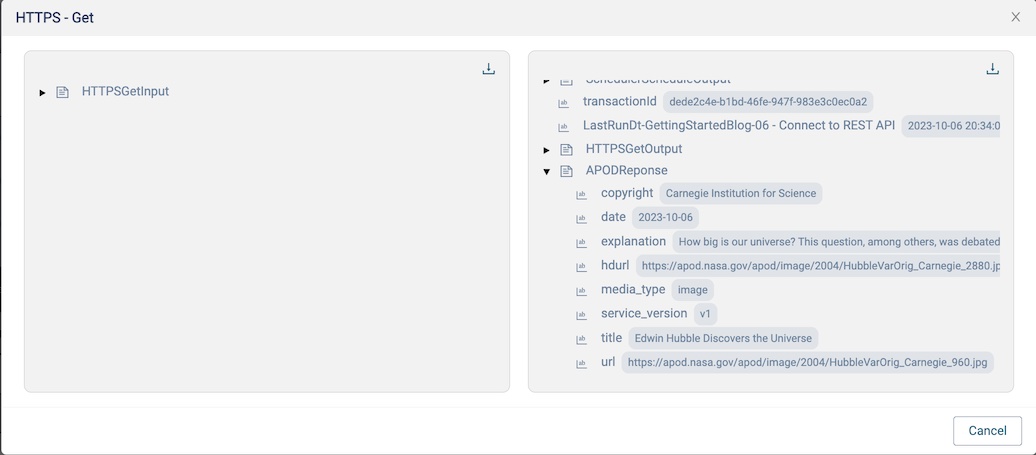
HTTPSGetOutput/responseto theAPODReponseextract variable - Click Save and test your integration and click on the HTTP/S Client Get step in the transaction to see the
APODReponsevariable contents
Closing Thoughts
As mentioned above, most modern REST APIs will have a more standard authentication and perhaps require certain headers be sent on all calls. The Amplify Fusion HTTP/S Client Connection supports most modern authentication schemes as shown below:
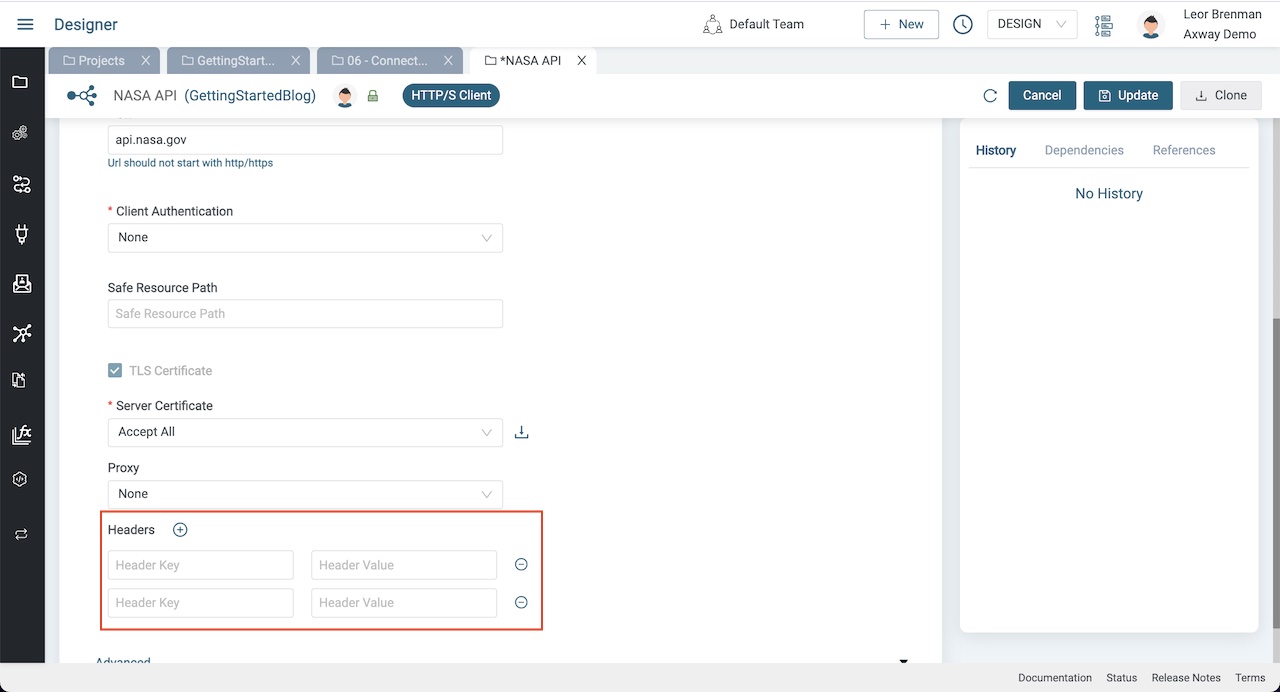
The Headers section enables you to add headers that are sent on all calls.
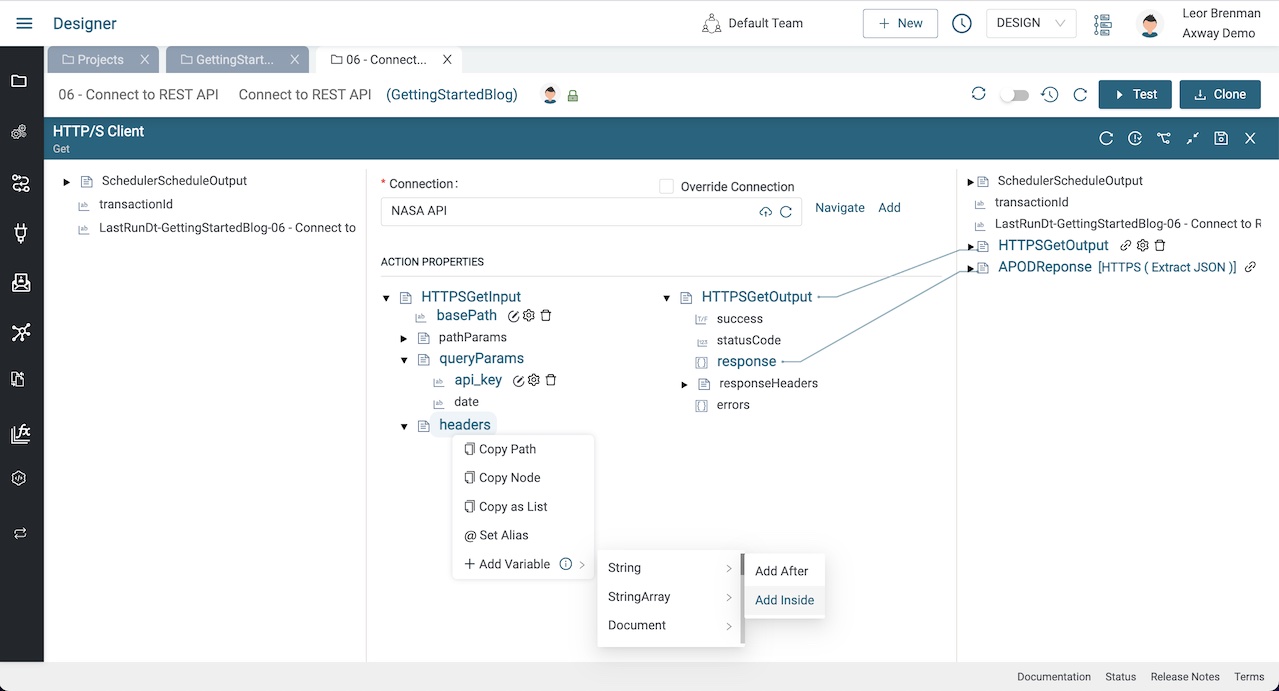
Of course, you can always add headers at the component level as well.
Summary
In this blog post we created an HTTP/S Client Connection to the NASA REST API and used the connection in an integration. We also JSON parsed the response so the response elements can be used later in the integration.
In future blog posts, we’ll build on our knowledge and explore more of the features of Amplify Fusion to create no code integrations.
Turn integration friction into orchestrated control with Amplify Fusion.

