

In this blog post, we’ll look at how to make an HTTPS call in an integration. We will configure an HTTP/S Client Connector and use it in an integration to make some HTTPS calls. This blog post is the second in the “Getting Started with Amplify Fusion” blog post series and builds on the knowledge gained prior. As such not all steps will be explicitly called out since they are already covered in prior posts.
You can view the technical on-line documentation for Amplify Fusion here and you can register for a free Introduction to Amplify Fusion on-line course at Axway University here.
You can read more about Amplify Fusion connectors including a list of currently available connectors here.
In order to follow this blog post, you will need access to Amplify Fusion.
We will also use webhook.site which provides a free, unique, random URL for testing and debugging Webhooks and HTTP requests. Make sure that you visit webhook.site and can make calls to your URL using Postman or a similar tool.
Add an HTTP/S Client Component to an Integration
As in the prior Hello World blog post, create an integration with a Scheduler trigger set to 60 seconds but this time add an HTTP/S Client Get component to the canvas instead of a Log component.
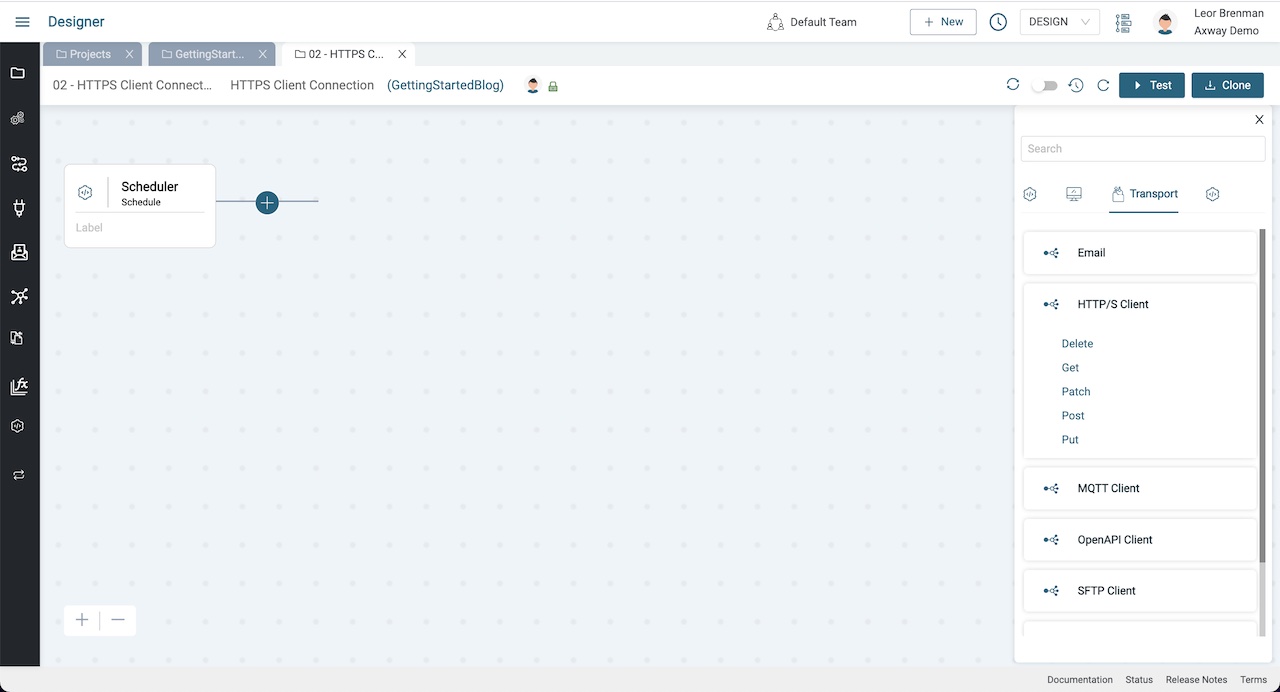
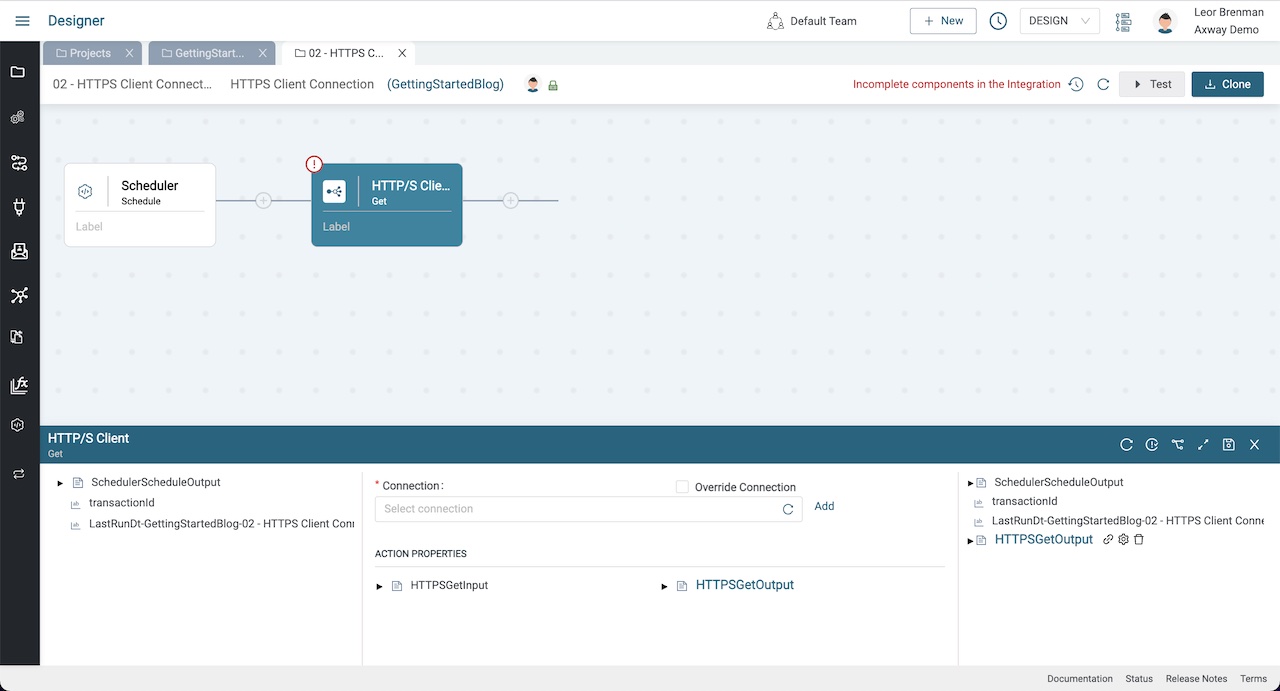
You can see that a Connection is a required property and we currently have none configured, so we will need to do that.
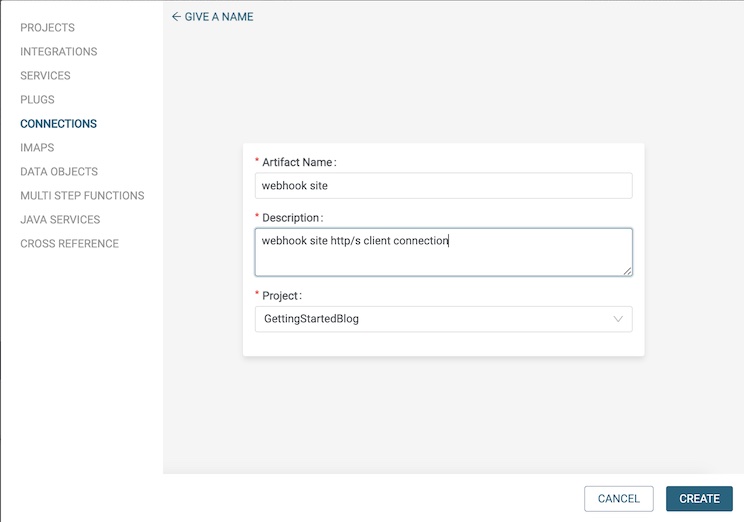
Click on the Add button to the right of the Connection picker, provide a name and description and click CREATE.

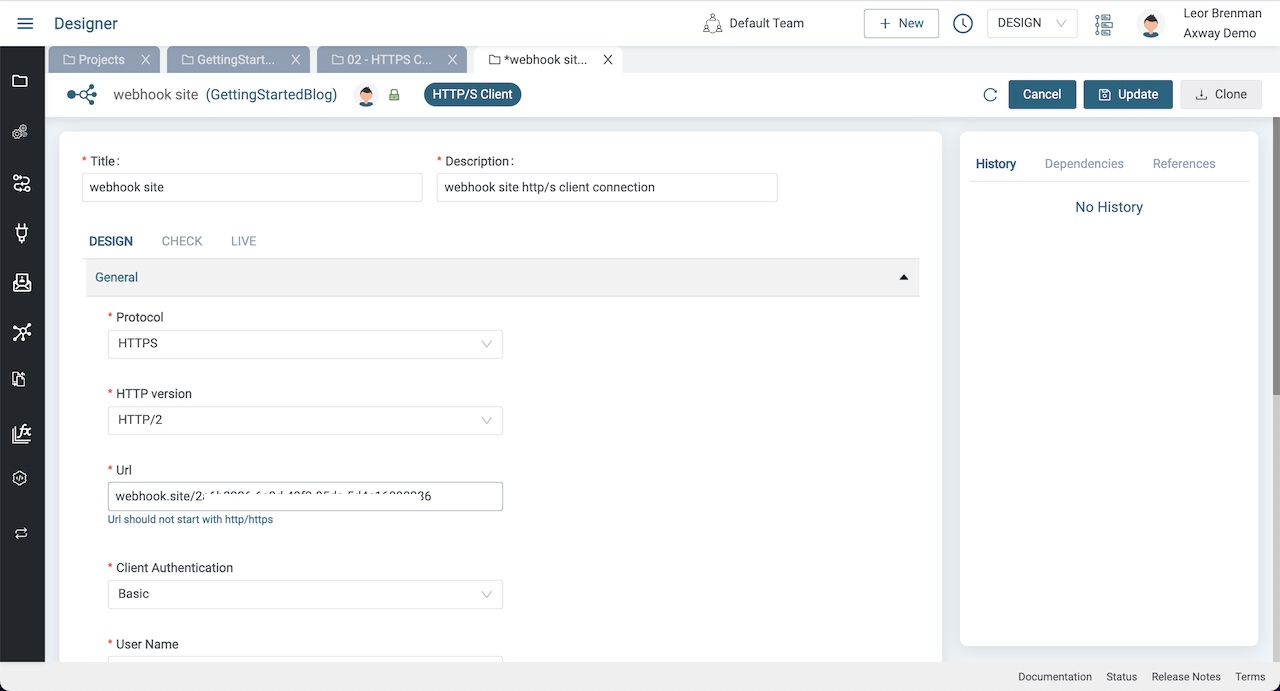
Configure the HTTP/S Client Connection
Let’s configure our Connection for Webhook Site as follows:
- Select
HTTPSfor the Protocol - Select
HTTP/2for the HTTP Version - Set the Url to your Webhook site URL (e.g.
webhook.site/vvvvvvv-wwww-xxxx-yyyy-zzzzzzzz). Note that thehttps://is not included as part of the Url - Set Client Authentication to
Basicand set username toabcdand password to1234 - Leave Safe Resource Path empty
- Select
Accept Allfor Server Certificate - Leave Proxy as
None - Add a custom header that will be sent on all components that use this connection. Set Header Key to
x-myheaderand Header Value to12345678
Click Update and then Click the Test button and you should see a green check mark.
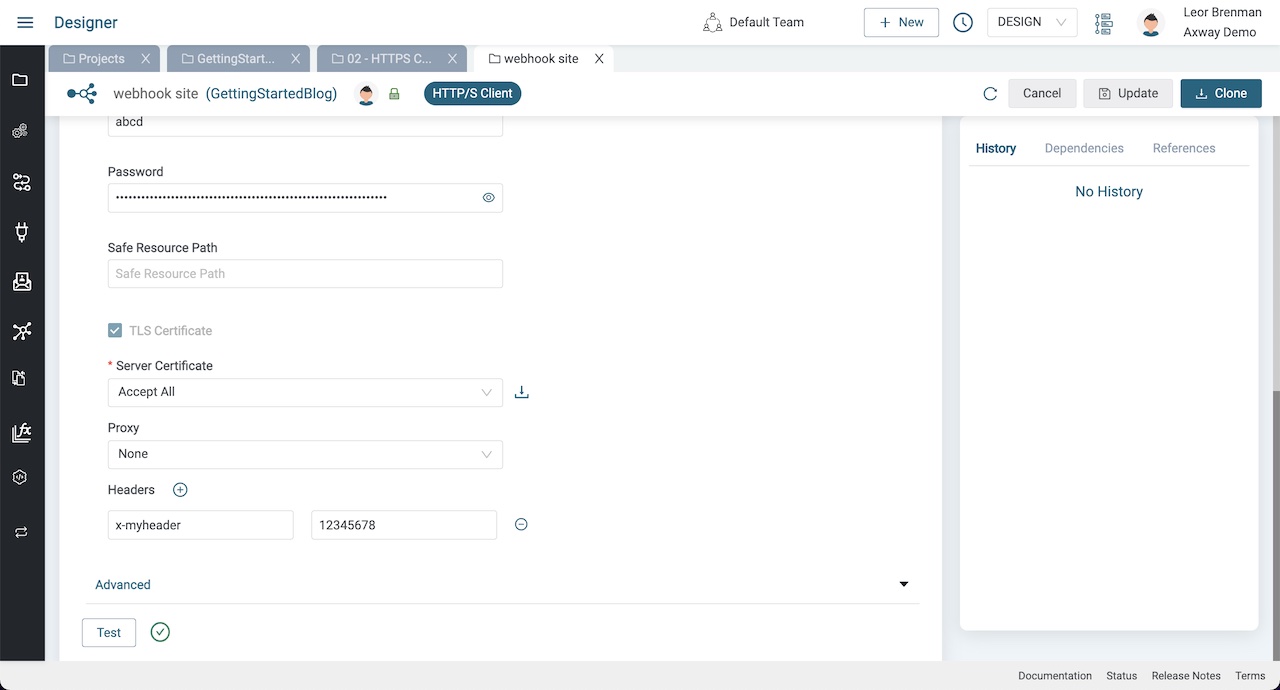
Note that the Password is obfuscated in the UI. Other team members will be able to use your connection and see your username but they will not know your password.
Check your Webhook Site URL and see the call that was made when you clicked the Test button.

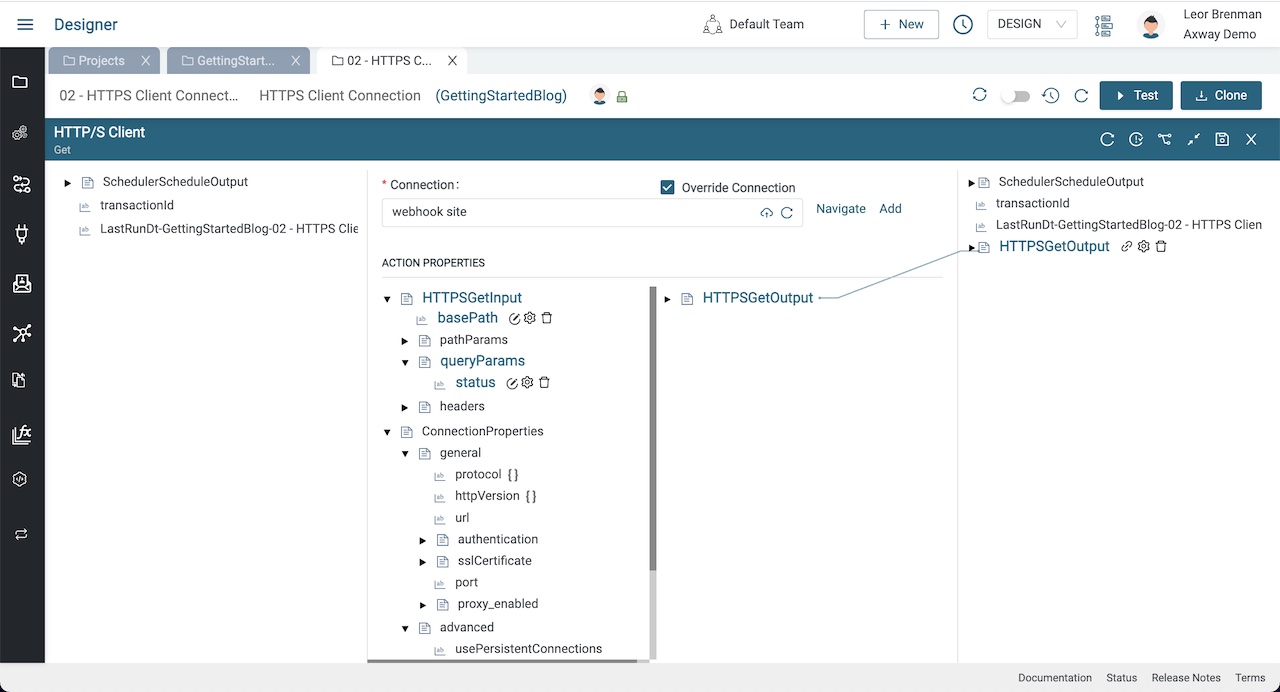
Configure the HTTP/S Client Get Component
Let’s use the connection to make a call to our webhook site url at a base path and let’s pass a query parameter, status.
Go back to the integration and click the HTTP/S Client Get component, expand the bottom panel and click the refresh button in the Connection picker so that our newly created HTTP/S Client Connection can be found and select it.
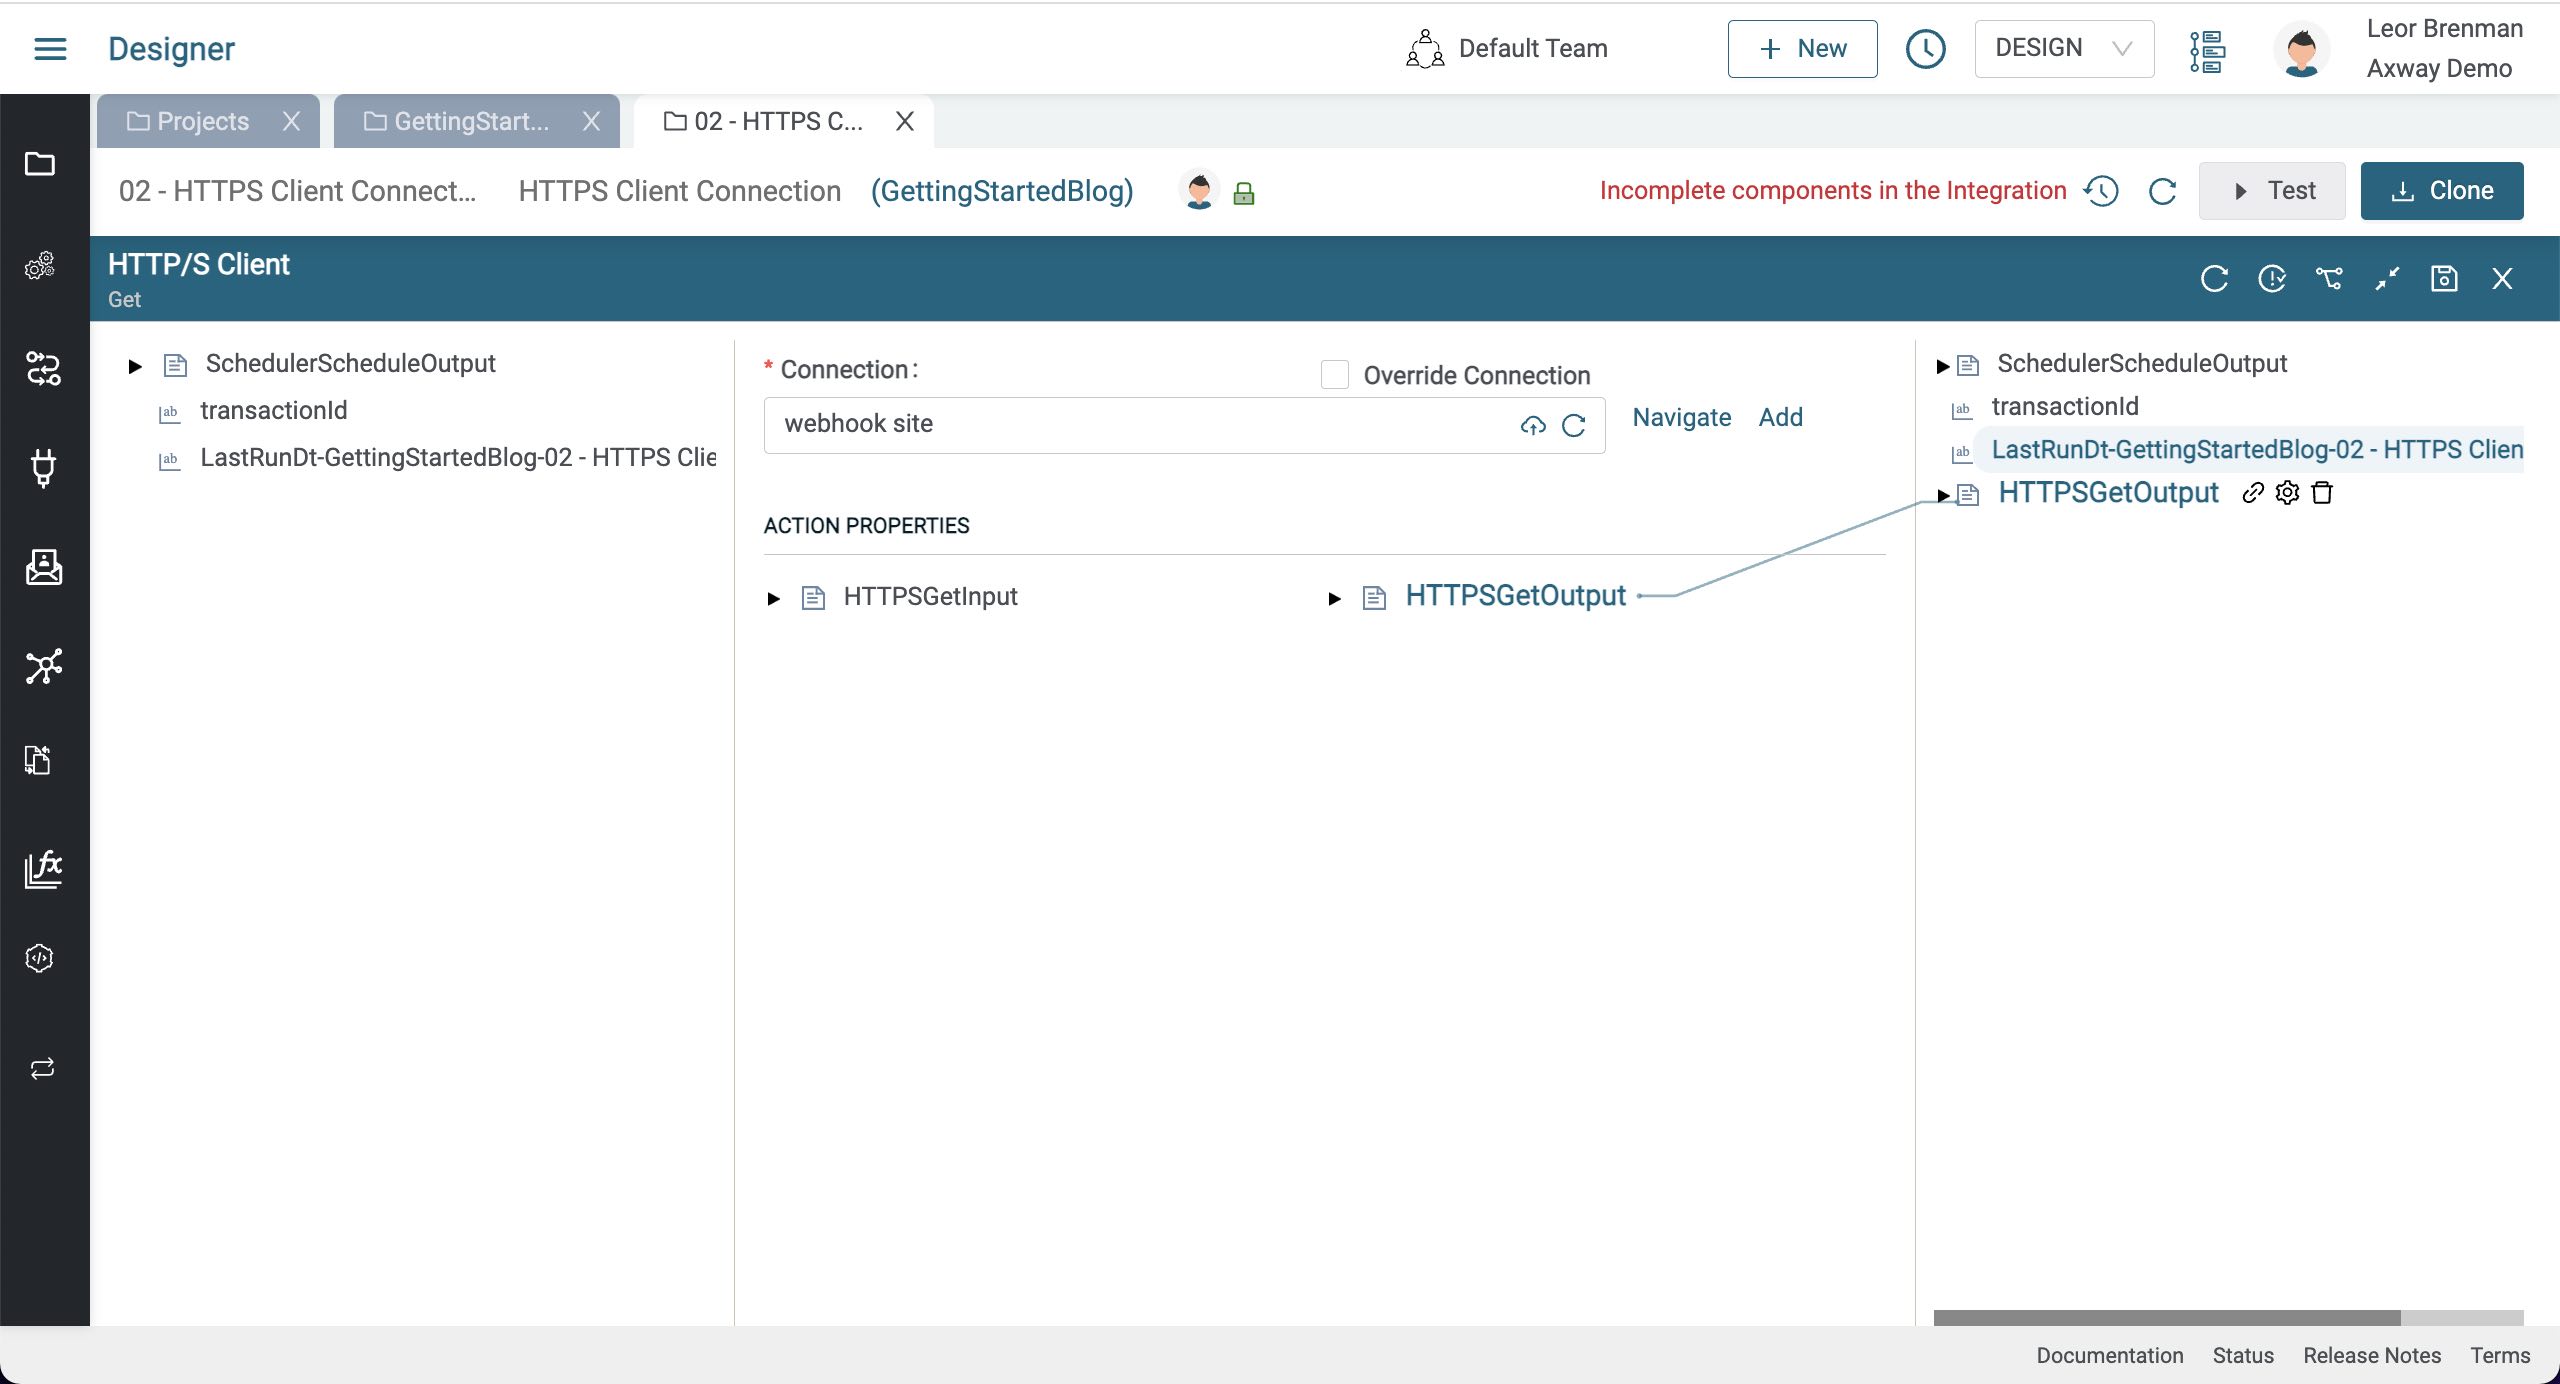
Expand HTTPSGetInput Action Property so we can set the base path and query parameters properties.
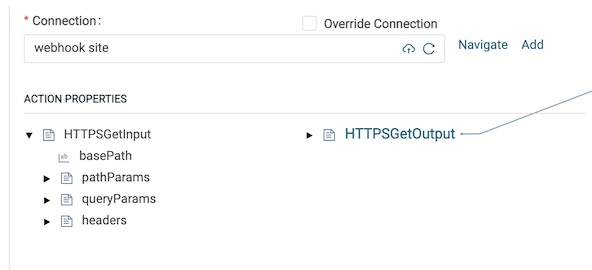
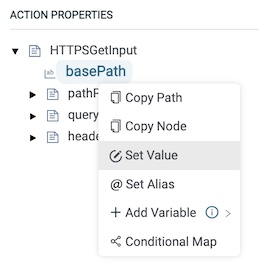
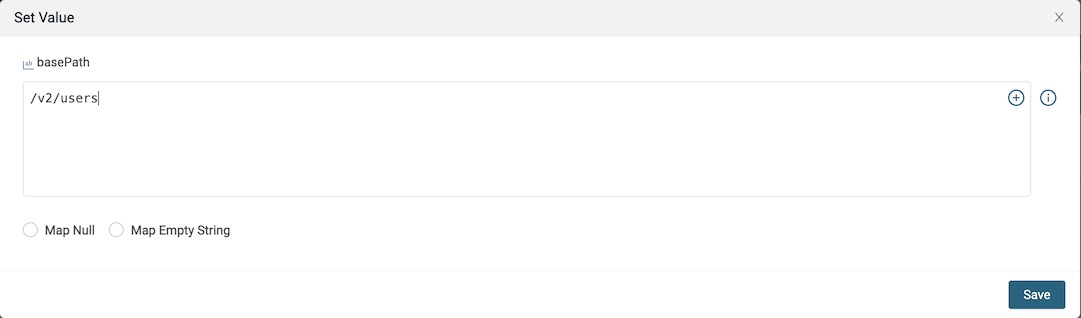
Let’s set the base path by right clicking on right clicking on basePath and selecting Set Value and set to /v2/users and click Save.
Right click on queryParams and select Add Variable -> String -> Add Inside and enter name your query parameter status.

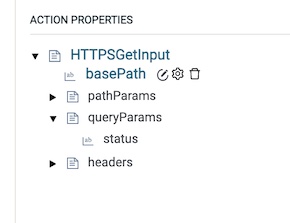
As we did for basePath, right click on the status query parameter and set it’s value to active.
Click save on the component.
![]()
Test the Integration
Click the Test button to test the integration and see the transaction in the Monitor module that automatically opens in a tab.
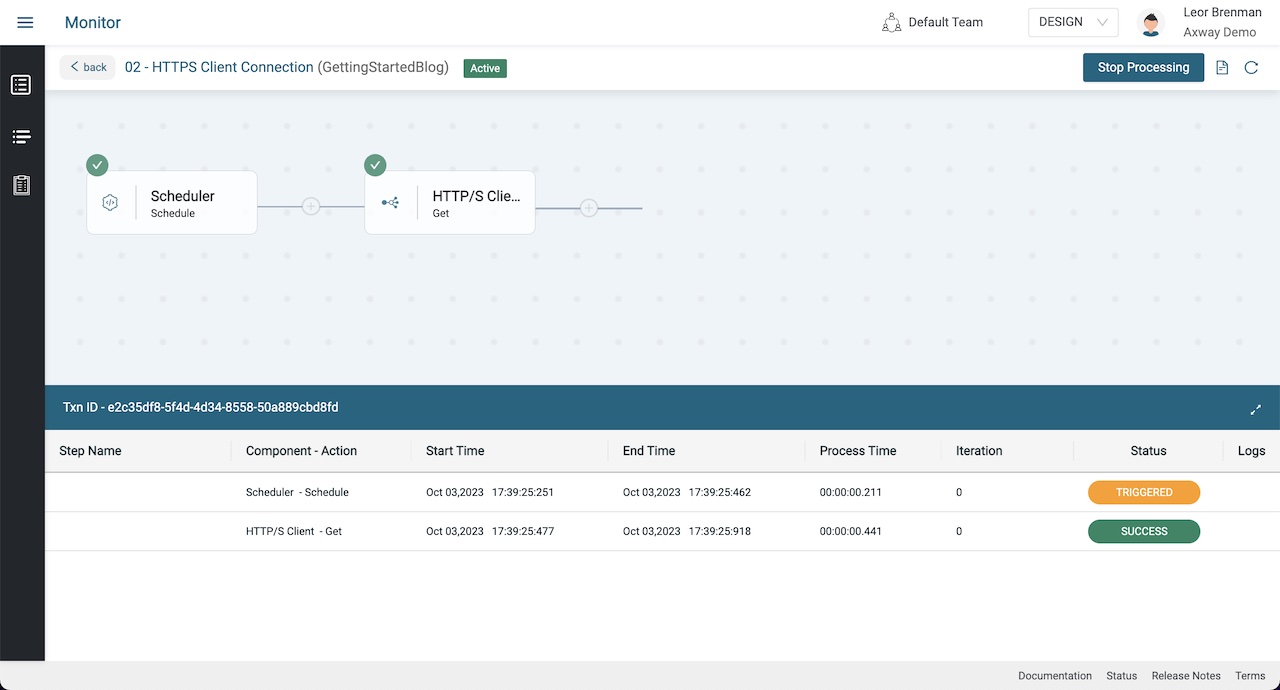
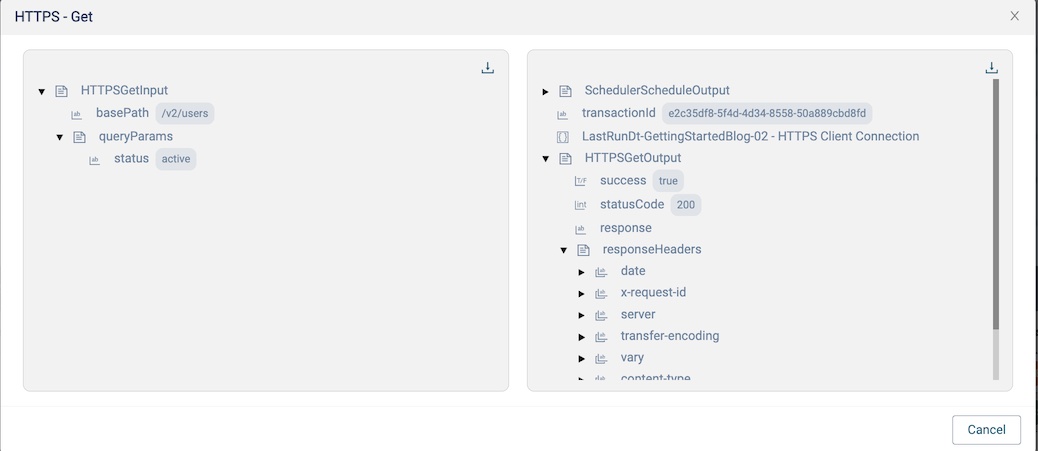
Click on the HTTP/S Client Get line in the transaction to see the details.
If you had an error this would be useful in debugging the issue.
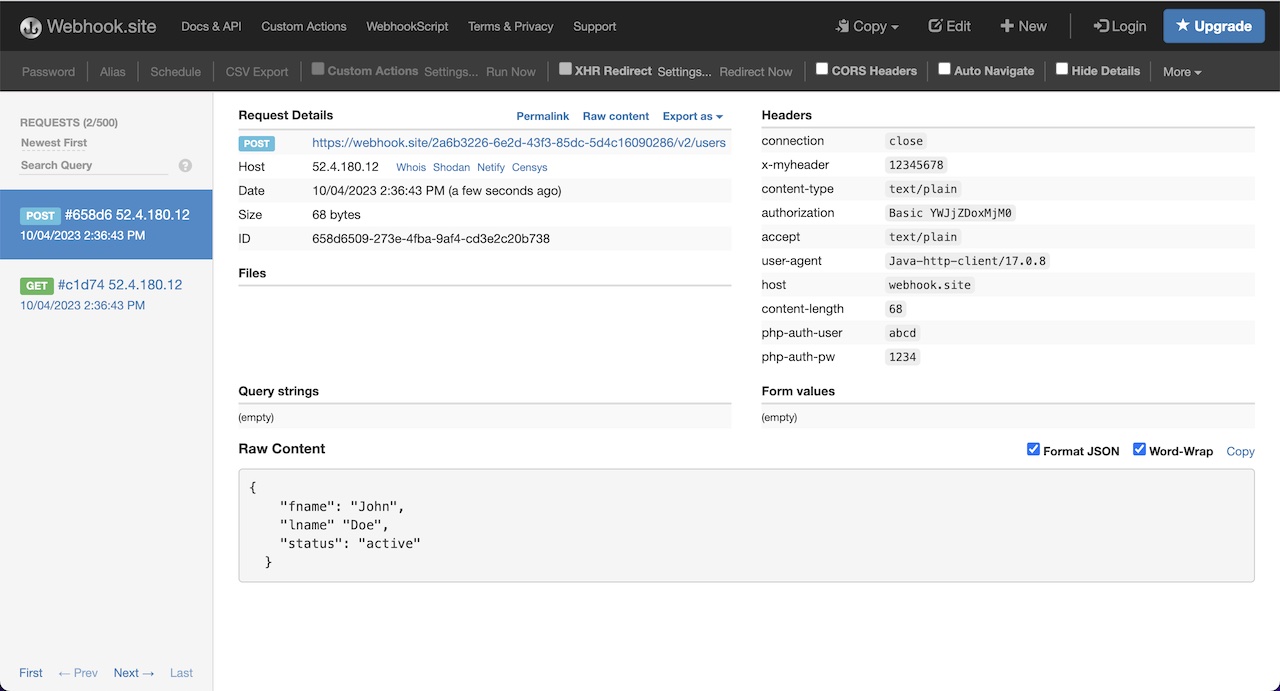
Let’s check our webhook site URL to see the HTTPS request.
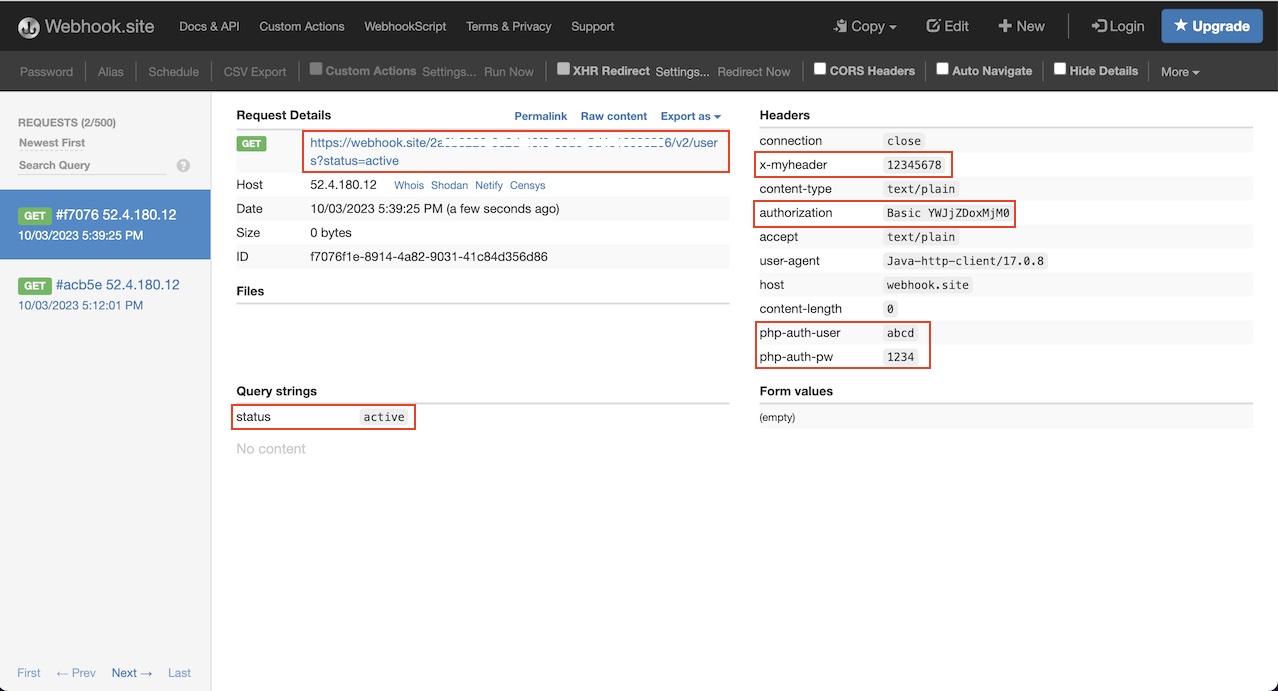
Note the following in the webhook site request:
- Base path
- Query parameter
- Custom header defined in the connection and sent automatically
- Basic Authentication header
Pro Tip 1: Notice the Override Connection check box in your HTTP/S Client Get component. It enables you to override Connection parameters for the current component instance.
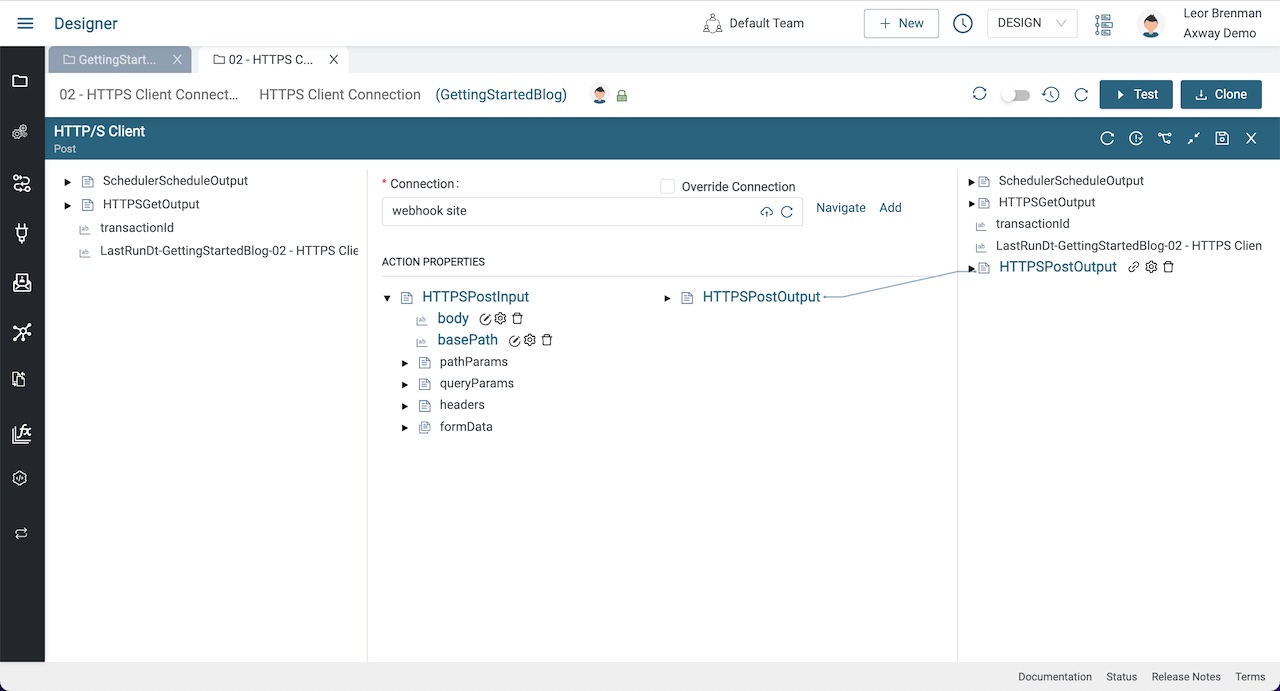
HTTP/S Client Post
Let’s add an HTTP/S Client Post component to the integration and expand the bottom panel and select the HTTP/S Connection as we’ve done above.
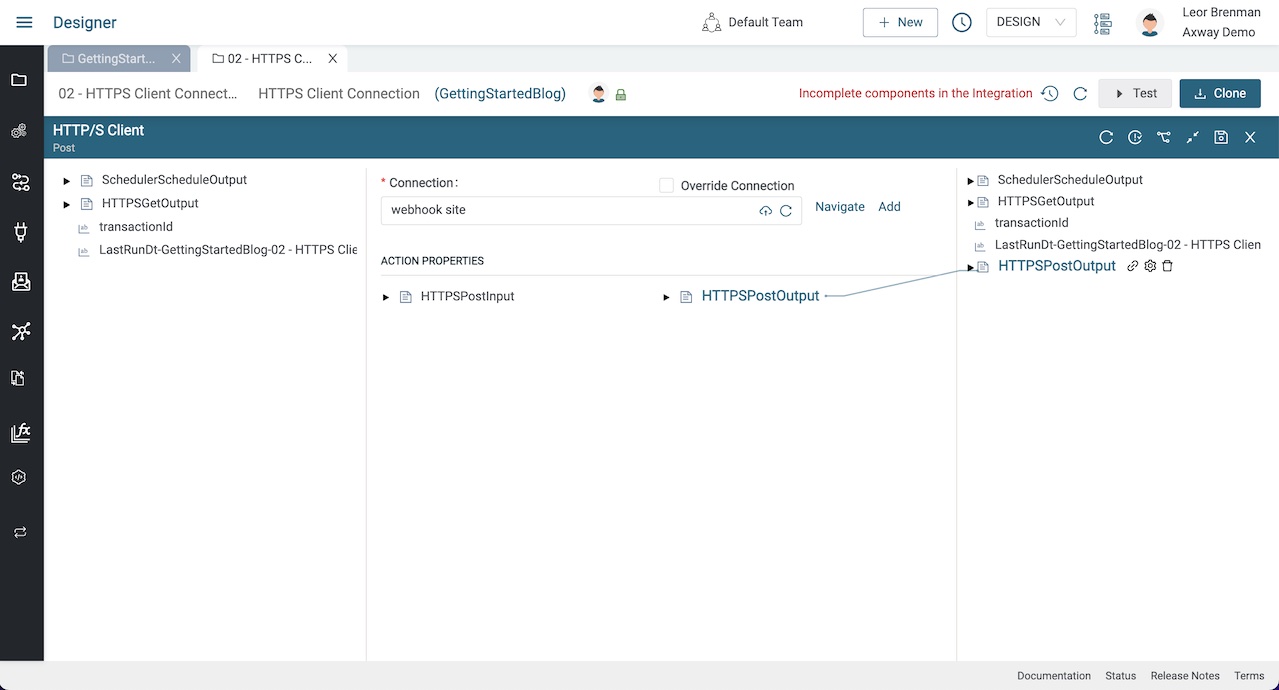
Expand the HTTPSPostInput Action property and do the following:
- Right click on the basePath and set the path as to
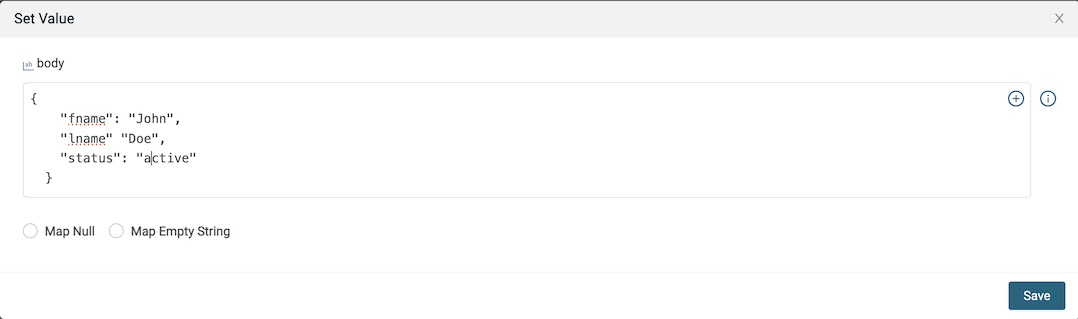
/v2/usersas you’ve done before - Right click on the body and select Set Value and enter the following JSON:
{
  "fname": "John",
  "lname" "Doe",
  "status": "active"
}
- Click Save and click the save button on the expanded bottom panel
Test your integration again by clicking on the Test button and see your two calls to webhook site. The POST should look like this:
Pro Tip 2: Add Labels to Your Components. When you view transactions, the labels will help you debug more easily
Summary
In this blog post we learned at how to make an HTTPS Call in an integration in Amplify Fusion. We created an HTTP/S Client Connection and defined the Authentication and a custom header that will be sent with all requests. We also used the Connection with HTTPS Client Get and POST components to make calls to Webhook Site.
In future blog posts, we’ll build on our knowledge and explore more of the features of Amplify Fusion to create no code integrations.
Turn integration friction into orchestrated control with Amplify Fusion.