In part 1 of this blog post series, we introduced sentiment analysis and how we can use Integration Builder to extract the text from our data source, make a call to Amazon Comprehend natural language processing (NLP) service, through API Builder, to determine the sentiment and send a notification to the appropriate stakeholder in Microsoft Teams. In part 1, we looked at the Net Promoter Score (NPS) survey example. In this post, we’ll look at detecting the sentiment in a Note in a Salesforce.com Opportunity.
Setup
The diagram below illustrates the flow of data:
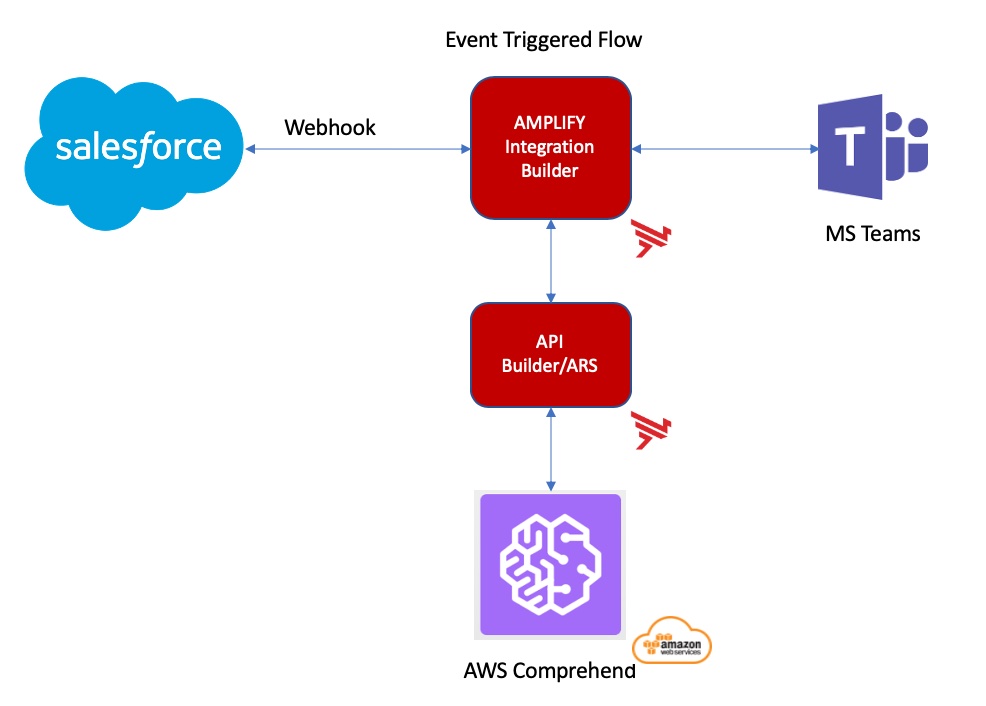
- We’ll configure an Integration Builder Salesforce connector for Webhook events, monitoring the Notes object
- We’ll create a flow that is triggered on Events
- We’ll use the API Builder Detect Sentiment connector we created in part 1 to detect the sentiment of the note
- If the sentiment is determined to be negative or mixed, we’ll send a notification to Microsoft Teams, as shown below:
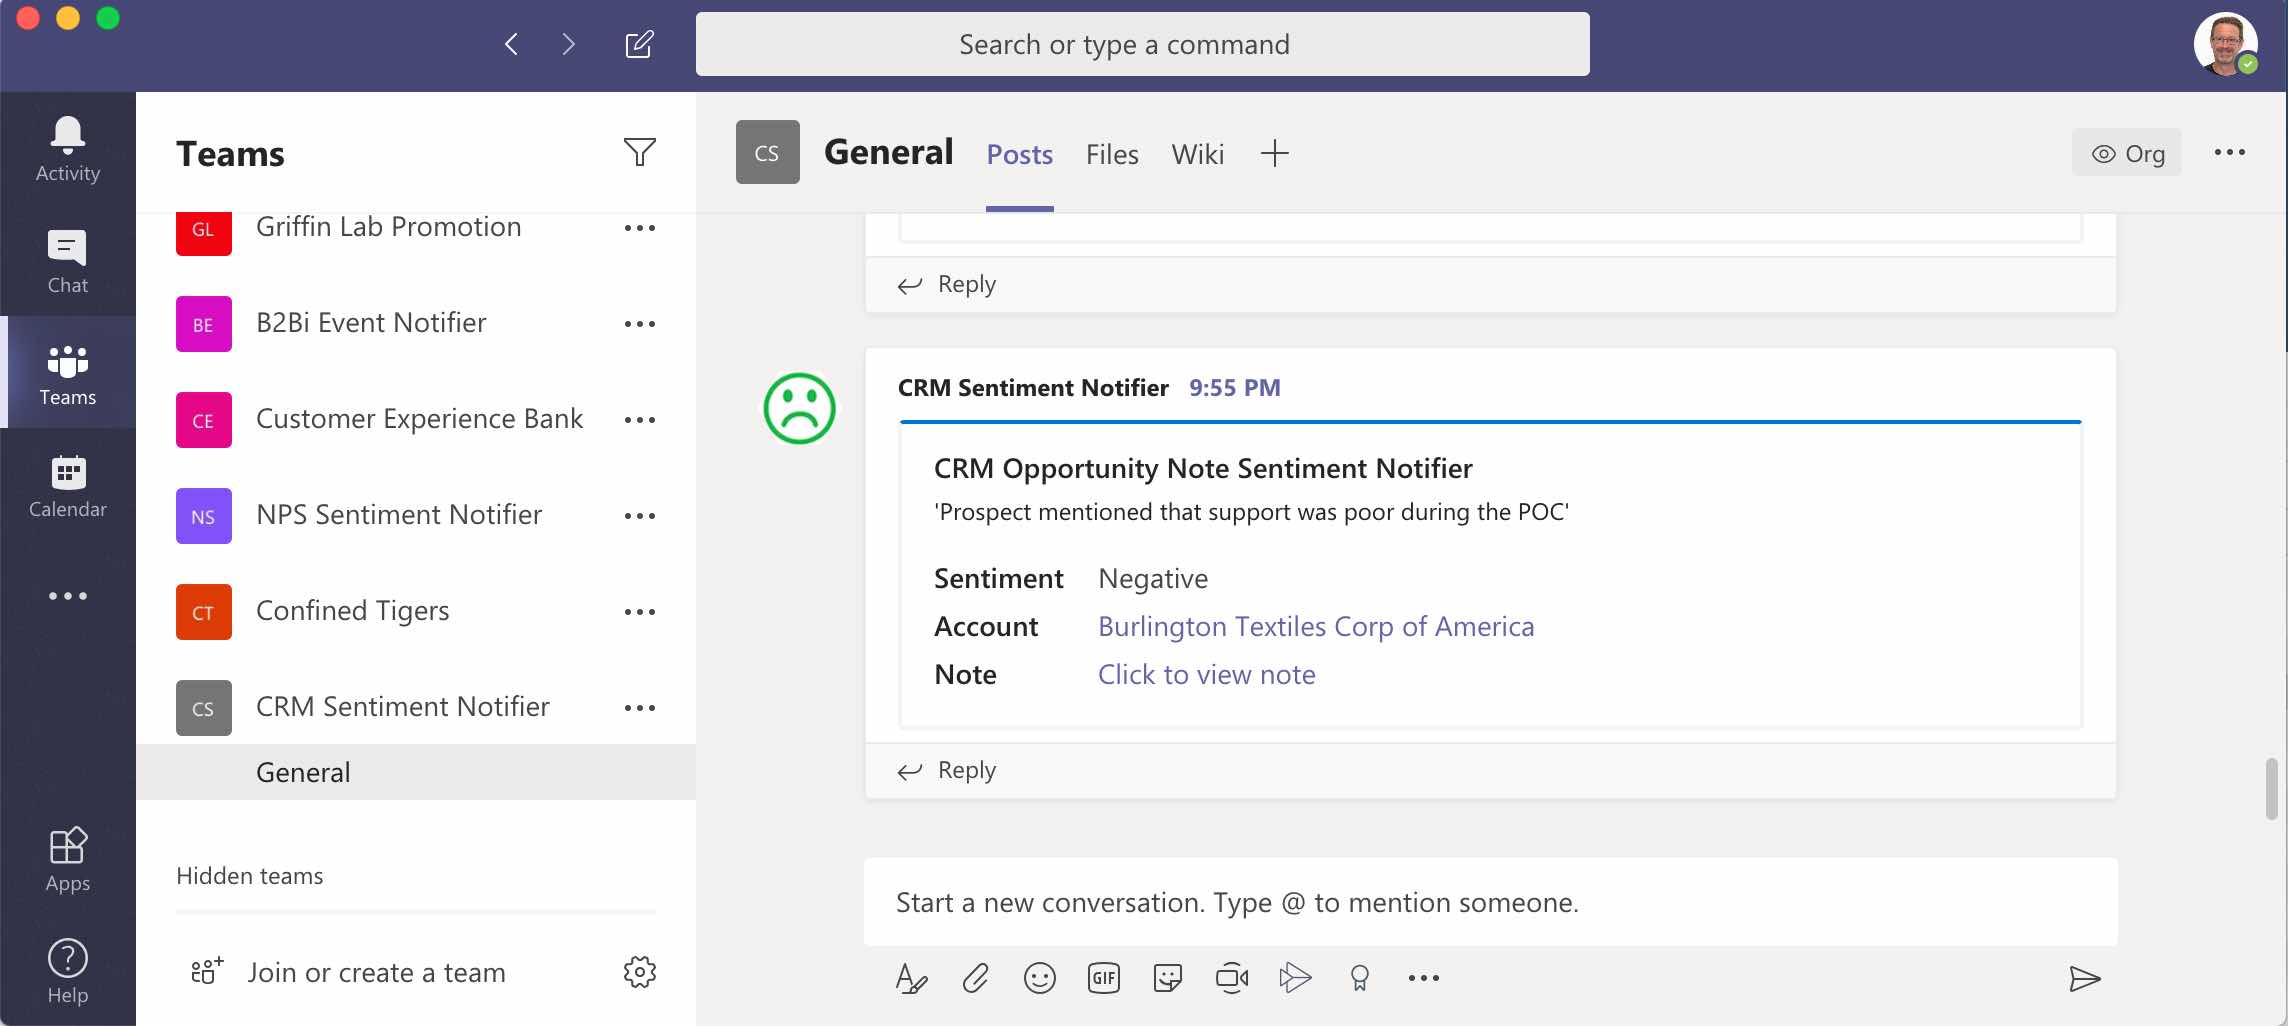
Note that the information in the notification contains the sentiment, the contents of the note, the account name, and a link to the note.
Integration Builder Salesforce Sales Cloud Connector
Follow the instructions here to configure Webhooks in your Salesforce account.
When you’re done, instantiate a Salesforce Sales Cloud connector in Integration Builder and make sure you enable events and select Webhook (instead of polling) and enter Note in the Object to Monitor for Changes as shown below:
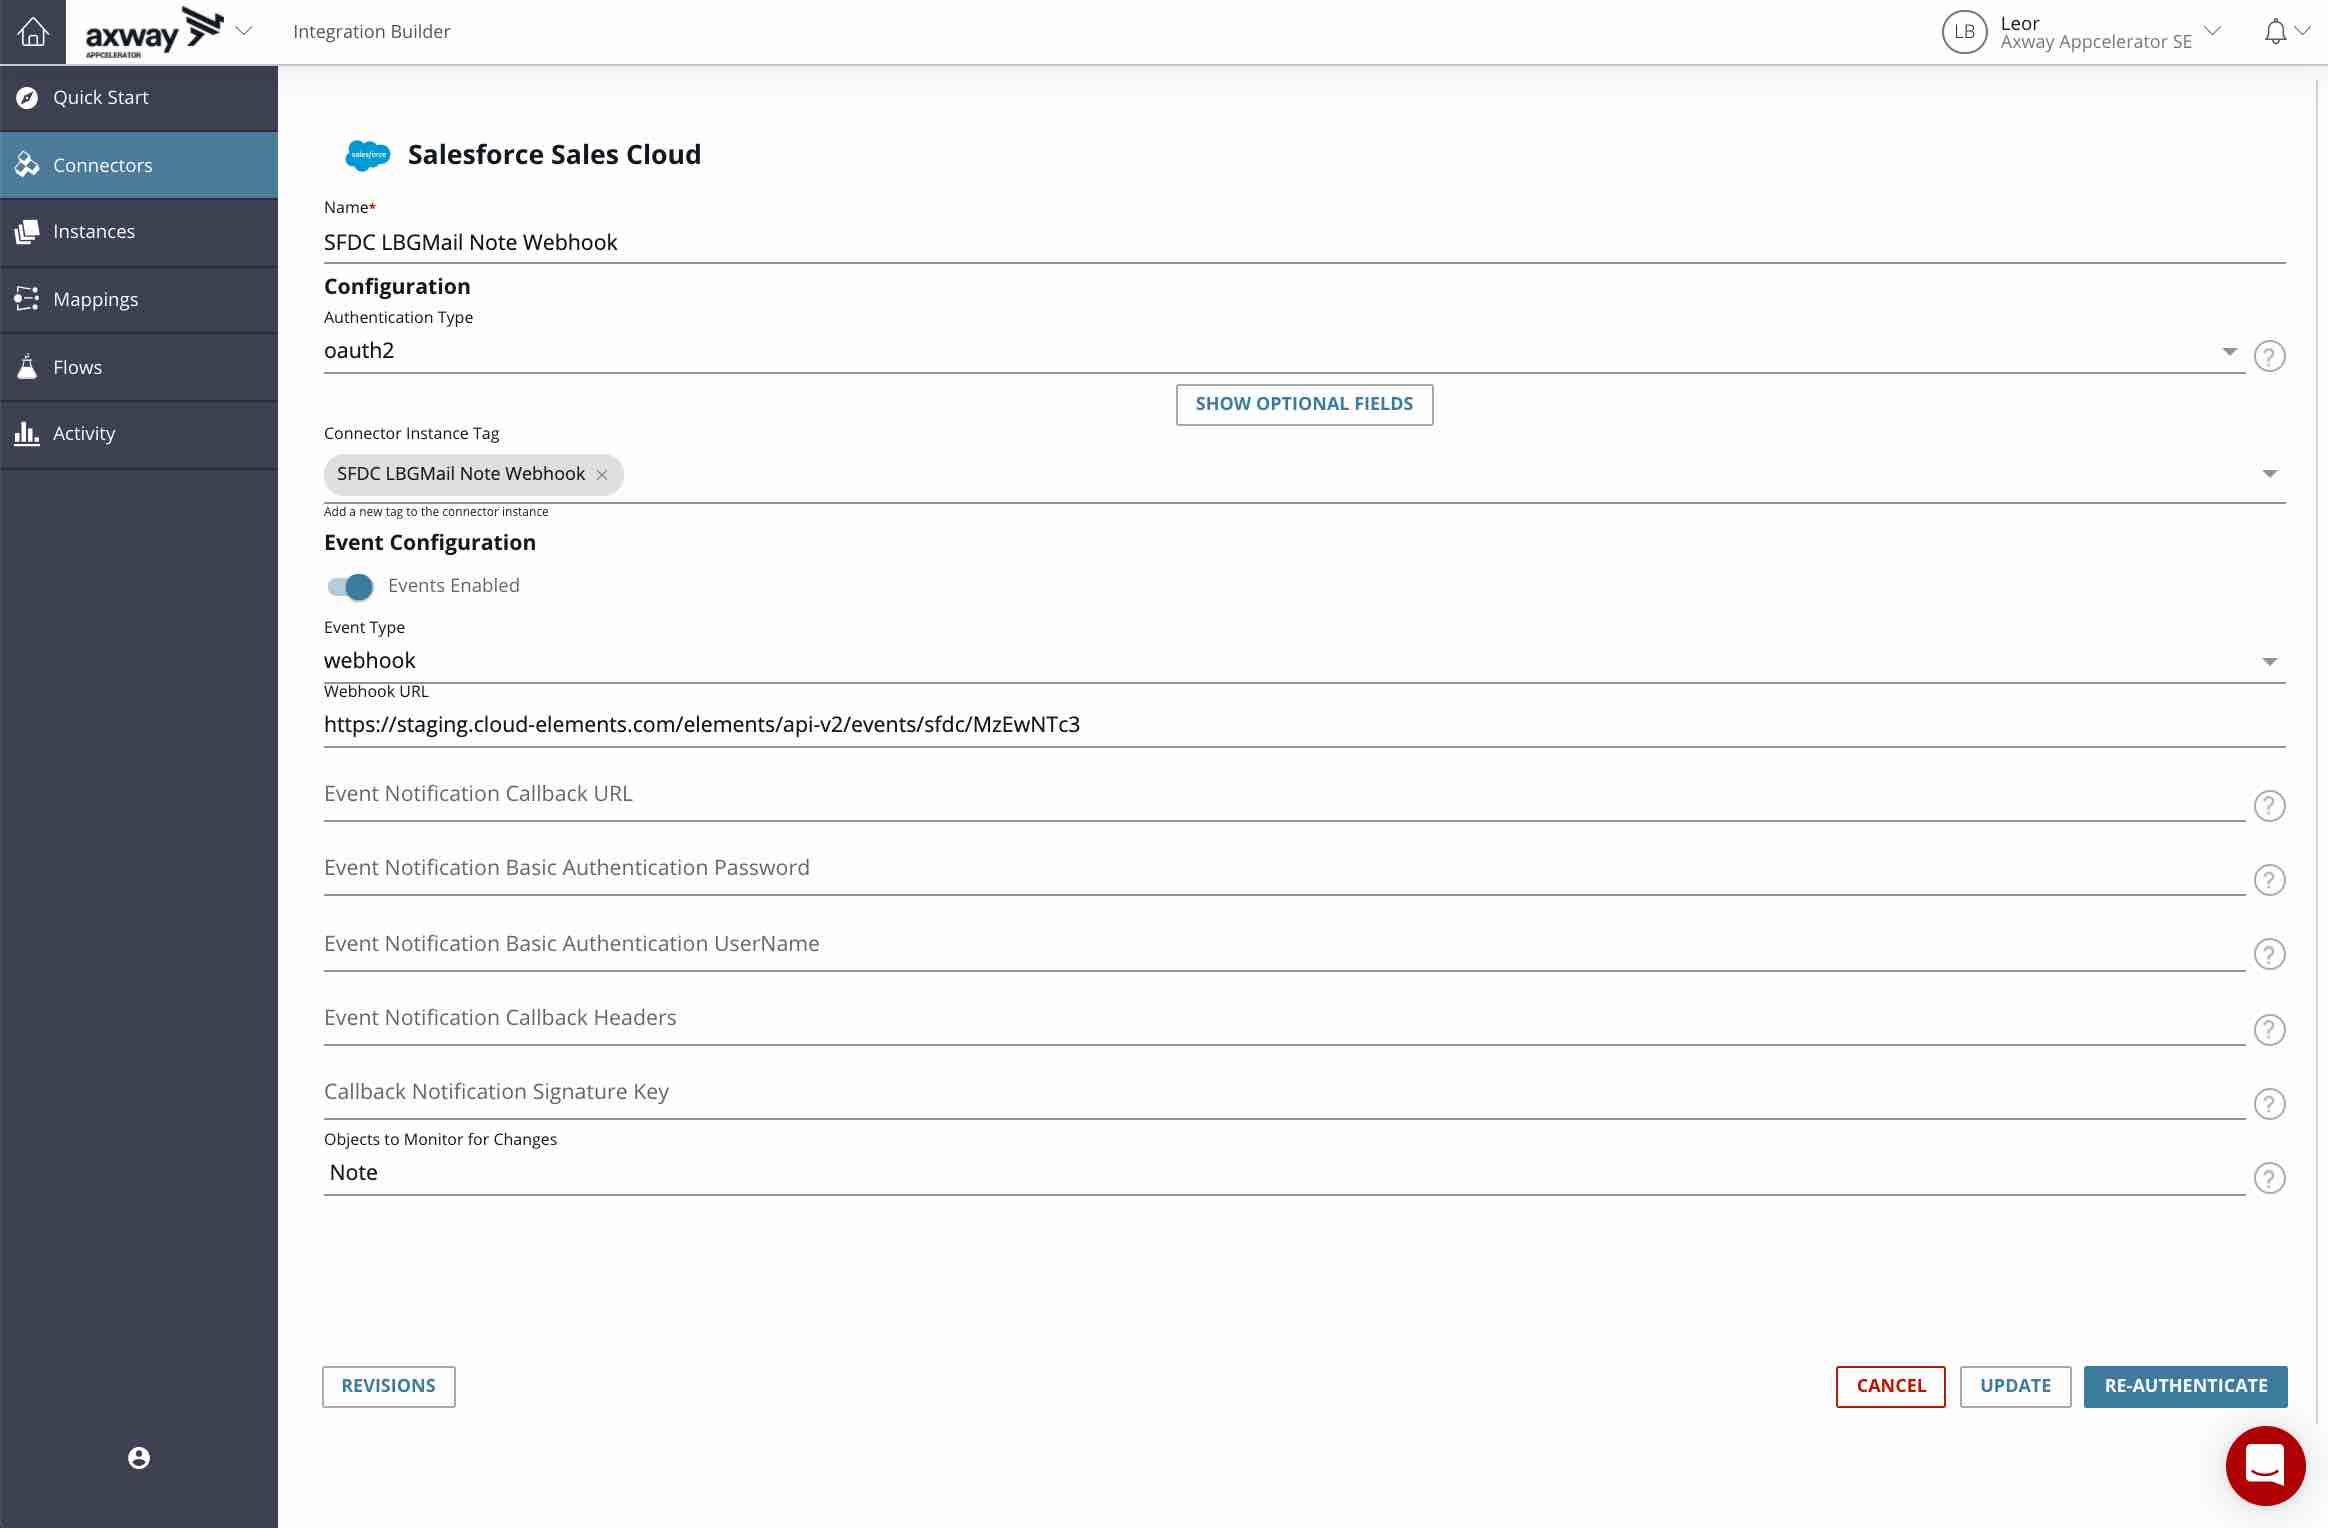
Note that you don’t need to enter the Webhook URL. Integration Builder will populate that field automatically when you authenticate.
Integration Builder Flow
In this section, we’ll create our Integration Builder flow. You can download the flow here.
The resulting flow is shown below:
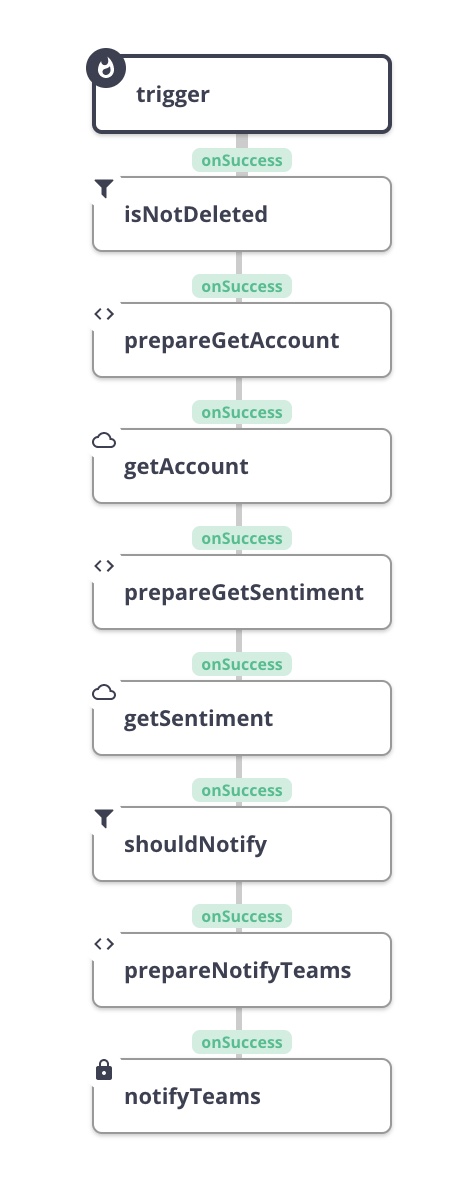
- Create a new flow and select Event as the trigger type. I entered crm as the connector variable name during creation. Refer to this post if you don’t recall how to accomplish this.
- Add two value variables to your flow template:
- crmBaseAddress – this is the base address of your Salesforce instance
- msTeamsWebhookURL – this is the URL of your MS Teams Webhook
- Add a Connector Instance variable for our API Builder Sentiment Connector. I called mine detectSentiment
- Add a JS Filter step, isNotDeleted, with the following content:
done(trigger.event.eventType != 'DELETED');
This will ensure that we only notify on new or edited notes and not deleted notes.
- Add a JS Script step, prepareGetAccount, with the following content:
let url = '/accounts/'+trigger.body.message.raw.objects[0].AccountId;
done({url:url});
This will create the URL (/accounts/{accountId}) for retrieving the account information associated with the Note. We are doing this so that the notification we send to Teams will have the name of the account that the note is associated with.
- Add a Connector API Request step, getAccount, as follows:
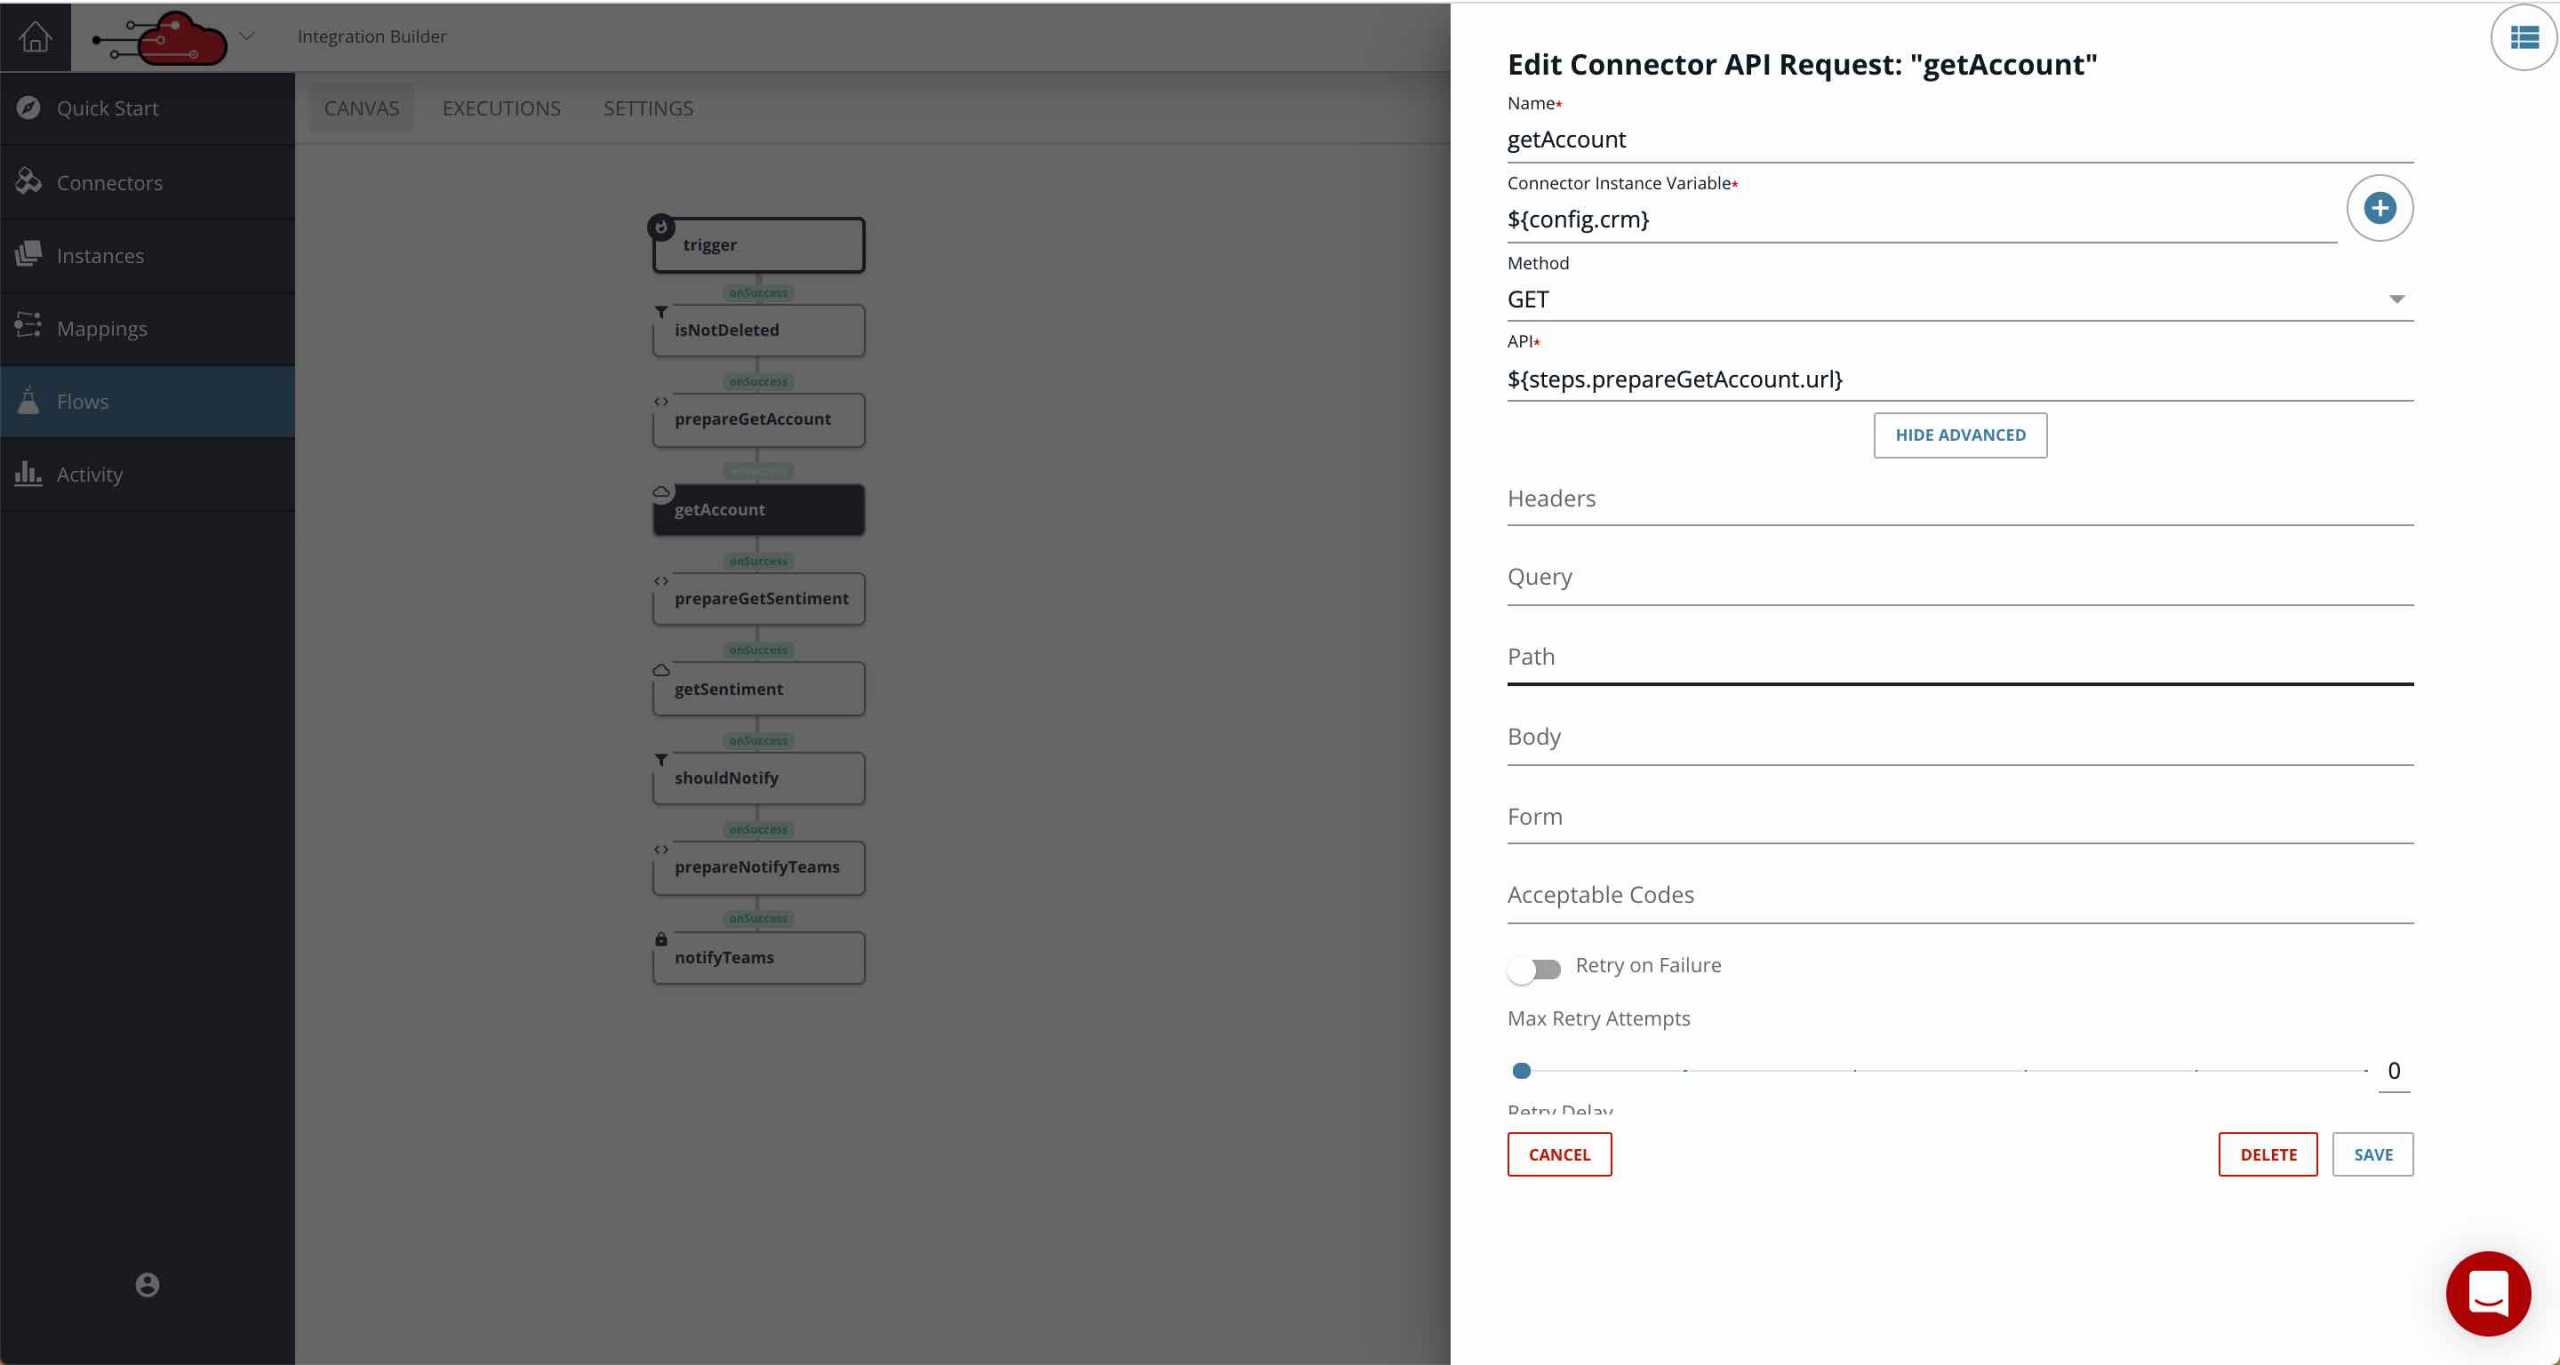
Recall that when I created my flow template, I named the connector variable crm
- Add a JS Script step, prepareGetSentiment, with the following content:
let query = {
  text: trigger.body.message.raw.objects[0].Body
}

done({query: query});
This gets the note’s text from the trigger and creates a query parameter for my API Builder sentiment API call as we did in part 1.
- Add a Connector API Request, getSentiment, as follows:
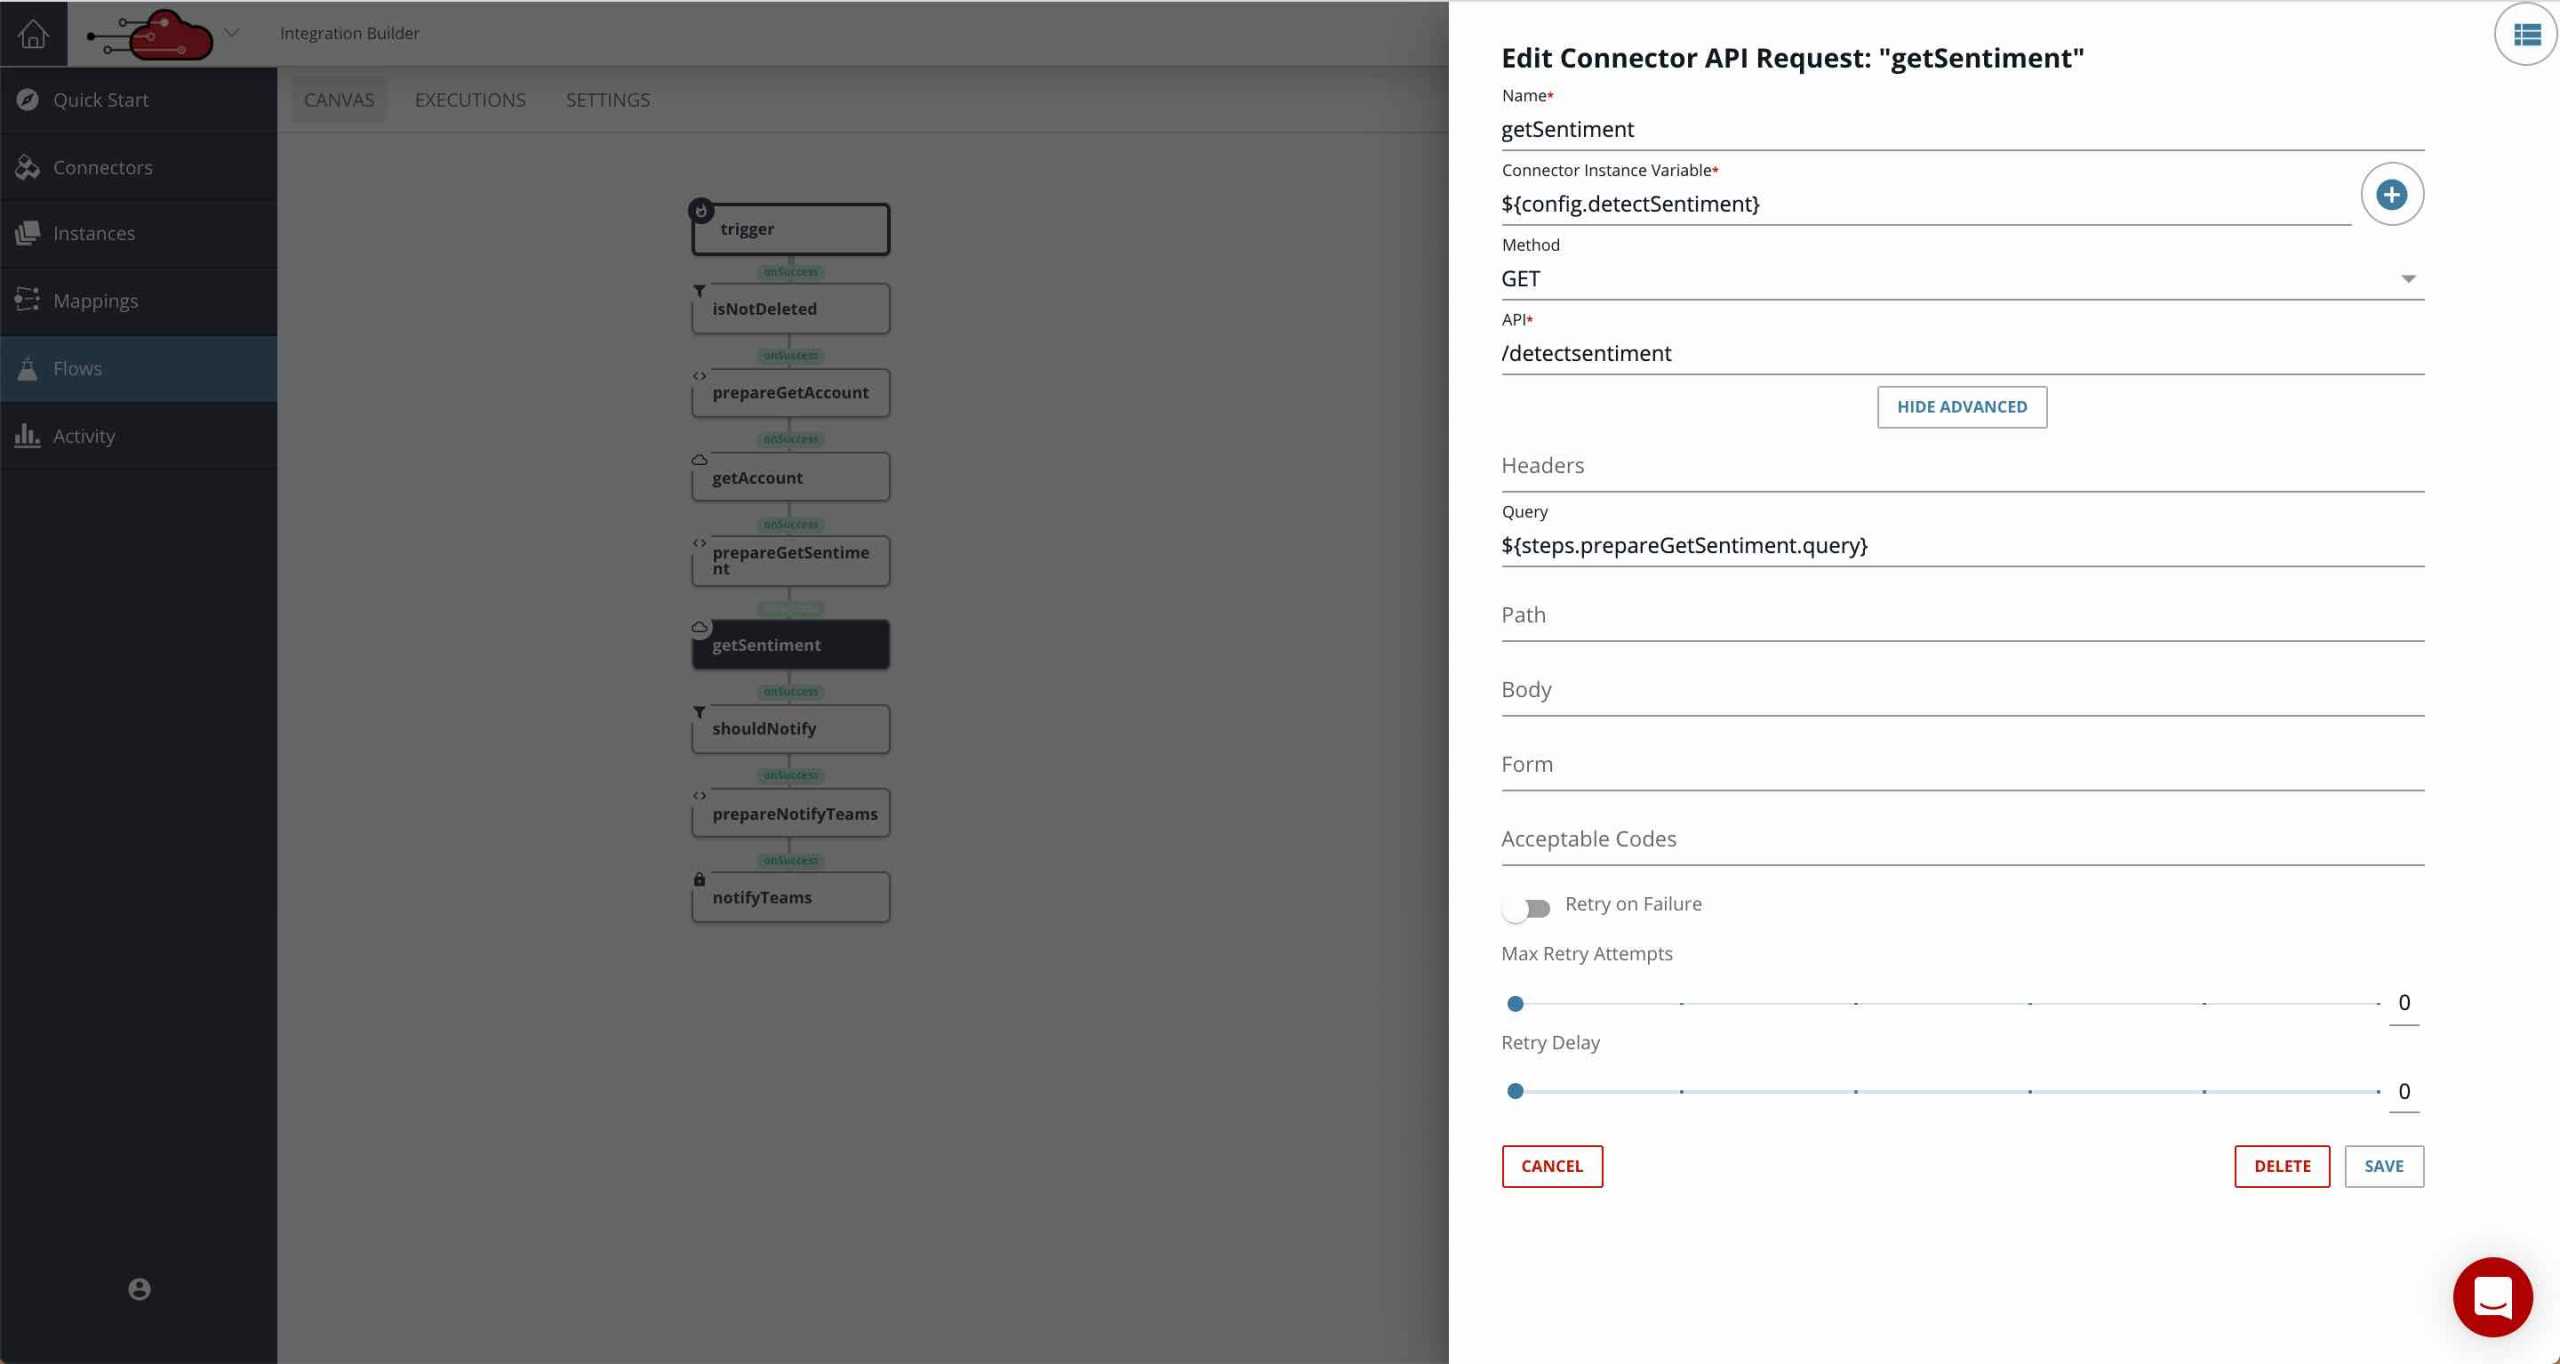
This will retrieve the sentiment for the note. Refer to part 1 for details of the returned data.
- Add a JS Filter step, shouldNotify with the following content:
done(steps.getSentiment.response.body.Sentiment === 'NEGATIVE' || steps.getSentiment.response.body.Sentiment === 'MIXED');
This will ensure that we only send a notification to Teams if the sentiment is Negative or Mixed.
- Add a JS Script step, prepareNotifyTeams, with the following content:
var sentiment;
if(steps.getSentiment.response.body.Sentiment === 'NEGATIVE') {
  sentiment = 'Negative';
} else if(steps.getSentiment.response.body.Sentiment === 'MIXED') {
  sentiment = 'Mixed';
} else {
  sentiment = 'Unknown';
}

let body = {
    "@type": "MessageCard",
    "@context": "http://schema.org/extensions",
    "themeColor": "0076D7",
    "summary": "CRM Opportunity Note Sentiment Notifier",
    "sections": [{
        "activityTitle": "CRM Opportunity Note Sentiment Notifier",
        "activitySubtitle": "'"+trigger.body.message.raw.objects[0].Body+"'",
        "facts": [{
            "name": "Sentiment",
            "value": sentiment
        },{
            "name": "Account",
            "value": "["+steps.getAccount.response.body.Name+"]("+config.crmBaseAddress+trigger.body.message.raw.objects[0].AccountId+")"
        },{
            "name": "Note",
            "value": "[Click to view note]("+config.crmBaseAddress+trigger.event.objectId+")"
        }],
        "markdown": true
    }]
}

done({body: body});
This creates the body for our call to the MS Teams webhook for a nicely formatted notification.
- Finally, add an HTTP Request step, notifyTeams, as follows:
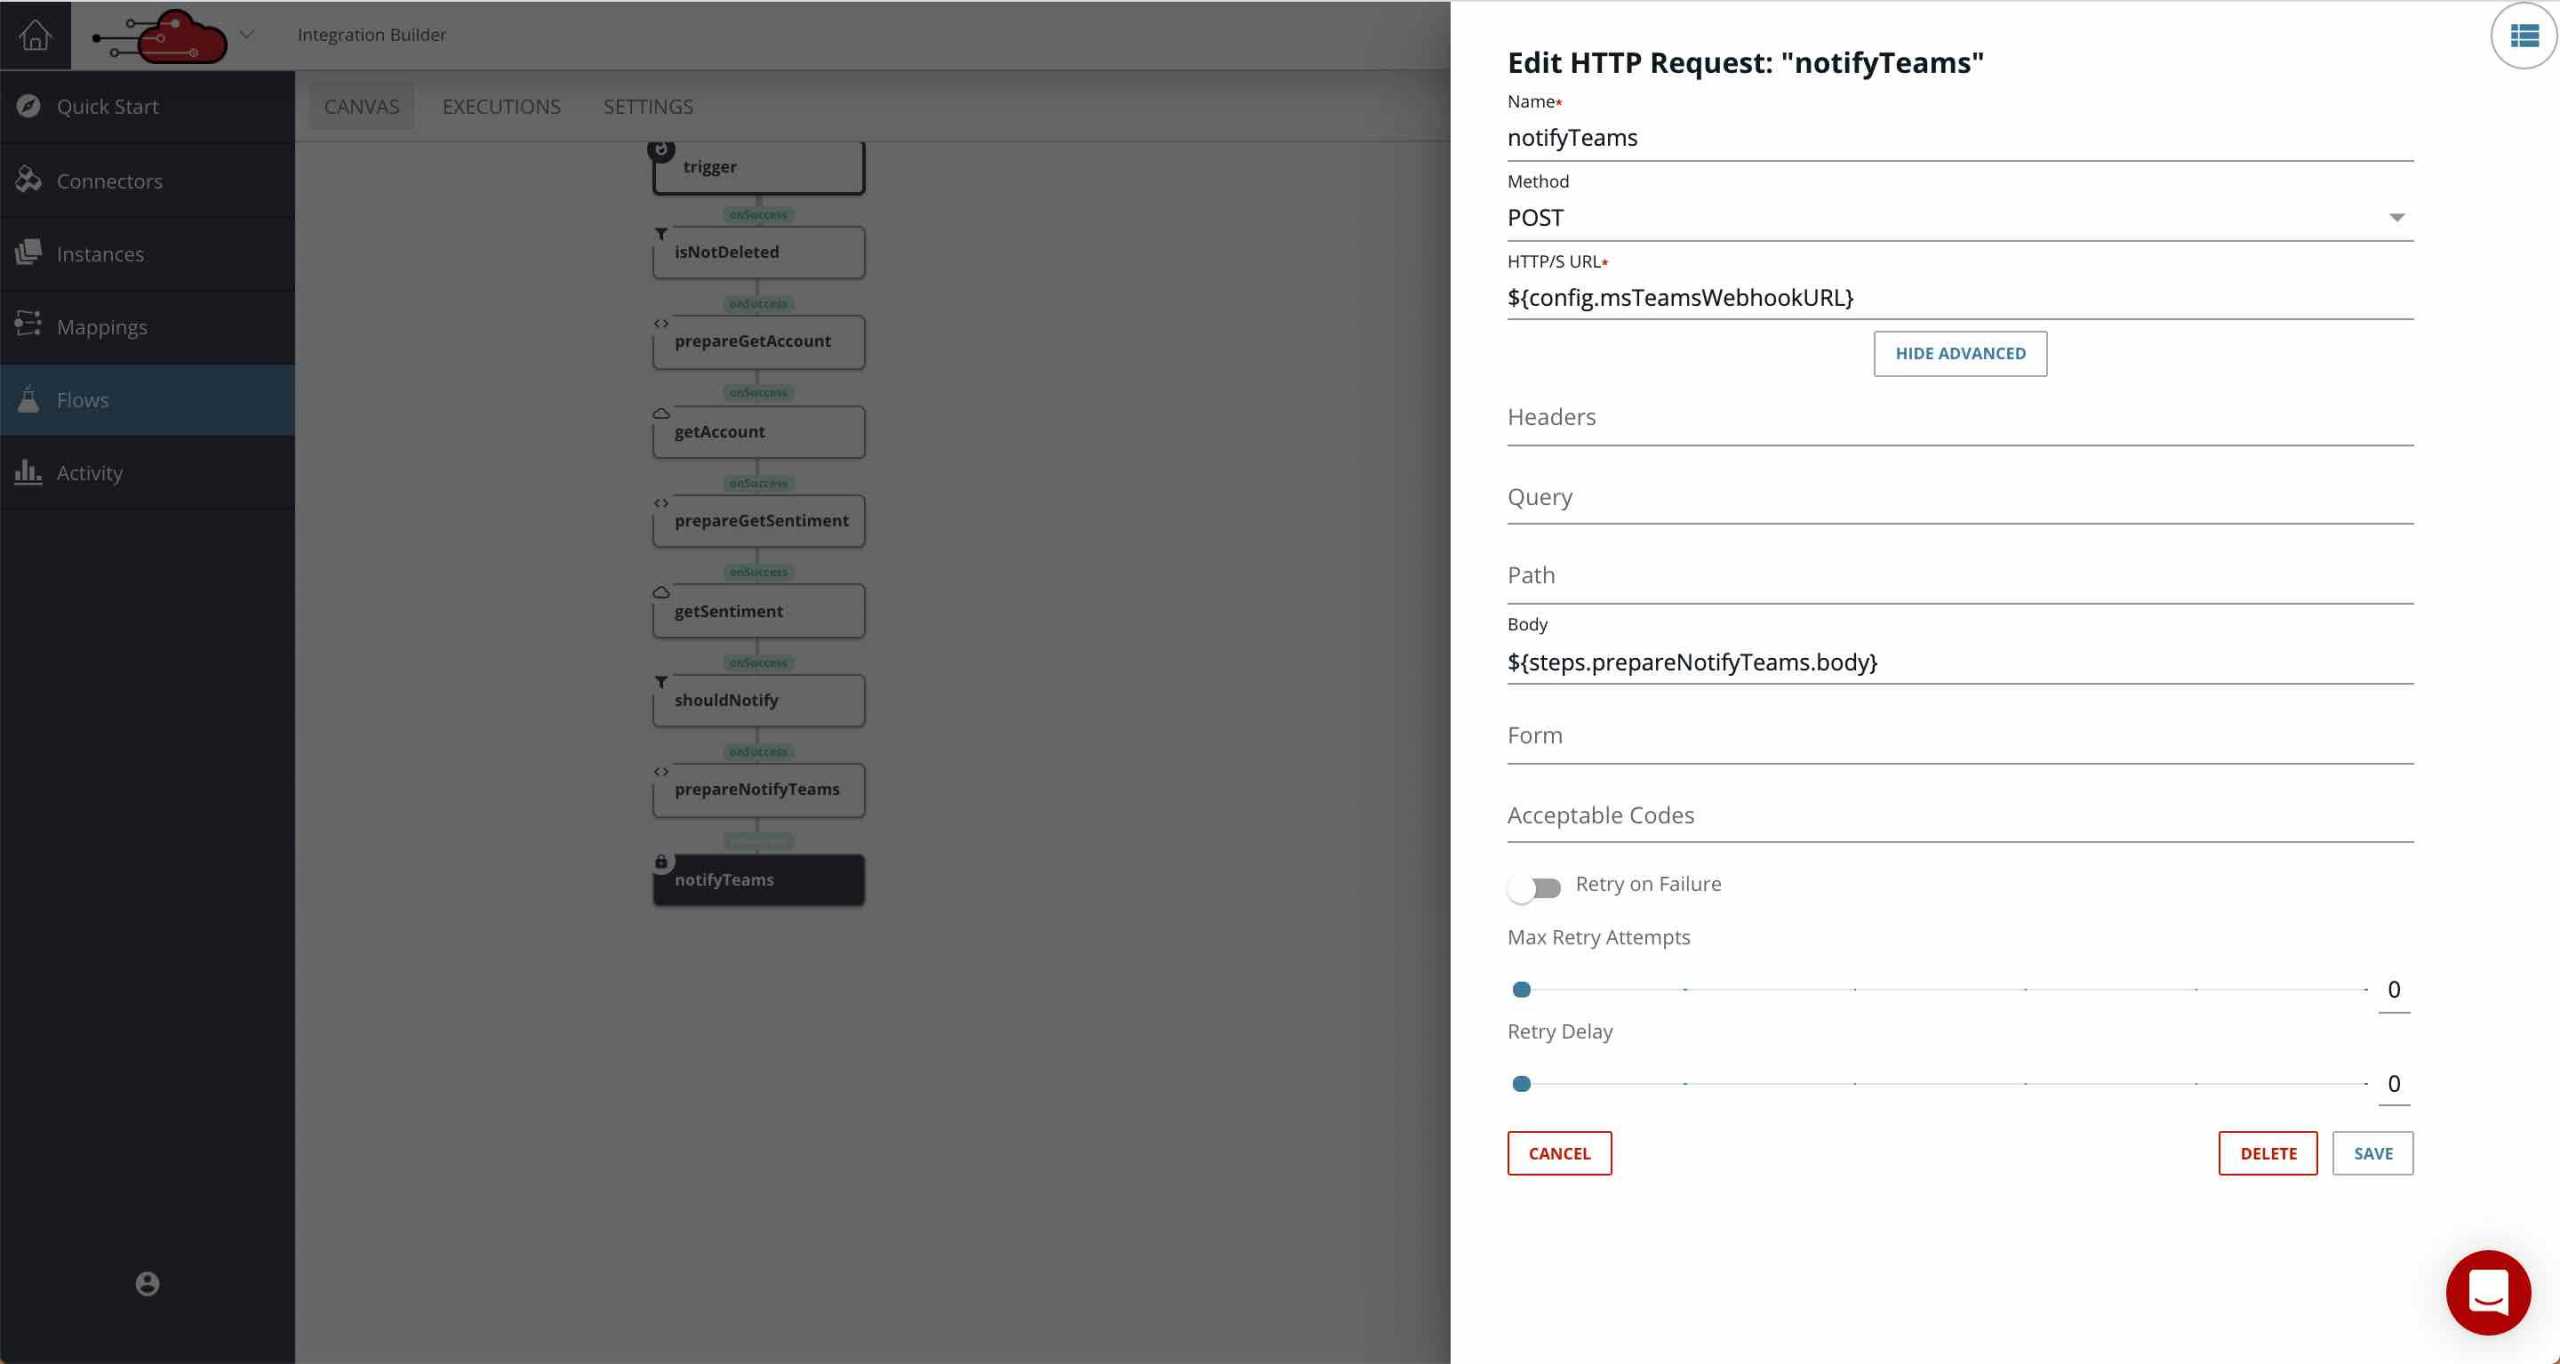
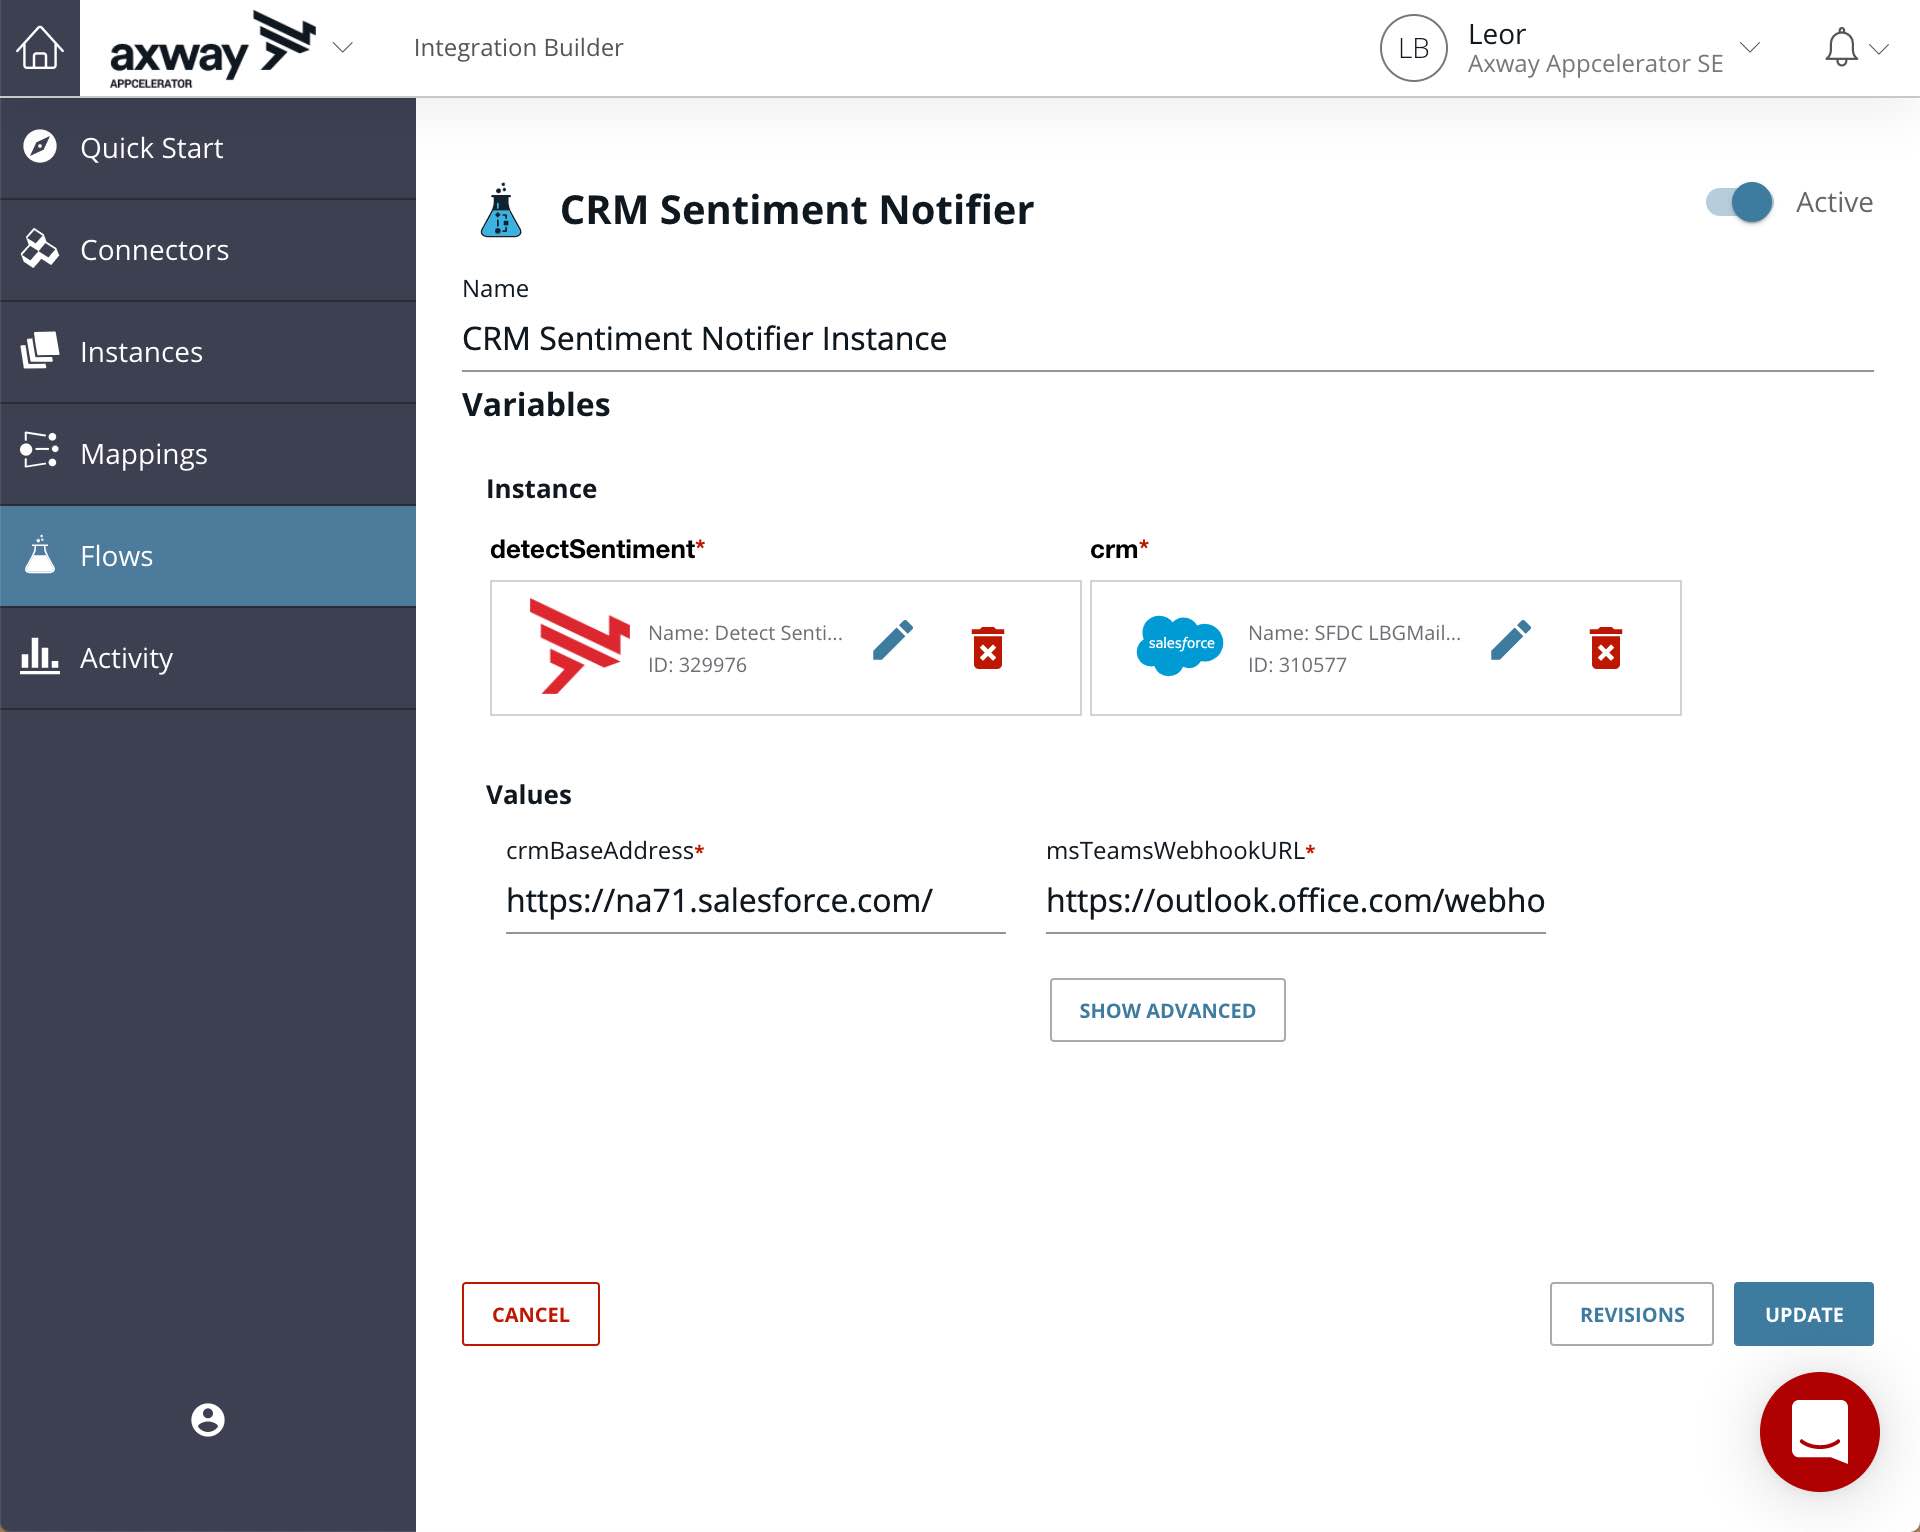
- Create an instance of your flow as follows:
Test Your Flow
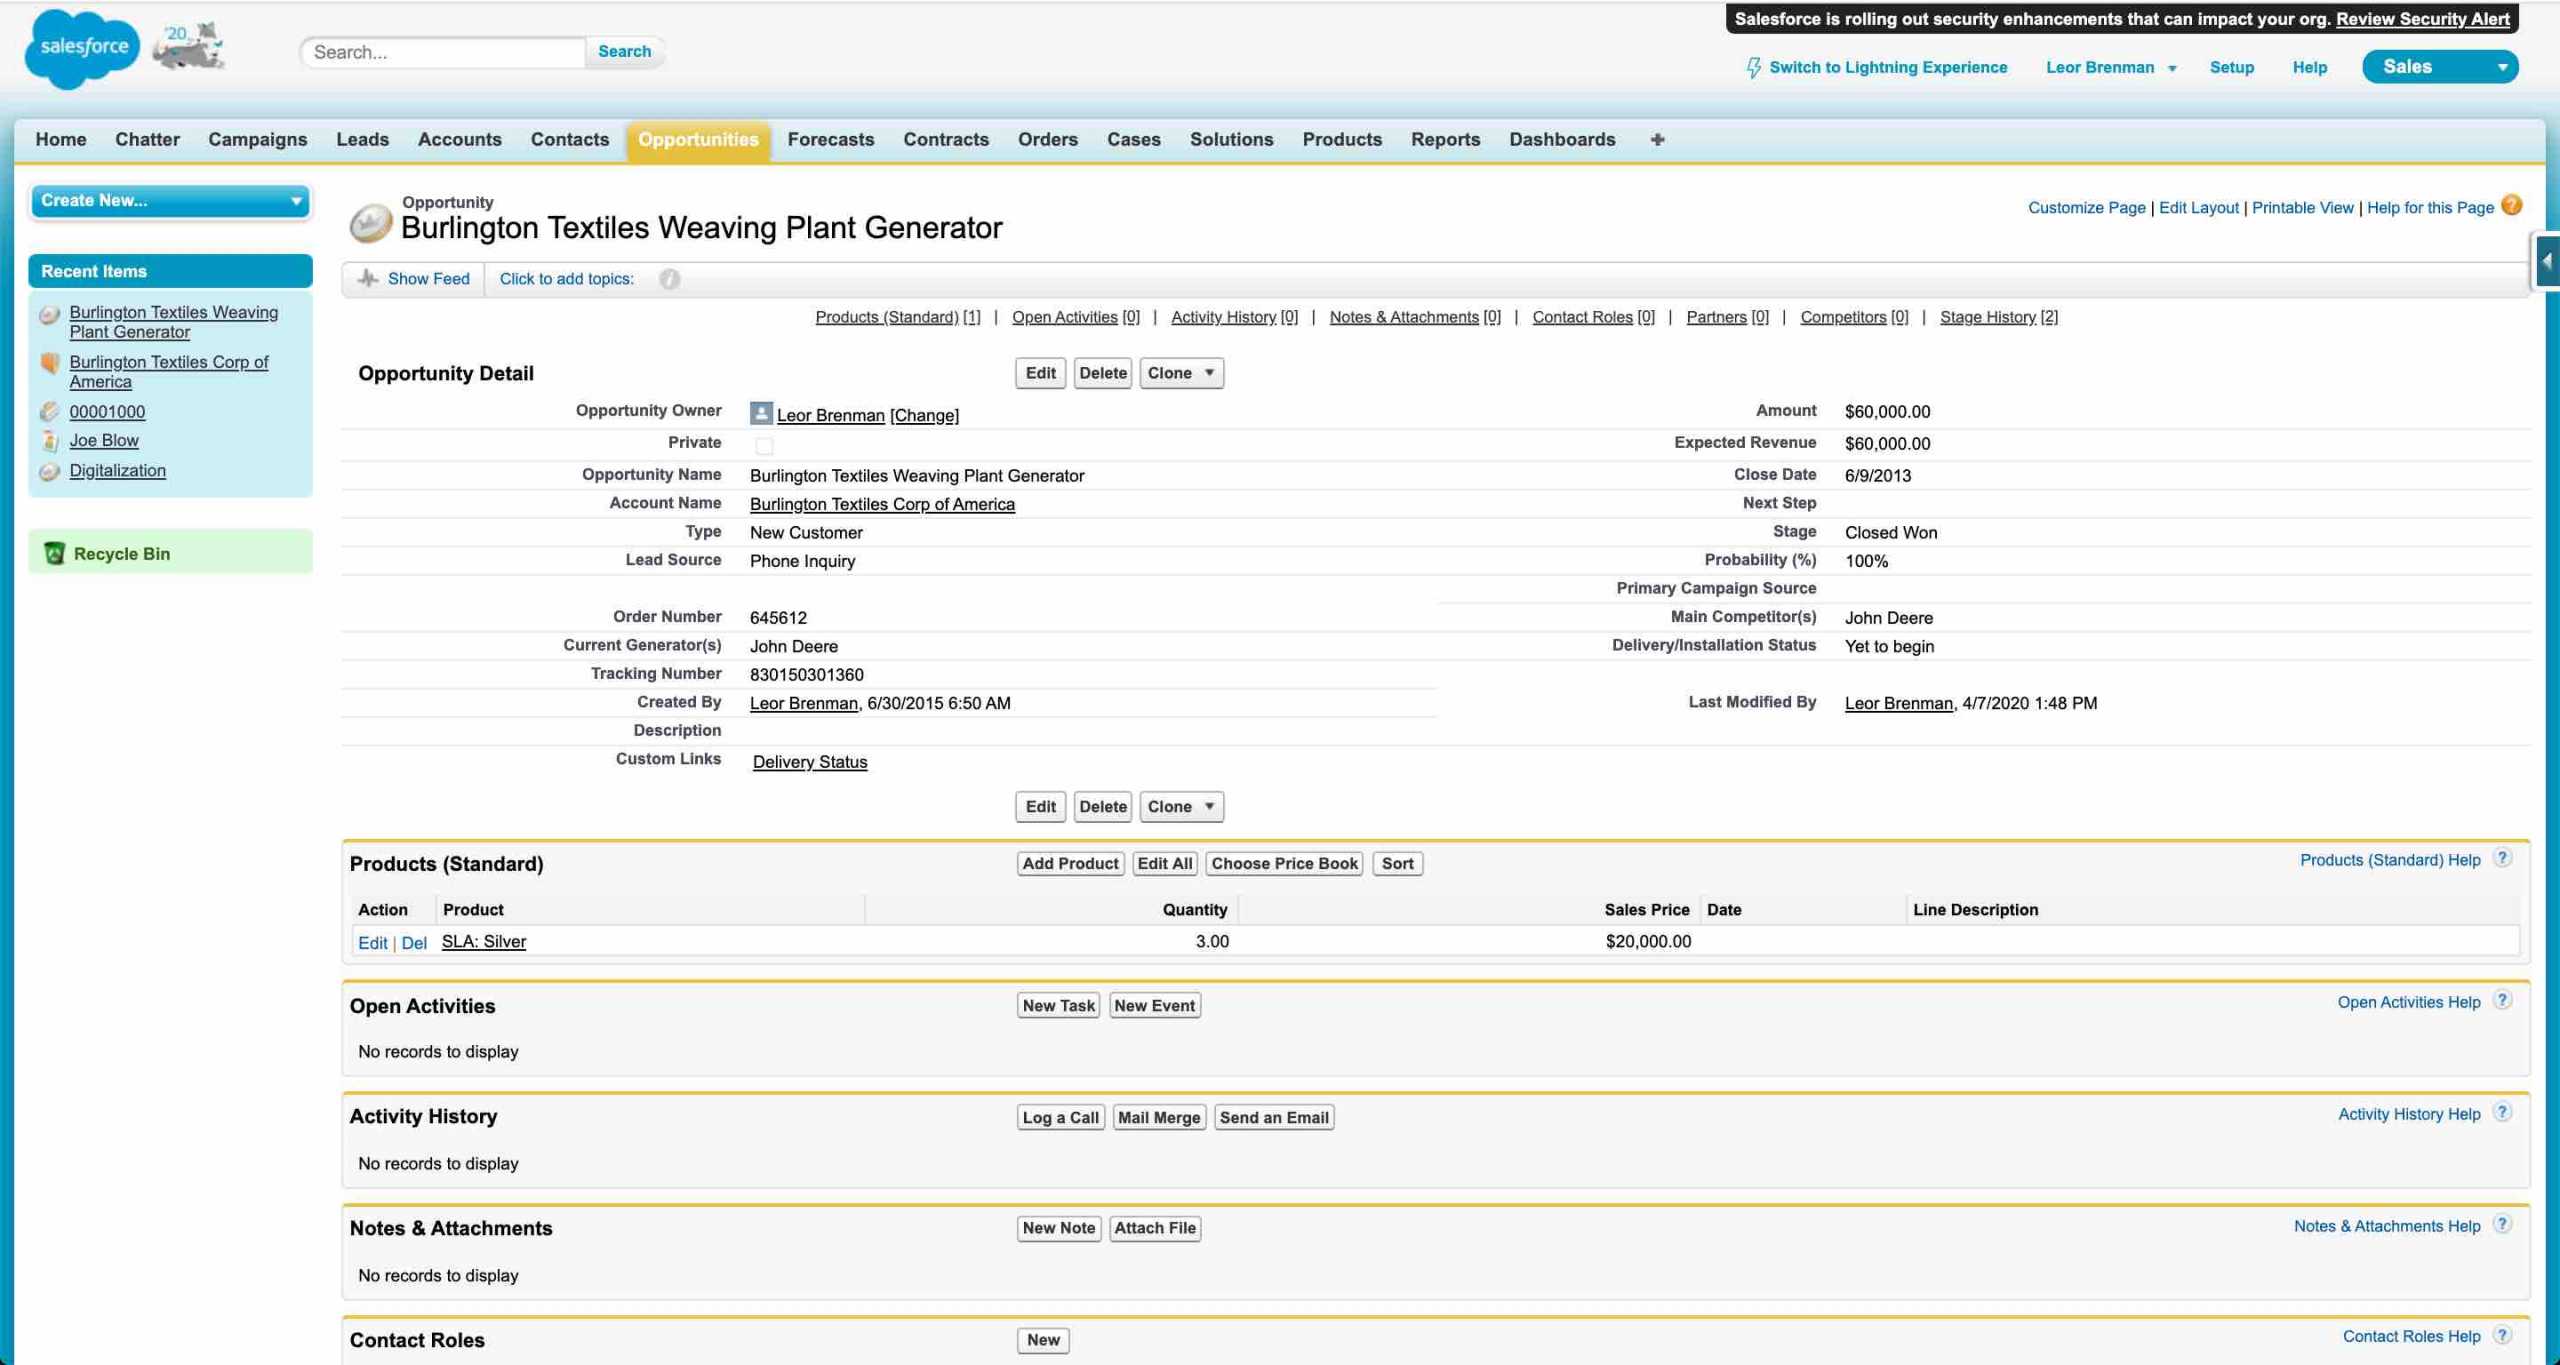
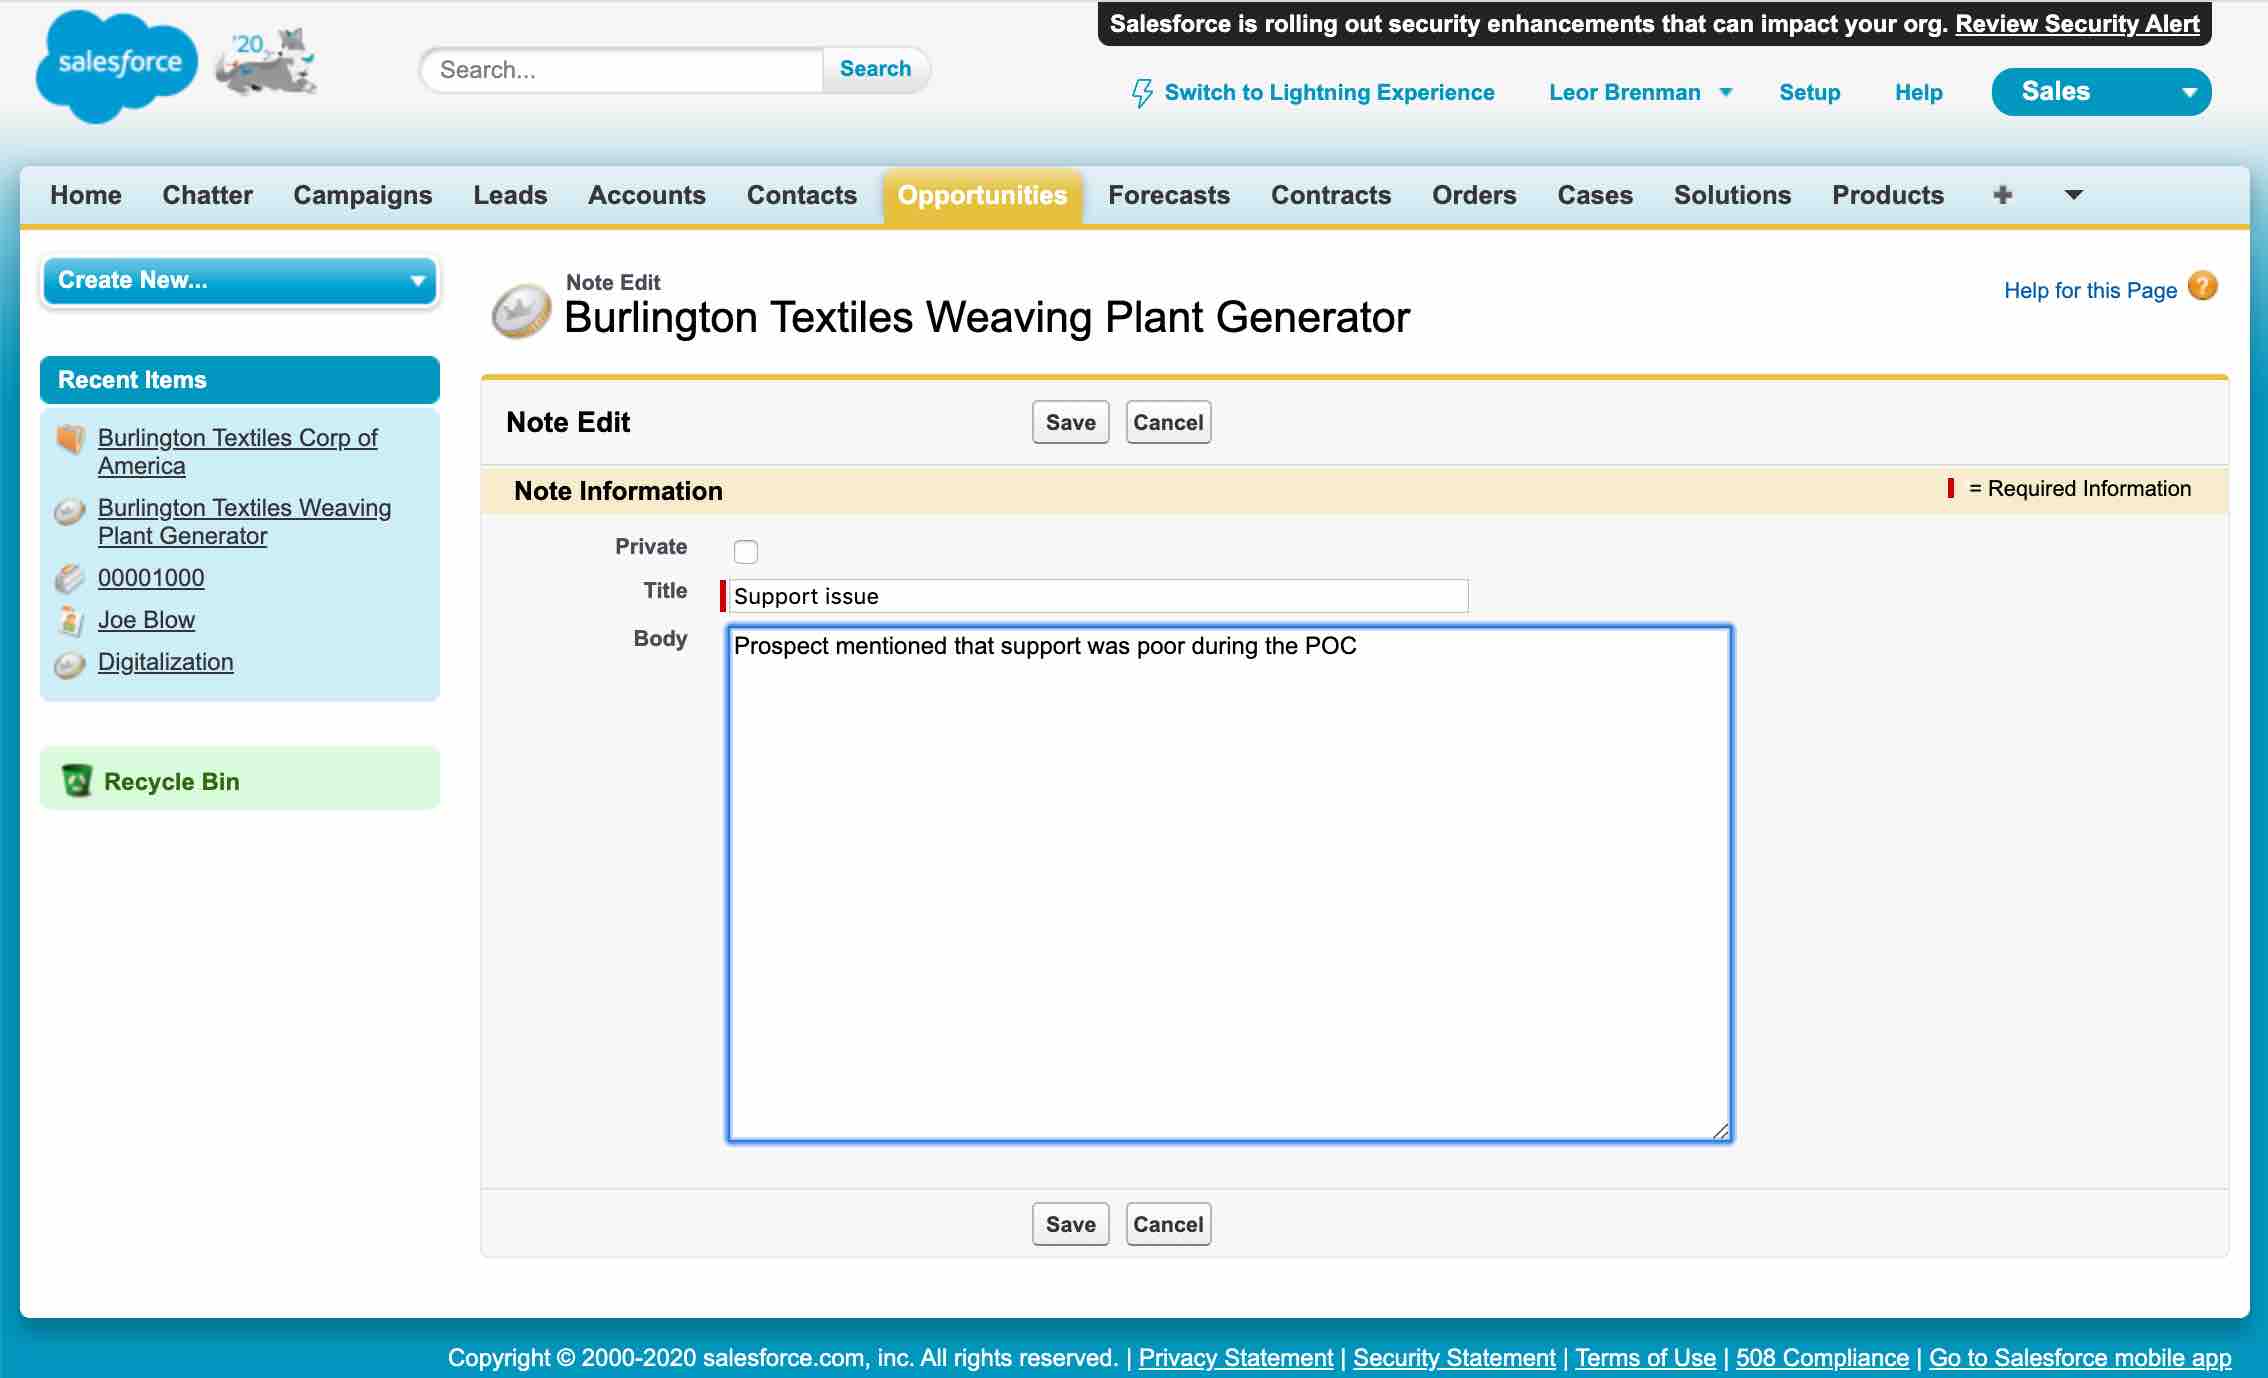
Create a note in a Salesforce opportunity and enter a negative sentiment: “Prospect mentioned that support was poor during the POC” as shown below:
You should get a notification in MS Teams as follows:

Summary
In this blog post, we saw how Integration Builder and API Builder can be used together with AWS Comprehend Natural Language Processing service to implement a sentiment analysis application to alert Sales via MS Teams. This enables a company to be more proactive in analyzing CRM Notes and ultimately the sales pipeline.
Learn how to authenticate a Gmail Connector with Integration Builder.

