

In my last blog post on Running API Builder 4.0 Docker Images on AWS EC2, we described how to set up multiple AWS EC2 Linux instances and install Docker and the API Builder Docker image on the instances for a high availability (HA) architecture. However, this architecture did not include scaling to cover different loads on our API.
In this blog post, we’ll describe how to use AWS Fargate to implement a high availability architecture with auto scaling. AWS Fargate is a compute engine for Amazon ECS that allows you to run Docker containers without having to manage servers or clusters. The only thing we need is our Docker image – which we already published to Docker Hub.
The architecture we are implementing is shown below:
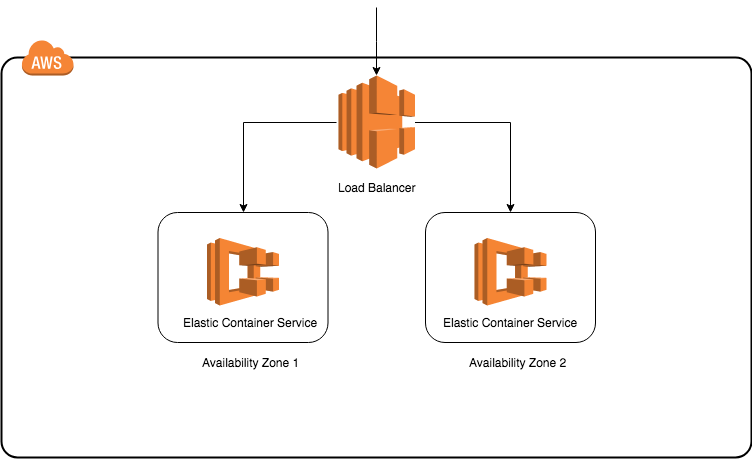
The main difference between this architecture and our previous HA architecture is that now we have auto scaling of our containers, managed by AWS.
Let’s get started.
Go to the AWS Fargate page at https://aws.amazon.com/fargate/ and press the Get started with AWS Fargate button.
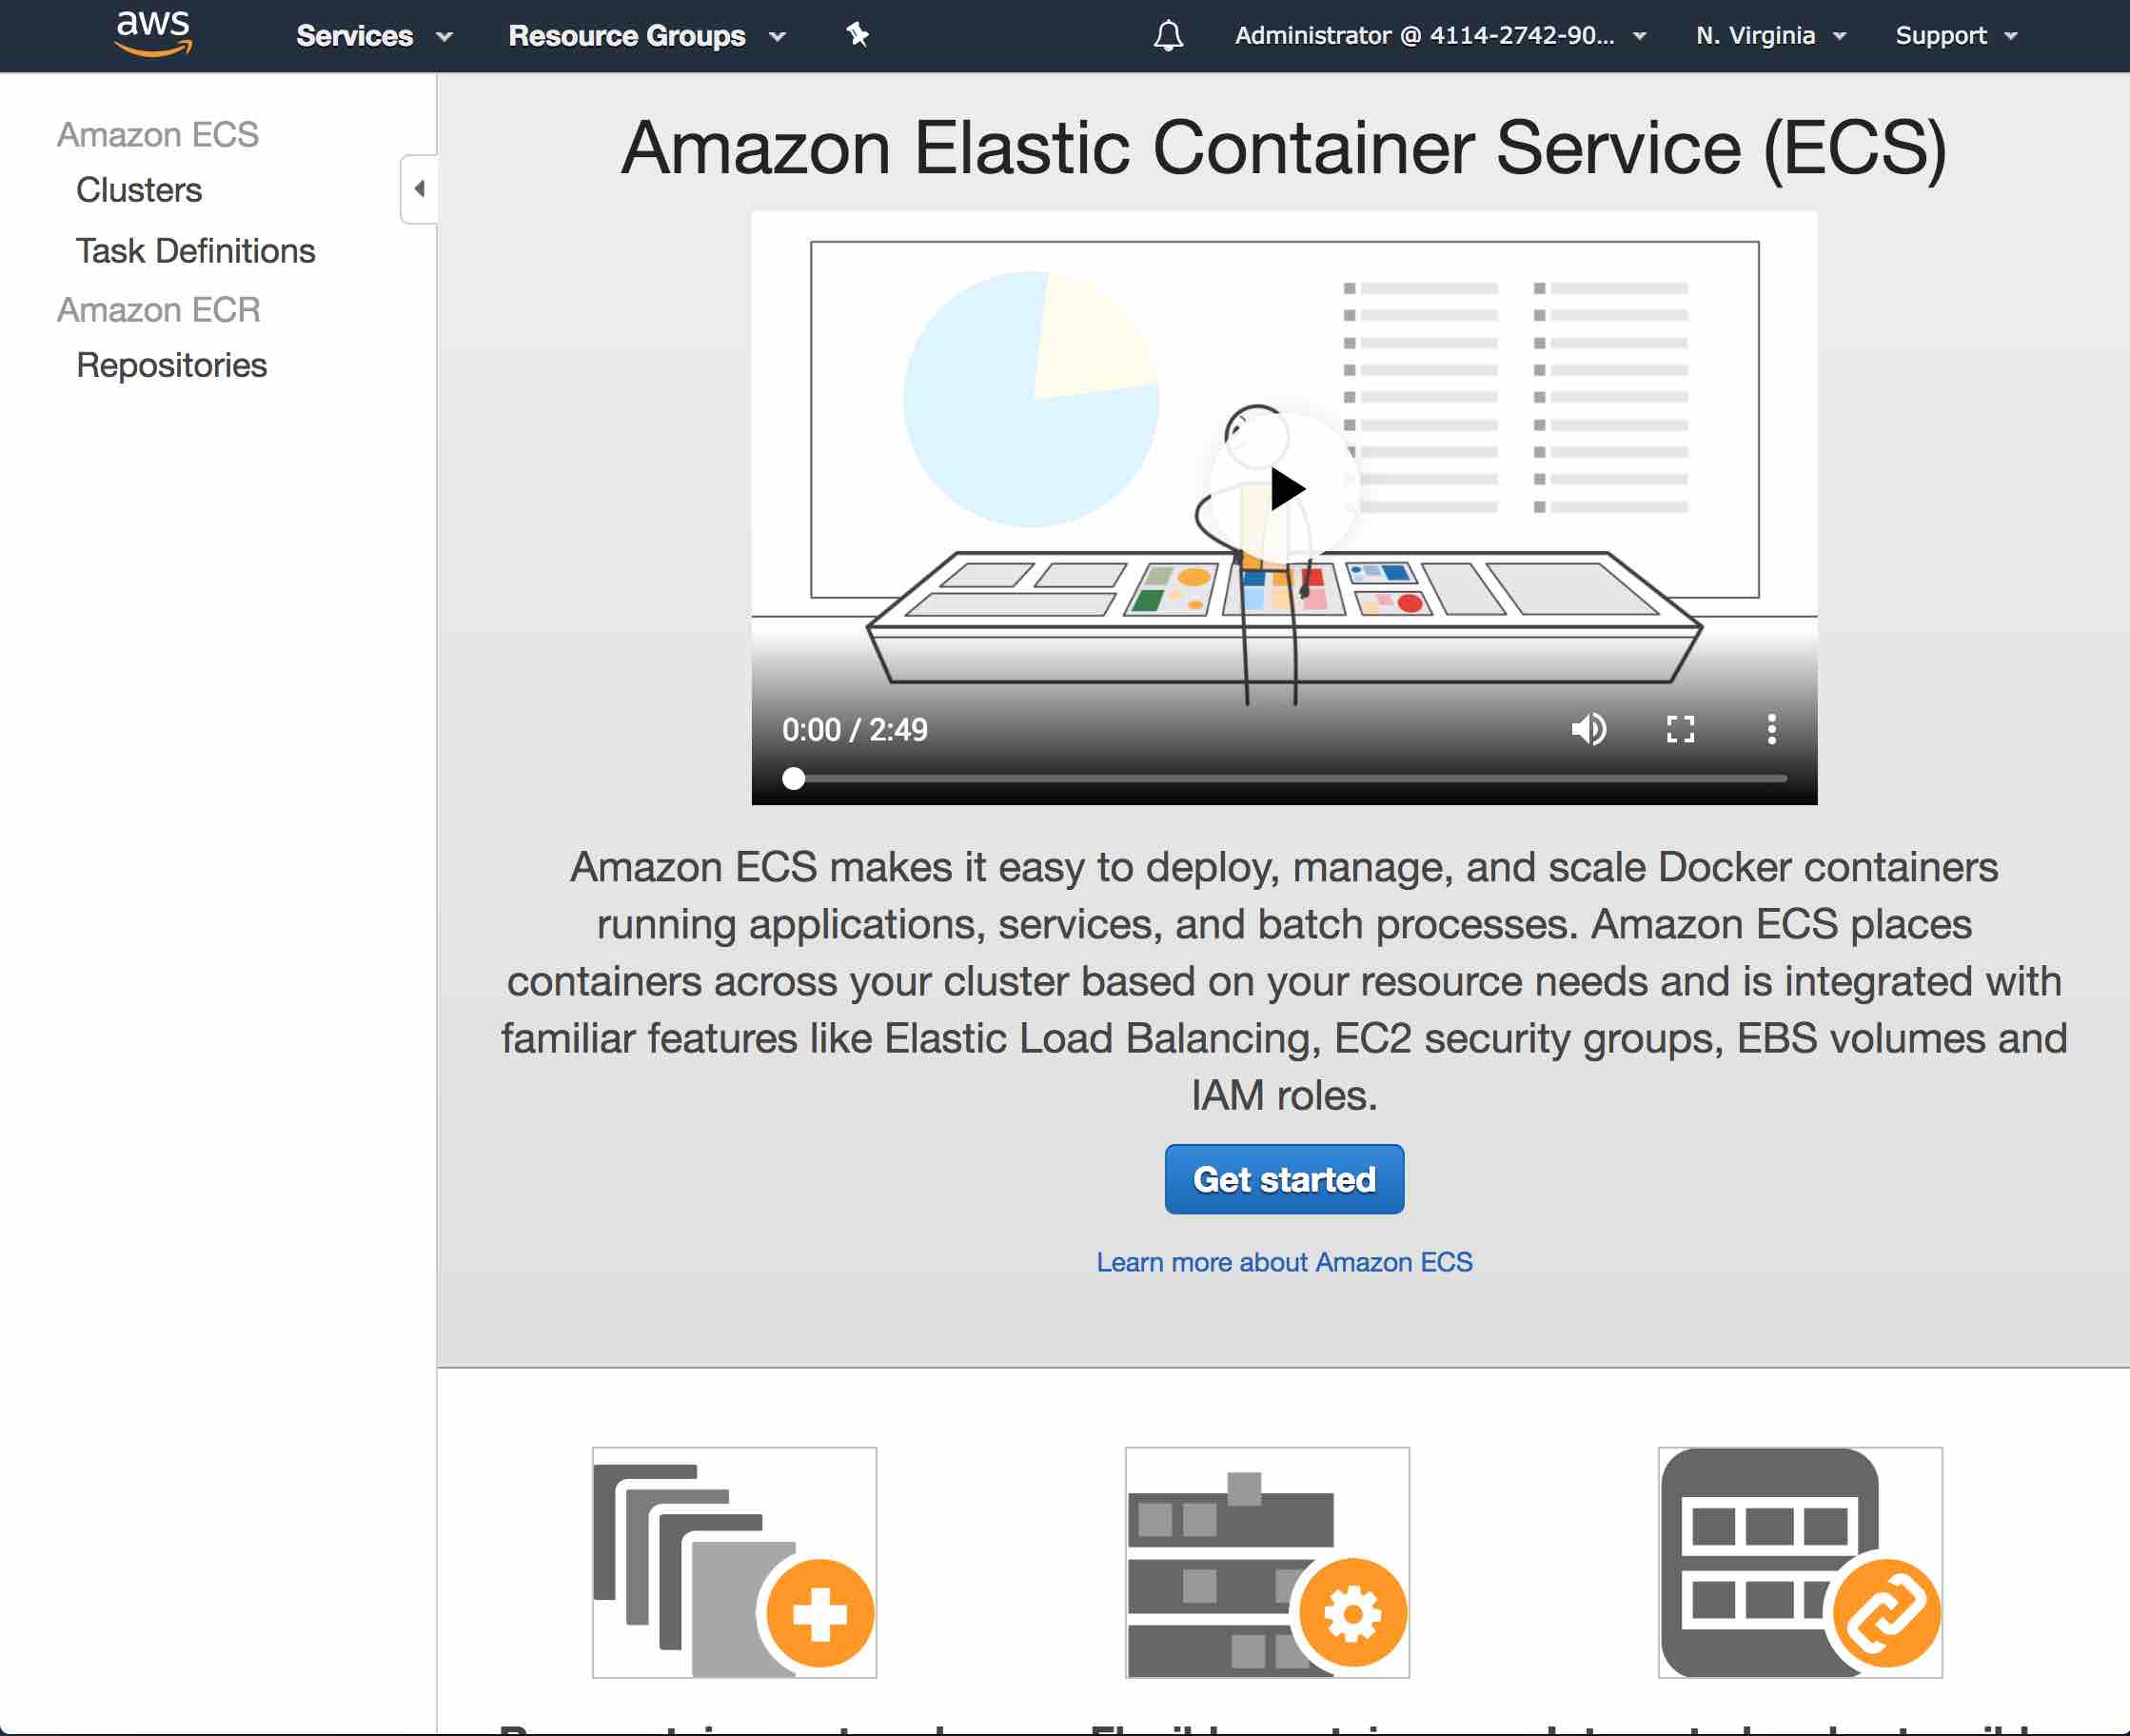
Press the Get started button.

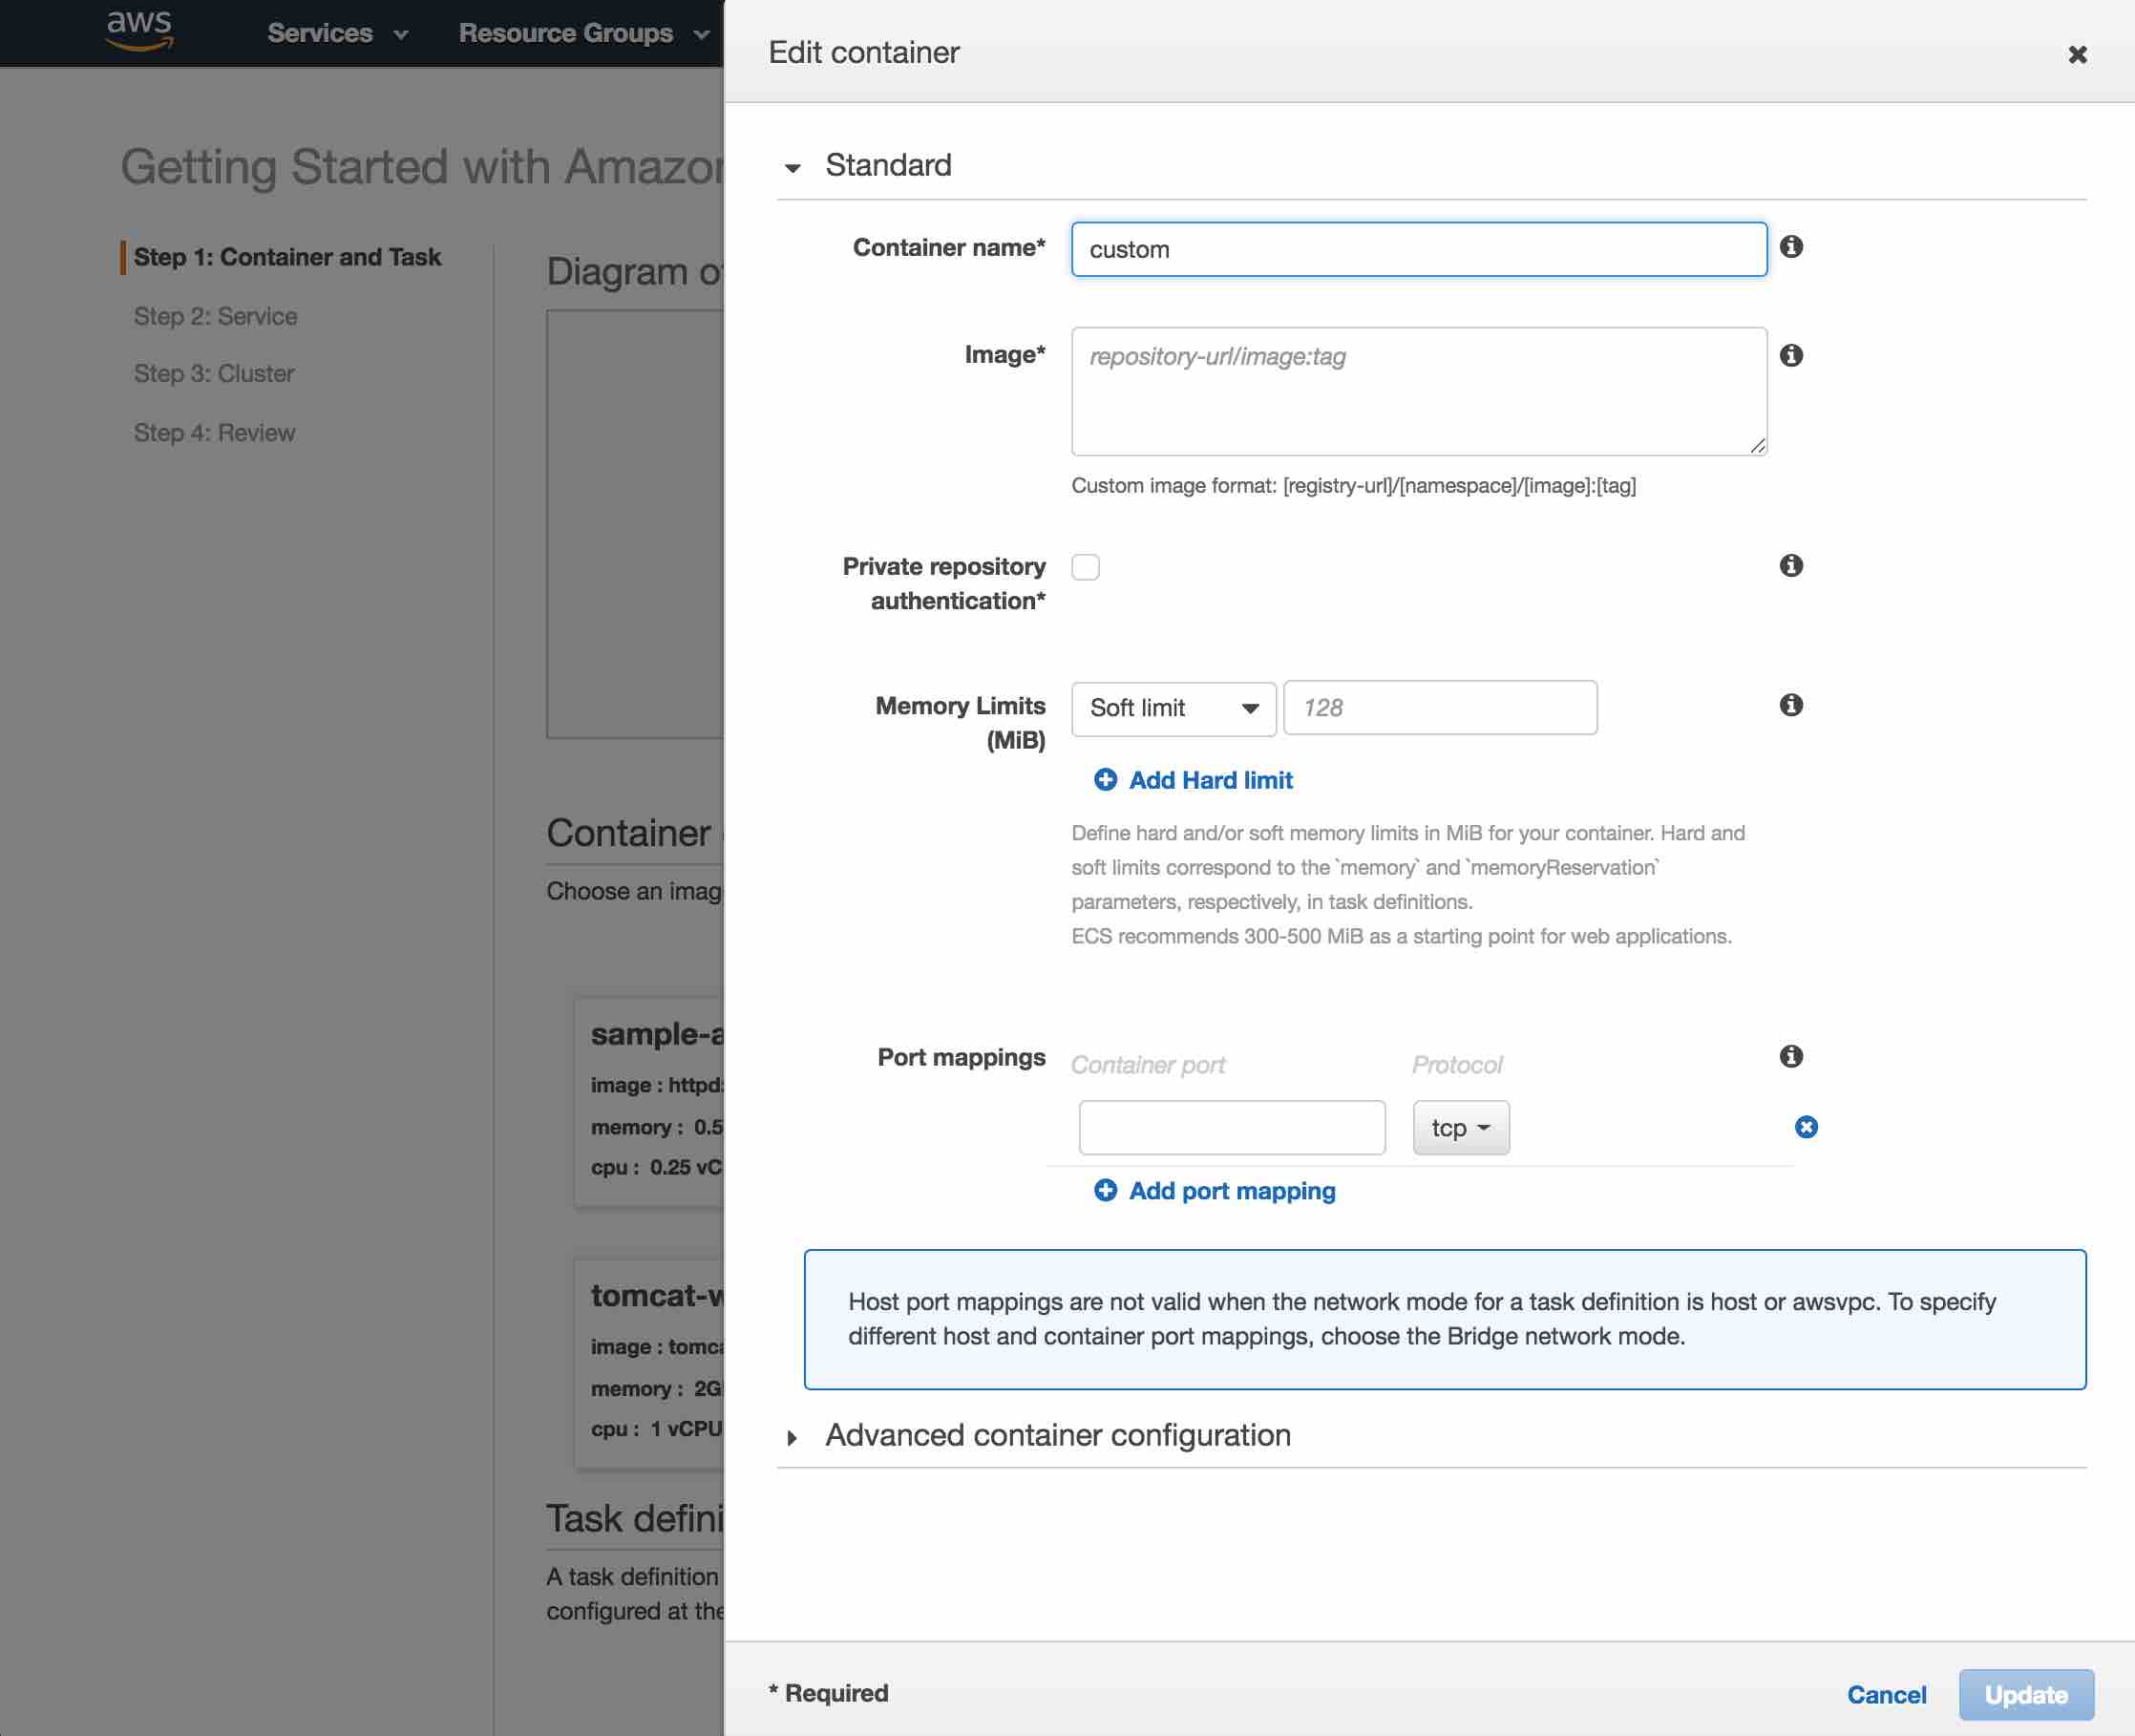
In the Container definition section, press the Configure button in the box labeled custom.
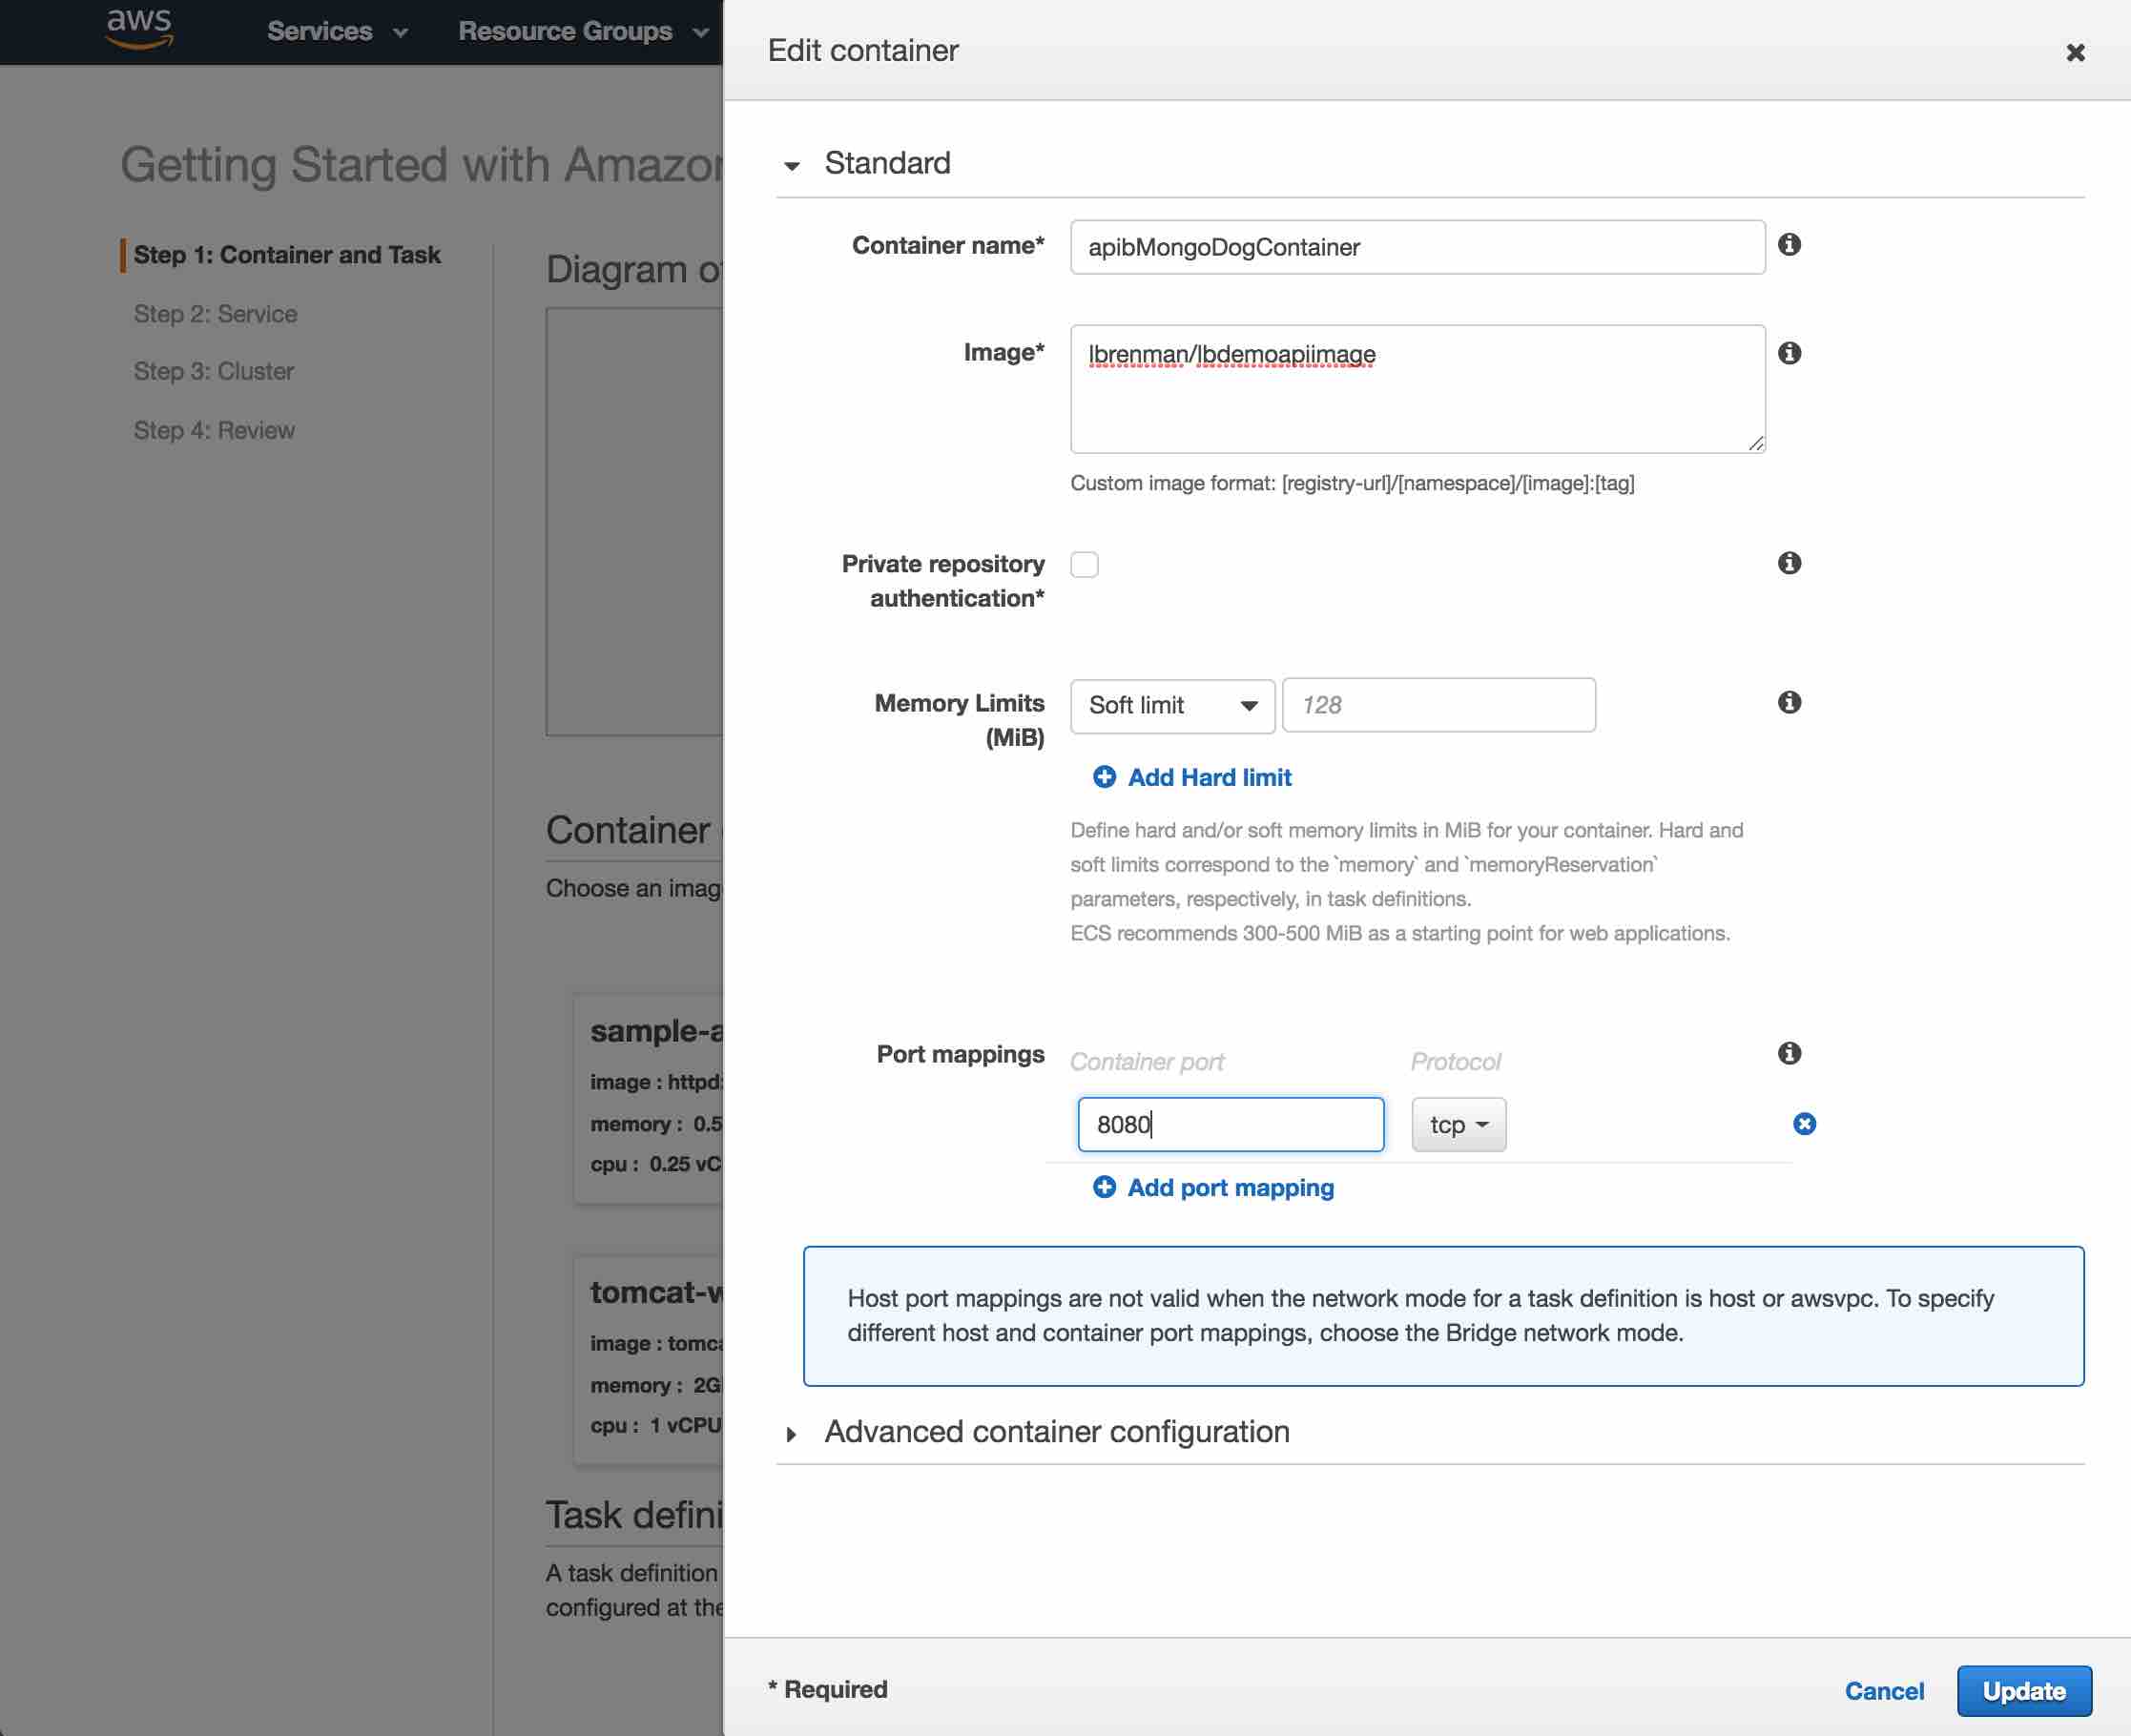
Enter a container name and the Docker Hub image name. I named my container apibMongoDogContainer and my Docker Hub image name is lbrenman/lbdemoapiimage. Also, since our API Builder API is running on port 8080, I need to add that to the port mapping section.
NOTE: Don’t press the Update button just yet.
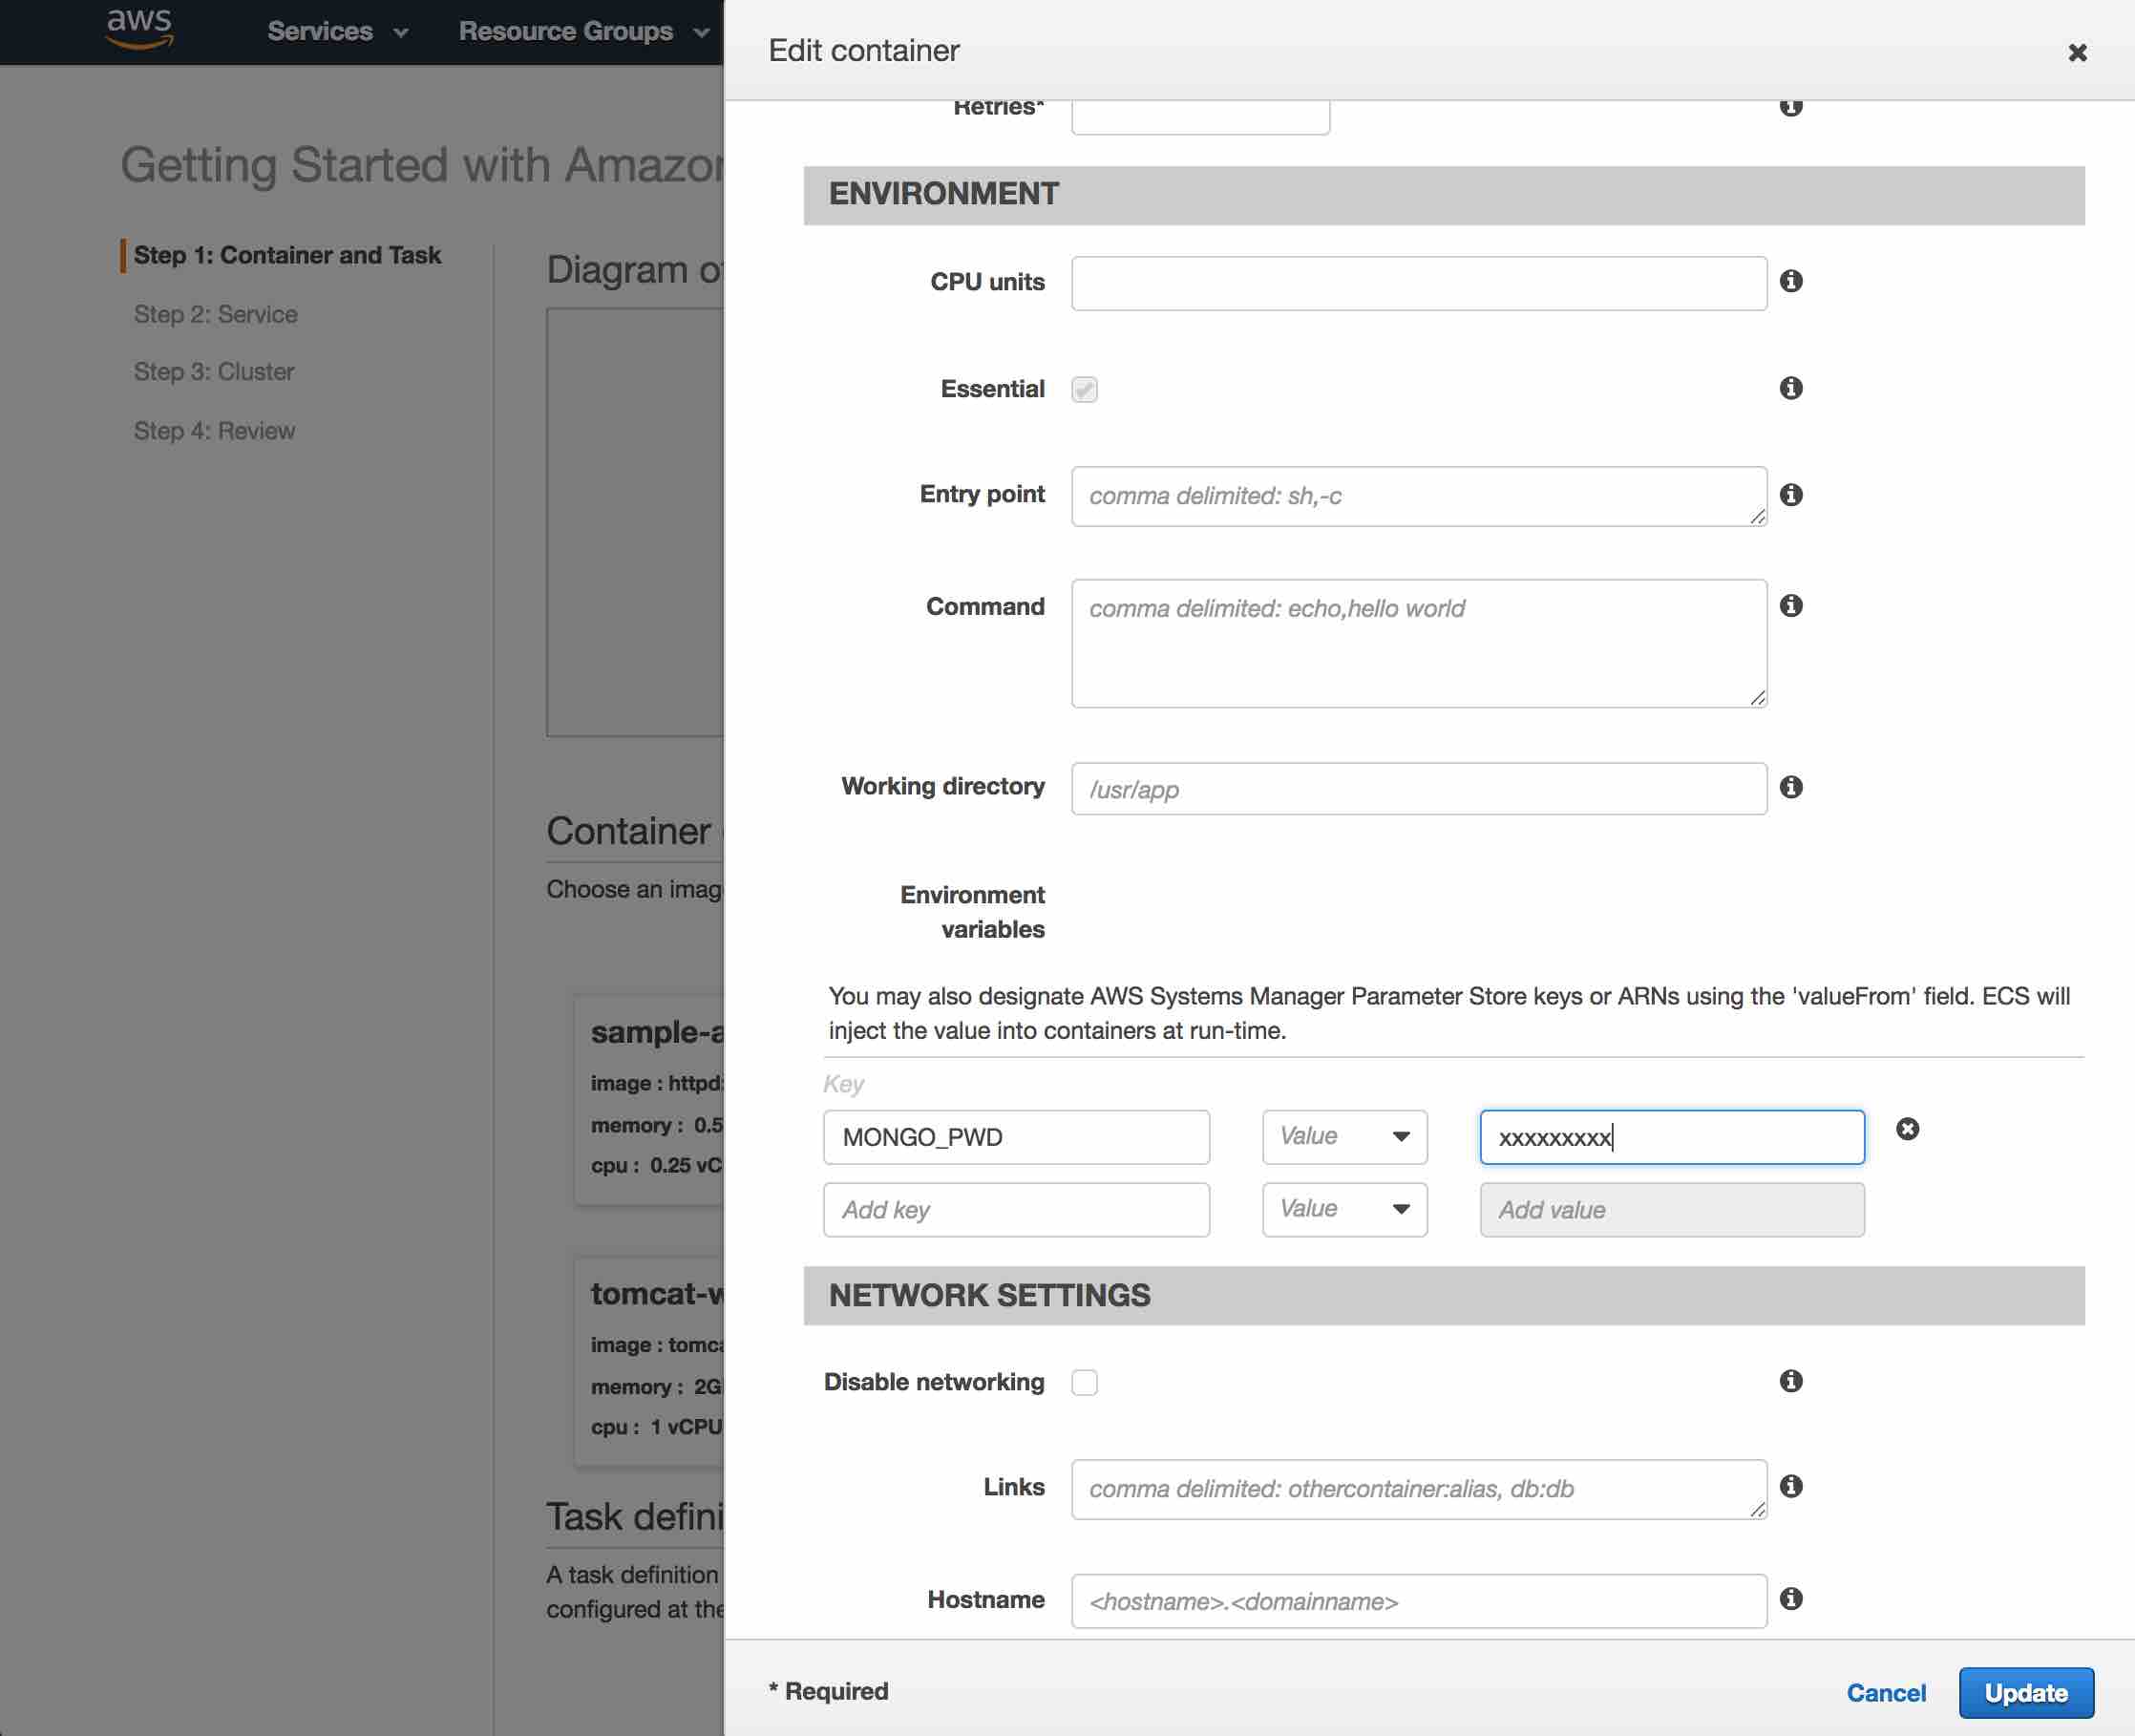
Open the Advanced container configuration section on the page and scroll down to the ENVIRONMENT section and find the Environment variables. Recall from our prior blog posts that we need to pass in the password to the MongoDB database as an environment variable called MONGO_PWD.
NOTE: Don’t press the Update button just yet.
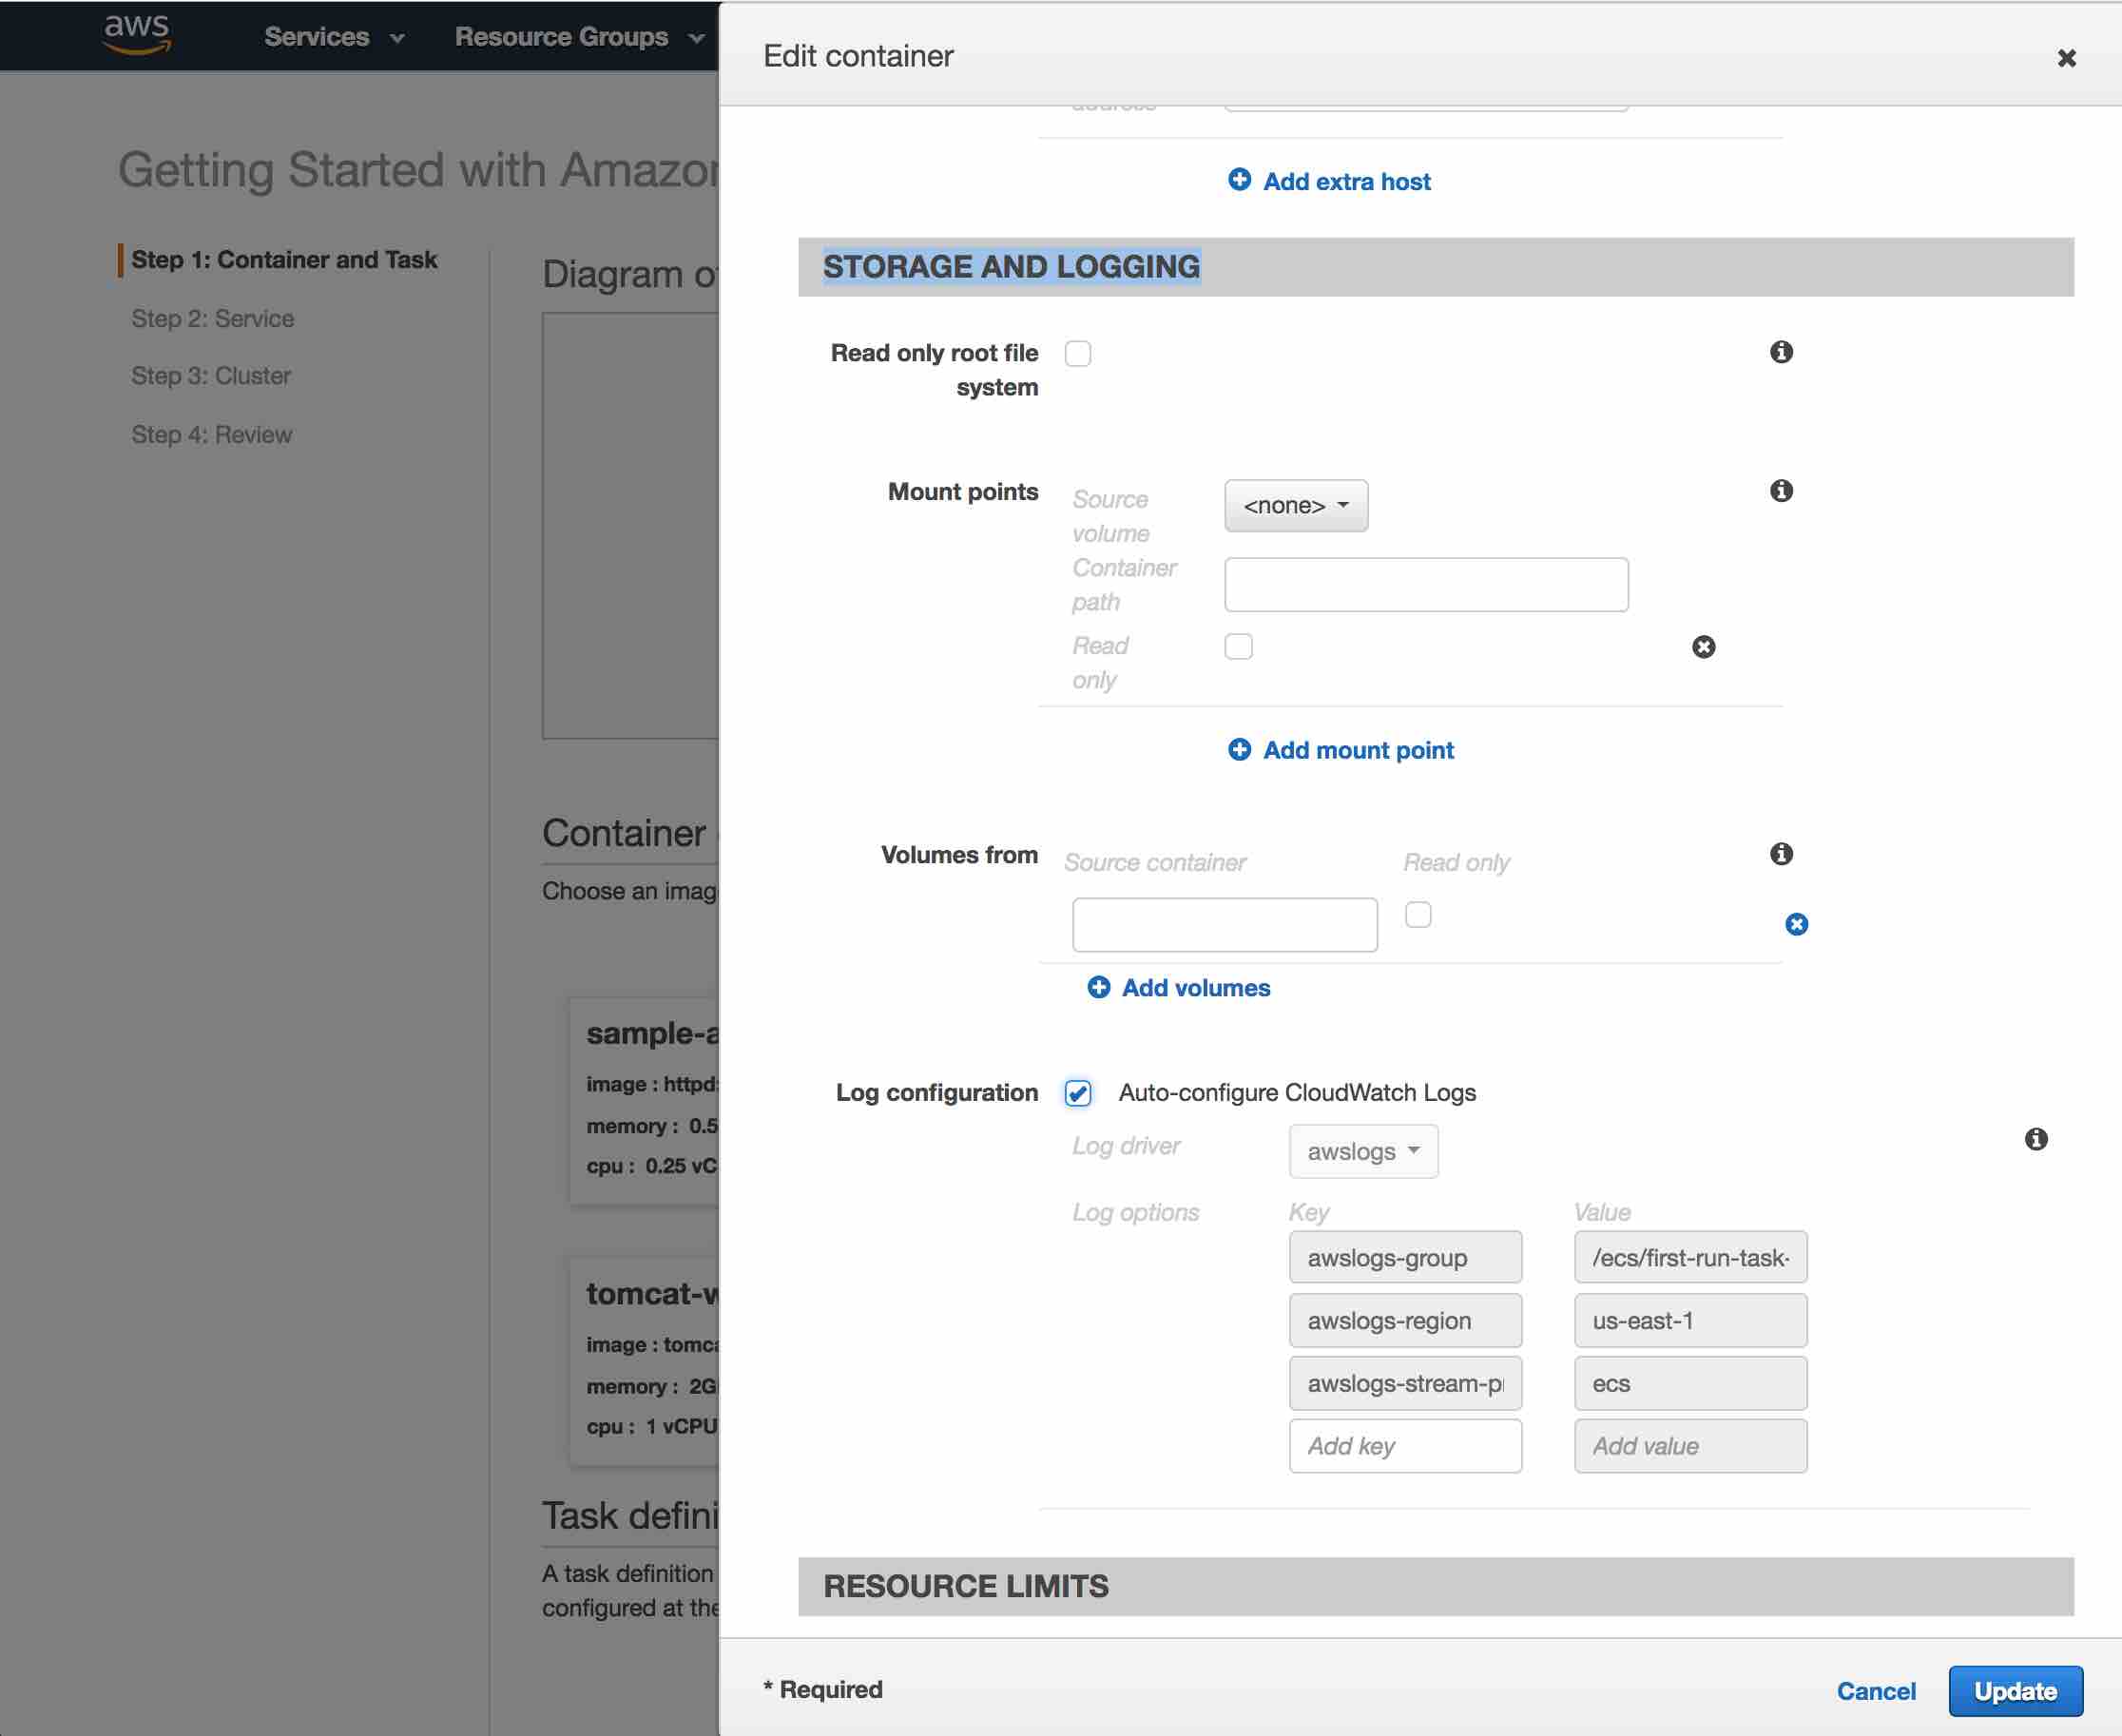
Scroll down to the STORAGE AND LOGGING section and enable Log configuration
Now, press the Update button to proceed. Scroll to the bottom of the page and press the Next button.
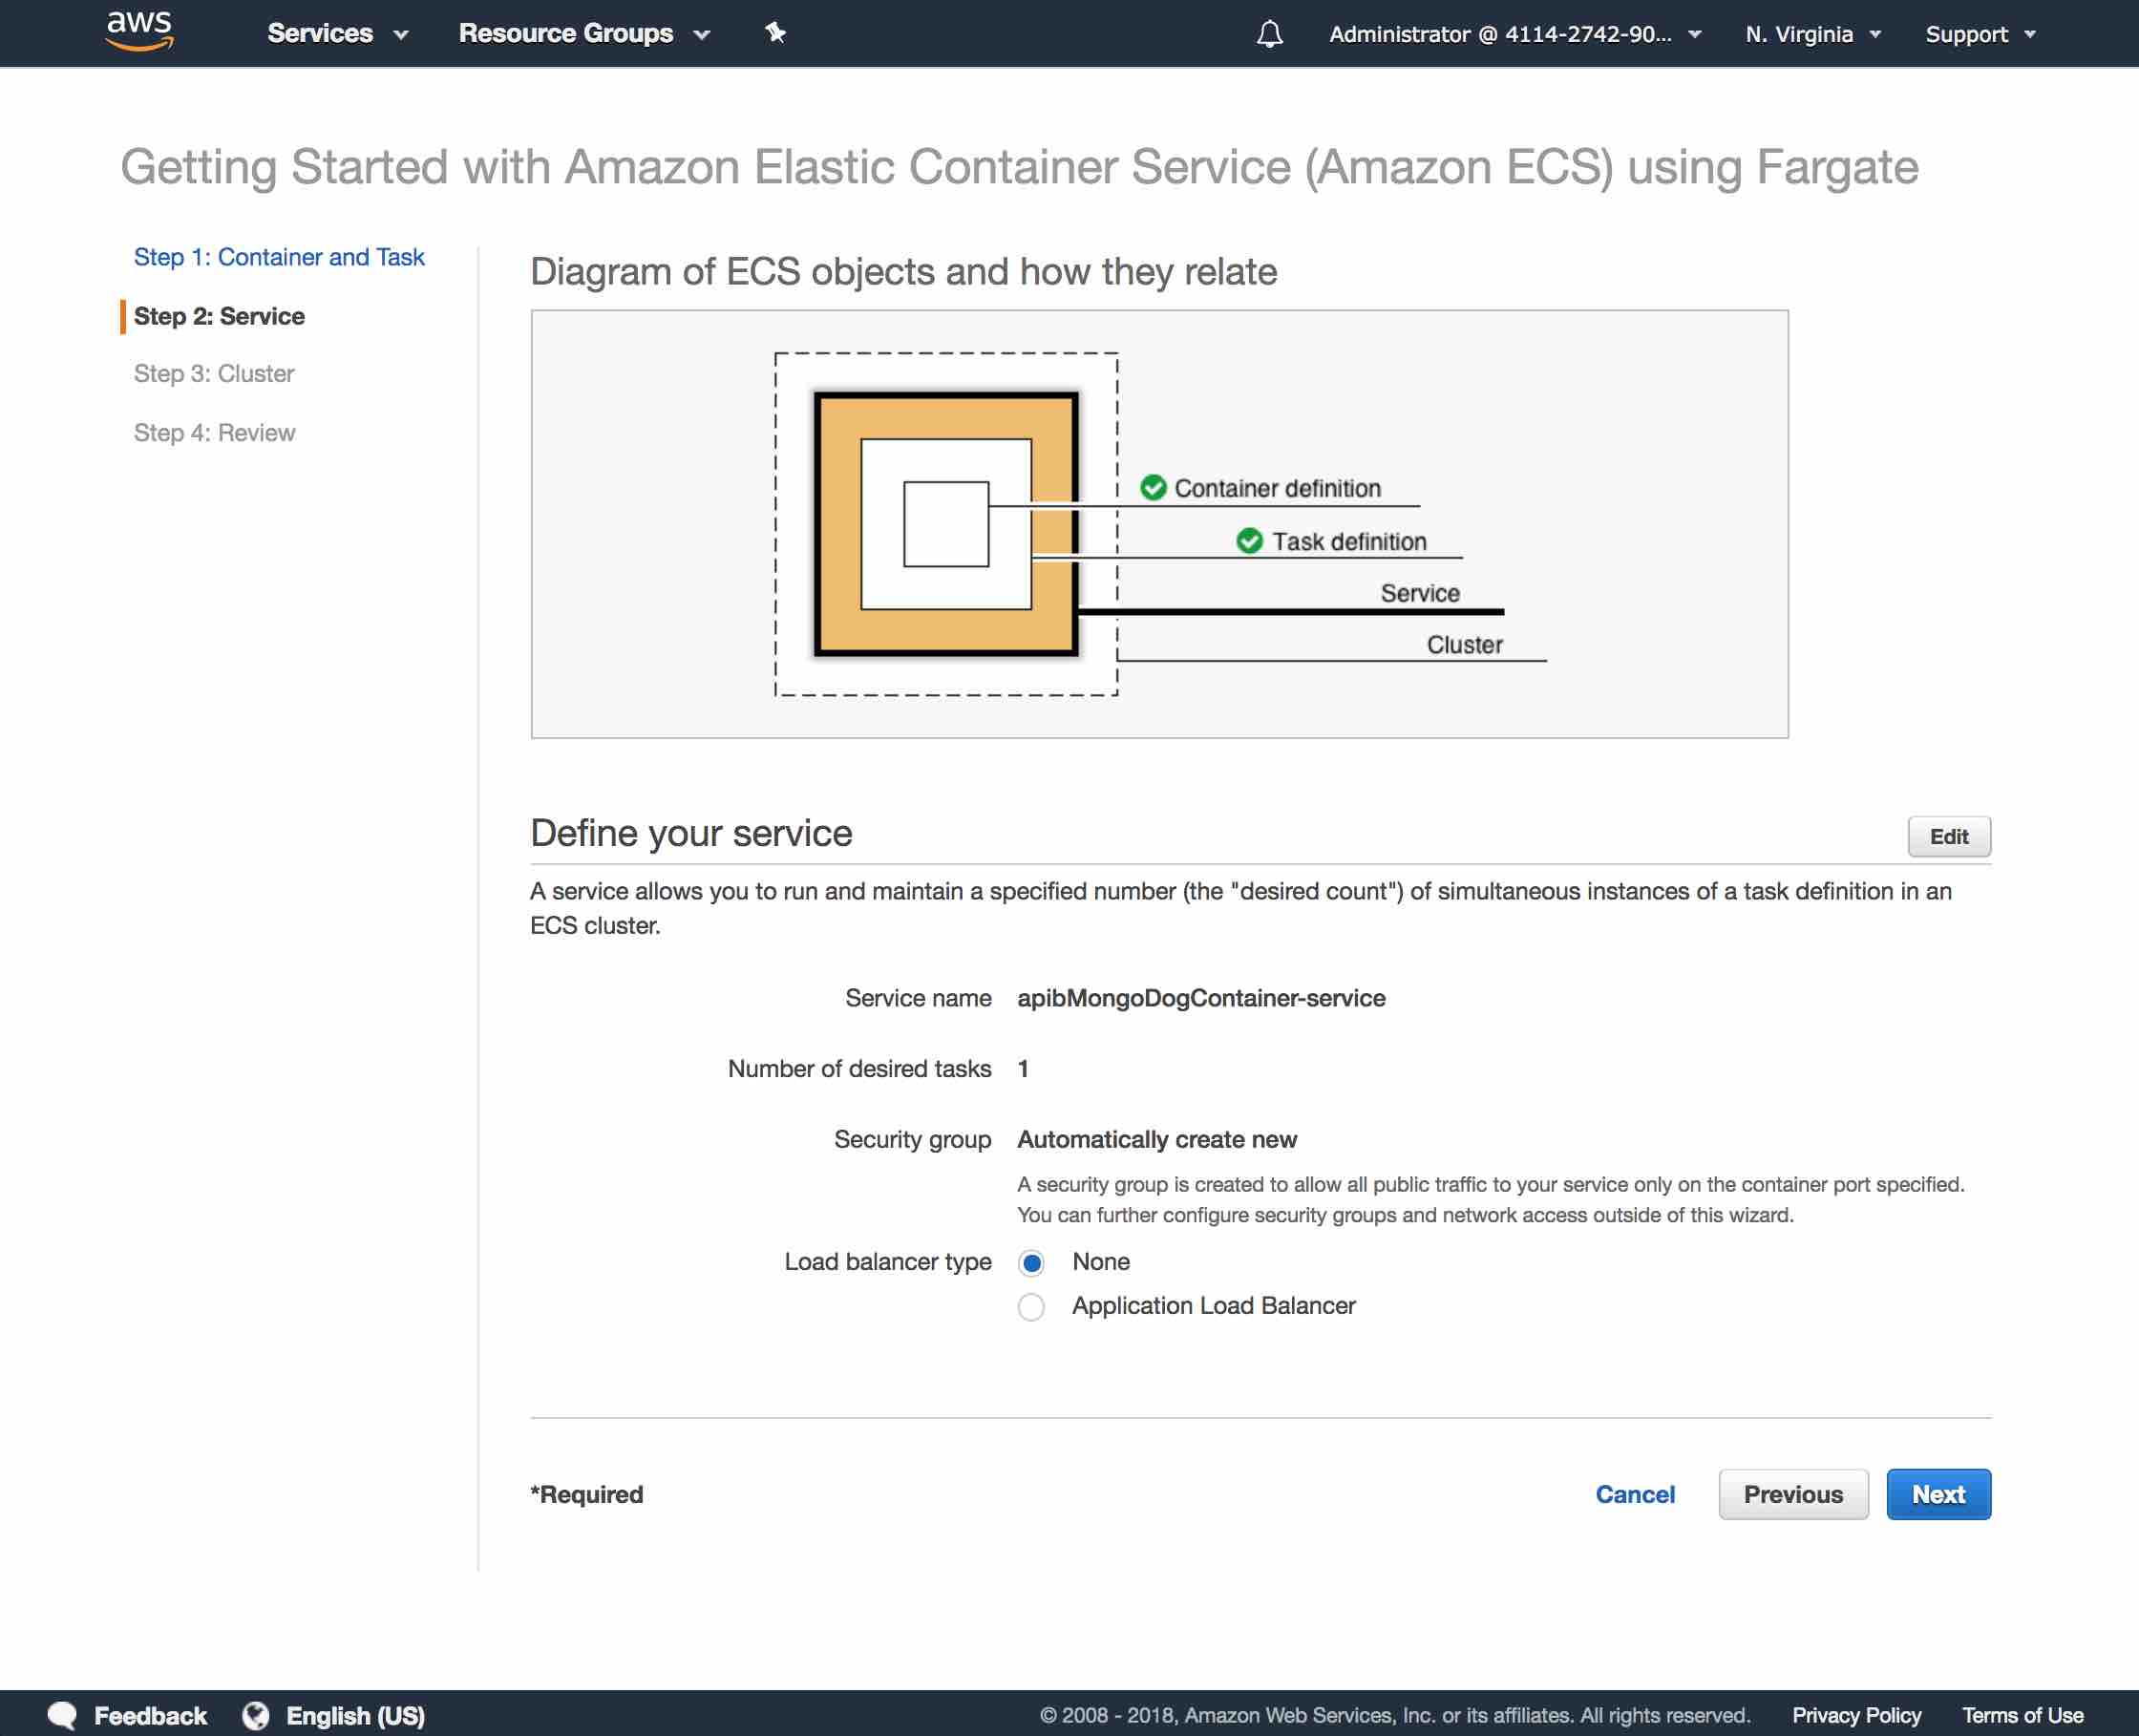
Press the Edit button to configure the service.
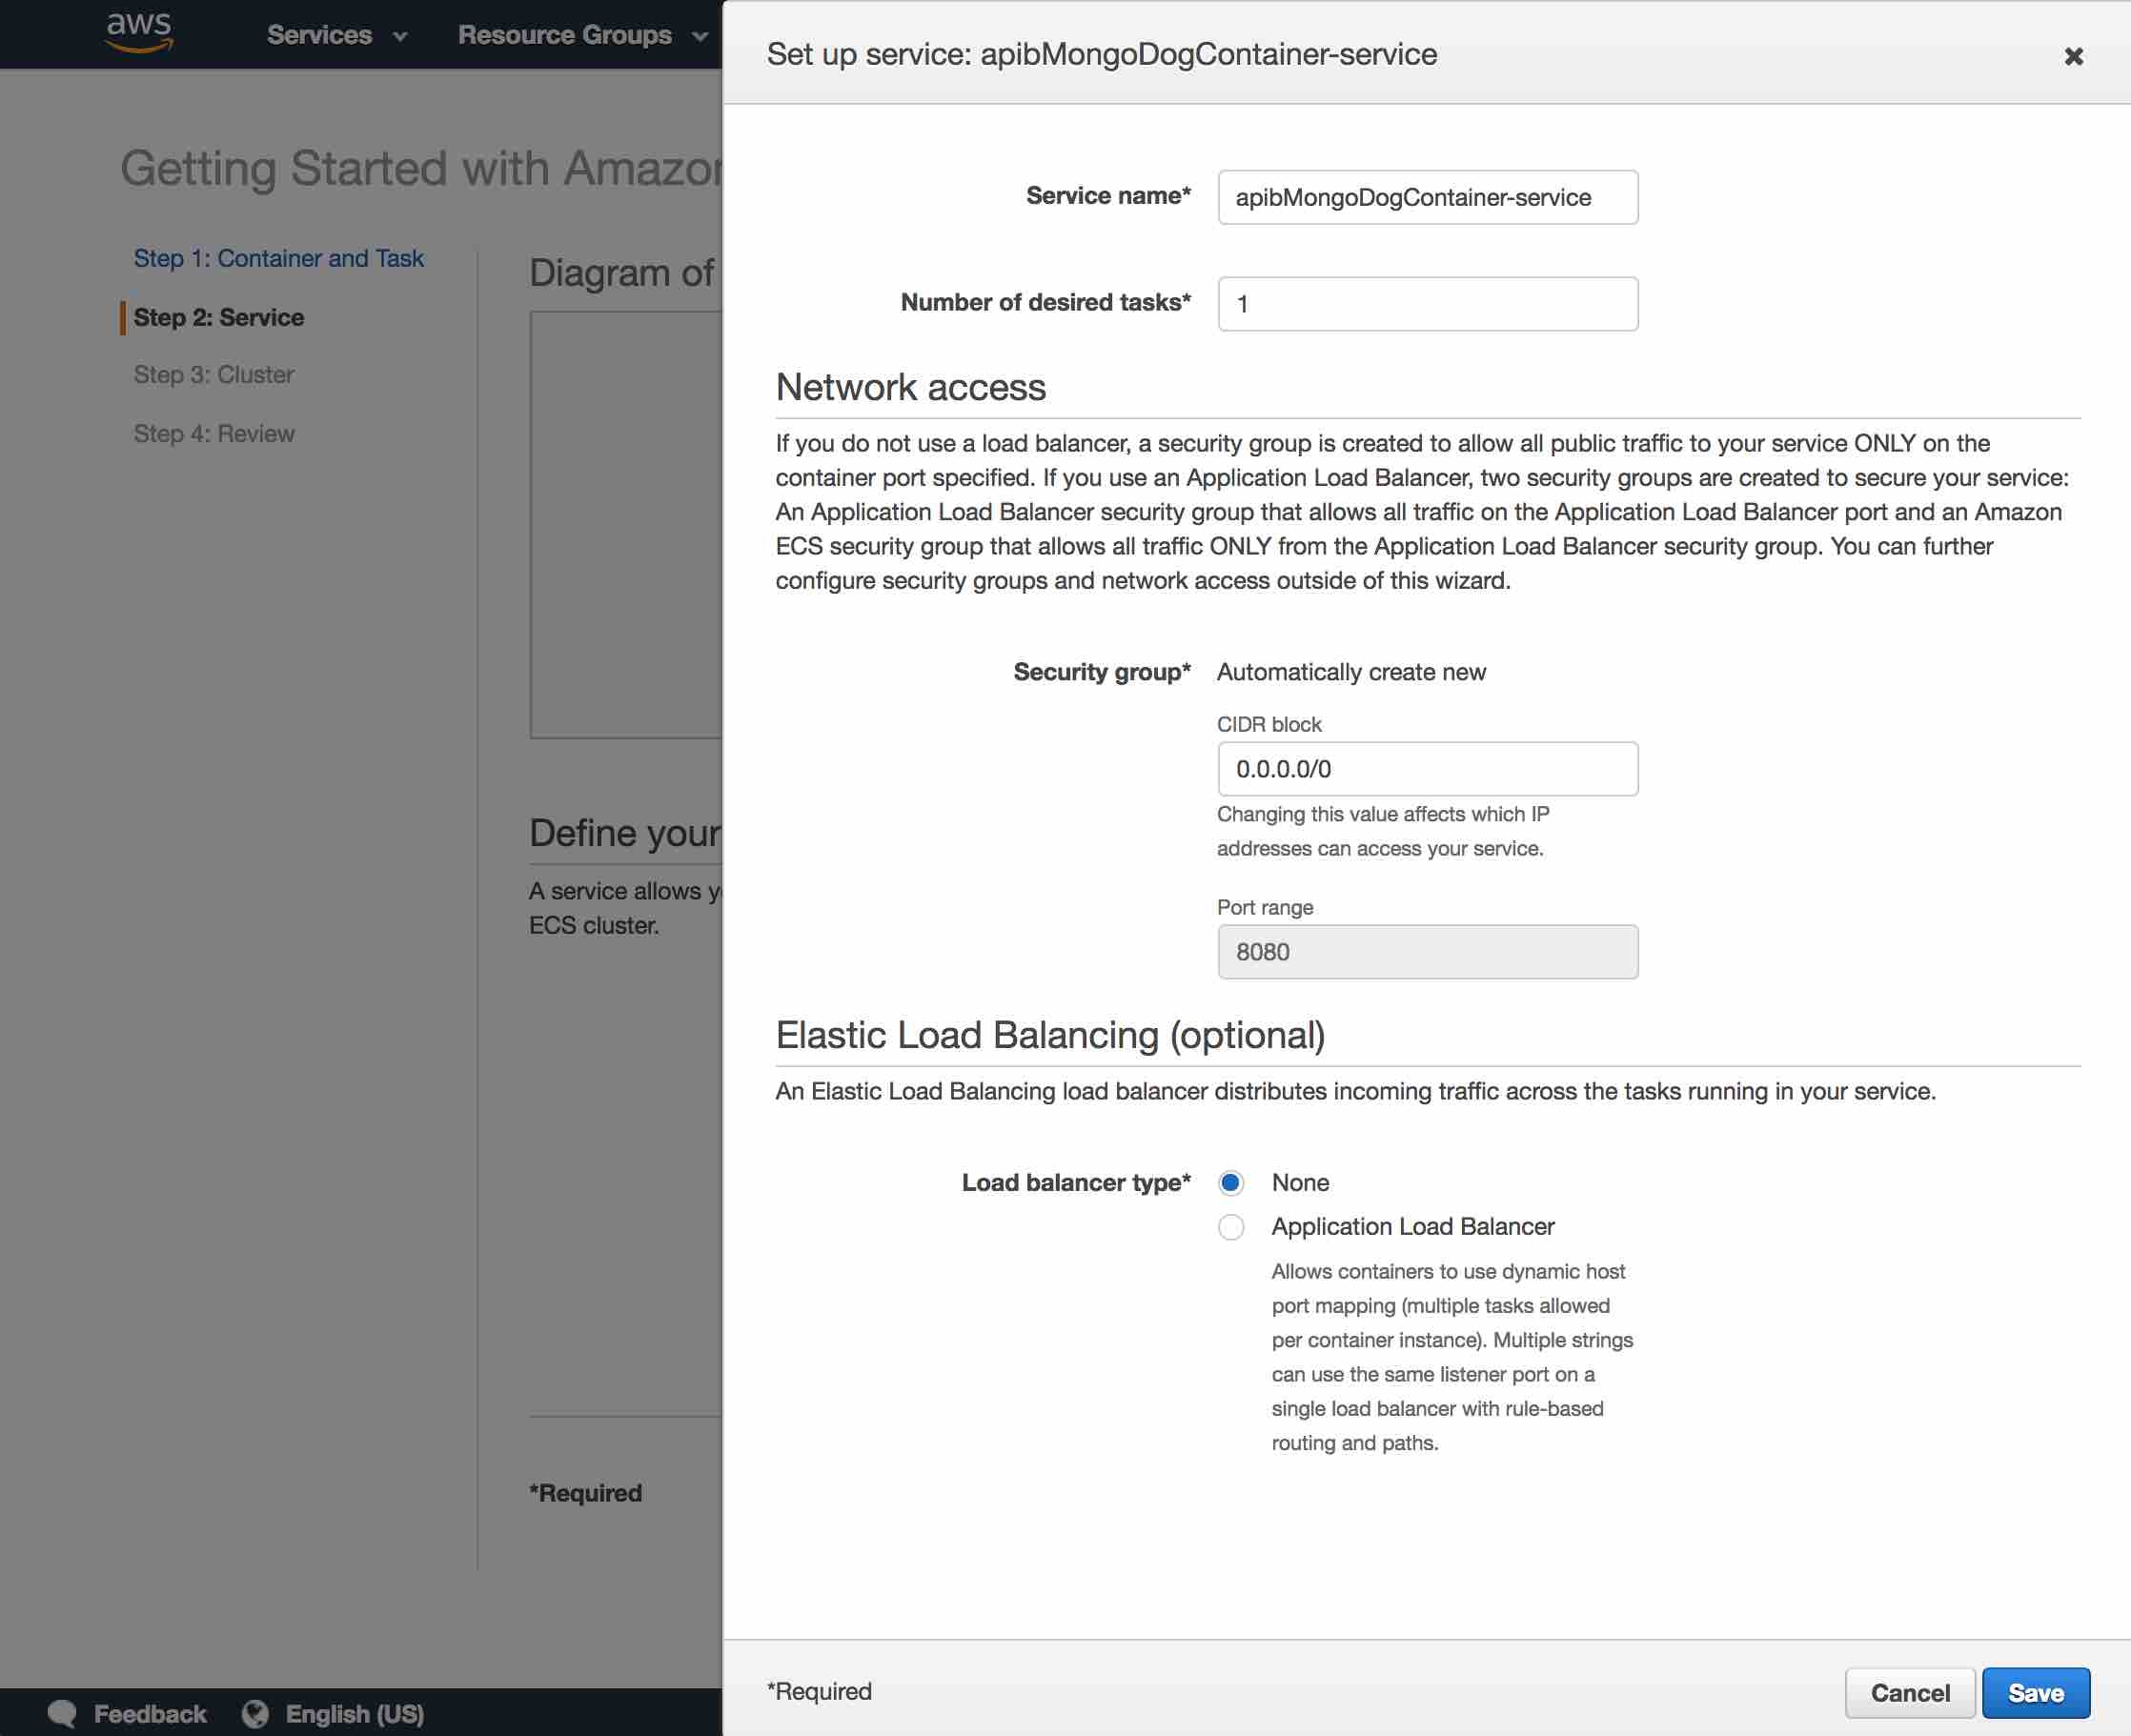
Select the Application Load Balancer option.
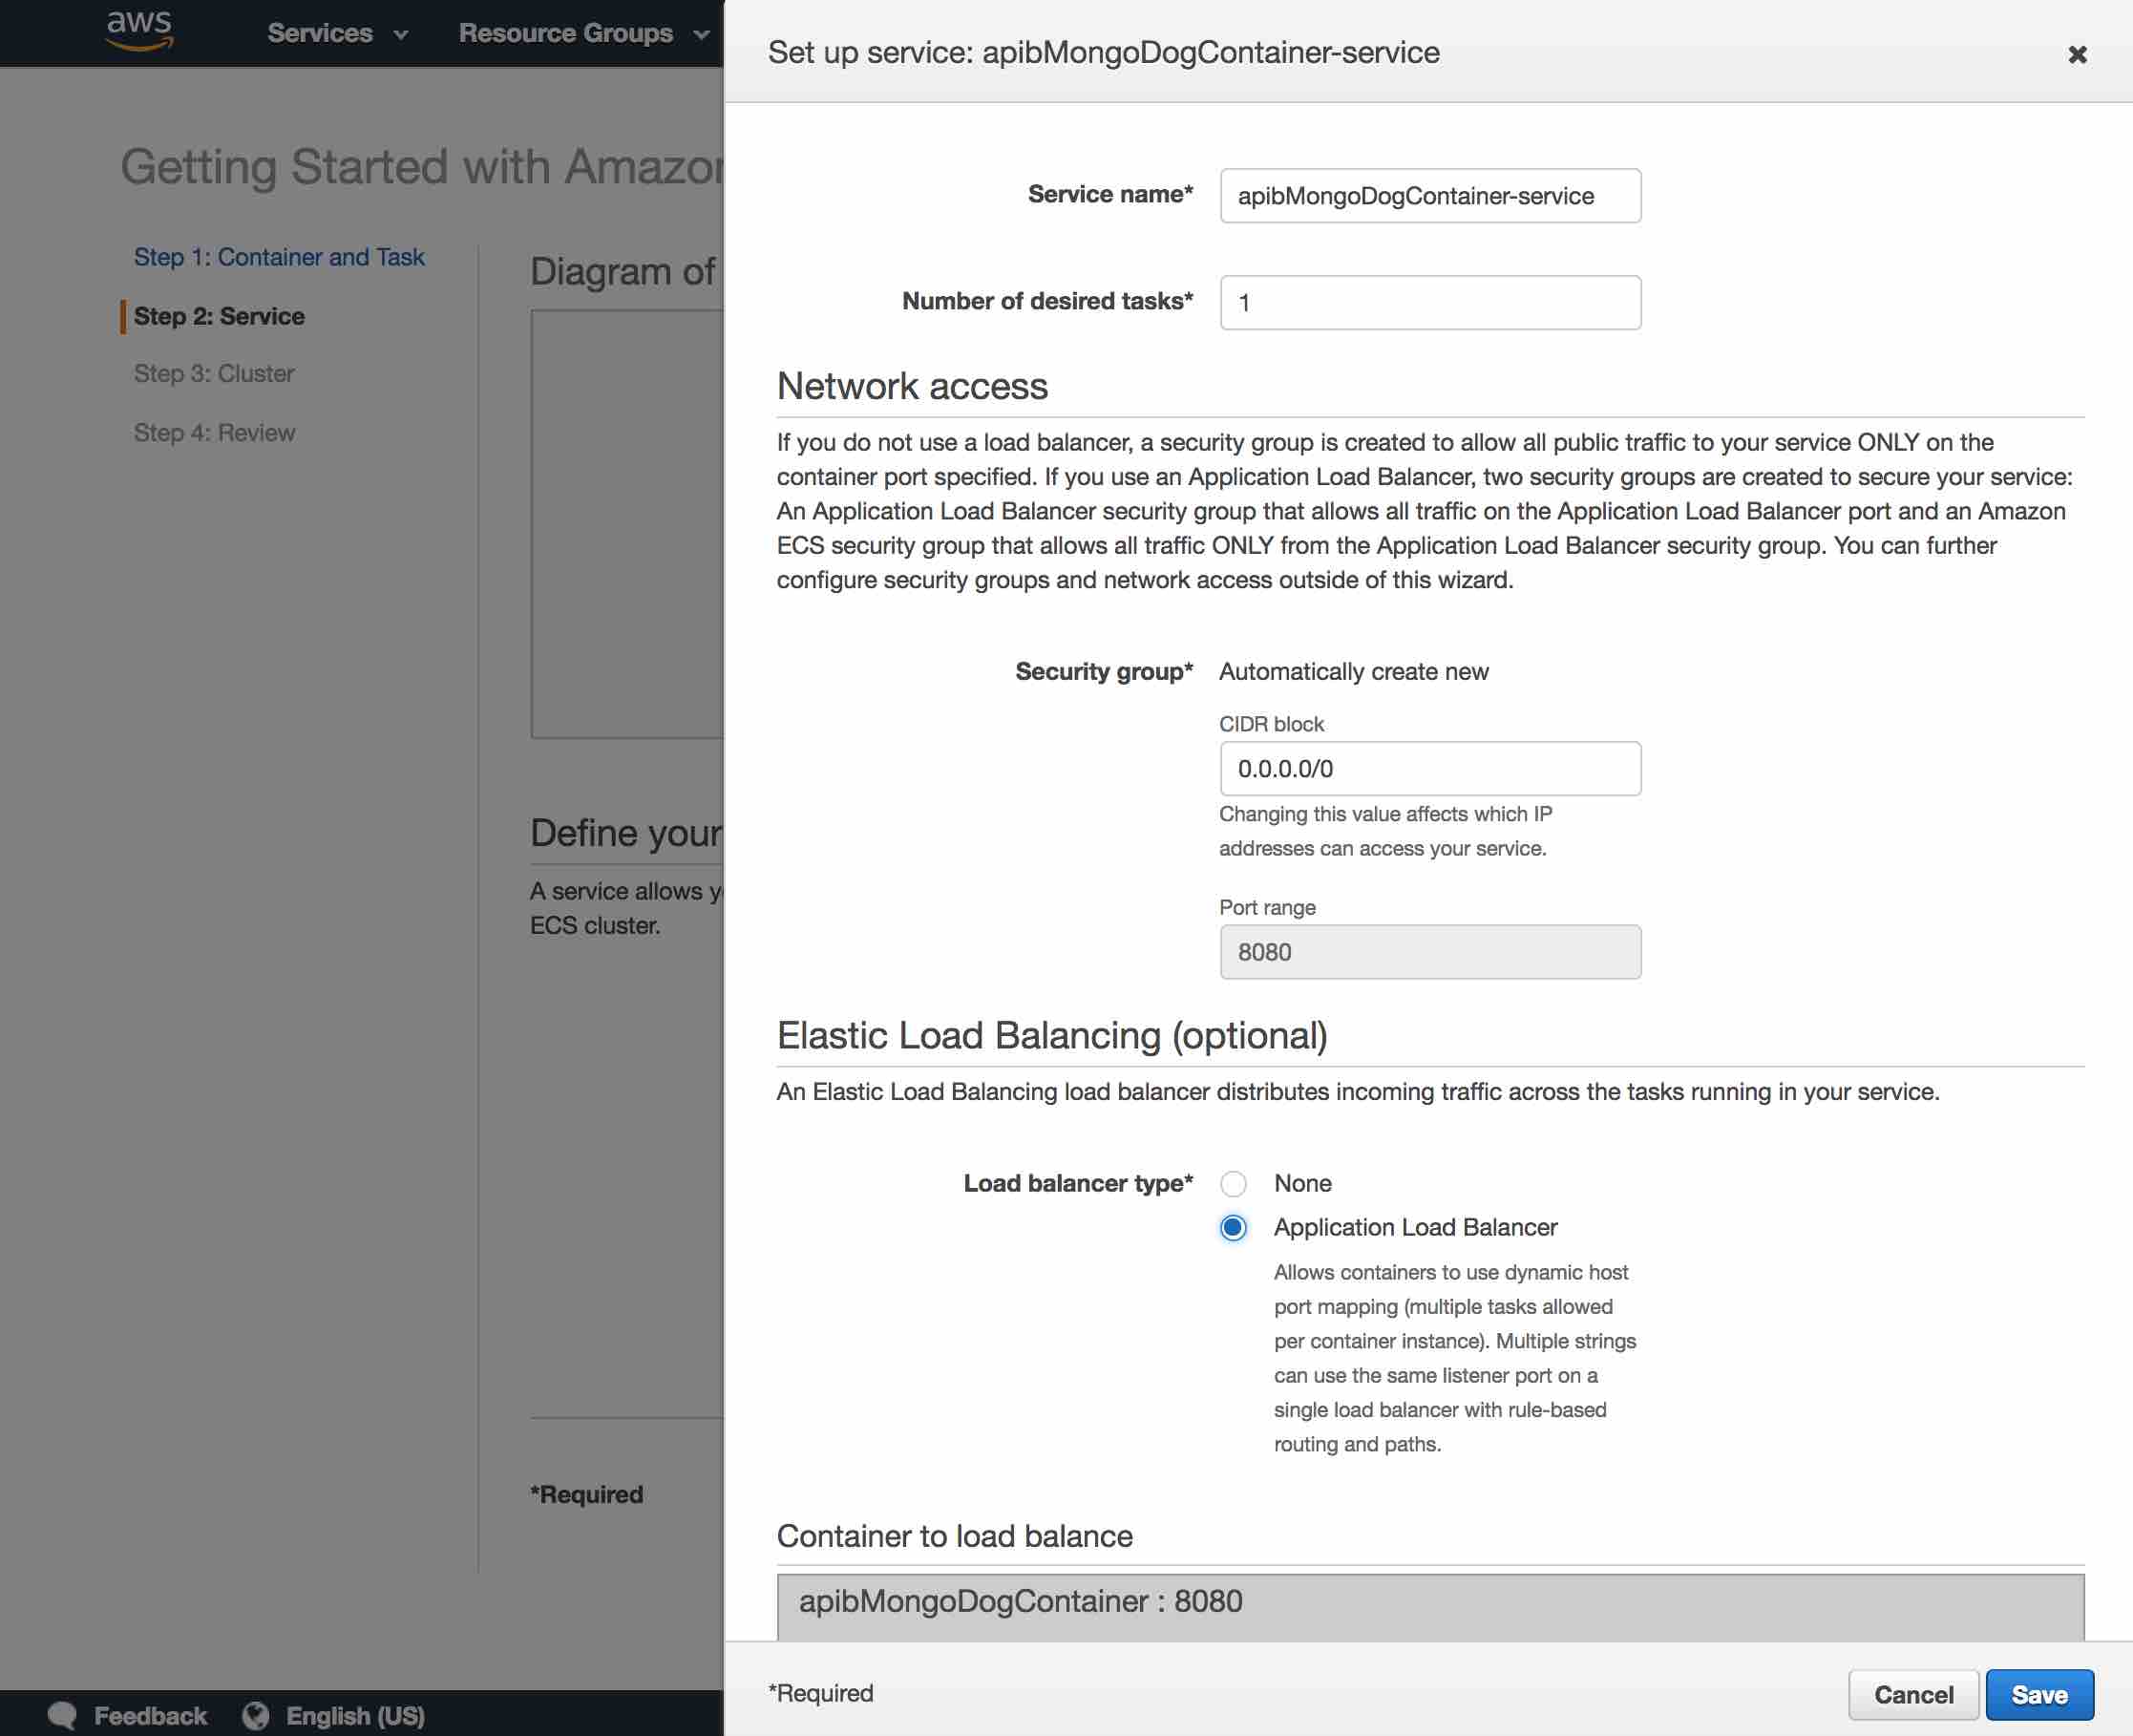
Press the Save button and then press the Next button.
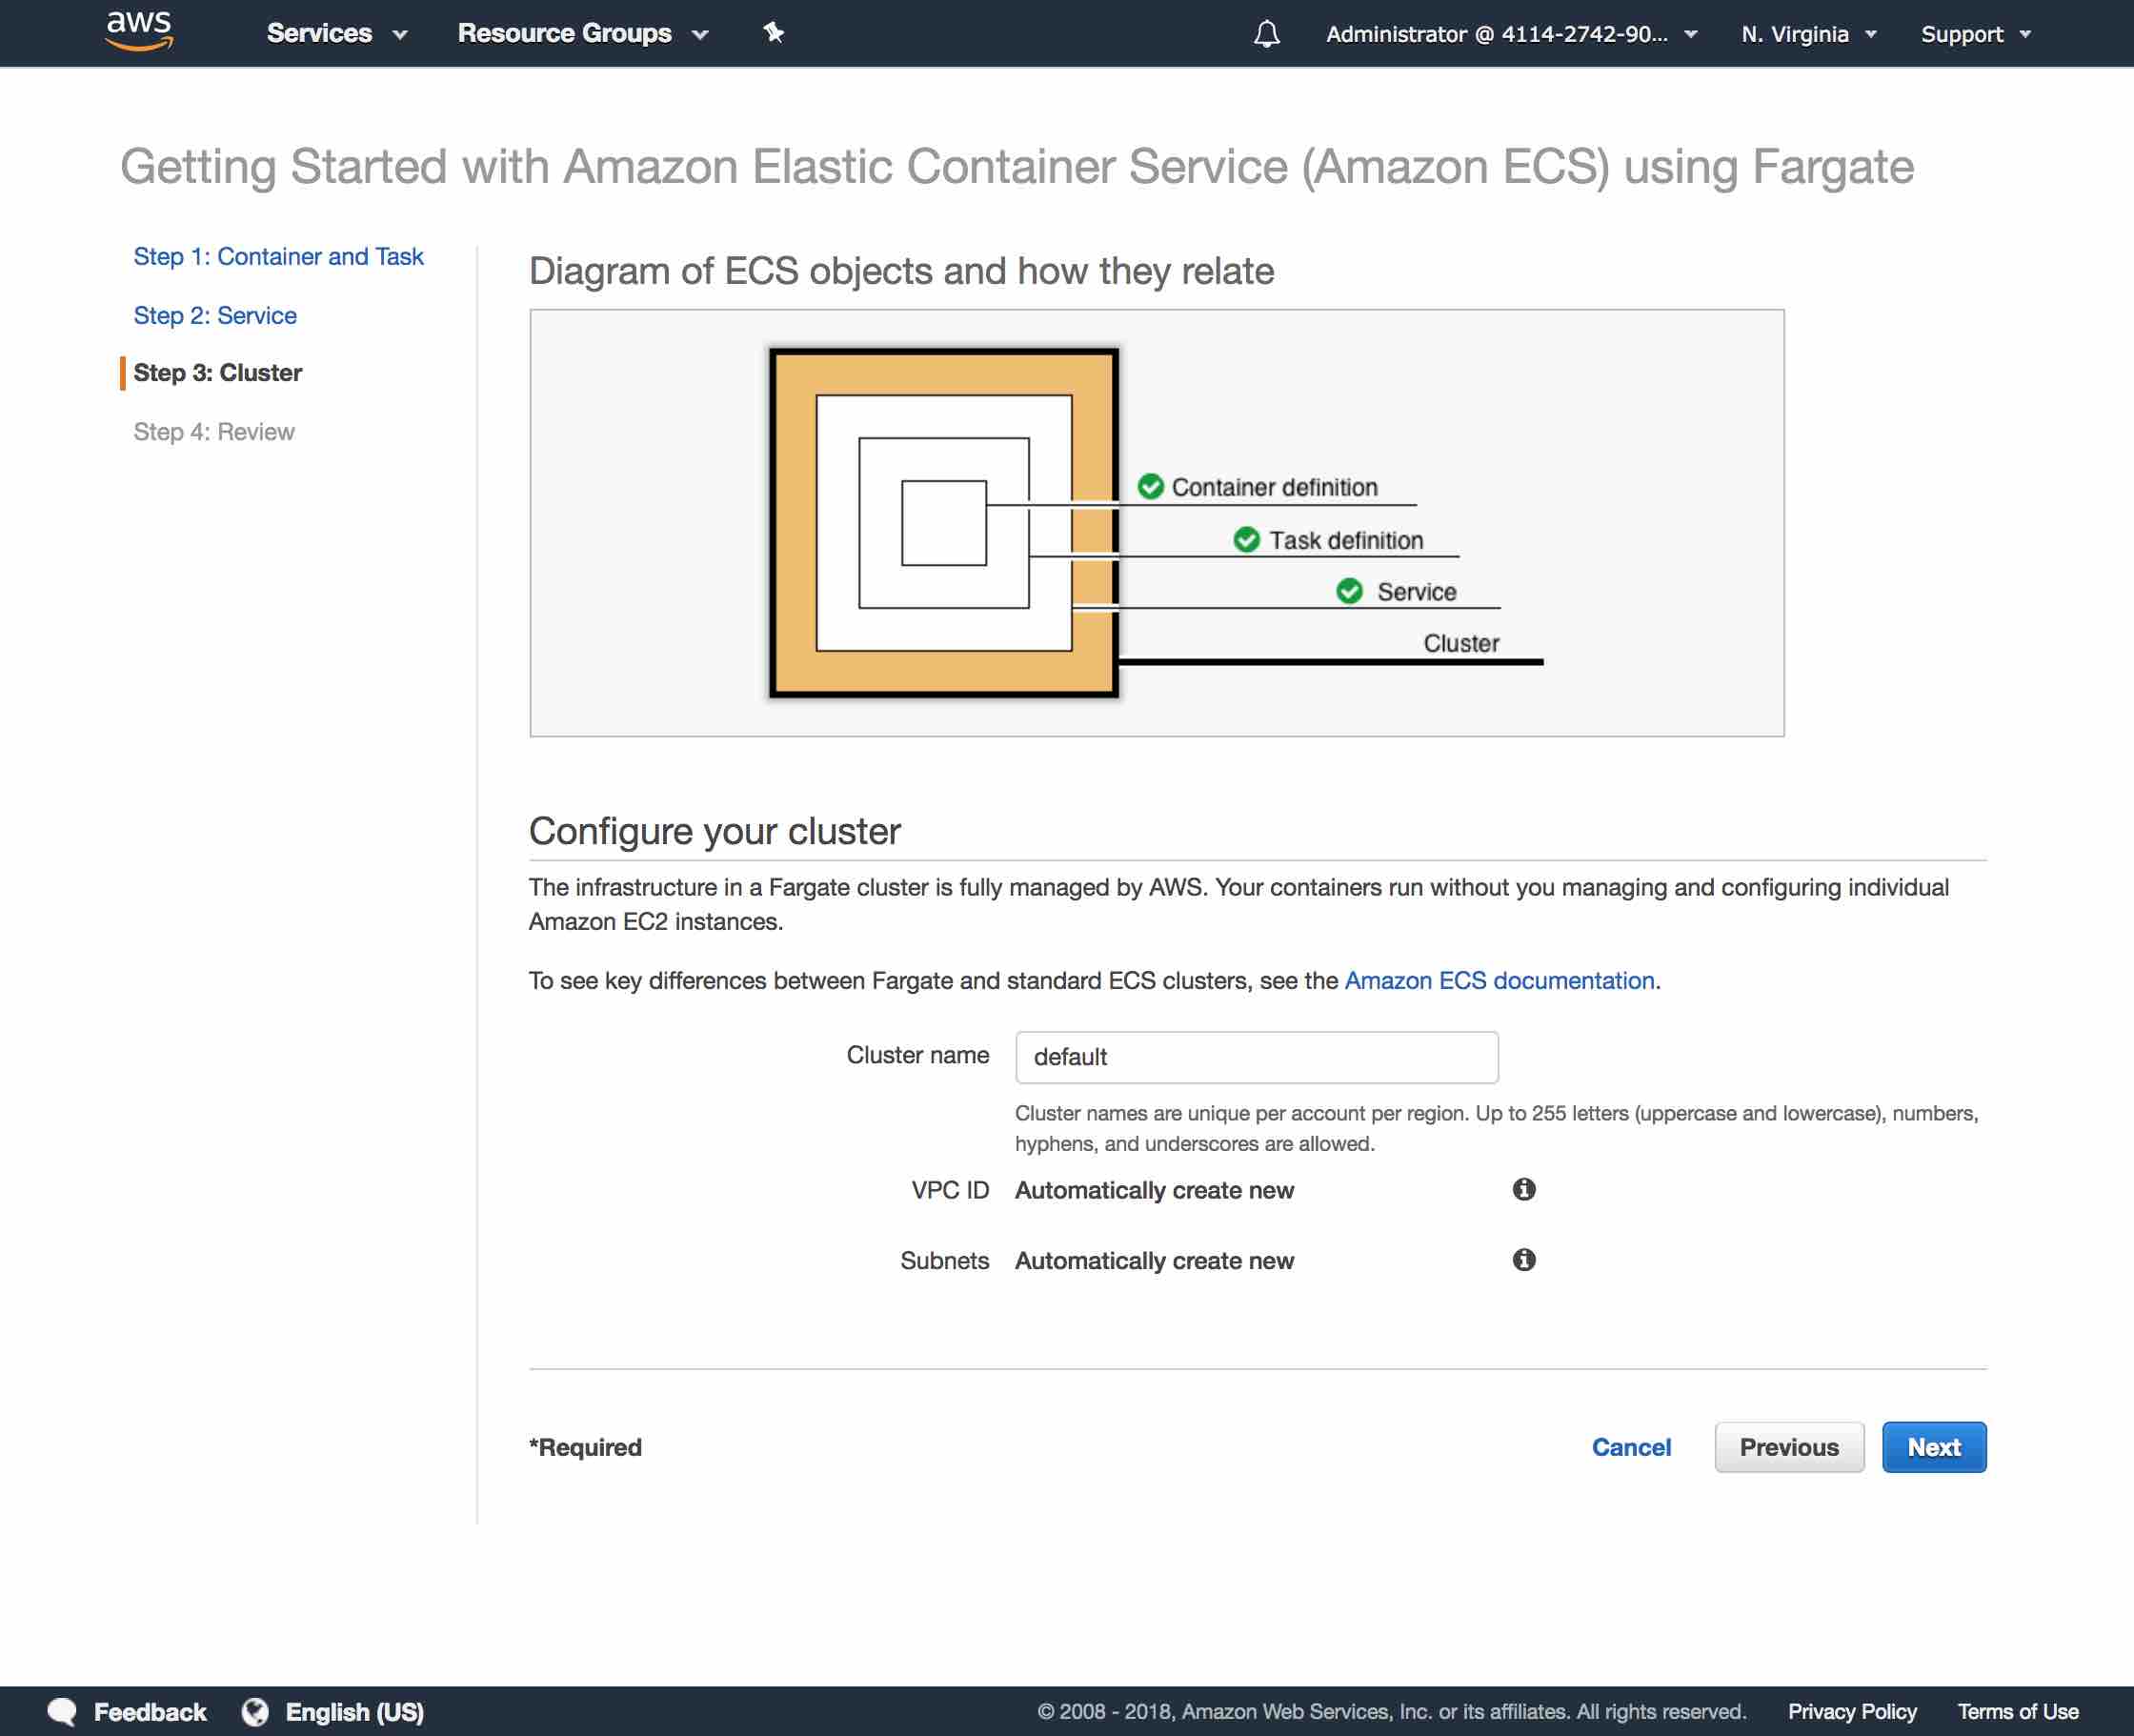
Name your cluster and press the Next button (I named mine APIBMongoDogCluster).
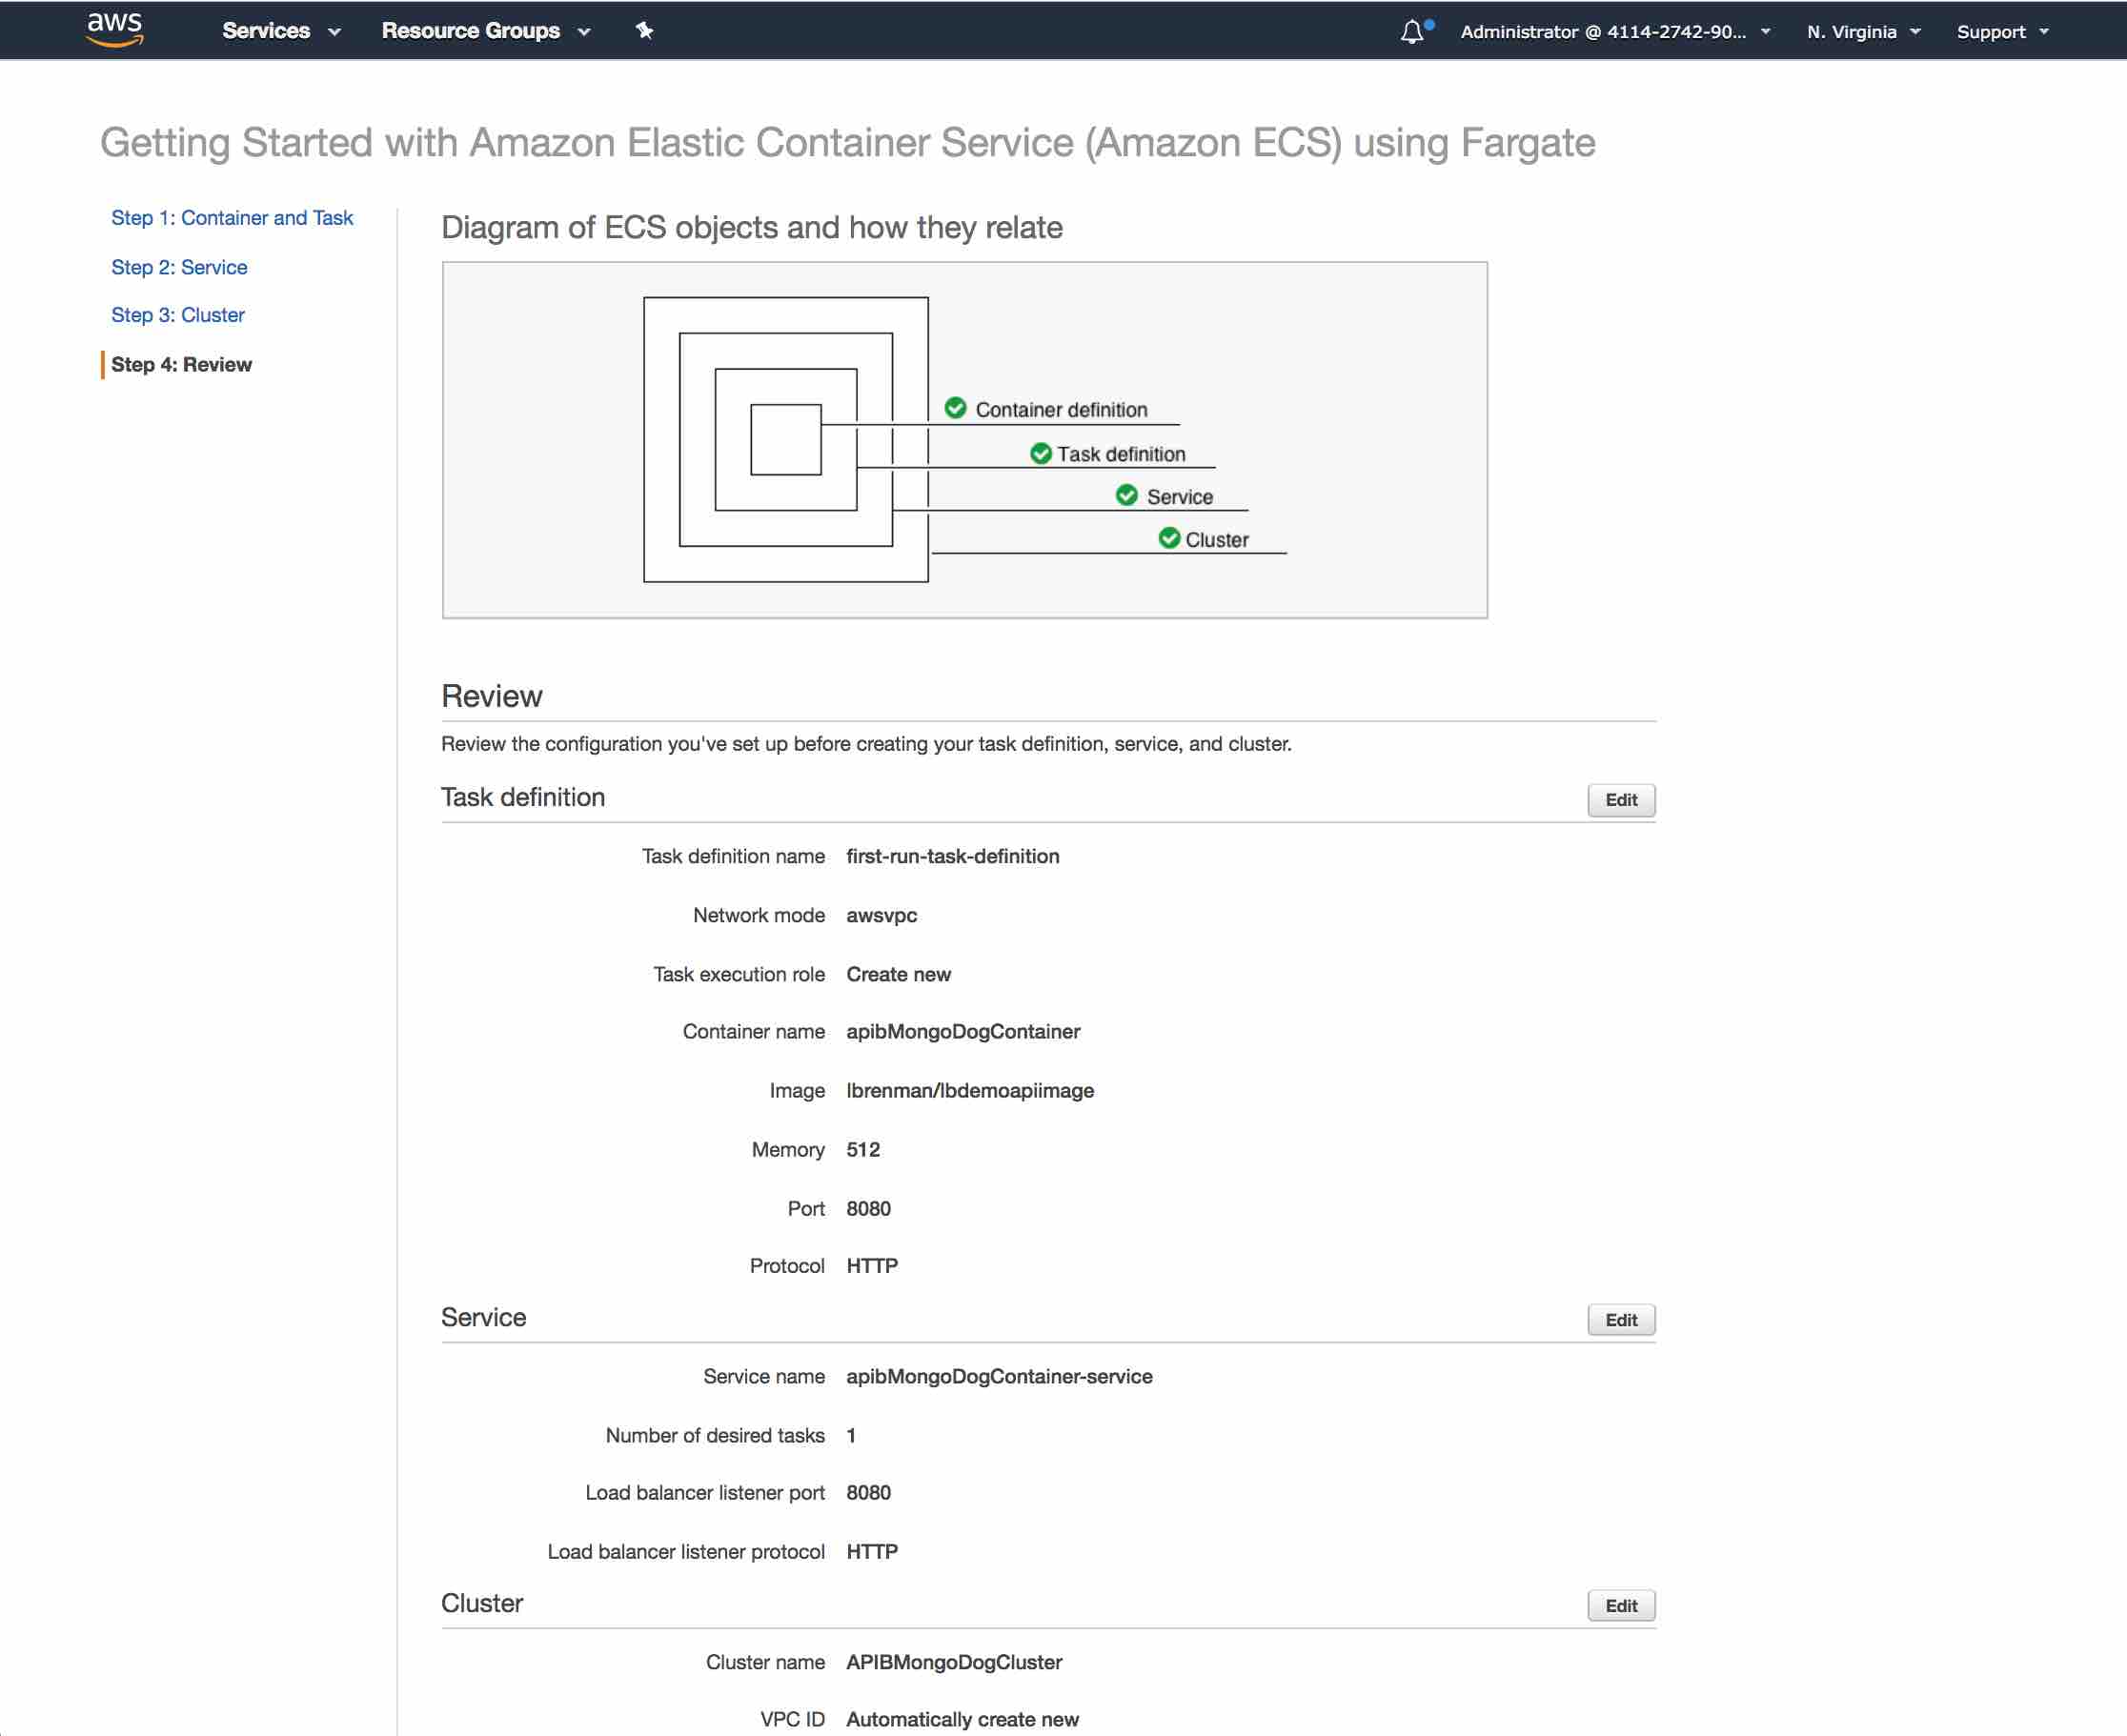
Review all the settings and press the Create button at the bottom of the page.
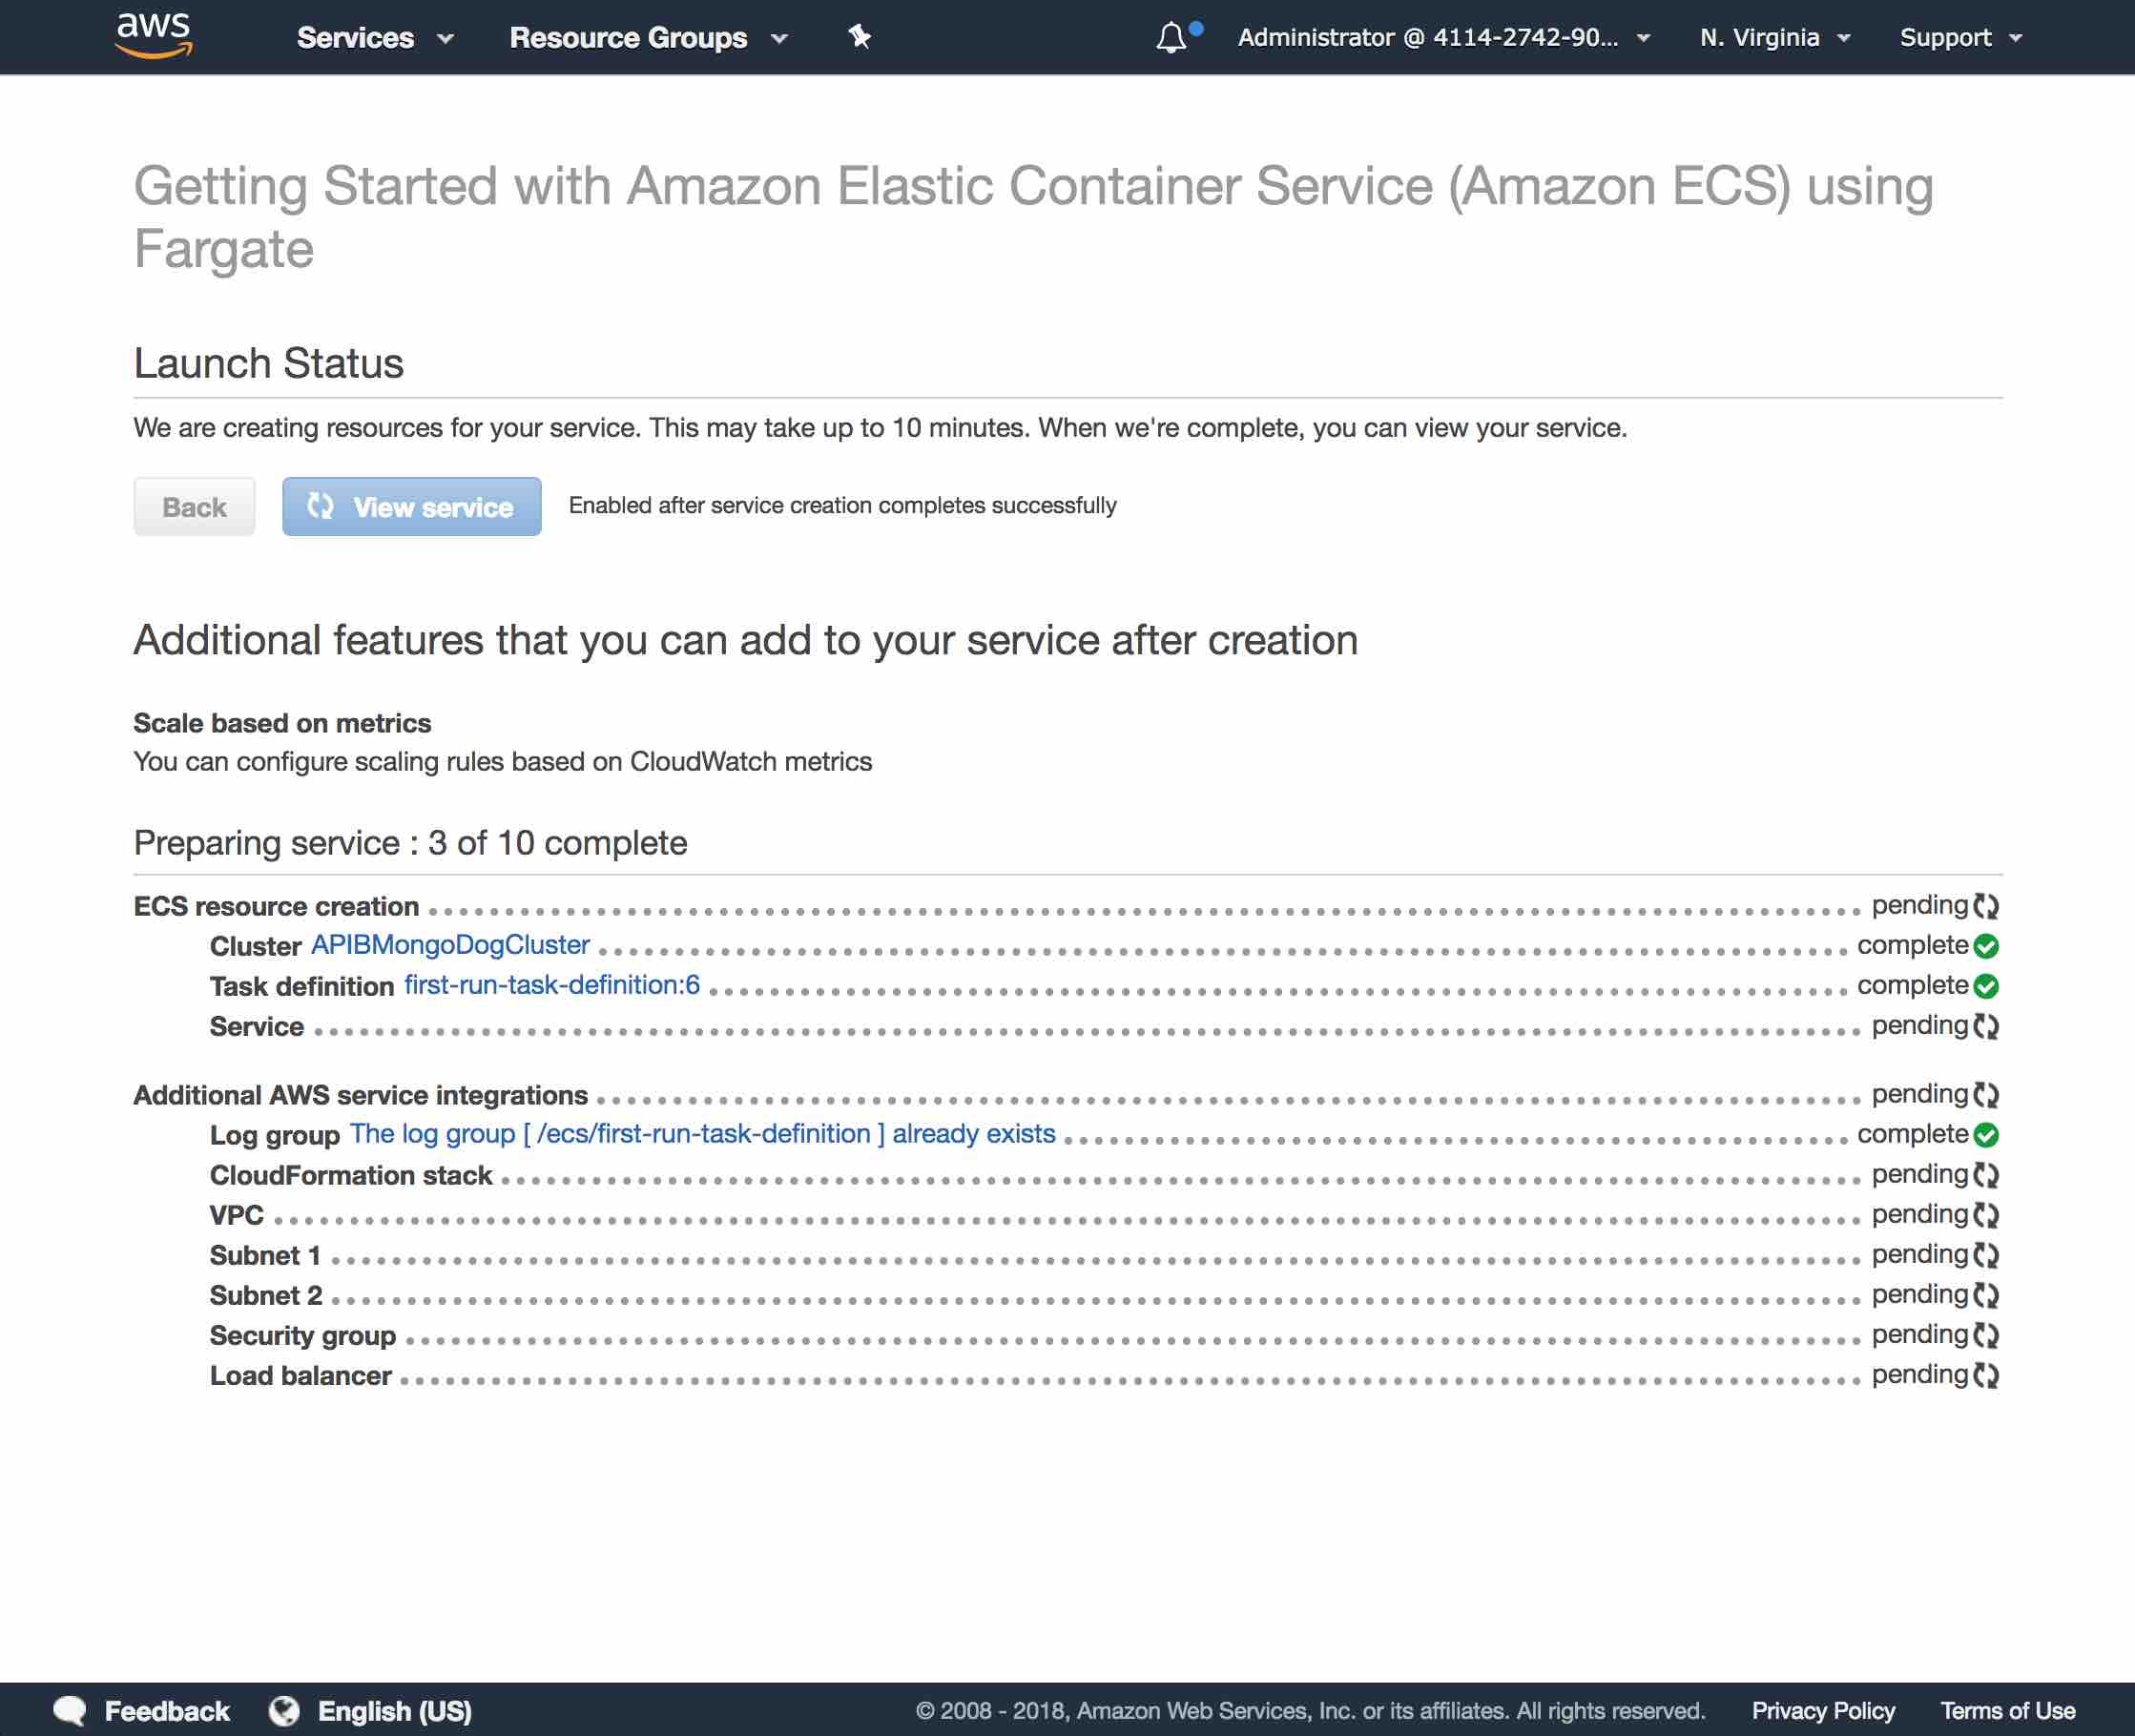
Wait until all of the services are complete (which can take up to 10 minutes).
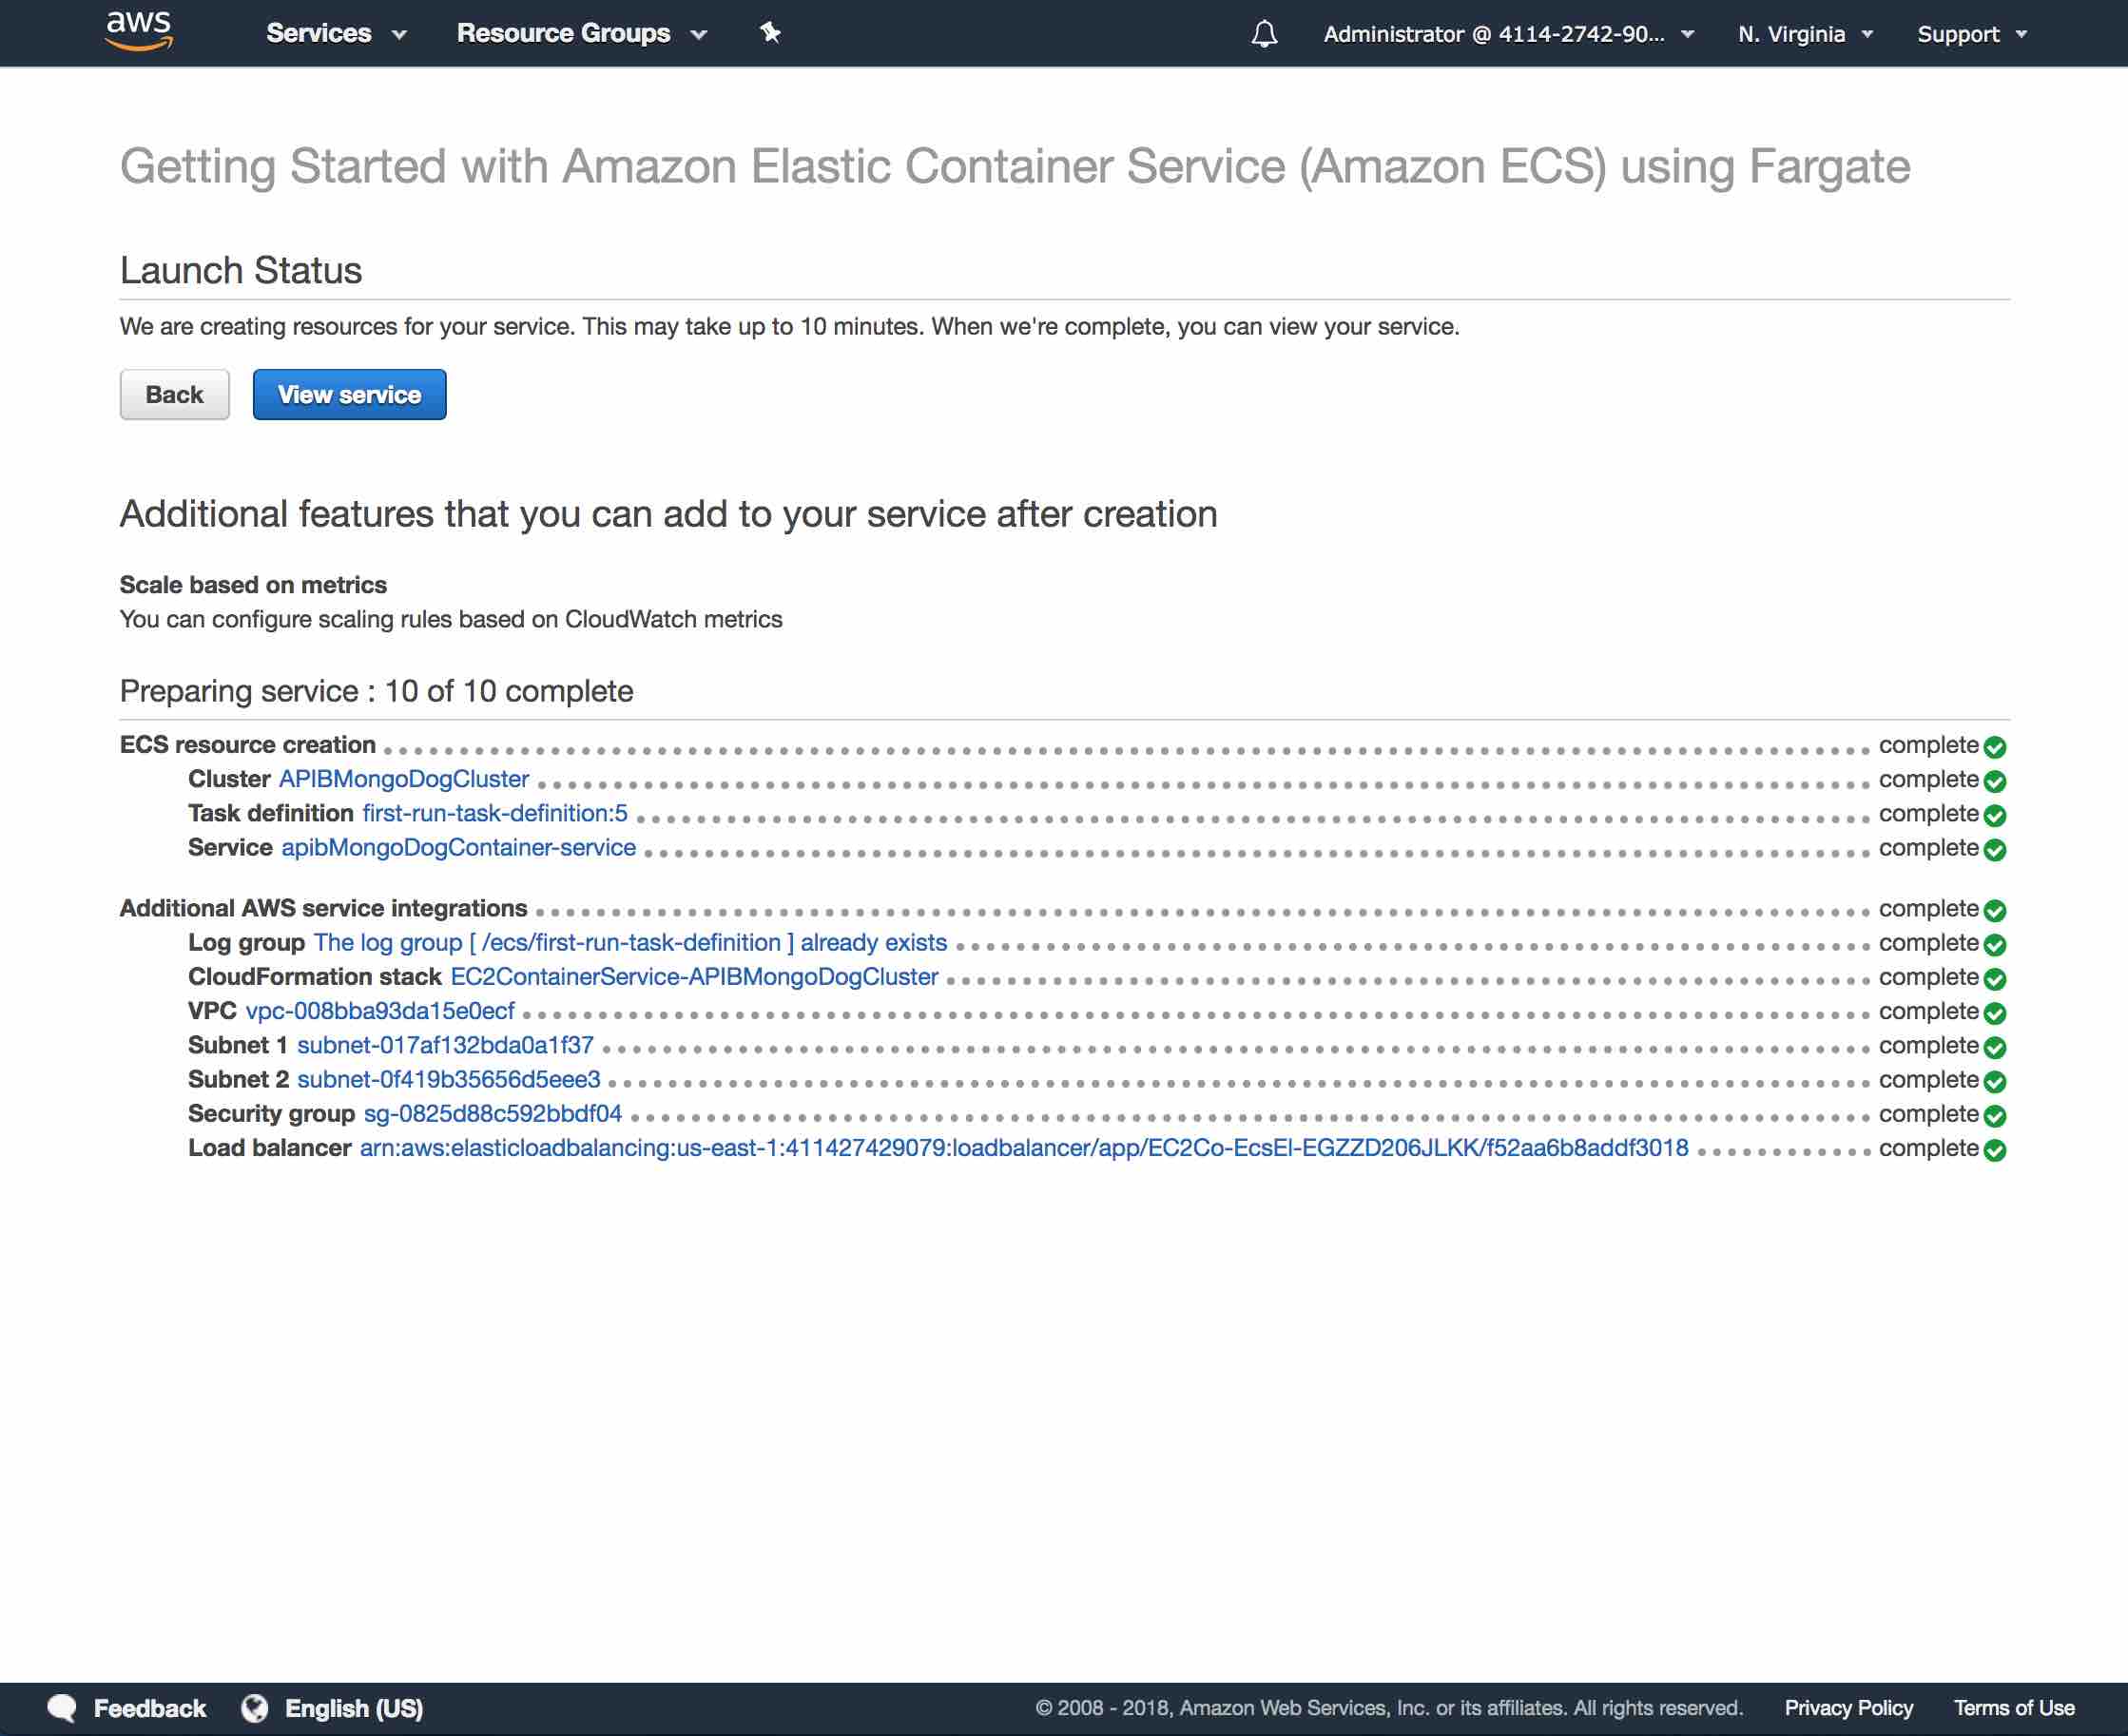
Press the View Service button to see the service details.
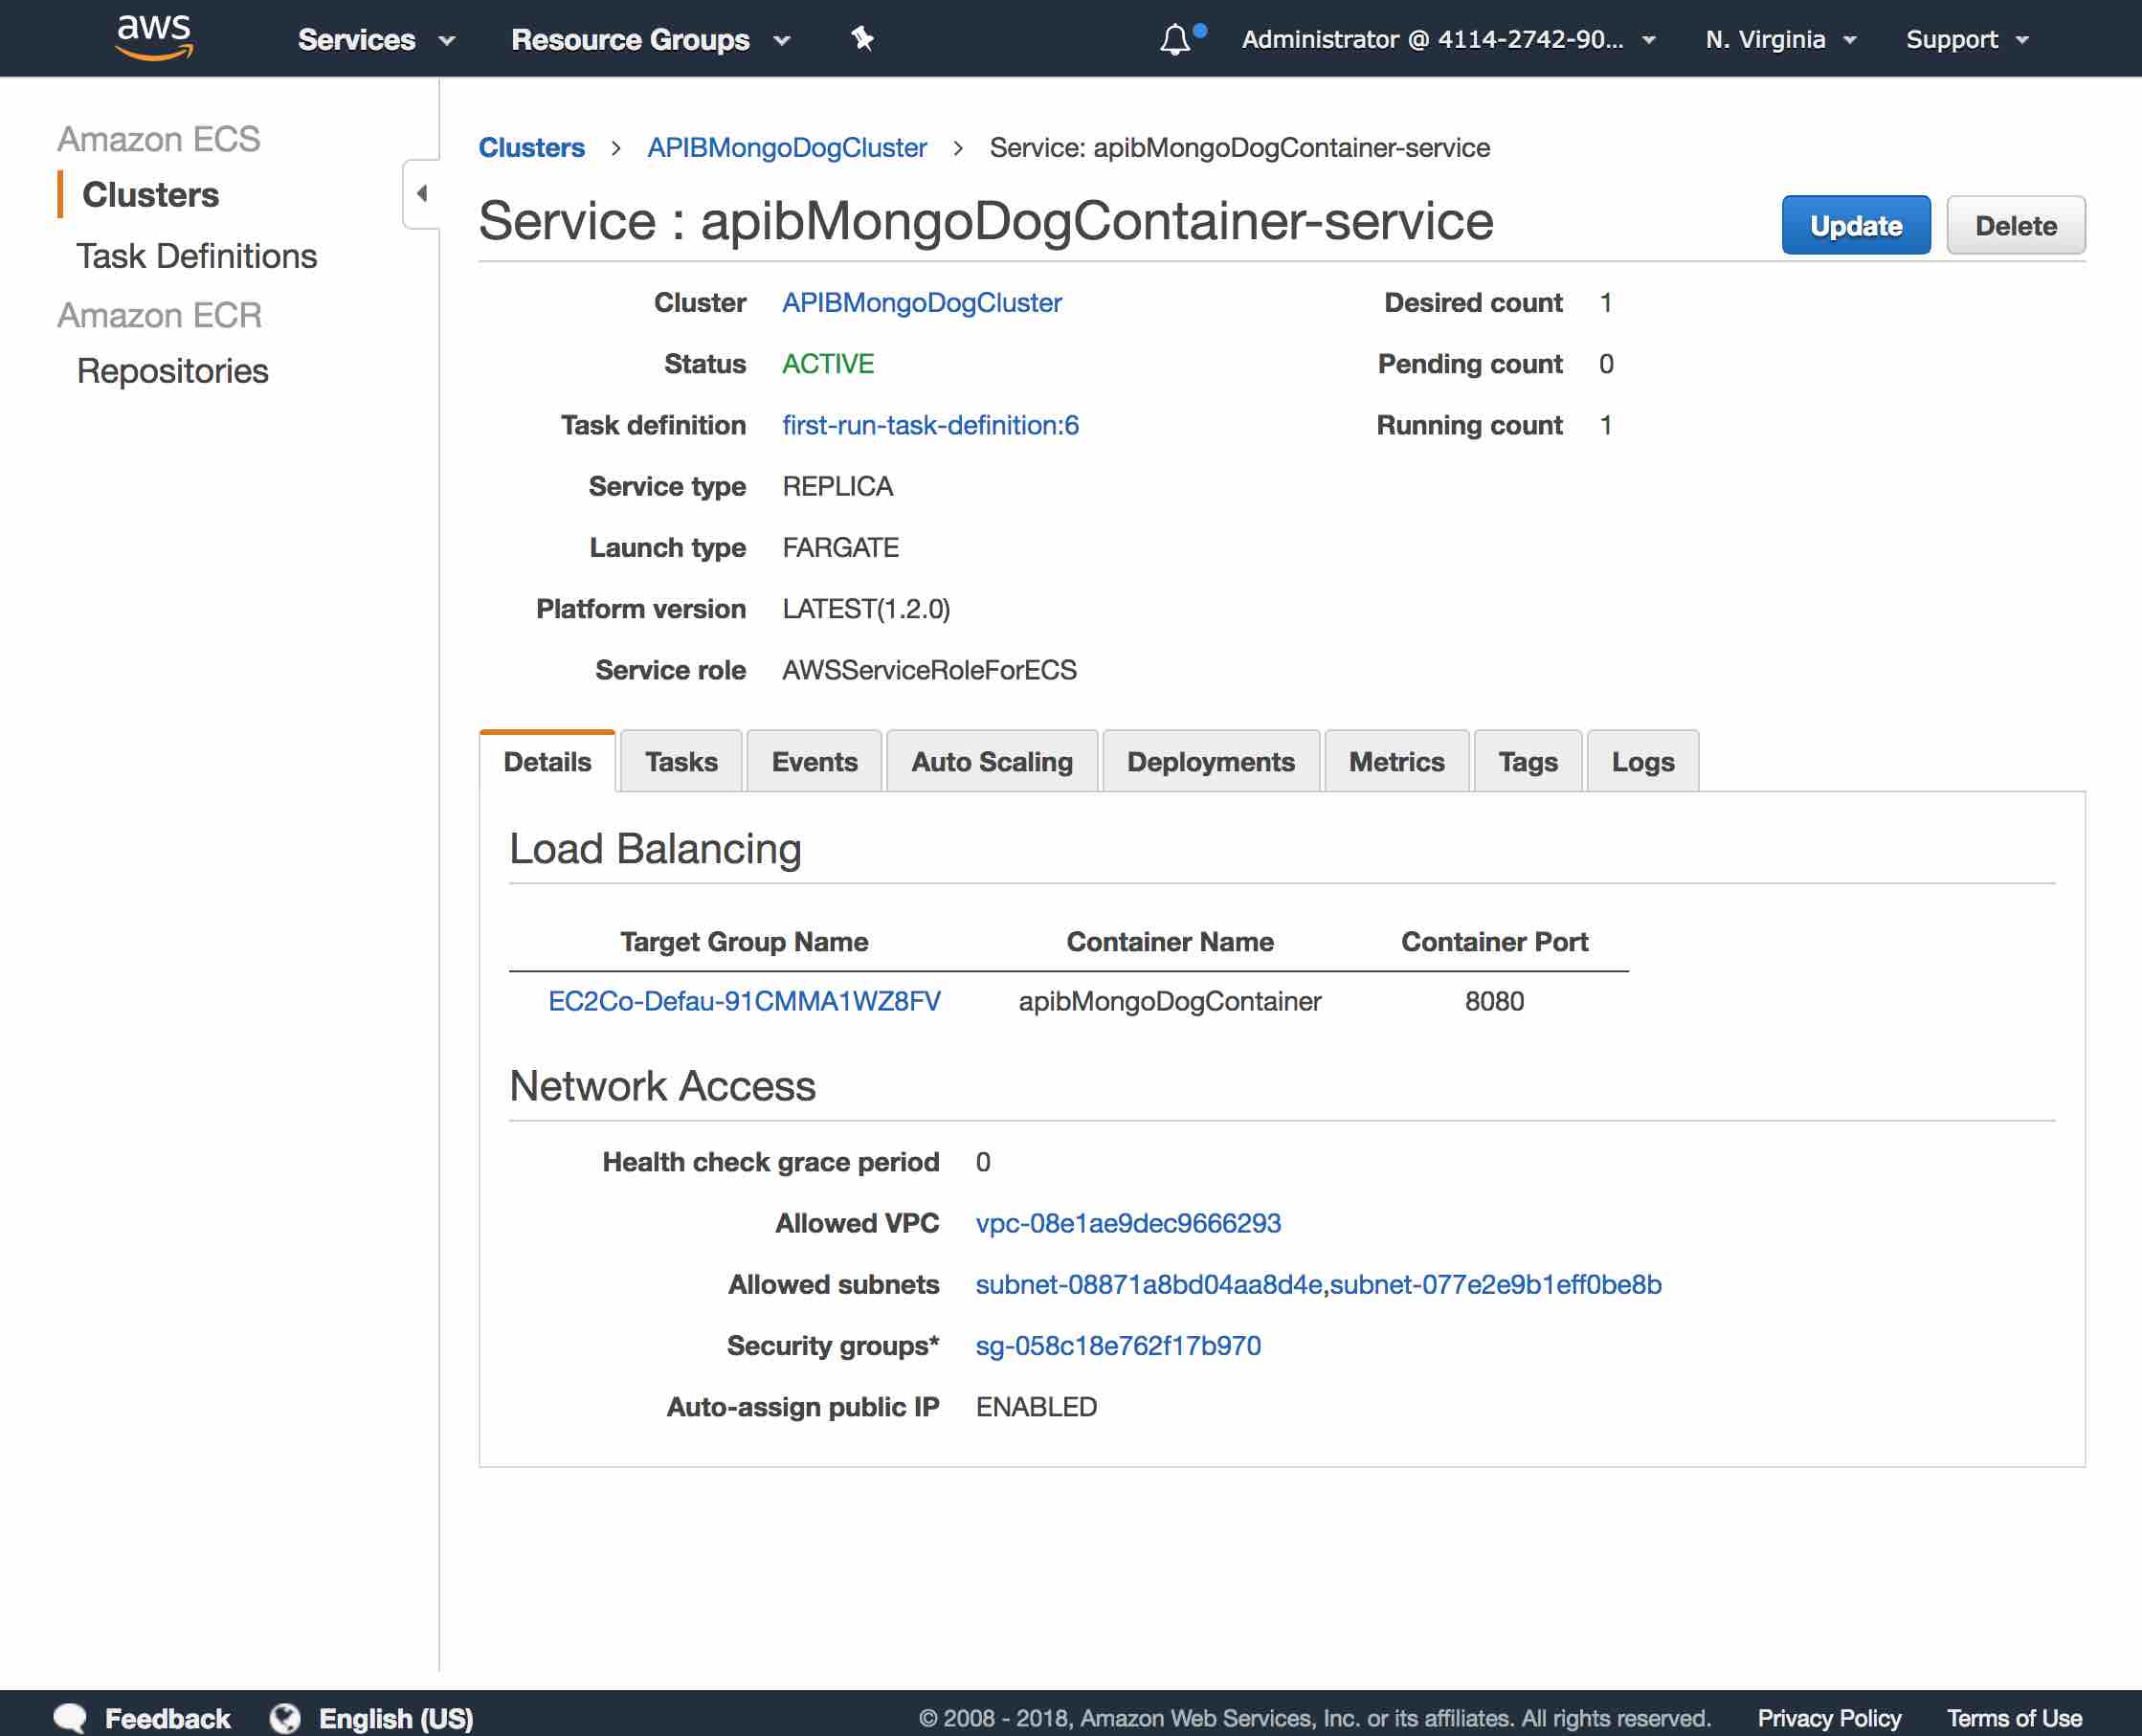
Press the Link under Target Group Name in the Details tab (e.g. EC2Co-Defau-91CMMA1WZ8FV in the screen shot above) and find the link to the load balancer.
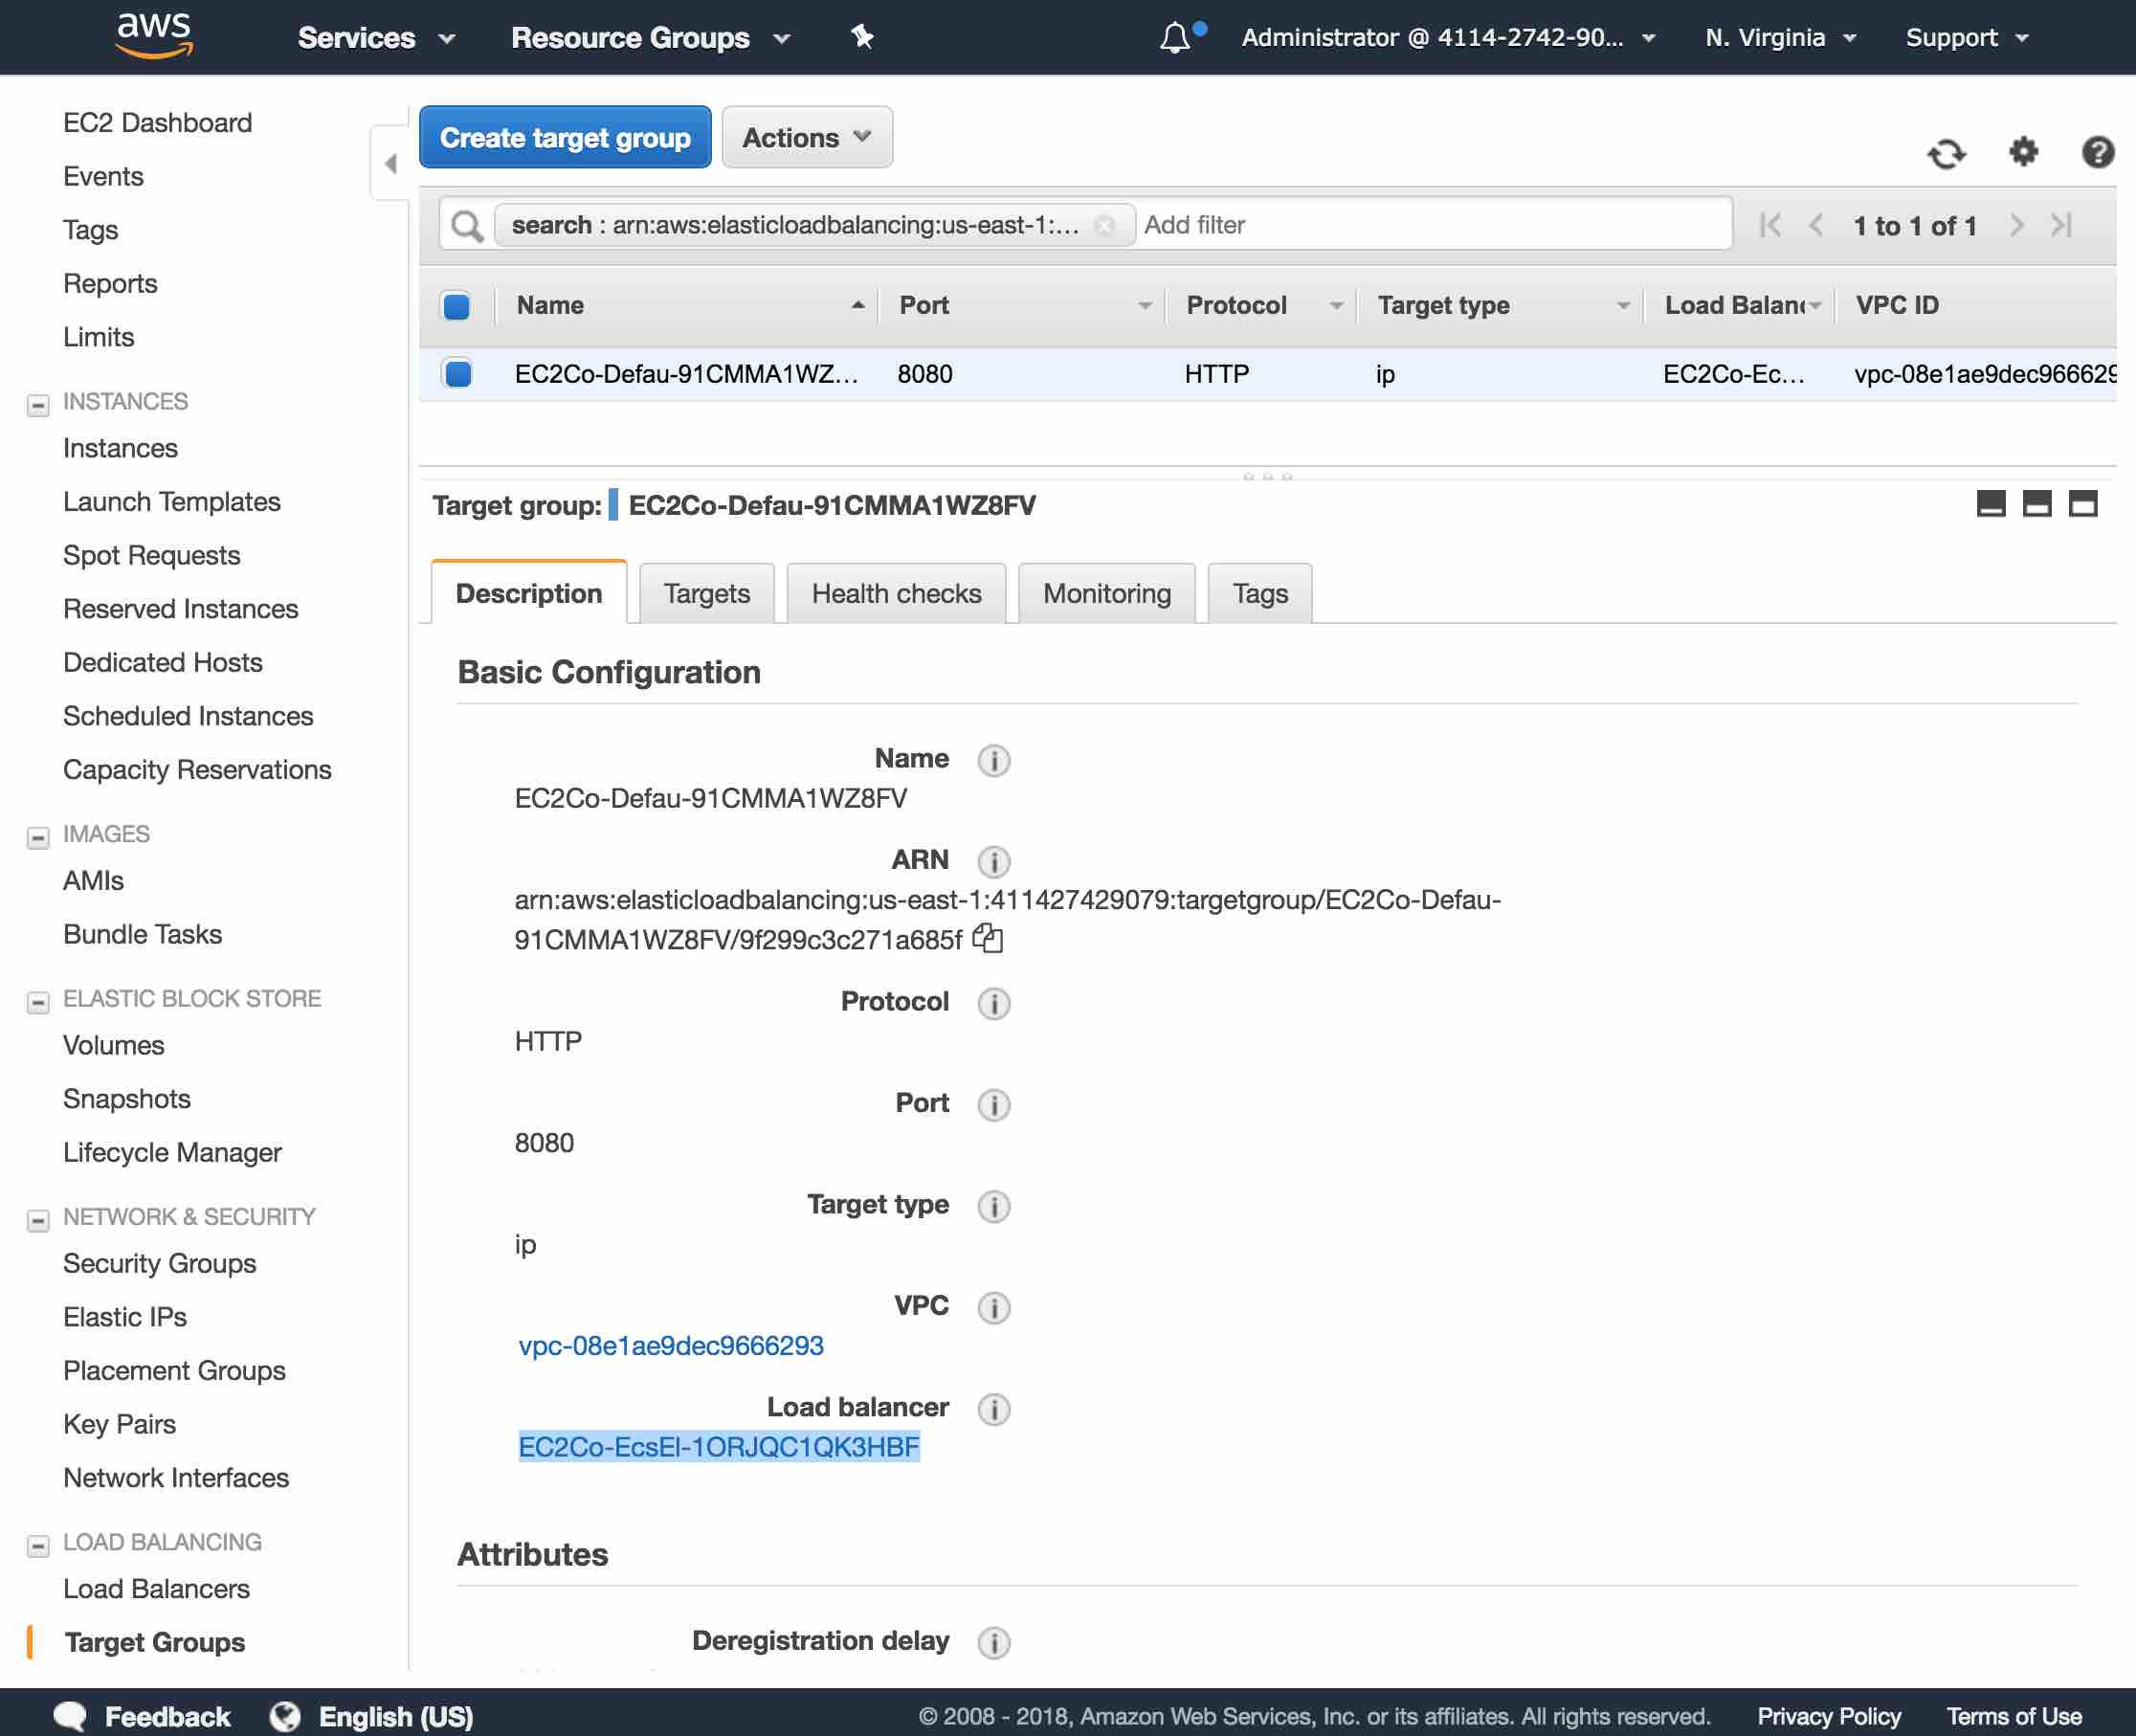
Press the Link for the load balancer (e.g. EC2Co-EcsEl-1ORJQC1QK3HBF in the screen shot above).
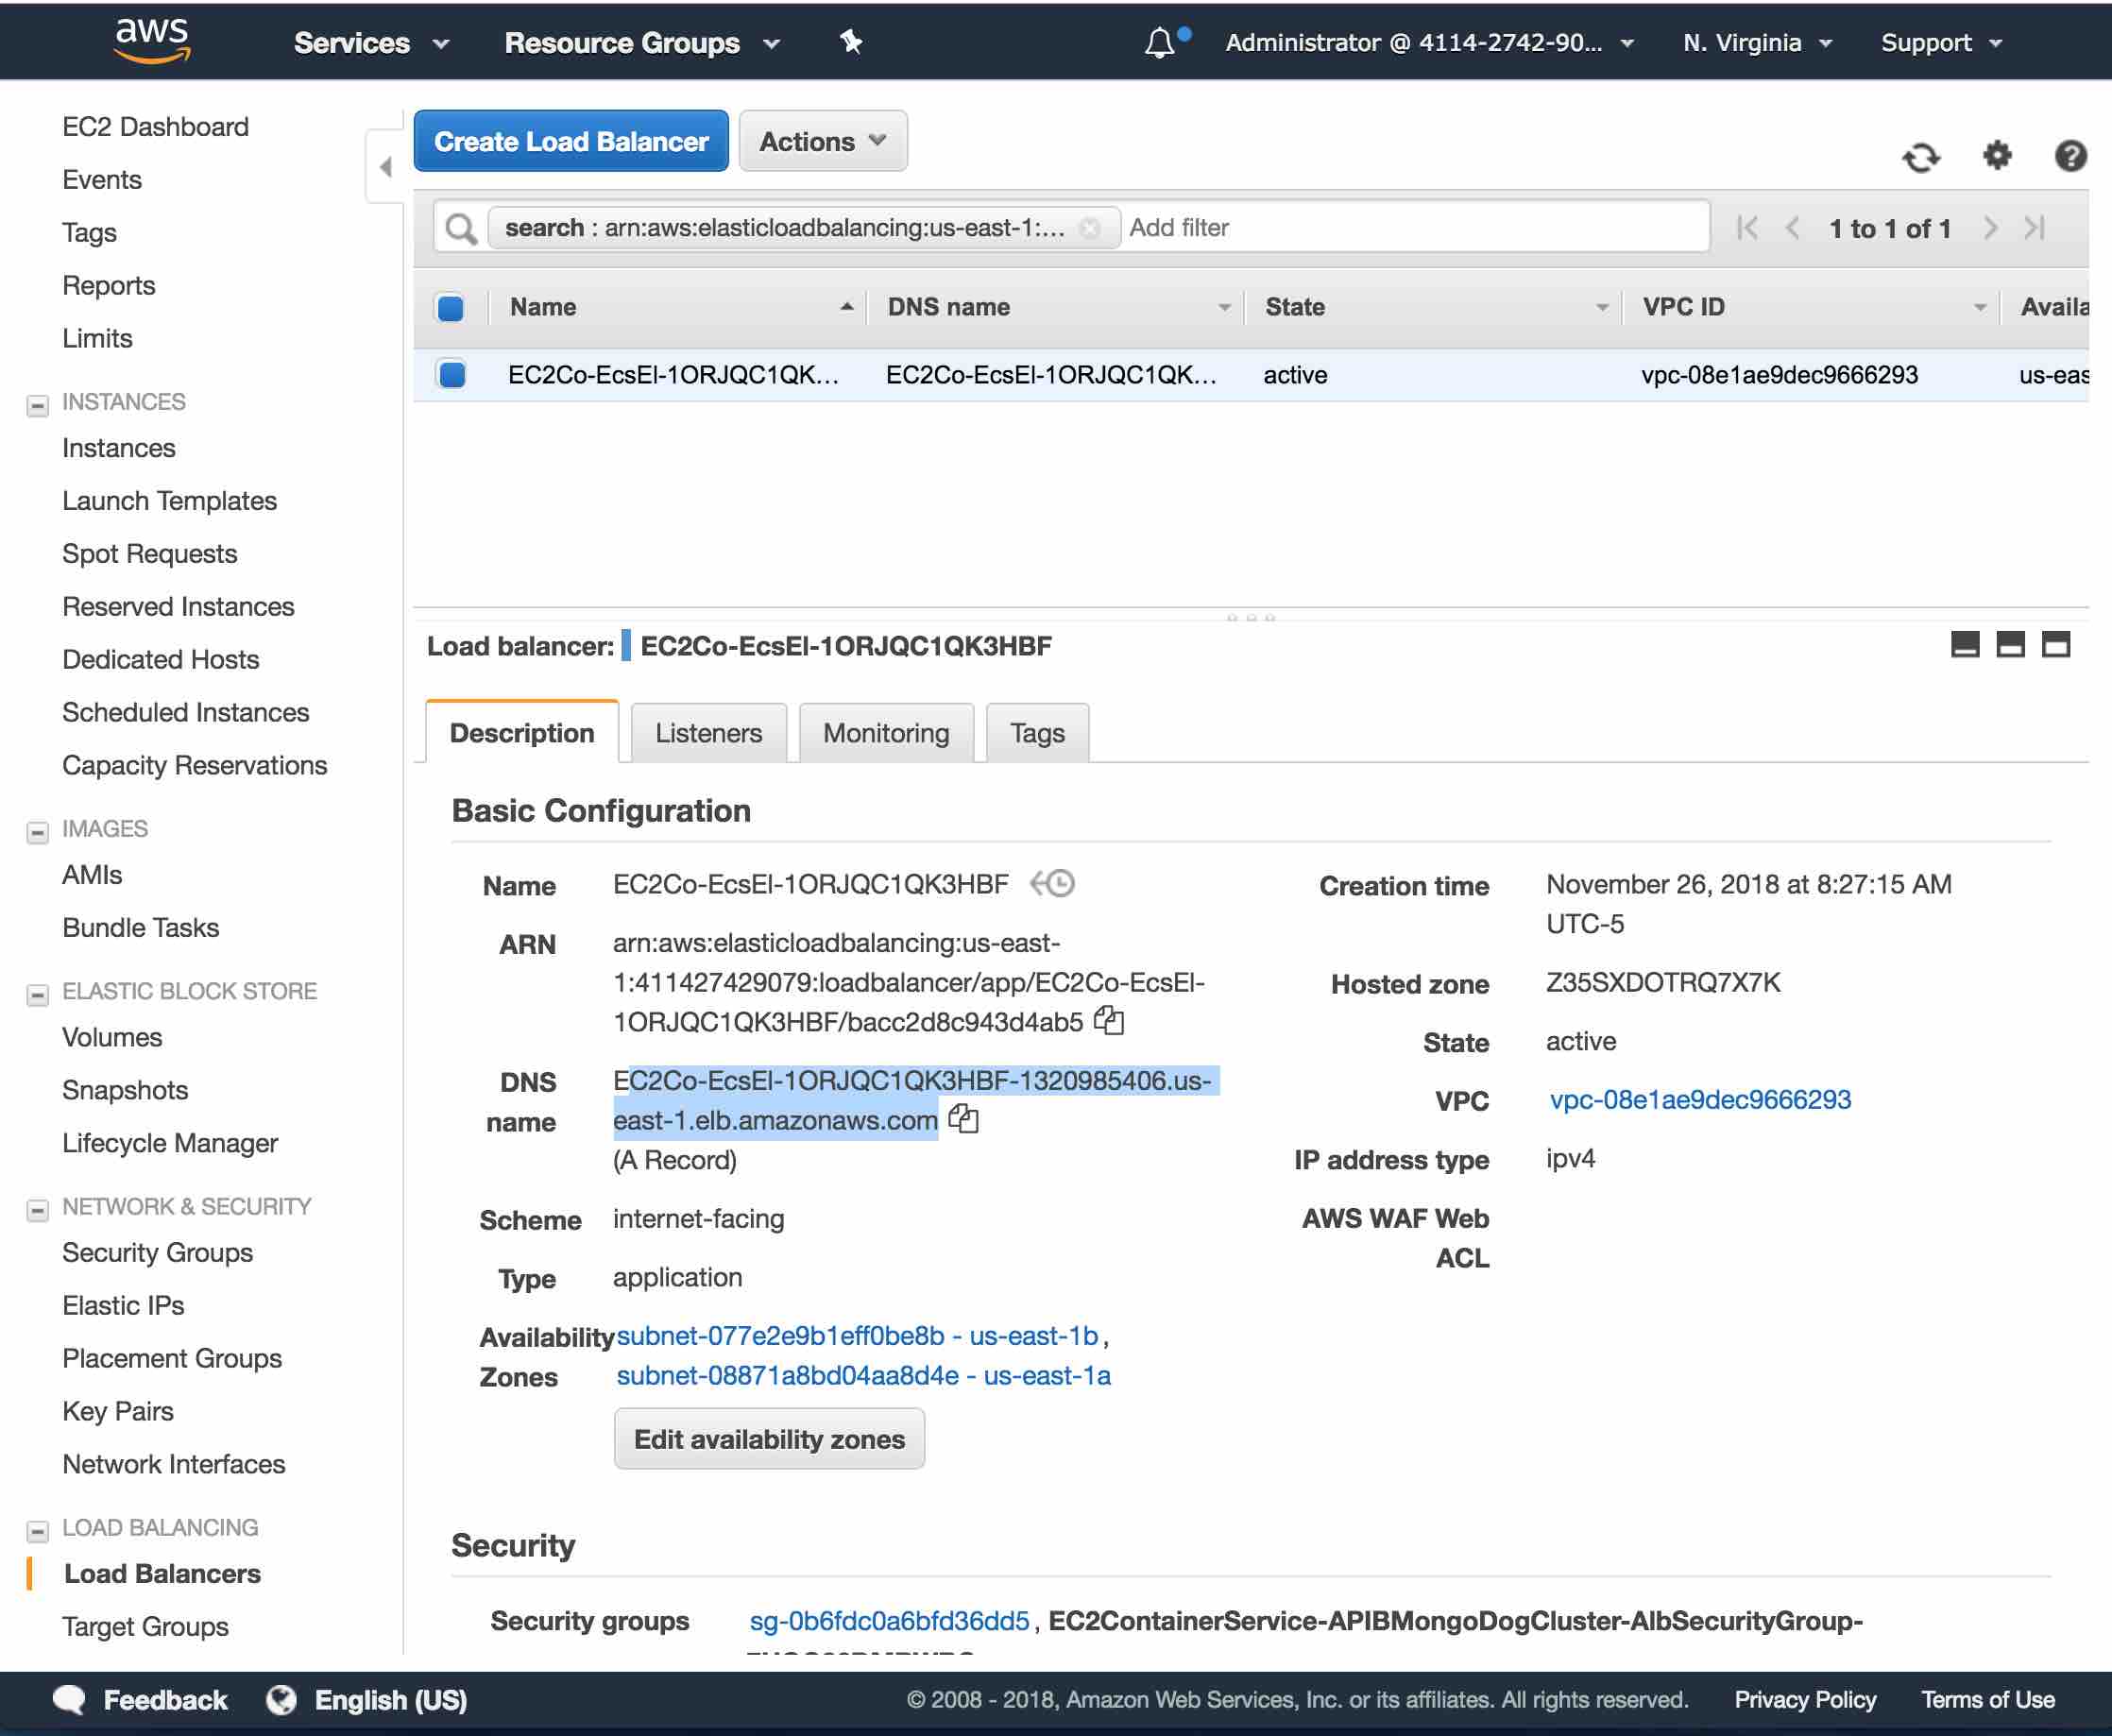
Copy the Load Balancer DNS name (e.g. EC2Co-EcsEl-1ORJQC1QK3HBF-1320985406.us-east-1.elb.amazonaws.com in screen shot above).
Paste the Load Balancer DNS into your browser (or POSTMAN) along with the port number and add the api path (/api/mongo/dog) as we discussed in the prior blog posts as follows:
https://EC2Co-EcsEl-1ORJQC1QK3HBF-1320985406.us-east-1.elb.amazonaws.com:8080/api/mongo/dogFor my API, the response is:
{
    "success": true,
    "request-id": "253a86e2-b660-4b8f-926a-d66bb6e3502c",
    "key": "dogs",
    "dogs": [
        {
            "id": "5a24a9a67779e860d007b13e",
            "breed": "Poodle",
            "name": "Fido"
        },
        {
            "id": "5a24a9d27779e860d007b140",
            "breed": "Lab",
            "name": "Fred"
        },
        {
            "id": "5b102c36bf67154b62b17bce",
            "breed": "Pincher",
            "name": "Frida"
        },
        {
            "id": "5b1148a06a42d5107628d9e8",
            "breed": "Beagle",
            "name": "Harry"
        },
        {
            "id": "5b3aafcb9de9003840480fe7",
            "breed": "Doberman",
            "name": "Doobie"
        }
    ]
}
Summary
In this blog post, we saw how easy it is to deploy our API Builder Standalone Docker image in AWS Fargate to easily achieve a high availability, auto scaling architecture in just a few minutes.
The same API Builder application can be deployed via ECS as well, but AWS Fargate abstracts a lot of the complexity of dealing with instances and load balancers. And, you can focus on your application instead and not have to worry about the nuances of container management.