

This blog post is the third in a series covering custom API subscription approval flows for Amplify Central connected API gateways using agents. You can read part two here.
In part 2, we described the main features of Amplify Central that enables us to integrate them into our own subscription approval process: Webhooks and platform API calls.
In this blog post, we’ll tie it all together and create a Hello World custom API subscription approval flow using Axway’s Integration Builder. The flow will be triggered from a Webhook in Central, use the clientId and clientSecret to get an access_token and then call the subscription API in order to approve the subscription request. These are the minimum steps required for any subscription approval flow.
Prerequisites
- You should already have your Gateway(s) connect to Amplify Central as described in the online docs: Axway API Manager and/or AWS Gateway
- You should have APIs in your catalog that API consumers can subscribe to
- You should have a clientId and clientSecret associated with an Amplify Central Service Account (that we created in the part 2)
- You should have familiarity with Axway’s Amplify Integration Builder
How It Works
An Integration Builder flow with a manual trigger can be triggered via a POST to /formulas/instances/:id/executions using your flow instance id. Refer to the online docs for details. We’ll also need to add a header with authentication details when we configure our webhook to trigger our flow properly.
As mentioned above, the flow will make Amplify API calls to:
- Retrieve an access_token
- Approve the subscription request
The flow is shown below and can be downloaded from here:
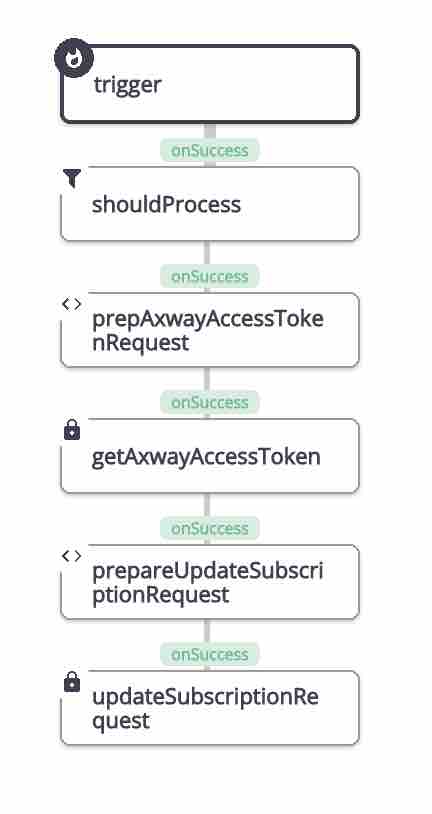
shouldProcess
The first step, shouldProcess, is a check to make sure that the event is one that we want to process. It’s a JS Script Step with the following contents:
done((trigger.args.type === 'SubscriptionUpdatedEvent') && (trigger.args.payload.subscription.currentState === 'REQUESTED'));I only want to process events related subscriptions so I check that they type is SubscriptionUpdatedEvent. Also, I only want to approve requests and don’t want to process other subscription events so I check the currentState is REQUESTED.
Note that you may also want to process UPDATE_REQUESTED states as well, but that is beyond the scope of this post
getAxwayAccessToken
The next two steps deal with getting an access_token.
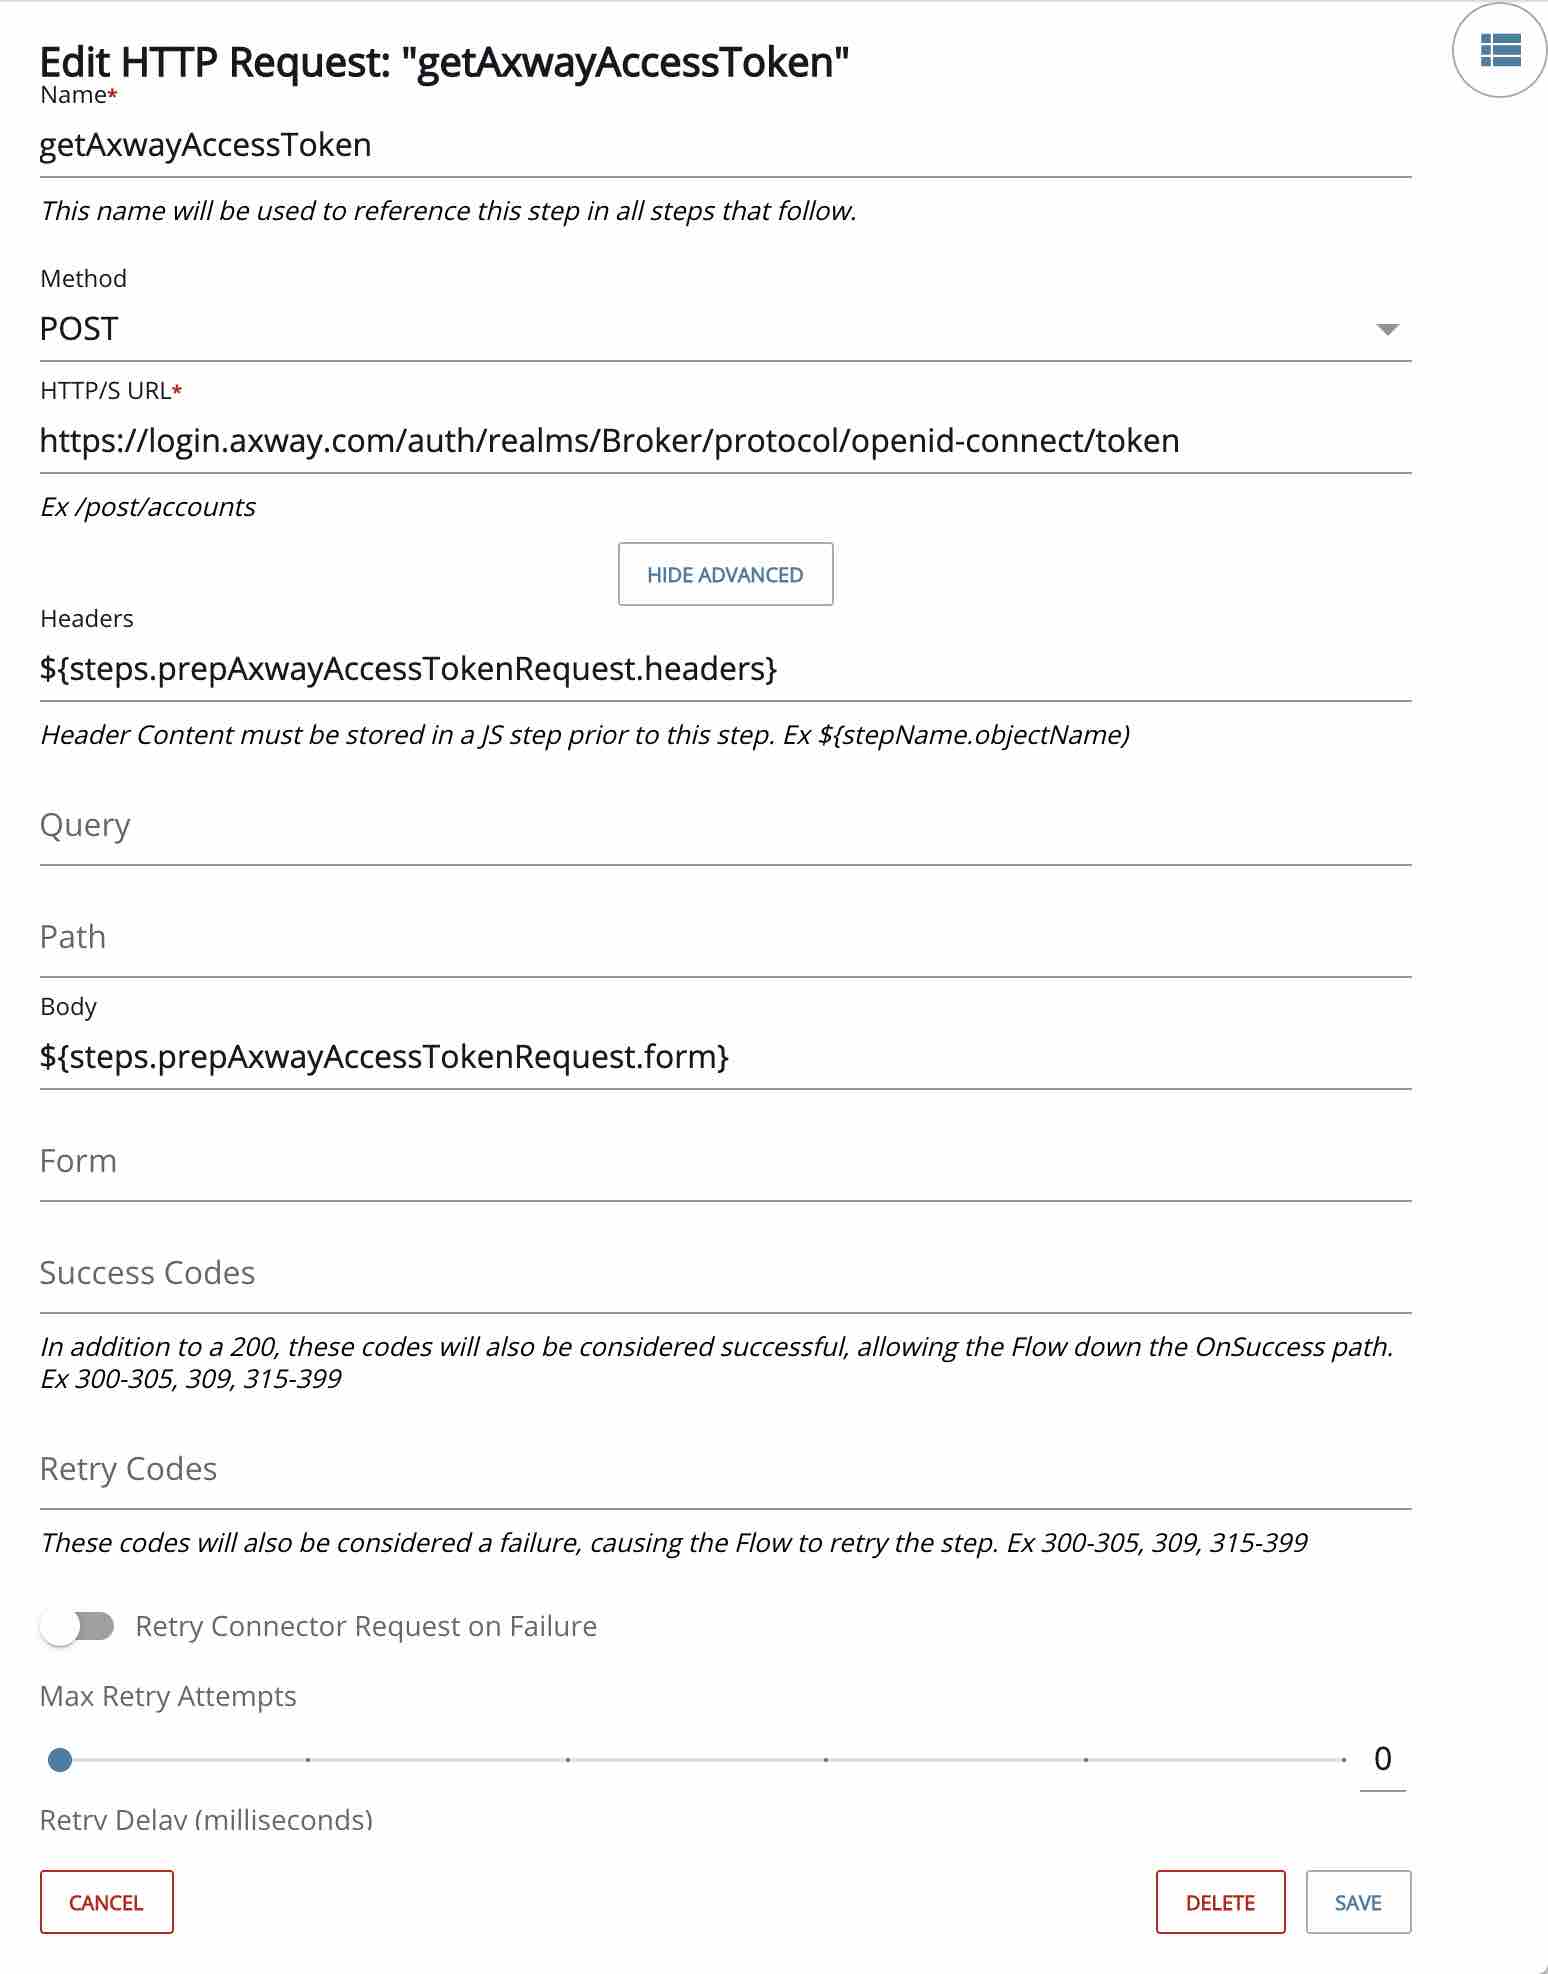
prepAxwayTokenRequest is a JS Script Step that prepares the headers and form data for the getAxwayAccessToken step that follows. It contains the following:
done({
  'headers': {
      Authorization: 'Basic ' + CE.b64(config.axwayClientId + ':' + config.axwayClientSecret),
      'Content-Type': 'application/x-www-form-urlencoded'
  },
  form: 'grant_type=client_credentials'
});
getAxwayAccessToken is an HTTP Request Step as follows. You can see the Headers and Body from the prior step. The URL for token request is: https://login.axway.com/auth/realms/Broker/protocol/openid-connect/token.
updateSubscriptionRequest
The next two steps deal with approving the subscription request.
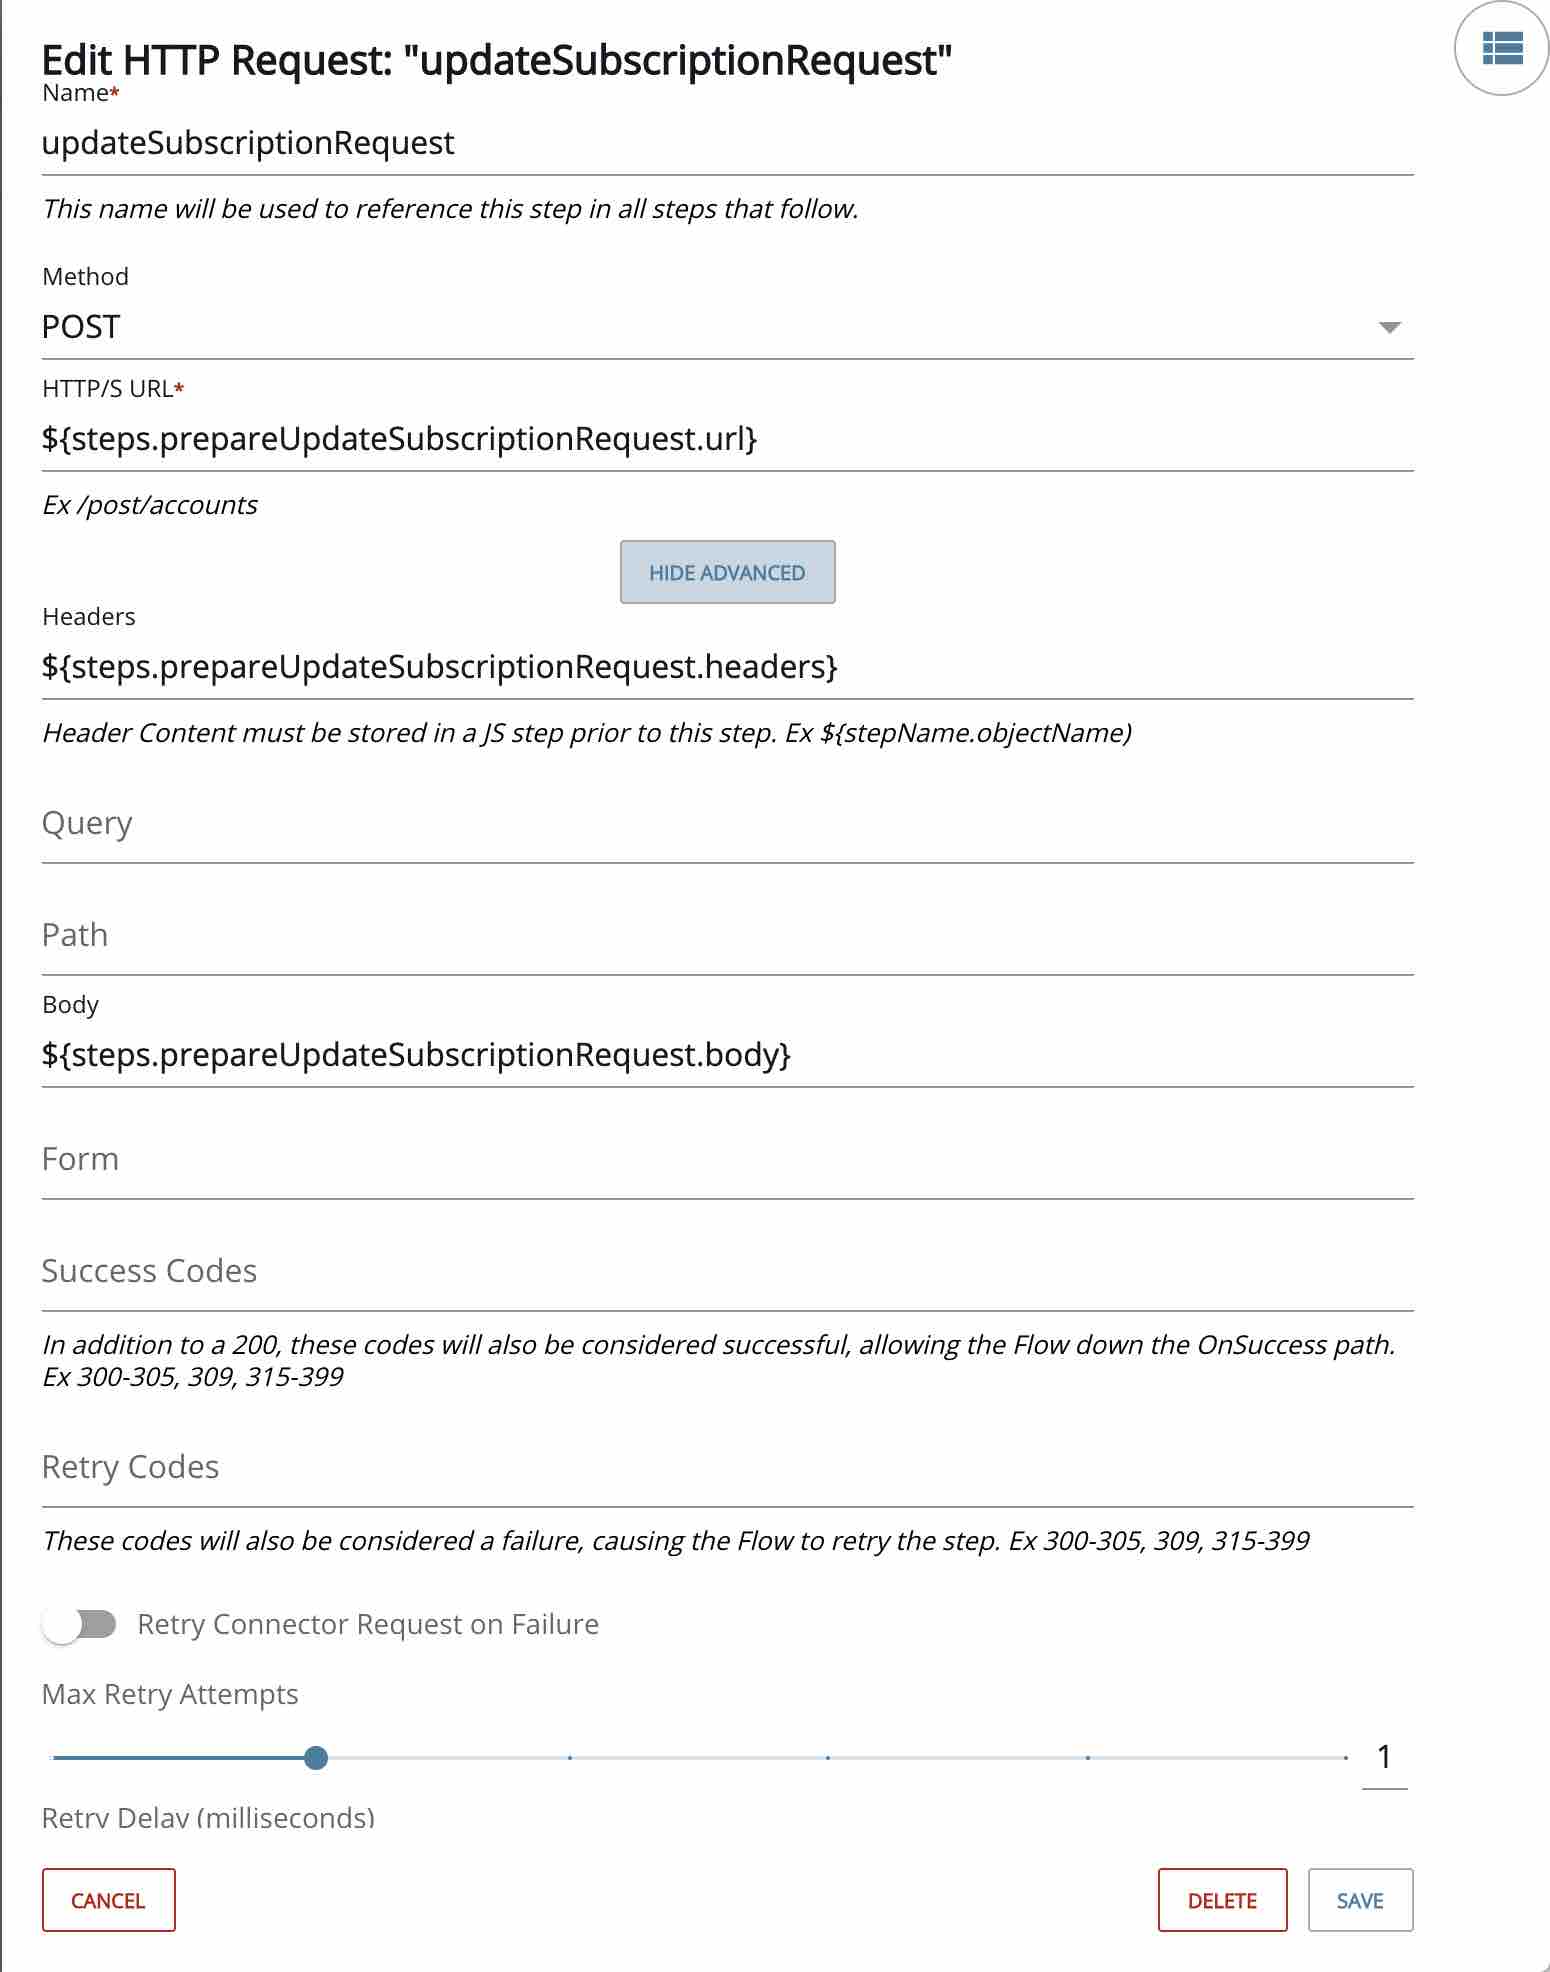
prepareUpdateSubscriptionRequest is a JS Script Step that prepares the url, headers and body for the updateSubscriptionRequest step that follows. It contains the following:
const apicentralUrl = config.apiCentralUrl ? config.apiCentralUrl : 'https://apicentral.axway.com';

const url = apicentralUrl + '/api/unifiedCatalog/v1/catalogItems/'+trigger.args.payload.catalogItem.id+'/subscriptions/'+trigger.args.payload.subscription.id+'/states';

const body = {
  "description": "Approved via Custom Subsription Flow",
  "state": "APPROVED"
}

const apiServerHeaders = {
  'Authorization': `Bearer ${steps.getAxwayAccessToken.response.body.access_token}`,
  'Content-Type': 'application/json'
}

done({url:url, headers:apiServerHeaders, body:body});
updateSubscriptionRequest is an HTTP Request Step as follows. You can see theURL, Headers and Body from the prior step.
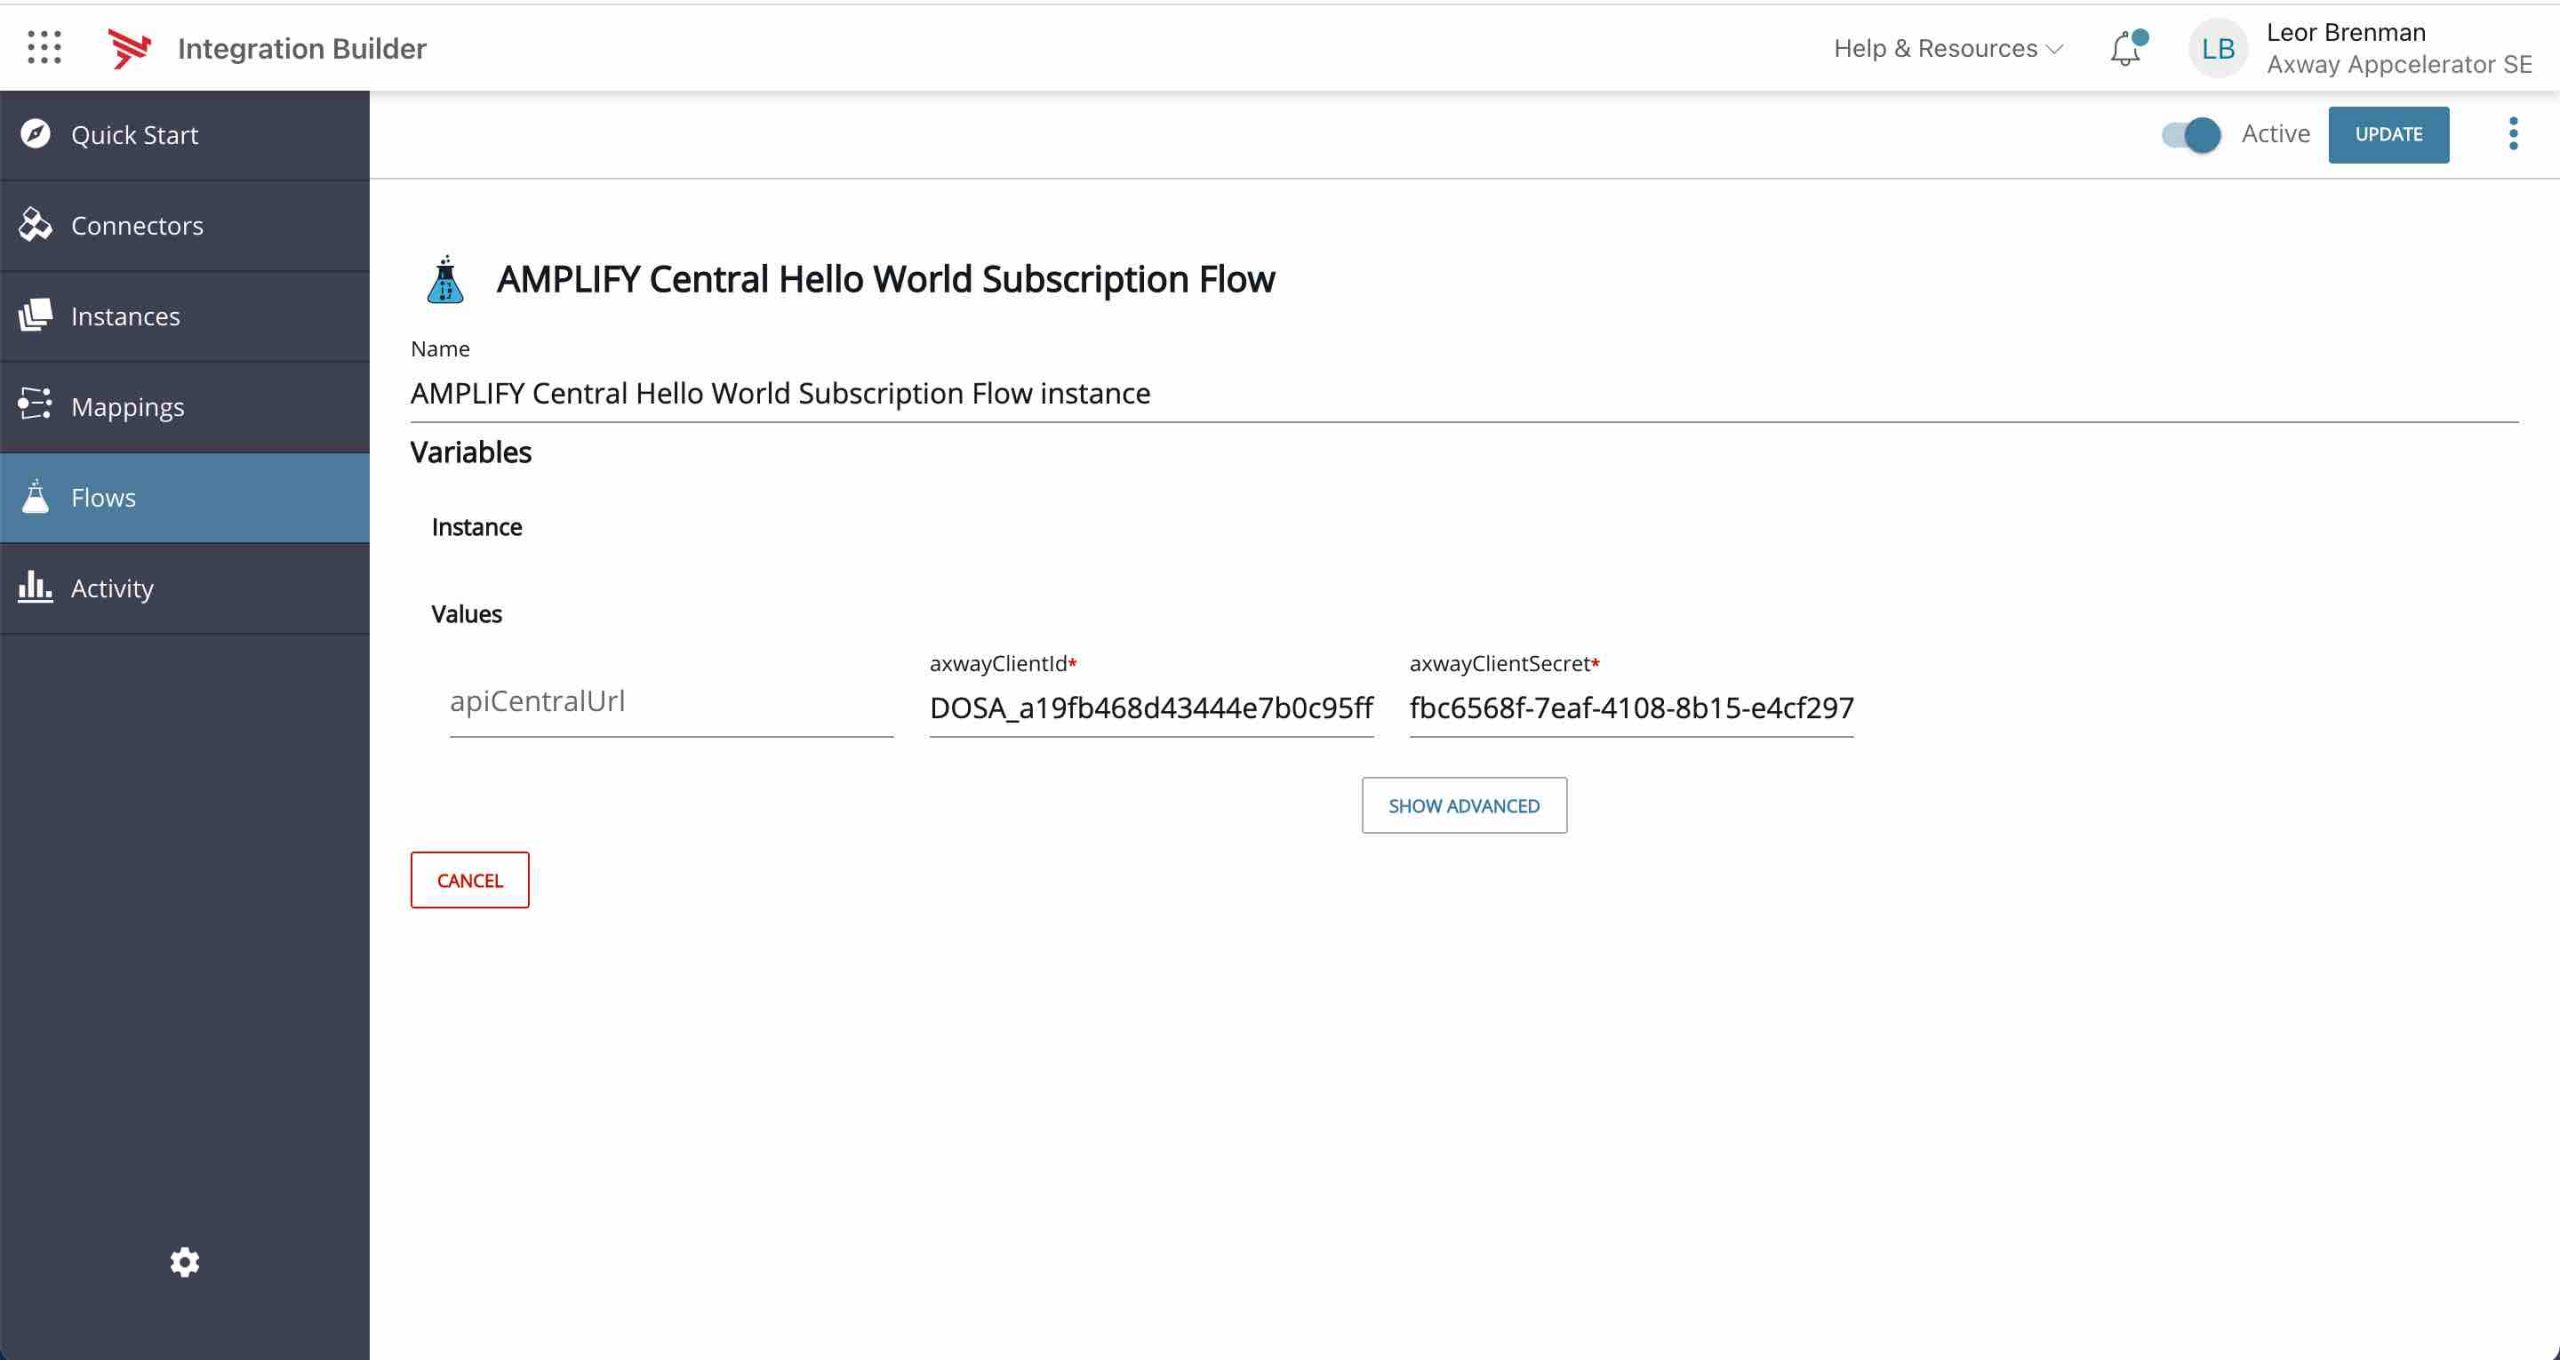
Flow Instance
Now that the flow template is complete, we need to create a flow instance.
The flow instance is shown below. You can see that you need to enter your clientId and clientSecret. The apiCentralUrl is an optional variable for supporting Central deployments in different geographical regions as they become available.
The only thing that remains is to configure out webhook by editing the discovery_agent.yml file as shown below:
.
.
.
subscriptions:
  approval:
    mode: webhook
    webhook:
      url: https://staging.cloud-elements.com/elements/api-v2/formulas/instances/463433/executions
      headers:
        Header=Authorization,Value=User IPJ.......NW4=, Organization 79......c2a05

  notifications:
    webhook:
    smtp:
      host: email-smtp.us-east-1.amazonaws.com
      port: 587
.
.
.
Alternatively, you accomplish the discovery agent configuration by editing the da_env_vars.env file as shown below:
.
.
.
CENTRAL_SUBSCRIPTIONS_APPROVAL_MODE=webhook
CENTRAL_SUBSCRIPTIONS_APPROVAL_WEBHOOK_URL=https://staging.cloud-elements.com/elements/api-v2/formulas/instances/463433/executions
CENTRAL_SUBSCRIPTIONS_APPROVAL_WEBHOOK_HEADERS=Header=Authorization,Value=User IPJ.......NW4=, Organization 79......c2a05
CENTRAL_SUBSCRIPTIONS_NOTIFICATIONS_SMTP_HOST=email-smtp.us-east-1.amazonaws.com
CENTRAL_SUBSCRIPTIONS_NOTIFICATIONS_SMTP_PORT=587
.
.
.
Refer to your Integration Builder account to get the details for the authorization header as shown below:
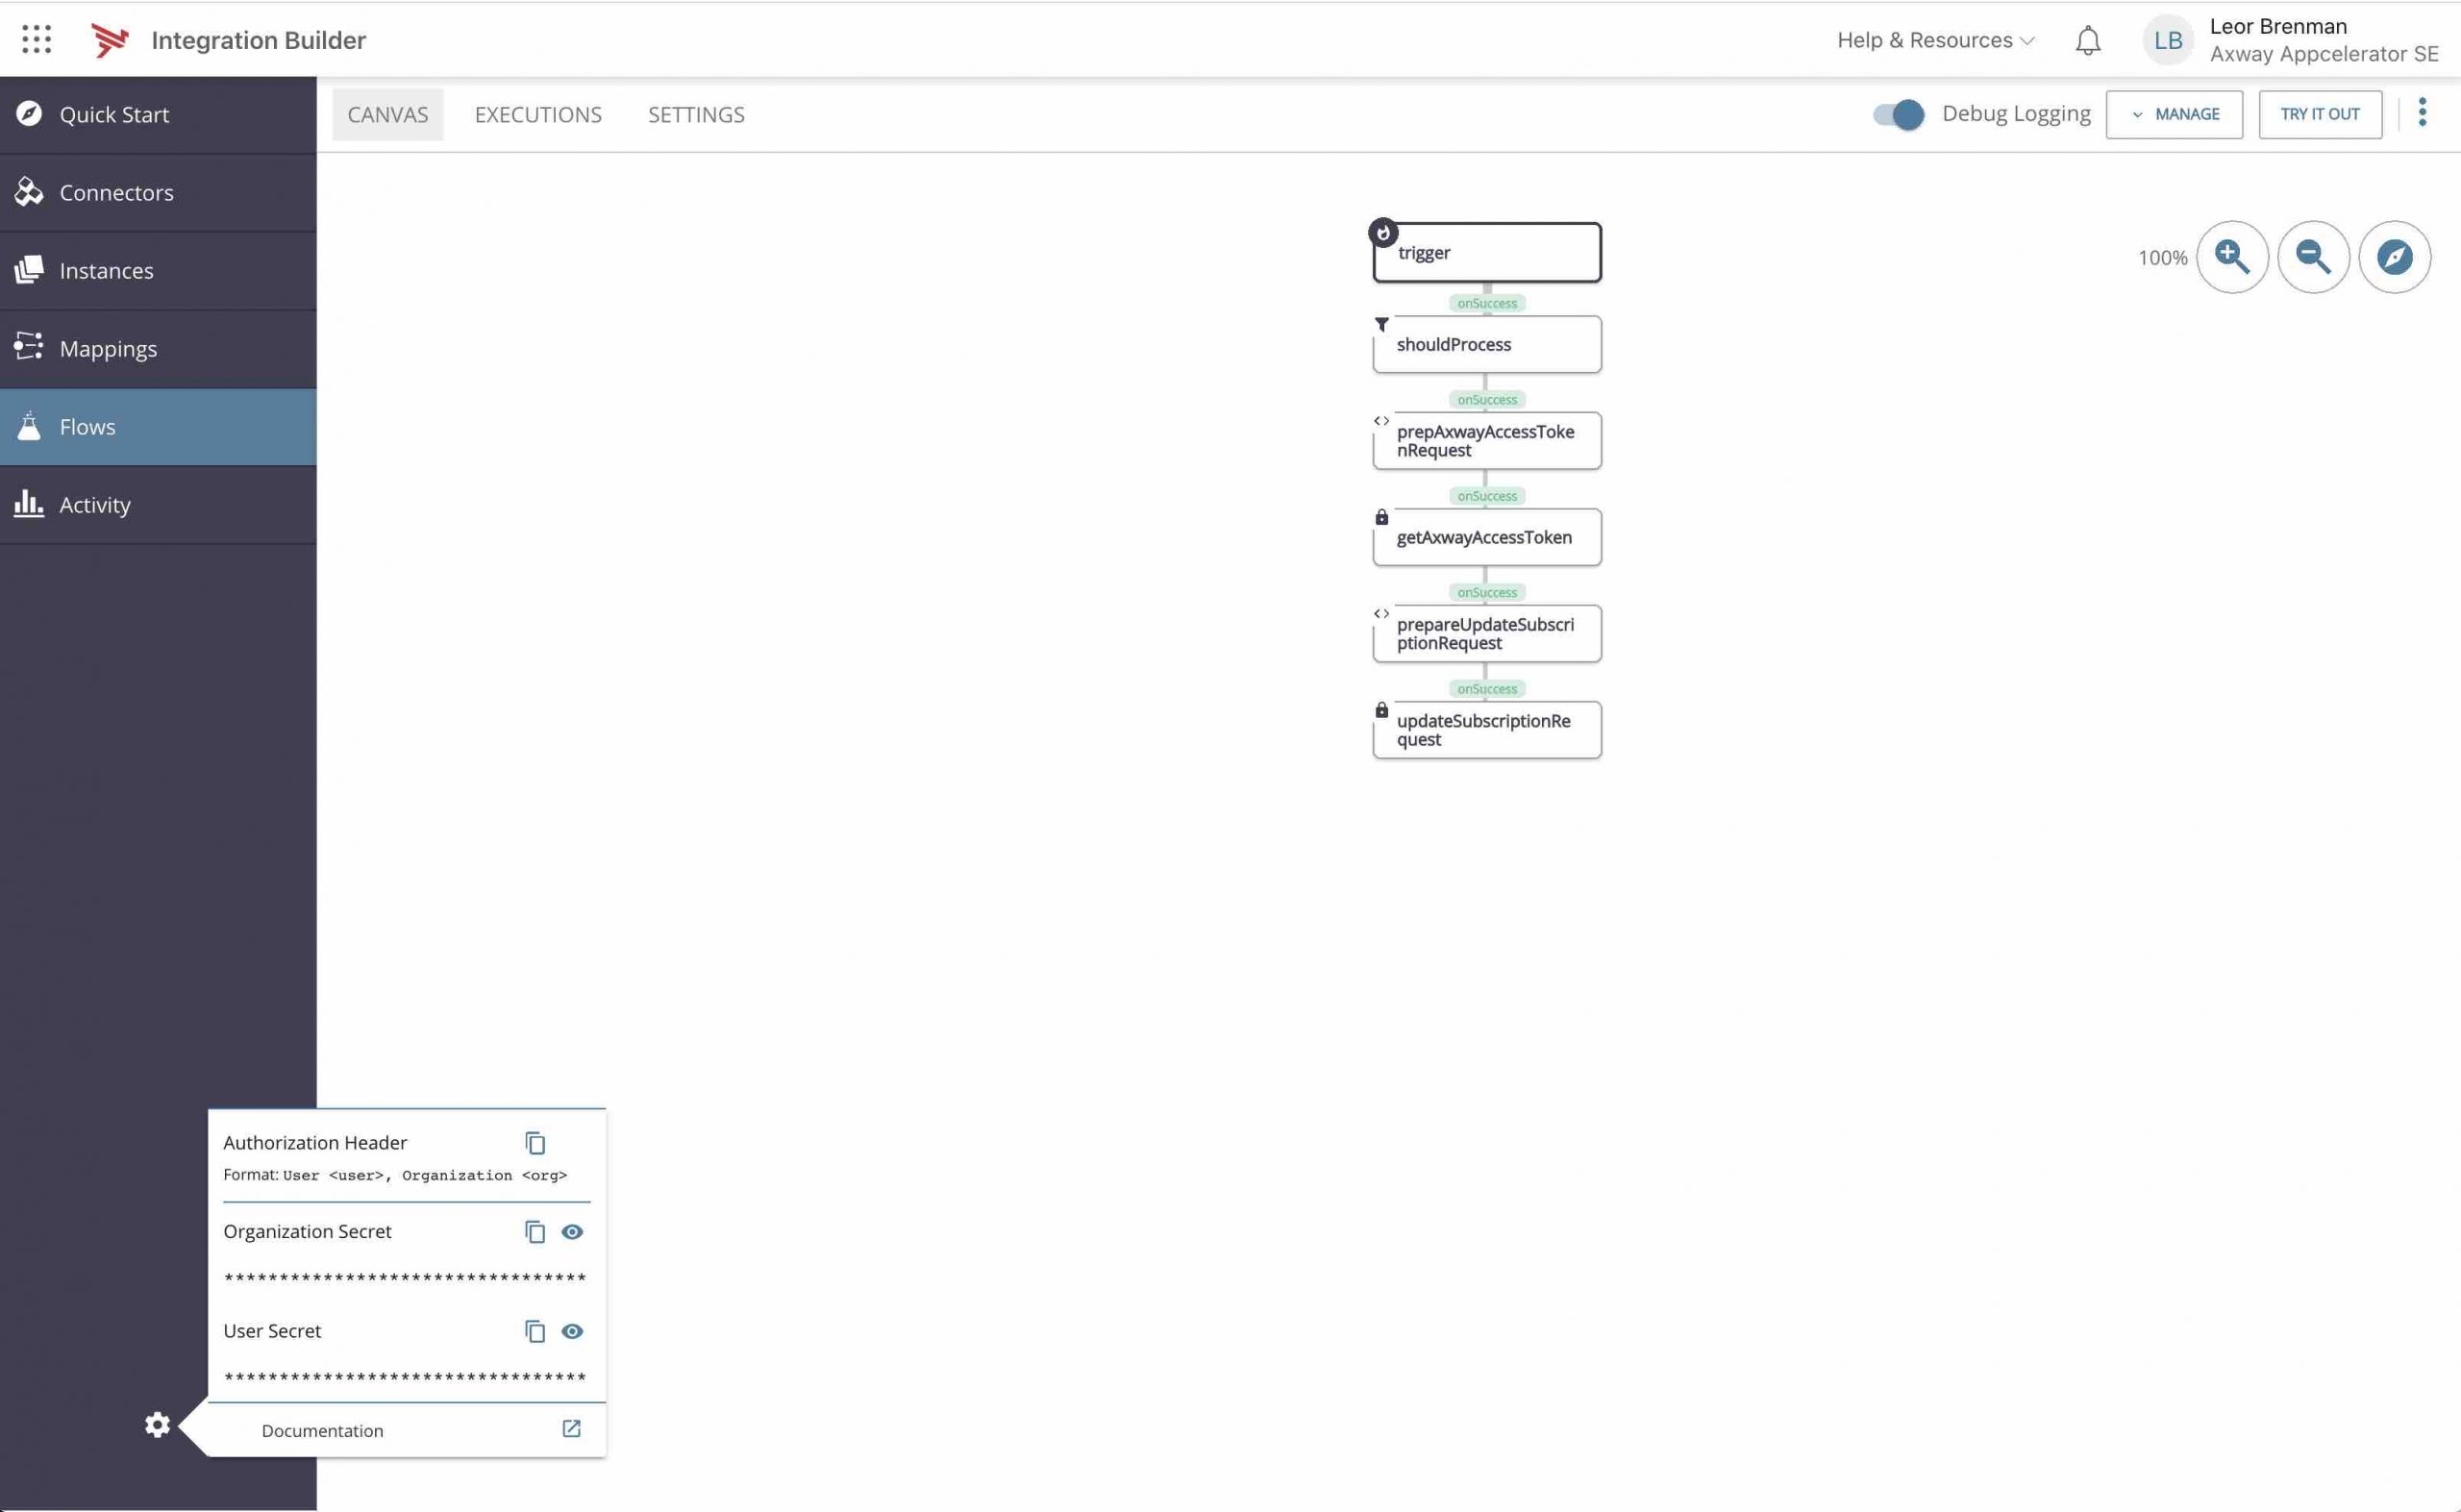
Once this is all configured properly, any API subscription request should trigger your Integration Builder flow to approve it automatically. The subscriber will get an email with authentication details for the API.
Summary
In this document, we saw how to create a simple, Hello World, custom API subscription approval flow using Axway’s Integration Builder.
Discover a more robust sample custom API subscription approval flow using Microsoft Flow and Microsoft Teams is provided here.