

API Builder is a key component of the Axway AMPLIFY Platform. You can use API Builder to create API Microservices using an API First approach or a data connector approach with no or low code. Since API Builder supports Docker Containers natively out of the box and can run in any Docker infrastructure, it supports Cloud to Ground Hybrid Integration Platform scenarios.
In this blog post, we’ll use API Builder Standalone and describe how to install and configure an API Builder Data Connector. We’ll use the MongoDB data connector for this post.
If you don’t already have a working API Builder project on your machine, head on over the Axway online docs and follow the API Builder Getting Started Guide.
Install MongoDB Connector
Follow these instructions to install the API Builder MongoDB Data Connector. Namely, use the CLI command in your terminal:
npm install –no-optional @axway/api-builder-plugin-dc-mongo
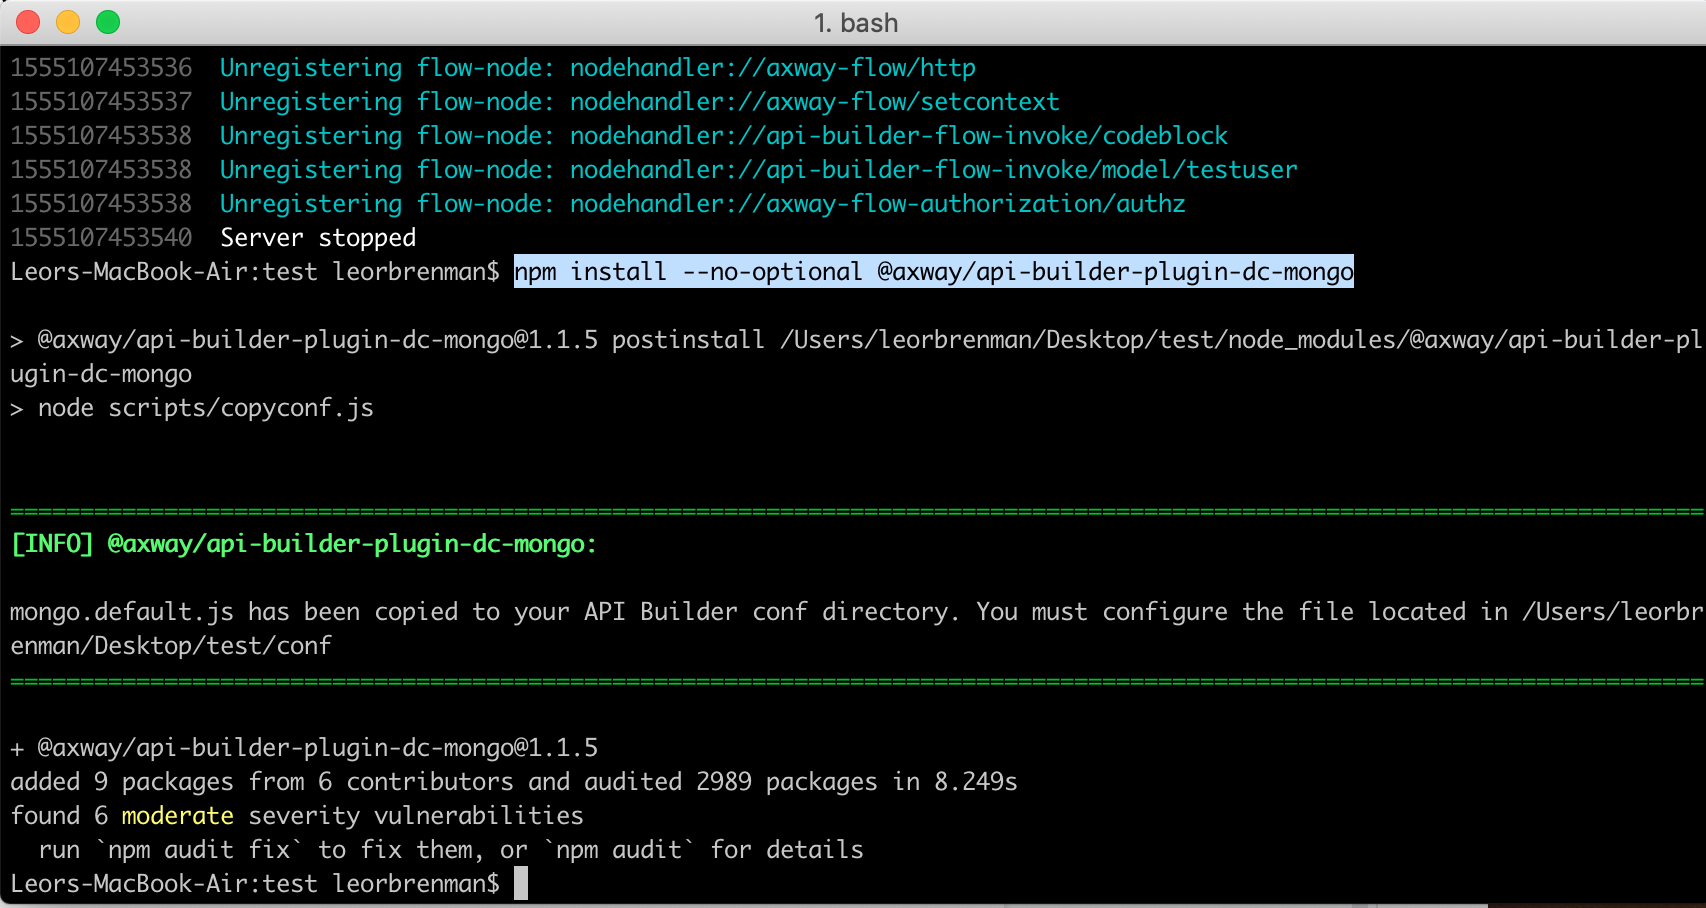
As you can see from the console log above, we need to configure the connector by editing the connector configuration file in the project /conf folder.
Configure the Connector
Edit the connector configuration file – mongo.default.js – in the project /conf folder. You can set the generateModelsFromSchema and modelAutogen properties to true so that API Builder will create models from any collection in your database and expose the models as full CRUD APIs.
We also need to set the url parameter to the MongoDB connection string for your instance. See the screenshot below for how to retrieve the connection string for my MongoDB Atlas managed instance (or for an on prem MongoDB instance, use the appropriate connection string).
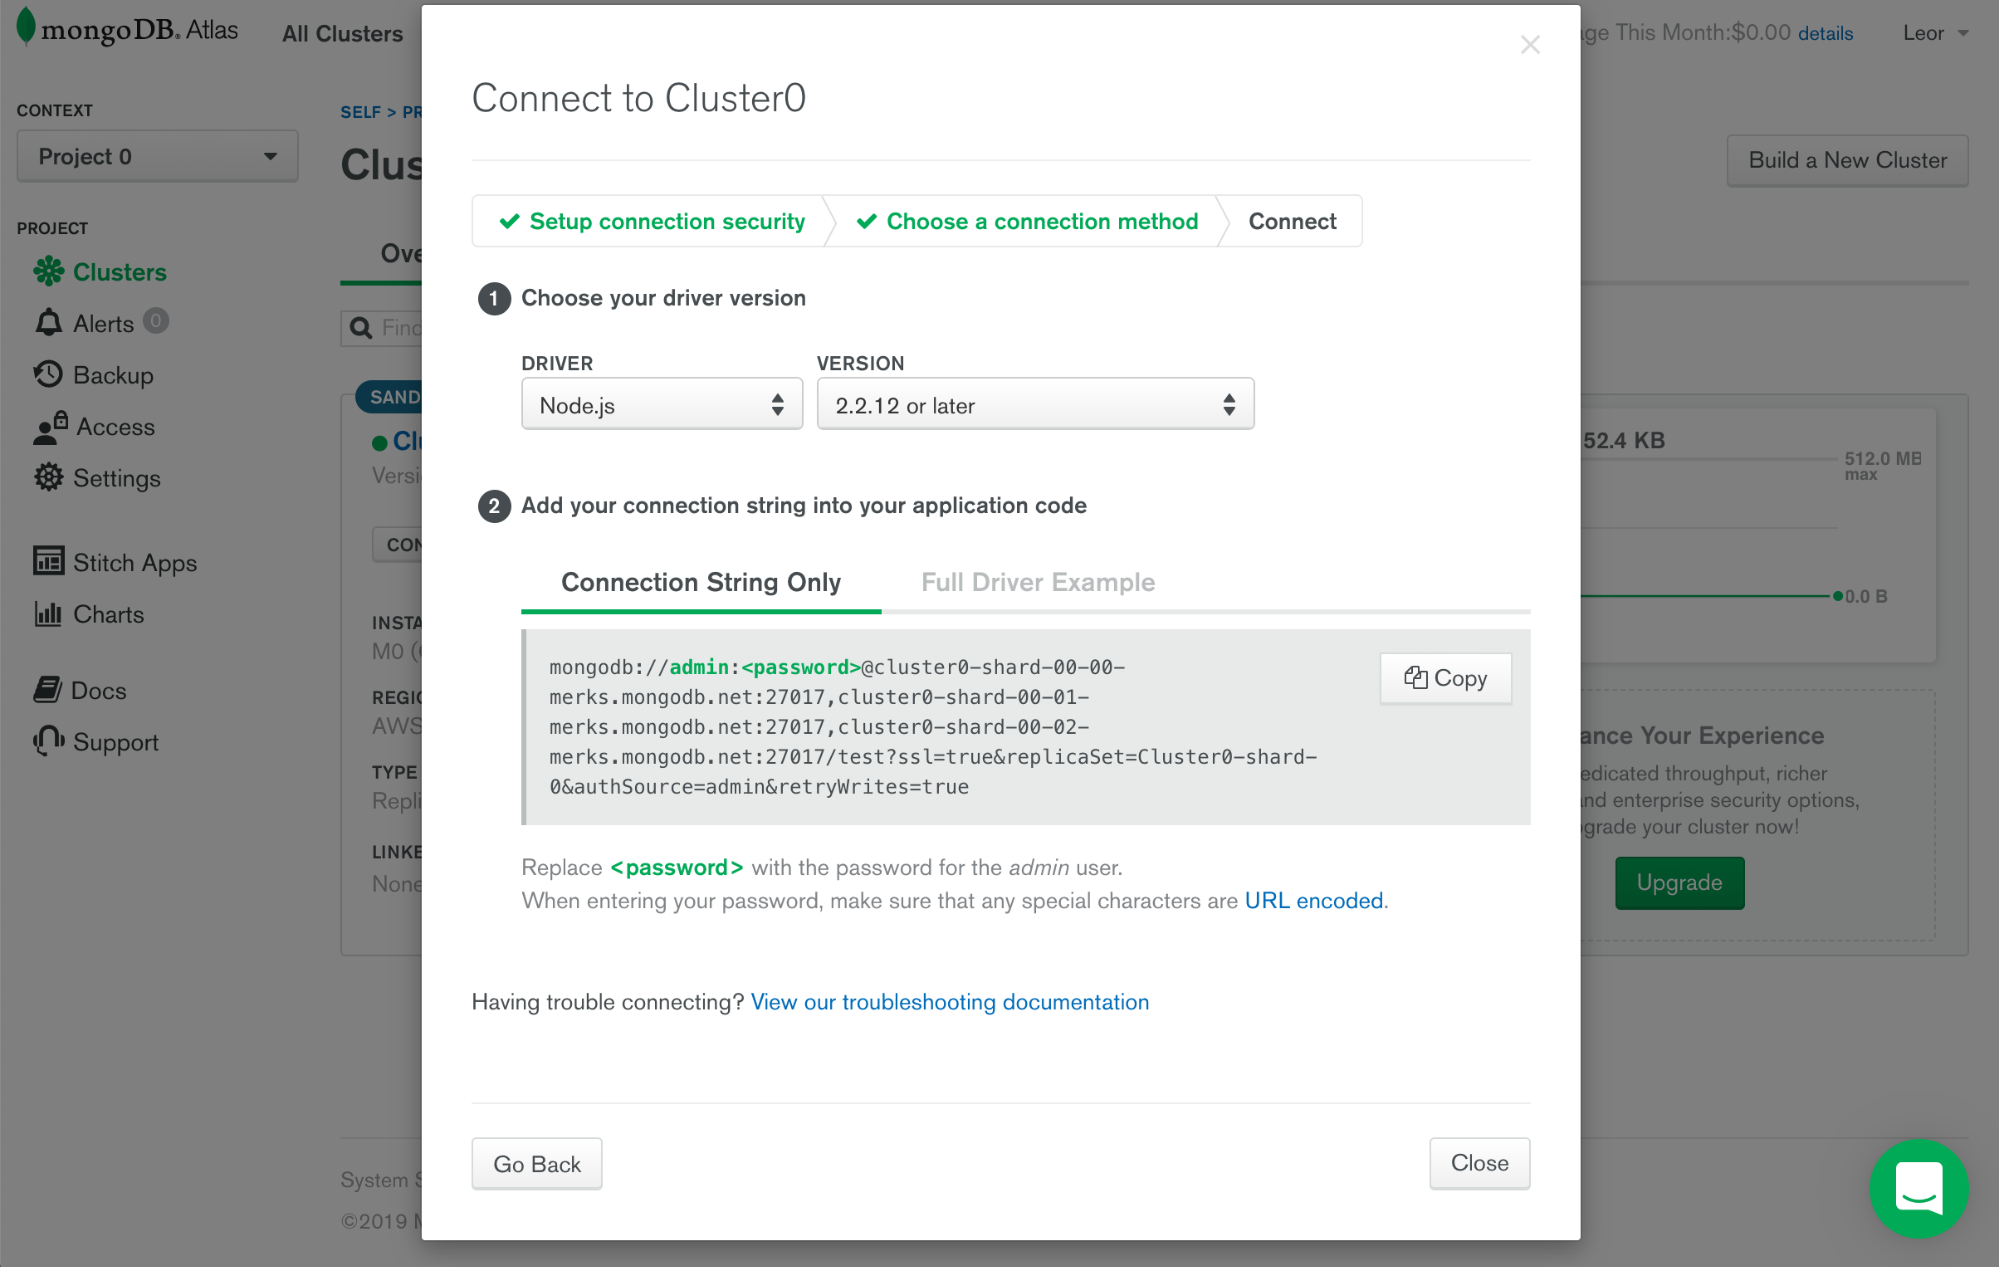
The connection string is shown below:
mongodb://admin:<password>@cluster0-shard-00-00-merks.mongodb.net:27017,cluster0-shard-00-01-merks.mongodb.net:27017,cluster0-shard-00-02-merks.mongodb.net:27017/test?ssl=true&replicaSet=Cluster0-shard-0&authSource=admin&retryWrites=true
Note that you need to edit the password and also set the database name.
Once you’ve edited the connector configuration file, you can restart the API Builder project again using:
npm start
Test your API
Now that the project is running, you can browse the API Builder Console in a browser at:
http://localhost:8080/console
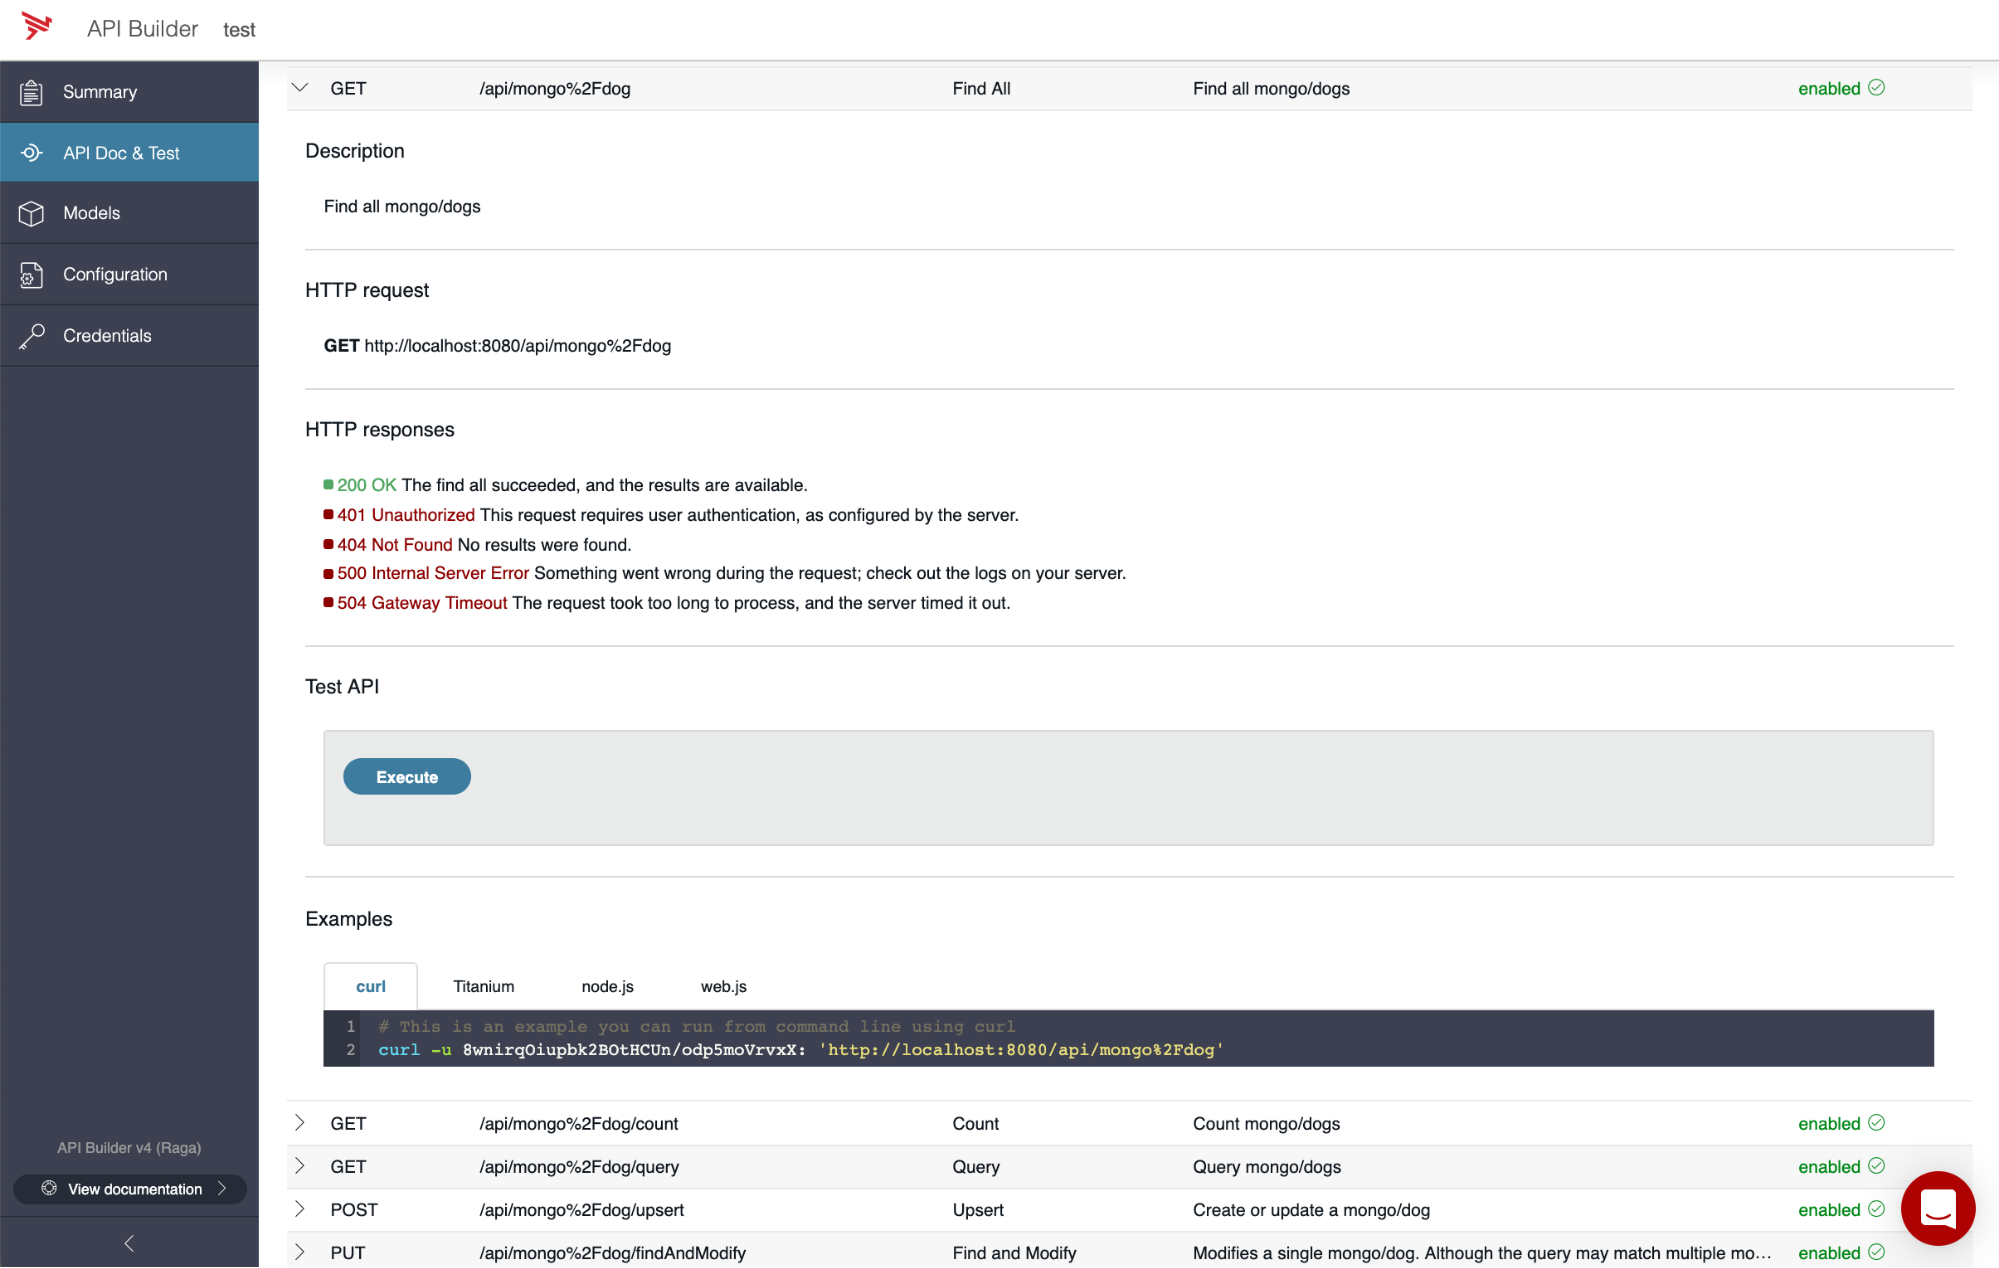
Navigate to the “API Doc & Test” tab as shown below:
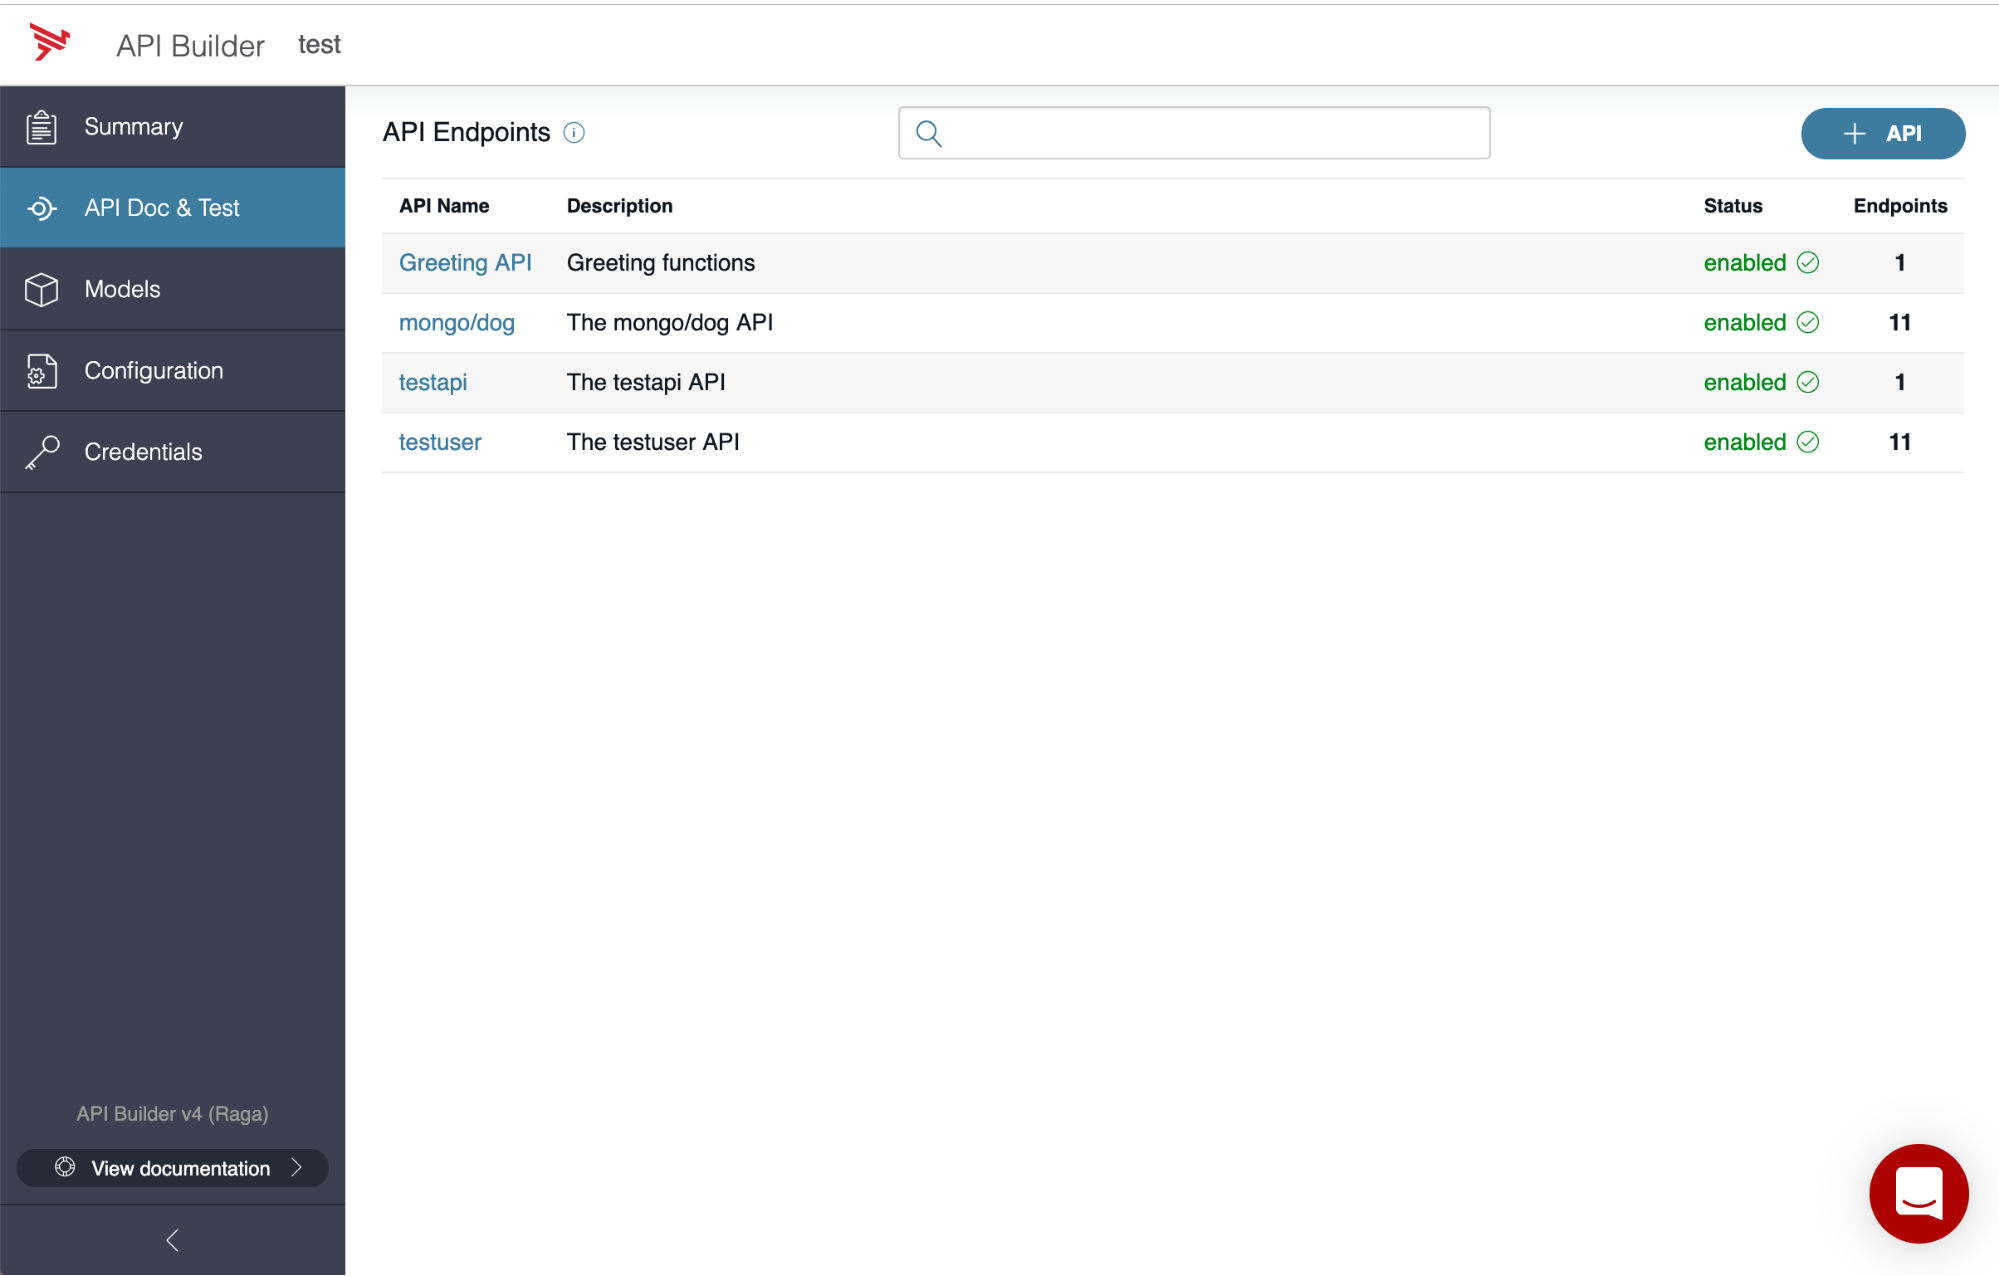
My MongoDB database contains one collection: “dog”. You can see the “mongo/dog” entry in the screenshot above.
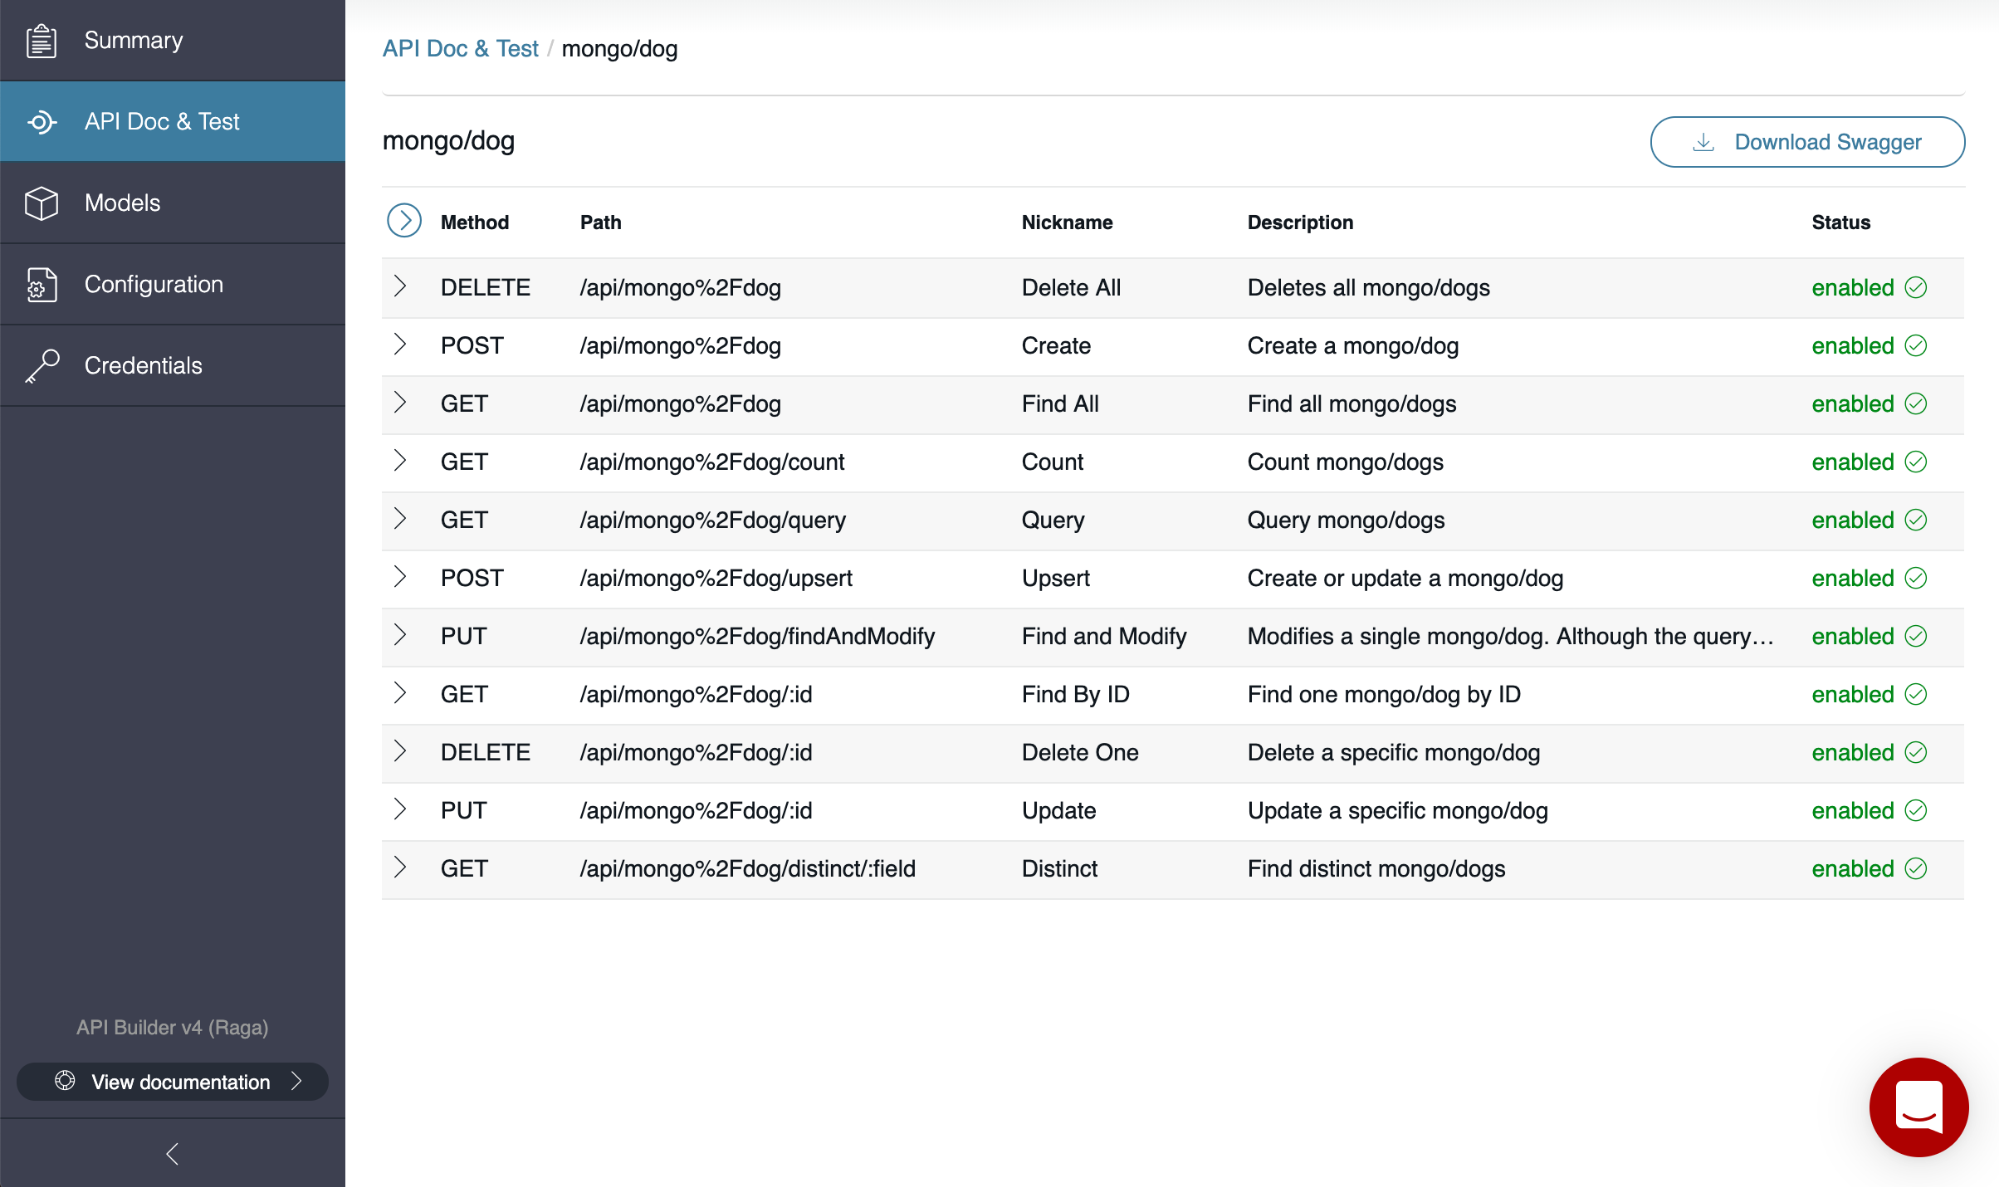
Click on the API for your collection and see the full set of CRUD APIs as shown below:
Click on the GET (FindAll) API to expand it and see the automatically-generated API Doc as shown below:
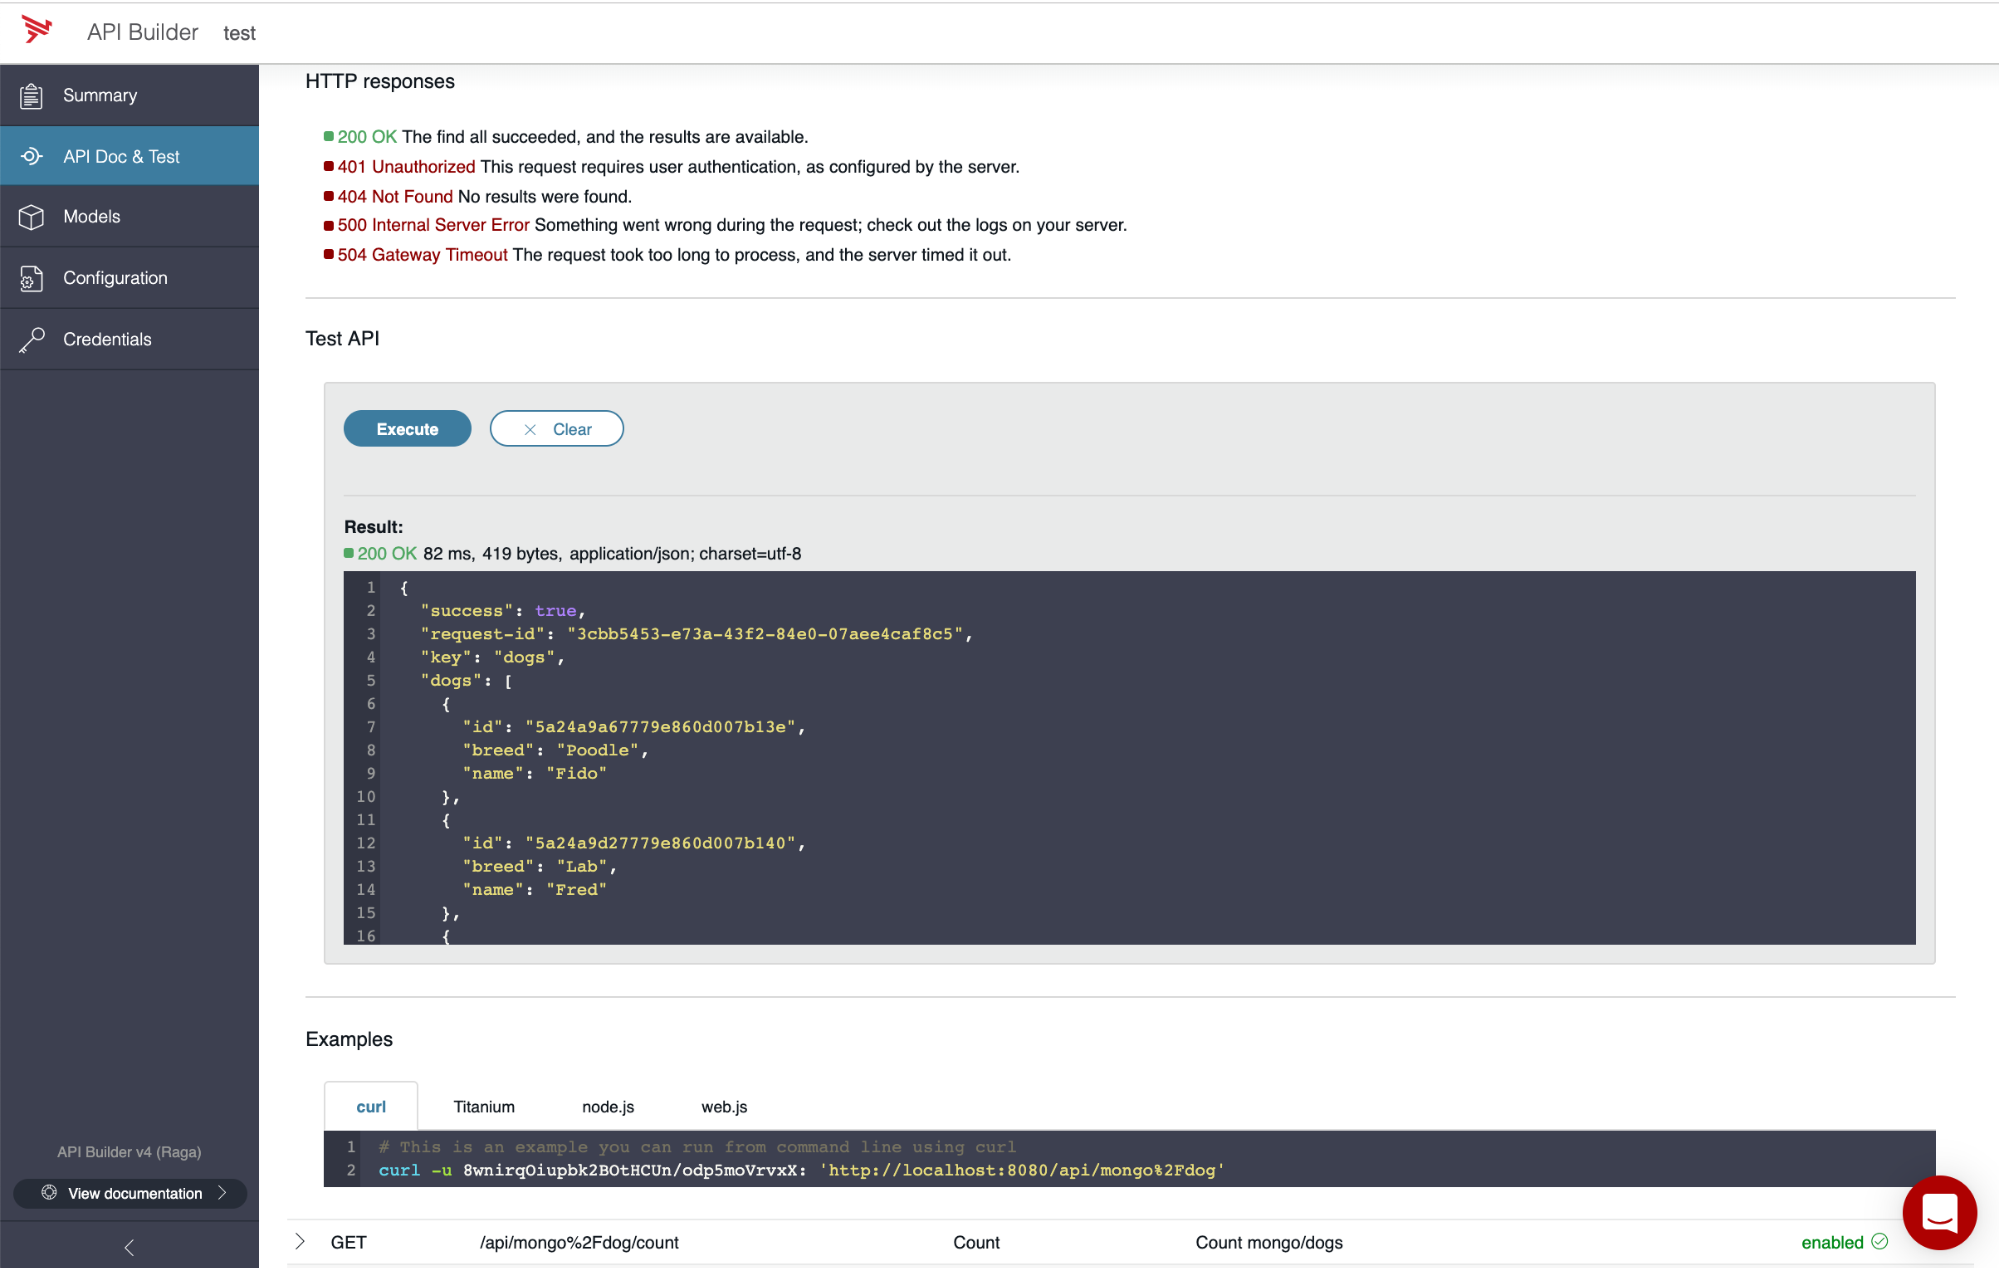
Press the Execute button to call the API and see the data in your collection:
Summary
In this blog post, we saw how easy it is to install, configure and test a data connector for API Builder Standalone. Take a look at this video that covers this flow in real-time: https://www.youtube.com/watch?v=MknEOb8FjVM
After testing your API, you need to create a Docker Container using the Dockerfile that comes out-of-the-box in your API Builder Project. Then, you can deploy that container image in any Docker infrastructure.