

The blog post, API Builder 4.0 Standalone – From Zero to Dockerized Microservice, shows how easy it is to use API Builder Standalone to create a Docker container microservice. In that example, we connected API Builder to a hosted MongoDB instance in MongoDB Atlas.
In this blog post, we’ll look at standing up a multi-container application with API Builder and MongoDB containers as shown below.

We’ll also see how Docker can help with inter-container communication. First, we’ll do this manually, and then we’ll use docker-compose to automate the process.
In part 2, we’ll build on this and use two API Builder containers, for increased load, and we’ll leverage an nginx container for a load balancer.
API Builder Microservice Container for MongoDB
I modified the API Builder project described in the prior blog post so that it can connect to ANY MongoDB instance by passing in the MongoDB connection URL as an environment variable, MONGO_URL at launch. The API Builder project will expose ALL collections in a database as APIs with all CRUD operations.
The API Builder MongoDB connector configuration is as follows:
module.exports = {
connectors: {
mongo: {
connector: '@axway/api-builder-plugin-dc-mongo',
url: process.env.MONGO_URL,
generateModelsFromSchema: true,
modelAutogen: true
}
}
};
This project is published to docker hub here.
Note that the only requirement for this API Builder project is that the MongoDB database specified in the connection URL must contain at least one collection with at least one document in it.
We’ll come back to how to launch this container shortly.
MongoDB Container
In the prior blog post, we connected API Builder to an already existing MongoDB instance running on MongoDB Atlas. In this blog post, we will create a MongoDB container. So, we’ll need to consider how to maintain the MongoDB database between container runs and when we remove (and reinstall) the container.
We’ll use the official Docker image for Mongo for our project. So, head over to Docker Hub and review the description and instructions to run.
In order to maintain the database contents, we’ll use Docker volumes to store the data on our host machine in a known location. This is described in the repository description under Caveats -> Where to Store Data section.
We’ll come back to how to launch this container shortly.
Container Communications
In order for API Builder to connect to the MongoDB container, we’ll need to know the MongoDB host IP address or have some means of connecting via DNS name.
This is most easily achieved using Docker Bridge Networking.
Manual Setup
Create a Network Bridge
Let’s start by creating a custom bridge, called mybridge that will enable our containers to communicate via DNS name using the following docker command:
docker network create -d bridge mybridge
When we run a container, we’ll use the –network option to specify what bridge to add the container to.
Create a new MongoDB instance with a mounted volume on your host for storing the data
docker run --name mymongodb -v ~/mongodata:/data/db --network=mybridge --restart=always -d -p 27017:27017 mongo mongod --auth
Note that in my example, I am mounting the MongoDB data store on my host in the /mongodata folder. Also, I am adding the MongoDB container to the network bridge called mybridge
Add a user with root privilege (if mounted volume is empty – e.g. first time)
docker exec -i -t mymongodb bash
mongo
use admin
db.createUser({user:"admin",pwd:"admin",roles:[{role:"root",db:"admin"}]})
exit
exit
Populate data in the DB (if mounted volume is empty – e.g. first time)
I used MongoDB Compass Community to connect to MongoDB running on local host as follows:
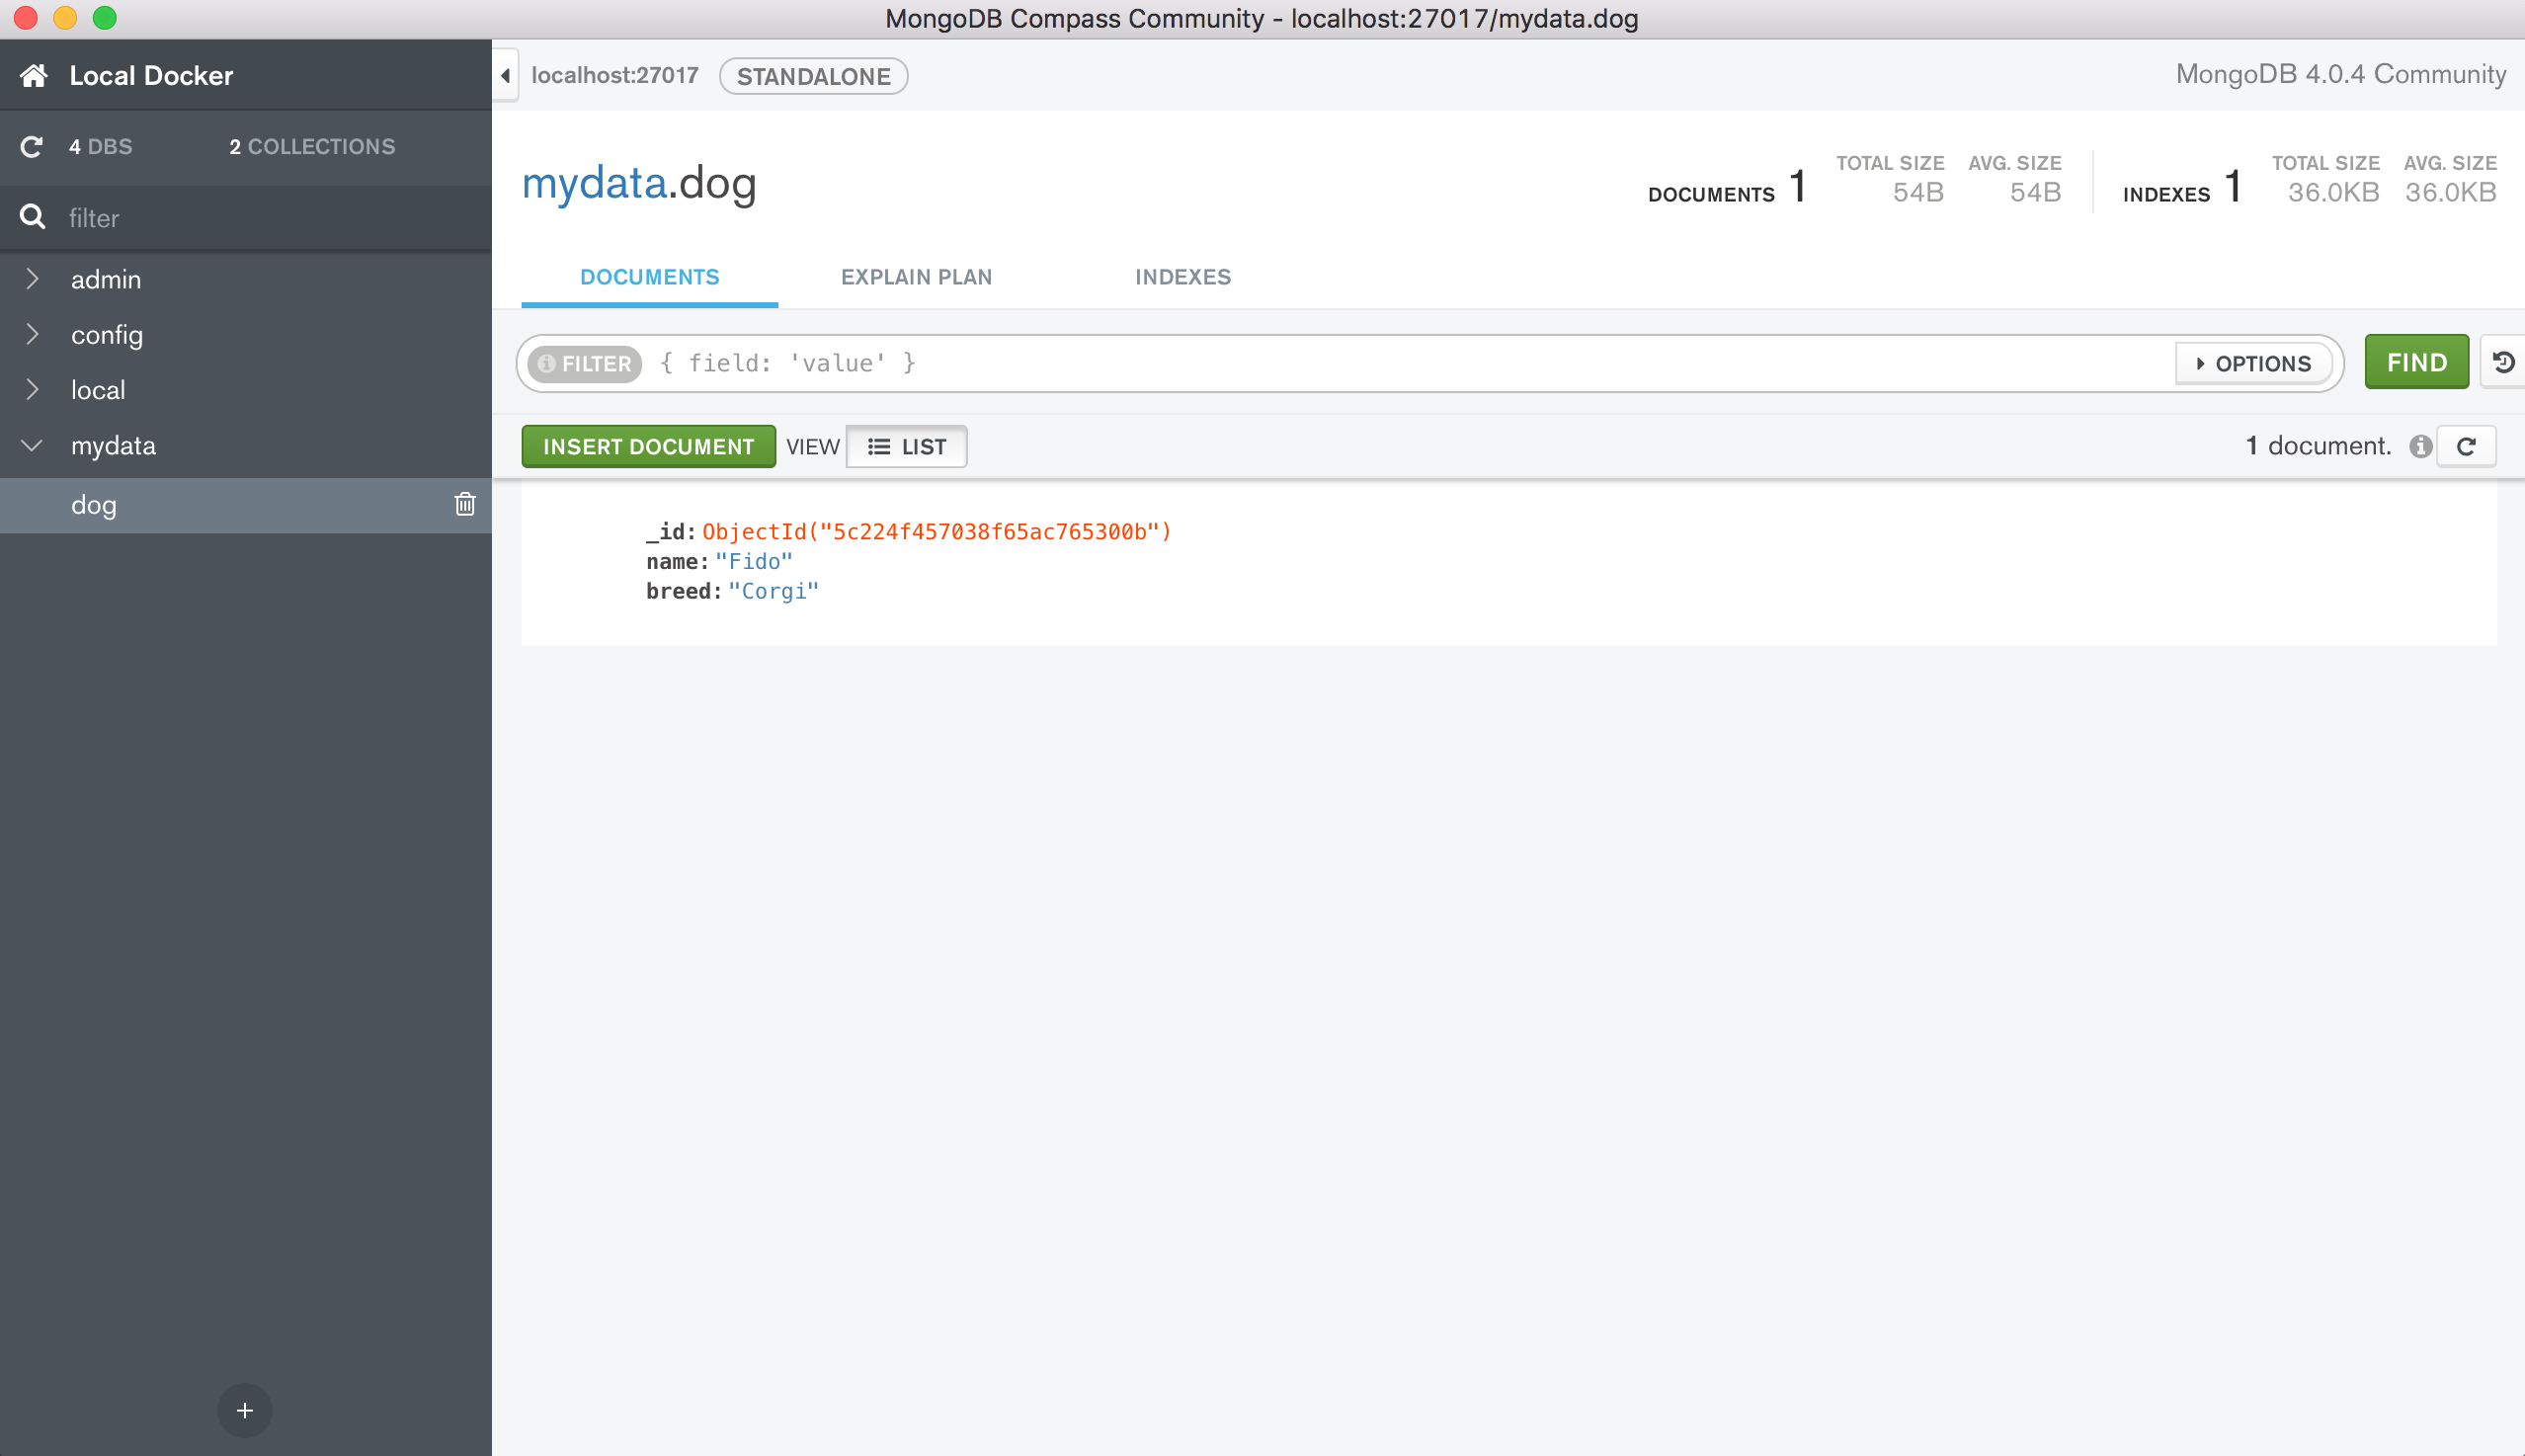
Then I created a database called mydata and I added a collection called dog and created an entry (document) as follows:
{
"name": "Fido",
"breed": "Corgi"
}
Create a new API Builder Mongo App instance
Us the following command to run your API Builder container and add it to the network created earlier:
docker run --rm --name lbdemoapi -d --network=mybridge -p 80:8080 -e MONGO_URL="mongodb://admin:admin@mymongodb:27017/mydata?authSource=admin" lbdemoapiimage
Note that you can replace lbdemoapi with a name for your image. Also, replace lbdemoapiimage with the name of the docker image you created at the begining of this blog post
Alternatively, you can use my docker image as follows:
docker run --rm --name apibmongodb -d --network=mybridge -p 80:8080 -e MONGO_URL="mongodb://admin:admin@mymongodb:27017/mydata?authSource=admin" lbrenman/apibmongodb:1.0.0
Note the MongoDB connection URL = “mongodb://admin:admin@mymongodb:27017/mydata?authSource=admin” is using the container name as the host address. This is possible because of the Docker Network Bridge we created.
Check your API
Call your API from curl (or Postman or equivalent)
curl 'https://localhost:80/api/mongo/dog'
Note that we mapped your host port 80 to the API Builder container port 8080
You should get a result similar to the following:
{
"success": true,
"request-id": "e8f15e54-ad13-42f8-9802-030dbb07270d",
"key": "dogs",
"dogs": [
{
"id": "5c224f457038f65ac765300b",
"breed": "Corgi",
"name": "Fido"
}
]
}
So far, we saw how to create our application manually using docker run commands for our containers after creating a bridge using the following 3 commands:
docker network create -d bridge mybridge

docker run --name mymongodb -v ~/mongodata:/data/db --network=mybridge --restart=always -d -p 27017:27017 mongo mongod --auth

docker run --rm --name lbdemoapi -d --network=mybridge -p 80:8080 -e MONGO_URL="mongodb://admin:admin@mymongodb:27017/mydata?authSource=admin" lbdemoapiimage
Note: run ‘docker ps’ to make sure both mymongodb and apibmongodb are both running. If apibmongodb is not, then run the last command again since API Builder might have failed to launch if the MongoDB was not up and running fully when API Builder tried to launch and connect to it.
Now you can test your API.
Now that we know how to manually bring up a multi-container app using docker commands, let’s move on to automating this a bit using Docker Compose.
Since we will be recreating our application, before proceeding, make sure to stop and remove the both mymongodb and apibmongodb containers using ‘docker stop ‘ and ‘docker container rm ‘ commands.
Docker Compose
Docker Compose is a tool for defining and running multi-container Docker applications. You can read more about it here.
The following instructions assume that you have a MonogDB database in a folder on your host (i.e. not a NEW MongoDB DB). Refer to manual setup above for instructions.
Using Docker Compose involves using the ‘docker-compose’ command line tool (which is installed along with the Docker command line tool when you install Docker on your machine) and creating a ‘docker-compose.yml’ YAML file.
My docker-compose YAML file looks like this:
version: '3'
services:
apibmongodb:
image: lbrenman/apibmongodb:1.0.0
container_name: "apibmongodb"
ports:
- "80:8080"
environment:
- MONGO_URL=mongodb://admin:admin@mymongodb:27017/mydata?authSource=admin
depends_on:
- mymongodb
mymongodb:
image: mongo:latest
container_name: "mymongodb"
ports:
- "27017:27017"
volumes:
- ~/mongodata:/data/db
command: mongod --auth
Note that the above docker-compose.yaml uses my API Builder docker image on Docker Hub. You can replace with your API Builder image that you created in this post.
All of this can be inferred directly from the ‘docker run’ commands I outlined above. The only new component is the depends_on: part which tells docker-compose to wait for MongoDB to be launched before trying to launch API Builder.
Note that there is no need to create a private network (as we did in the manual setup) because compose will do that automatically as per https://docs.docker.com/compose/networking/.
Start the containers using:
docker-compose up -d
Now you can make API calls as before:
curl 'https://localhost:80/api/mongo/dog'
Note that if your API calls fail, perhaps API Builder is not running (because it could not connect to mongoDB, which was starting up at the same time). Try running docker-compose up -d again and then everything should work. You can read more about this here
Stop the containers using:
docker-compose down
Summary
In this blog post, we saw how could leverage Docker and Docker Compose to create a multi-container application using API Builder and MongoDB. Furthermore, we looked at how to persist MongoDB data on our host computer and how to leverage Docker Bridge Networks to make inter container communications easier.
In Part 2, we’ll use Docker Compose to create a more complex multi container application with two API Builder containers for increased load, one MongoDB database and a nginx based load balancer.