

This blog post describes an image analysis plugin for API Builder based on AWS (Amazon Web Services) Rekognition. The plugin is intended to help create API Builder-based APIs and integrations that include image analysis. For example, you can create an API that detects Personal Protective Equipment (PPE) worn by employees in an image. You can use this information to improve workplace safety practices.
In this blog post we’ll describe how to install and leverage the plugin in an API.
You can find and read about the plugin here.
The current methods exposed are:
- detectFaces – Detects the 100 largest faces in the image. For each face detected, the operation returns face details. These details include a bounding box of the face, a confidence value (that the bounding box contains a face), and a fixed set of attributes such as facial landmarks (for example, coordinates of eye and mouth), presence of beard, sunglasses, and so on
- detectLabels – Detects instances of real-world entities within in the image. This includes objects like flower, tree, and table; events like wedding, graduation, and birthday party; and concepts like landscape, evening, and nature
- detectModerationLabels – Detects unsafe content in an image
- detectProtectiveEquipment – Detects Personal Protective Equipment (PPE) worn by people detected in an image
- detectText – Detects text in the input image and converts it into machine-readable text
The plugin requires that images be passed as Base64 encoded text.
Prerequisites
In order to use the plugins you will need an AWS access key ID and secret access key, which are used to sign programmatic requests that you make to AWS (through the plugin). You will use these to set the following two environment variables as per the AWS SDK for JavaScript online docs:
- AWS_ACCESS_KEY_ID
- AWS_SECRET_ACCESS_KEY
Refer to the AWS online docs for instructions on how to get an access key id and secret access key.
Install plugin
If you don’t already have an API project created, then create a new API Builder project using the API Builder Getting Started guide here. For example:
axway builder init rekplugintest
Install the Rekognition plugin by executing the following command in your API Builder project folder:
npm install api-builder-plugin-rekognition
One way to set environment variables for an API Builder project is to edit the /conf/.env environment file and add the following two environment variables:
- AWS_ACCESS_KEY_ID
- AWS_SECRET_ACCESS_KEY
For example:
PORT=8080
LOG_LEVEL=debug
AWS_ACCESS_KEY_ID=AK........UA
AWS_SECRET_ACCESS_KEY=nie......oKE
At this point the plugin is installed and ready to use in the flow editor in an integration or an API and you will find the plugin in the AI section of the Flow-Nodes palette.
You should also add the following to the /conf/default.js file in order to overcome the 1MB default limit on POST data:
bodyParser: {
  limit: '5mb'
},
Note that 5mb is just an example. You can set it to the value that meets your needs based on the image size
Test plugin
For convenience’s sake, we’ll modify the built-in Greeting API to test the plugin since the Greeting API takes a username parameter which we can used to pass a Base64 string into the plugin as the encoded image to be analyzed.
Start your API Builder project using npm start.
Start the console and open the Greeting API flow. You will see the Rekognition plugin in the AI section of the Flow-Nodes palette:
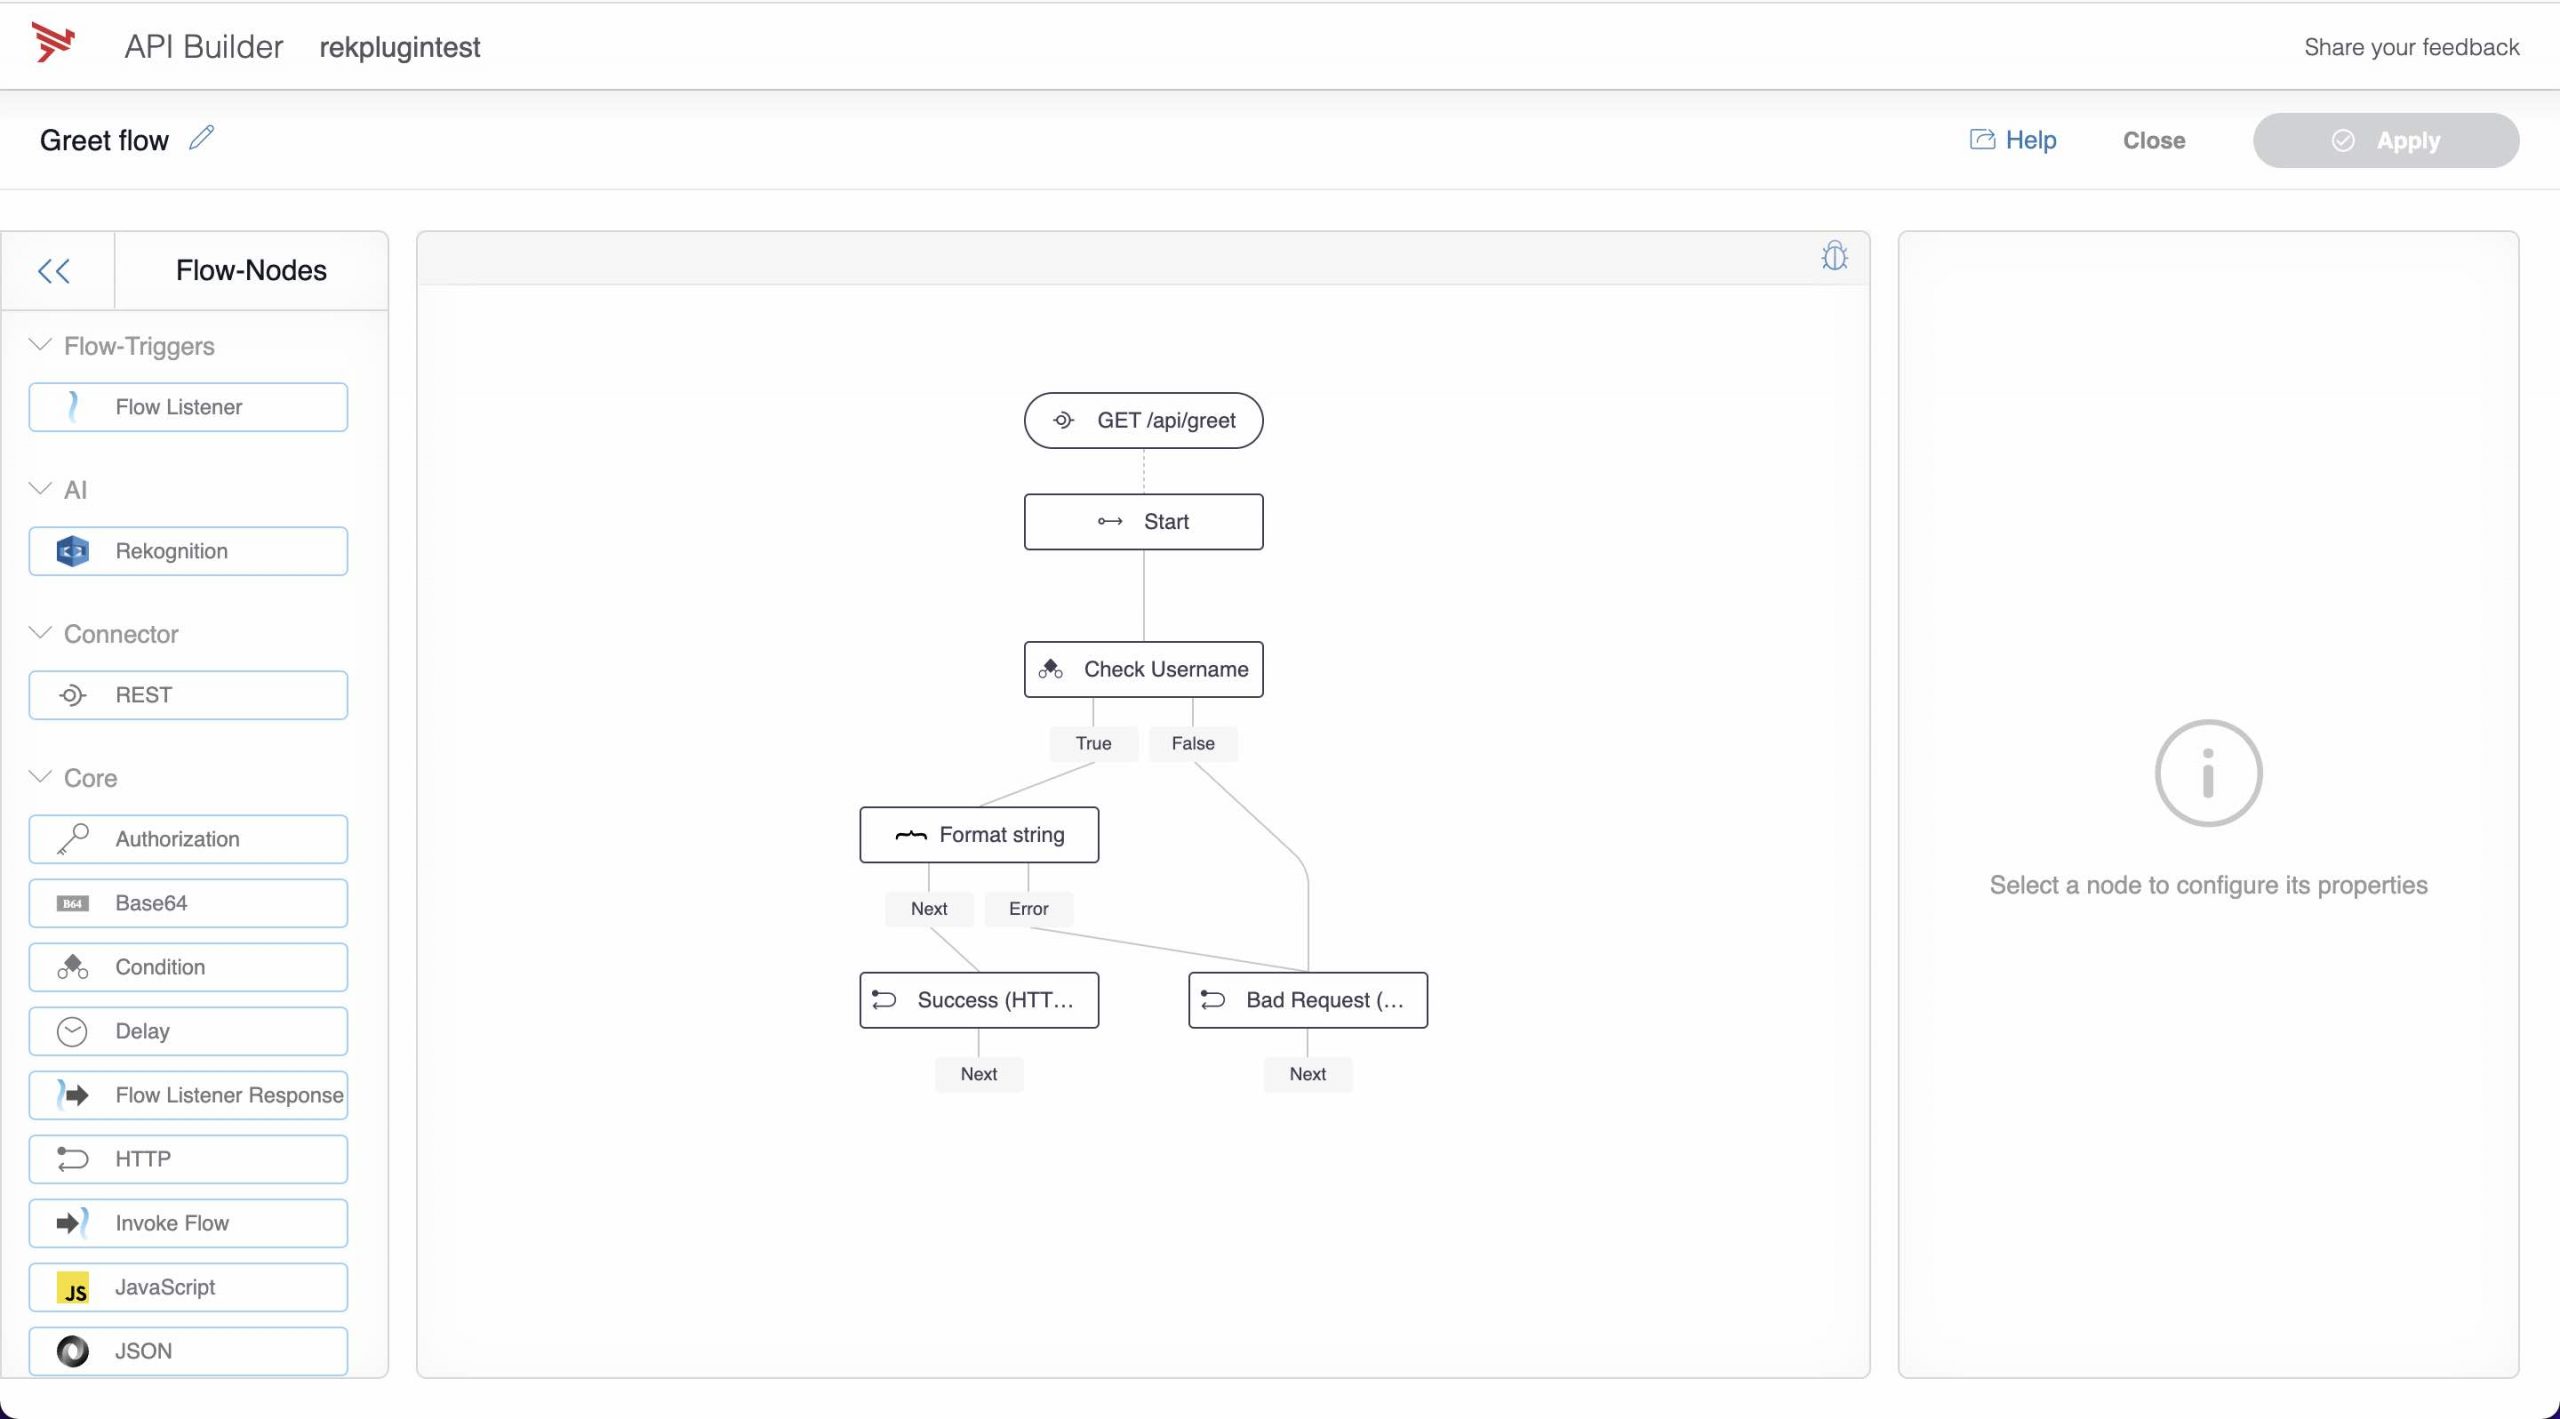
Now, let’s do the following:
- Drag the Rekognition plugin to the canvas and connect between the Start node and the Success HTTP Response node
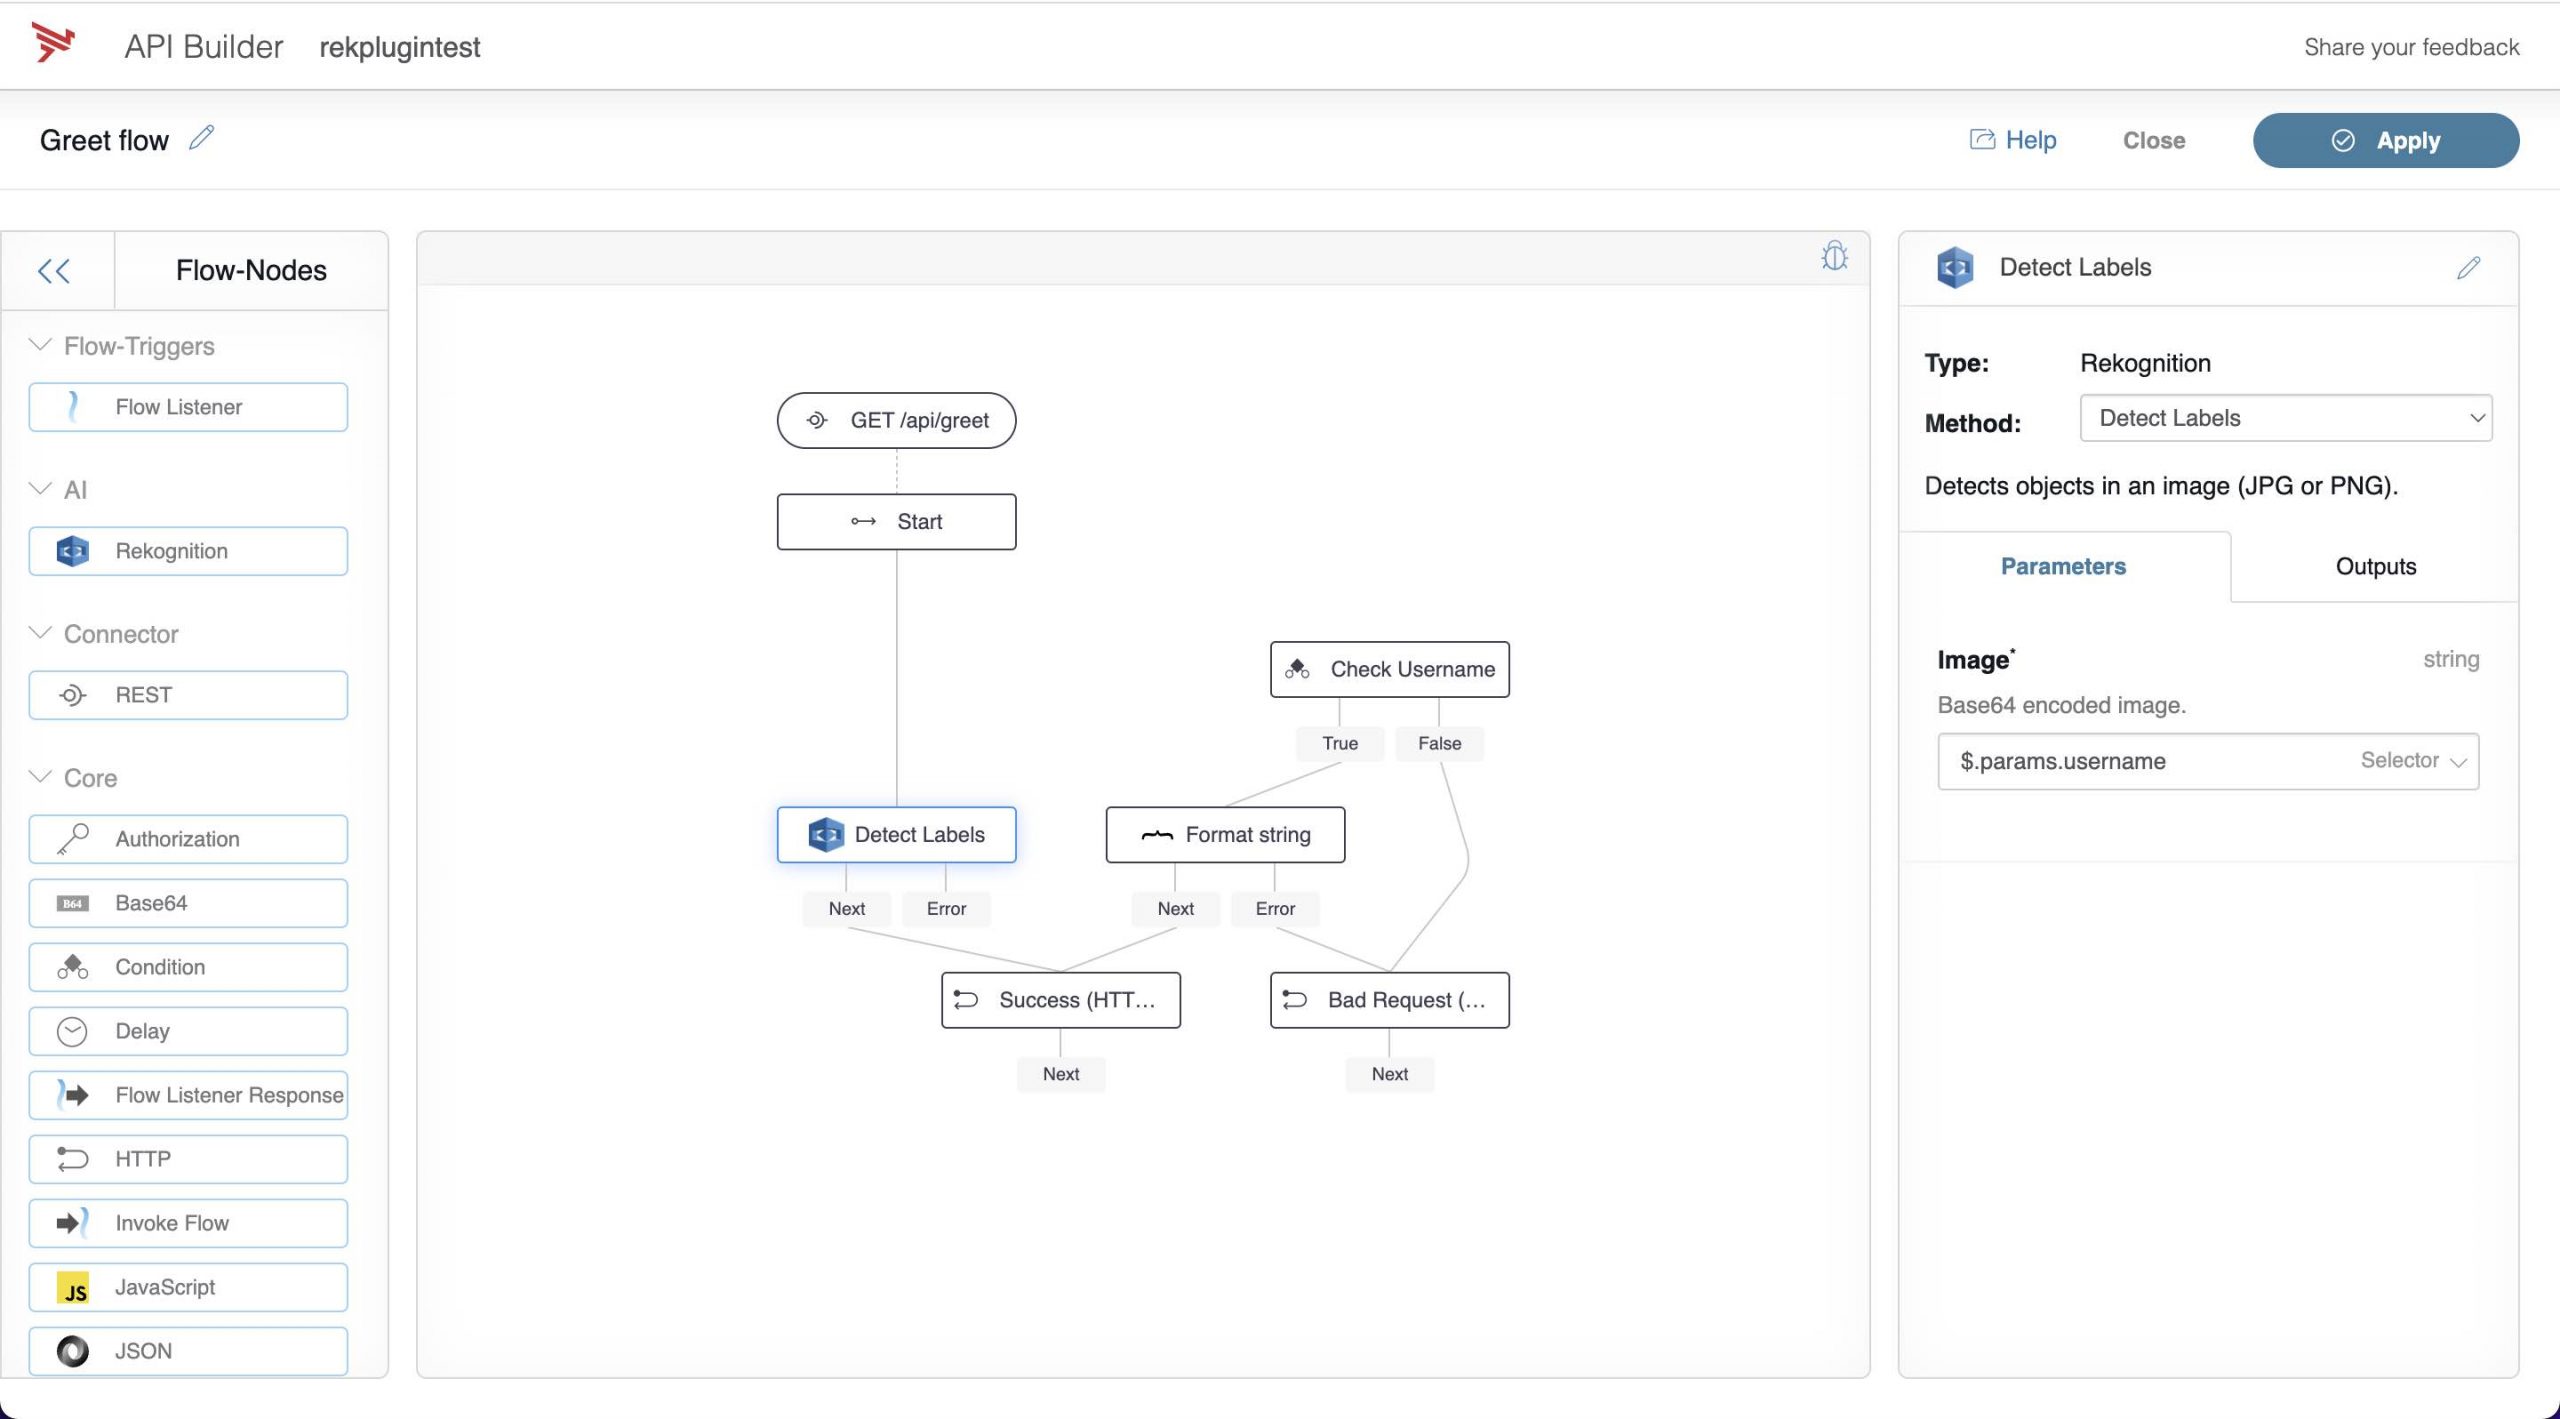
- Select “Detect Labels” from the Rekognition Method picker
- Set the Image Parameter to Selector and enter `$.params.username` as it’s value
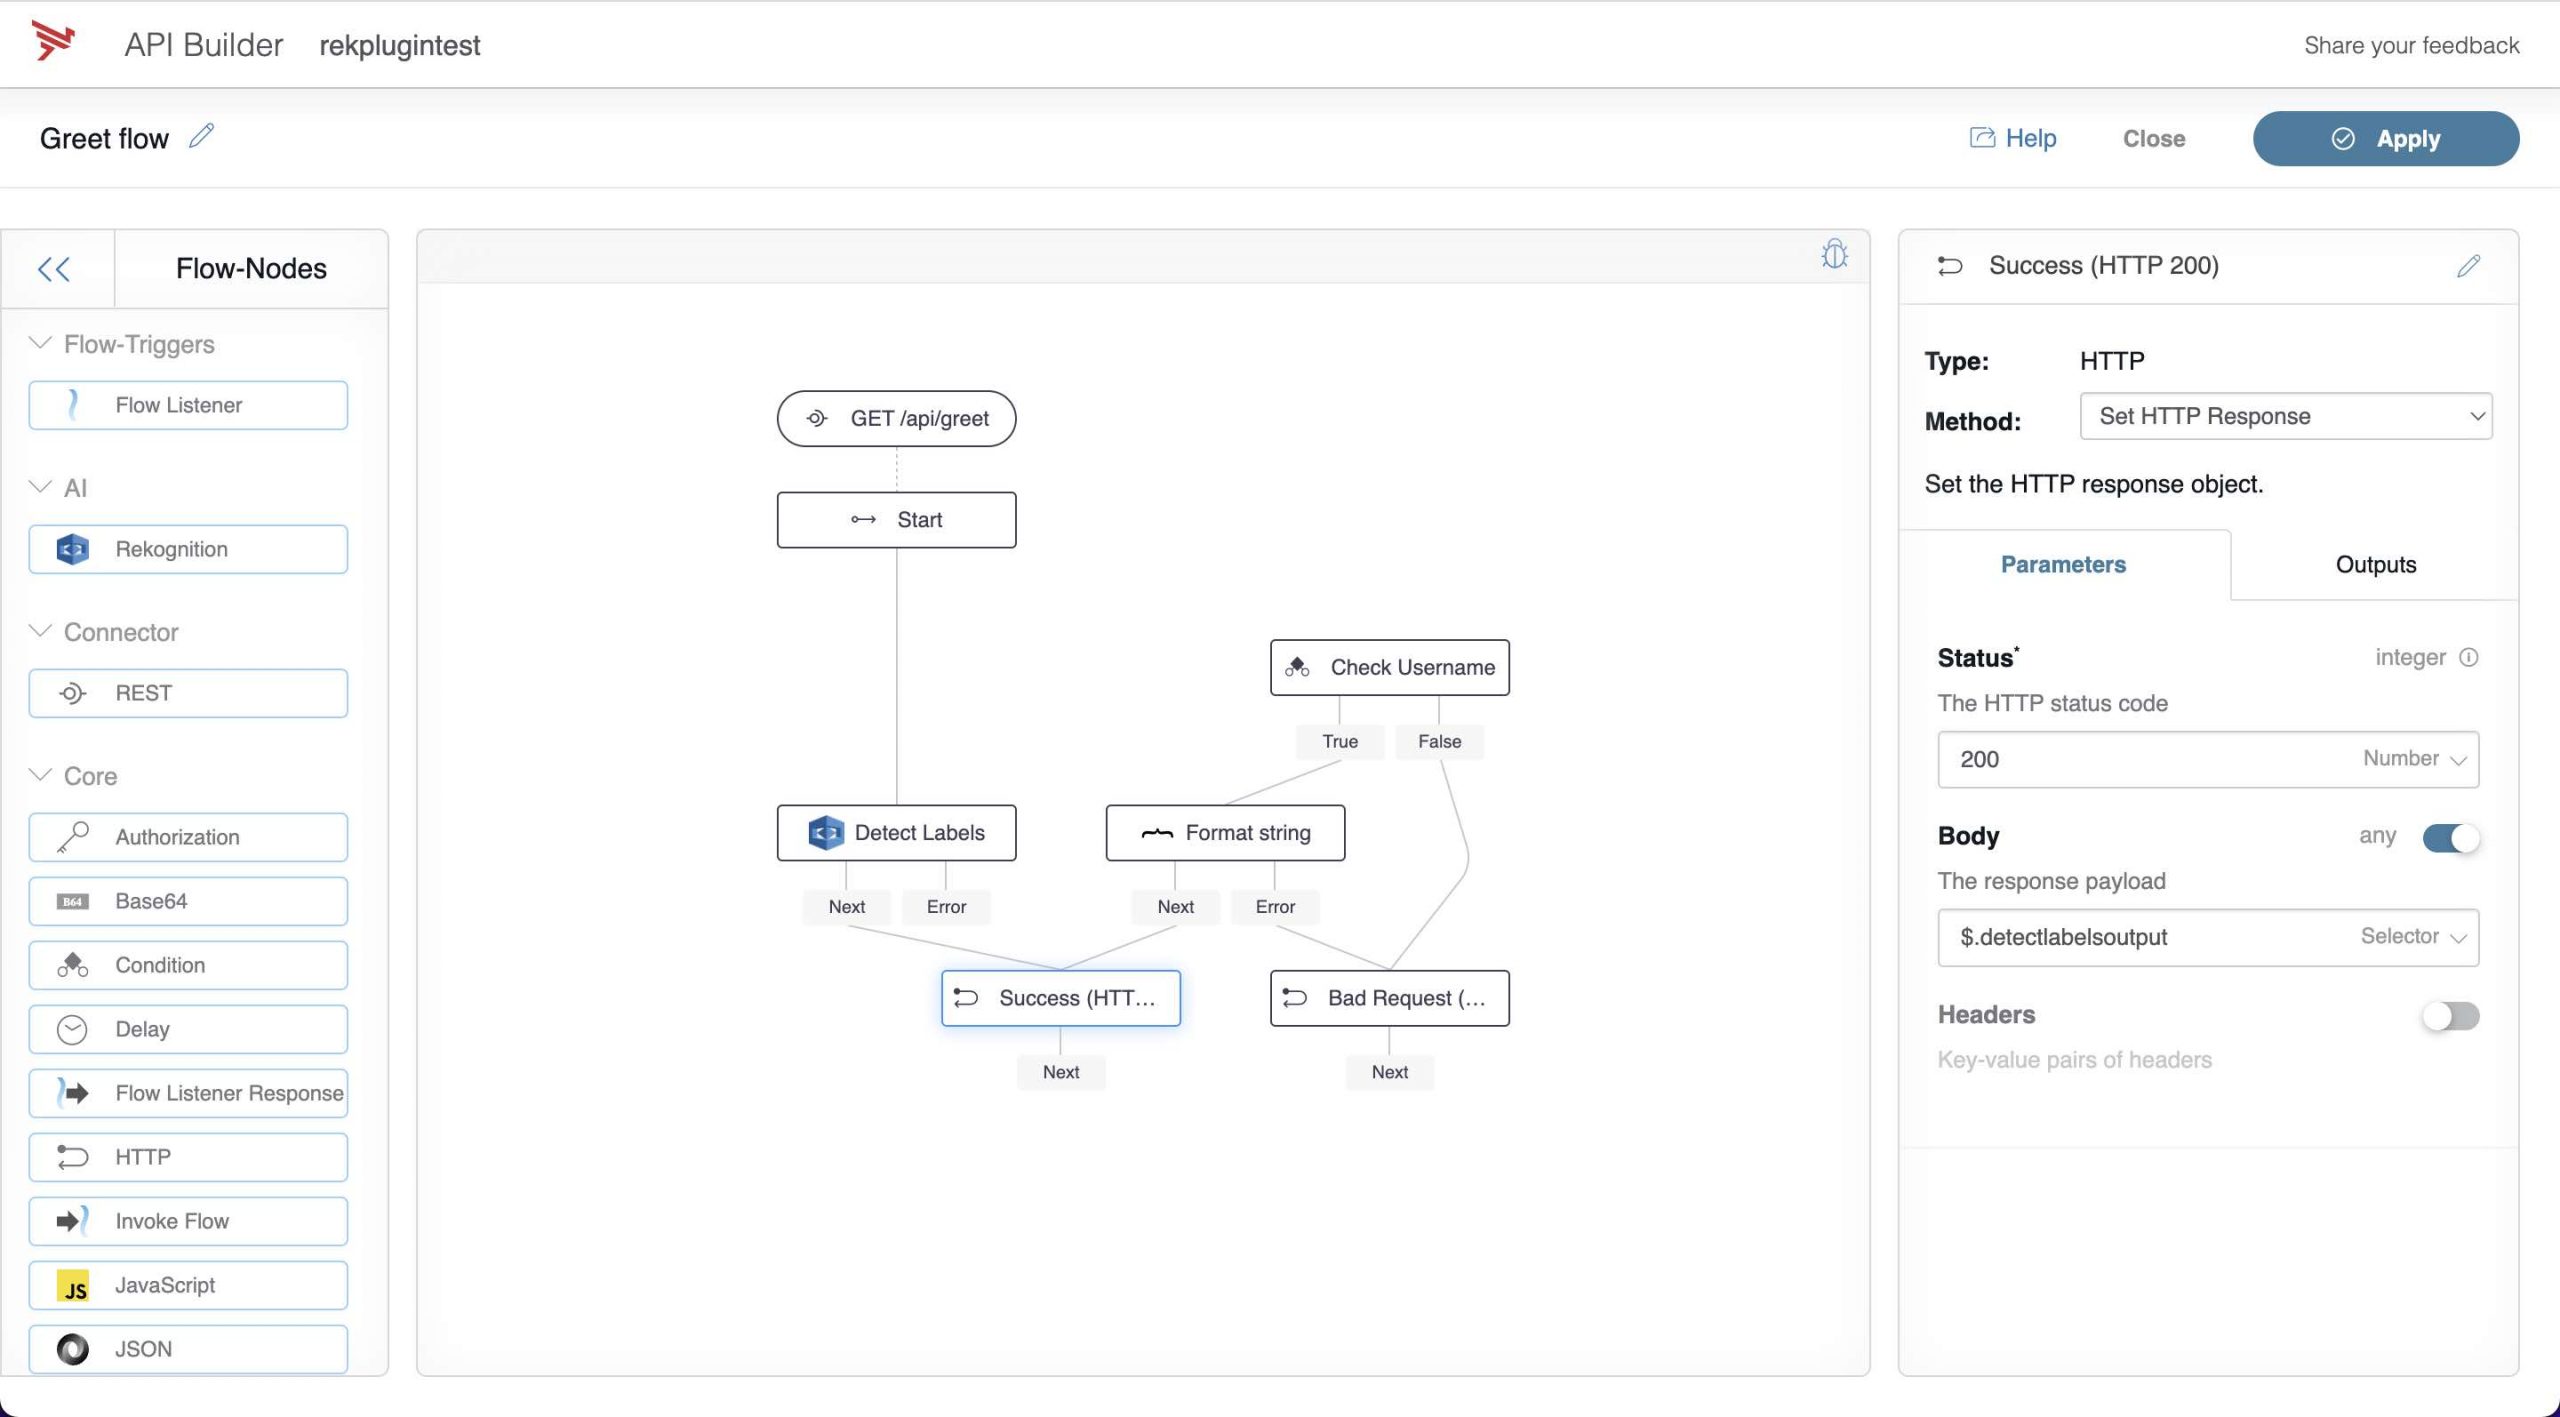
- Click on the Success HTTP node and change the Body from
$.greetingto$.detectlabelsoutput
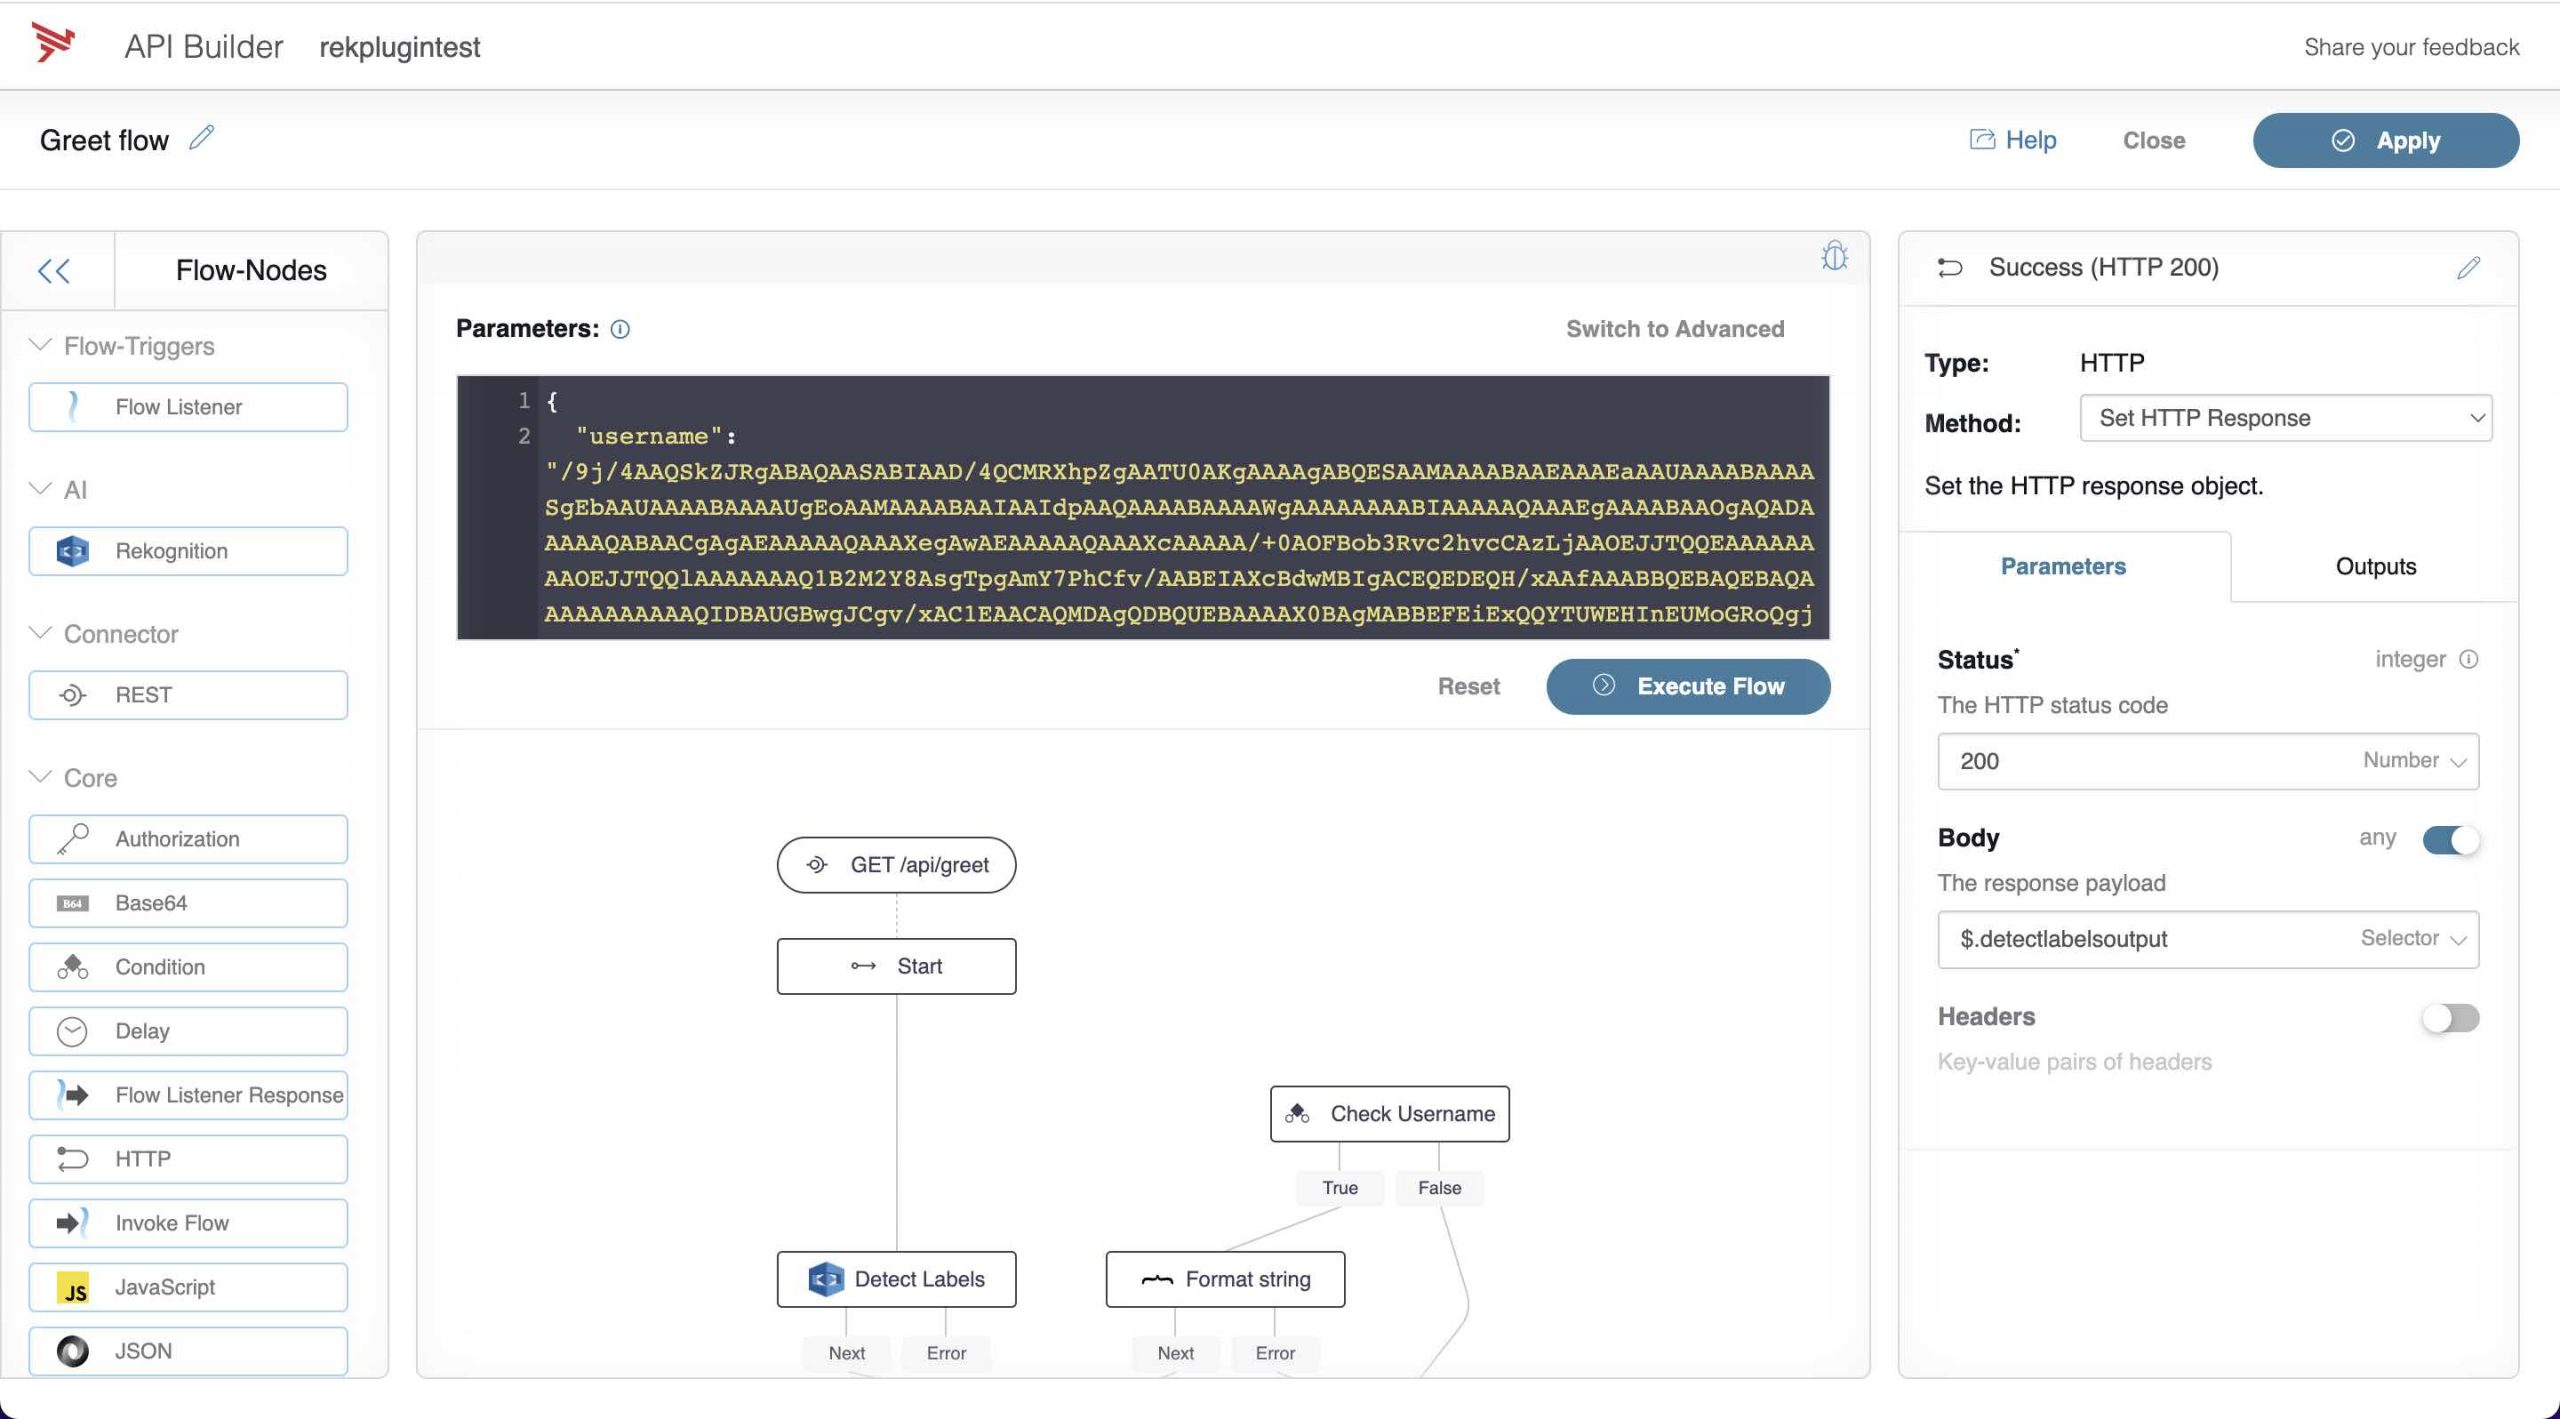
- Click the debug icon and we’ll need to enter a string for the Base64 encoded image. Click this link and copy the Base64 encoded text for the car image below and paste it into the username value.

- Click the Execute Flow button
- See the response:
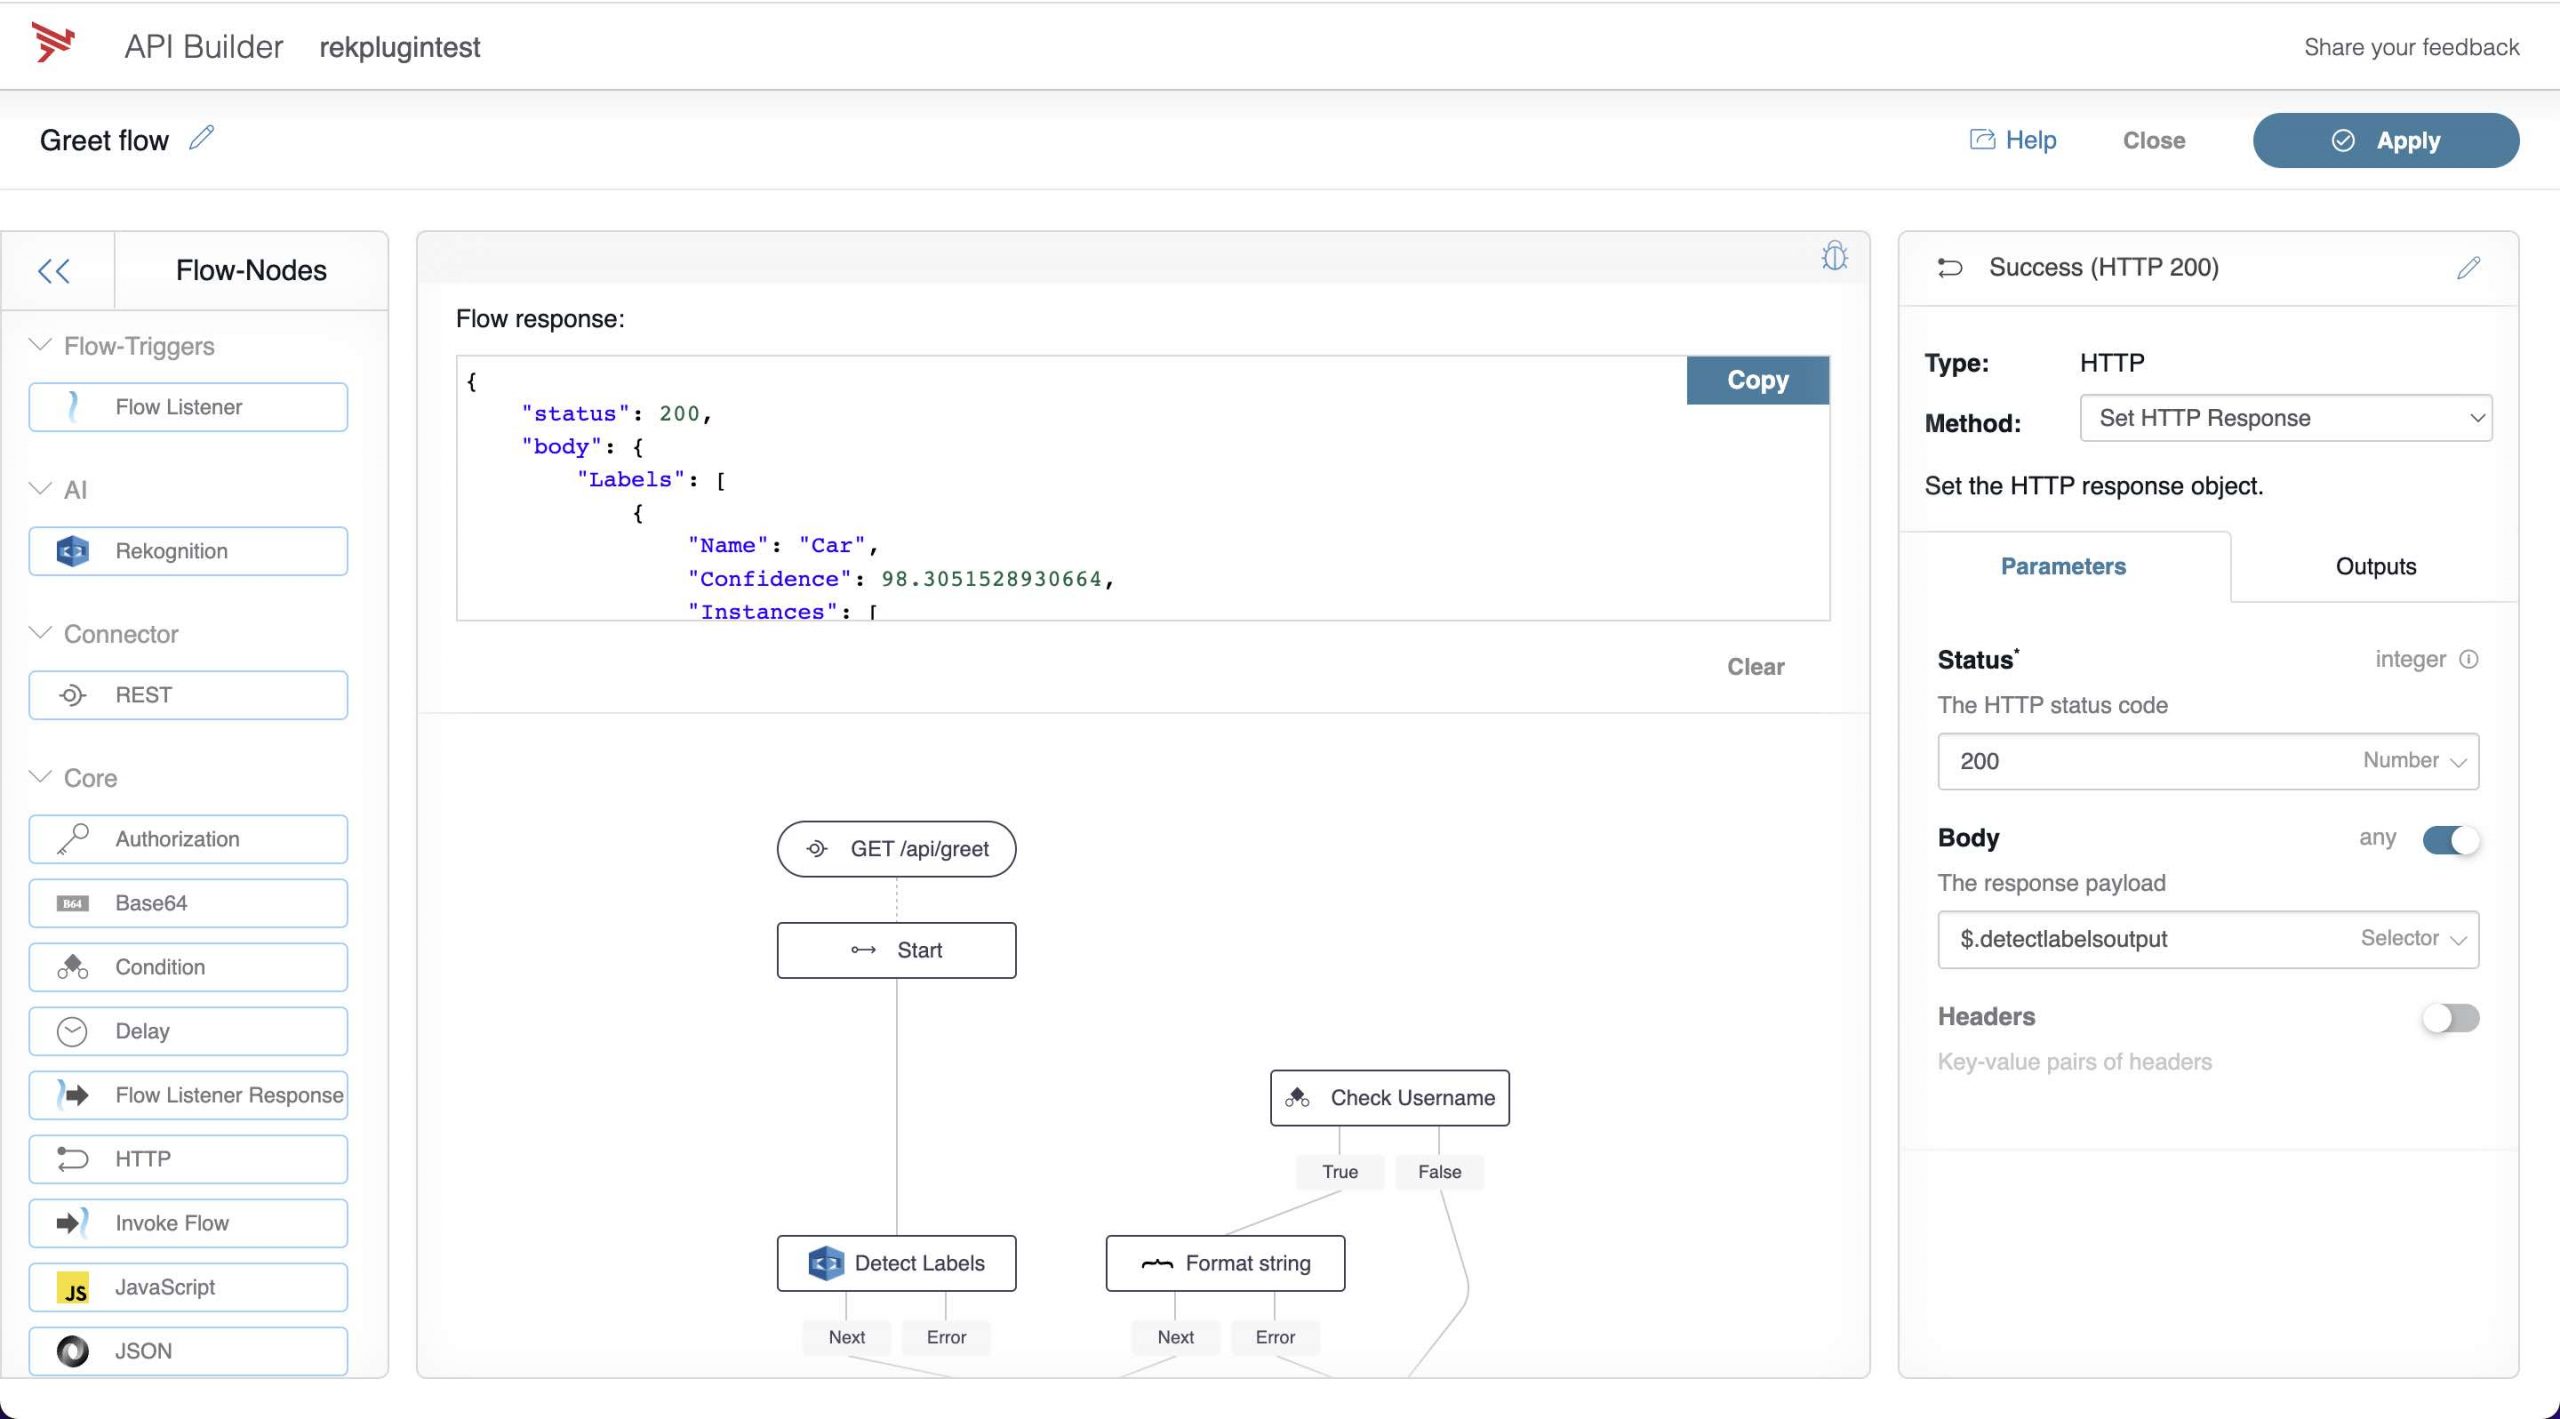
{
  "status": 200,
  "body": {
    "Labels": [{
        "Name": "Car",
        "Confidence": 98.3051528930664,
        "Instances": [{
          "BoundingBox": {
            "Width": 0.9070876240730286,
            "Height": 0.4264858365058899,
            "Left": 0.04061555862426758,
            "Top": 0.3711528182029724
          },
          "Confidence": 98.3051528930664
        }],
        "Parents": [{
            "Name": "Vehicle"
          },
          {
            "Name": "Transportation"
          }
        ]
      },
      {
        "Name": "Automobile",
        "Confidence": 98.3051528930664,
        "Instances": [],
        "Parents": [{
            "Name": "Vehicle"
          },
          {
            "Name": "Transportation"
          }
        ]
      },
      {
        "Name": "Transportation",
        "Confidence": 98.3051528930664,
        "Instances": [],
        "Parents": []
      },
      {
        "Name": "Vehicle",
        "Confidence": 98.3051528930664,
        "Instances": [],
        "Parents": [{
          "Name": "Transportation"
        }]
      },
      {
        "Name": "Wheel",
        "Confidence": 96.4452133178711,
        "Instances": [],
        "Parents": [{
          "Name": "Machine"
        }]
      },
      {
        "Name": "Machine",
        "Confidence": 96.4452133178711,
        "Instances": [],
        "Parents": []
      },
      {
        "Name": "Tire",
        "Confidence": 95.14317321777344,
        "Instances": [],
        "Parents": []
      },
      {
        "Name": "Car Wheel",
        "Confidence": 89.39521026611328,
        "Instances": [],
        "Parents": [{
            "Name": "Tire"
          },
          {
            "Name": "Wheel"
          },
          {
            "Name": "Machine"
          }
        ]
      },
      {
        "Name": "Spoke",
        "Confidence": 84.72041320800781,
        "Instances": [],
        "Parents": [{
          "Name": "Machine"
        }]
      },
      {
        "Name": "Coupe",
        "Confidence": 80.97046661376953,
        "Instances": [],
        "Parents": [{
            "Name": "Sports Car"
          },
          {
            "Name": "Car"
          },
          {
            "Name": "Vehicle"
          },
          {
            "Name": "Transportation"
          }
        ]
      },
      {
        "Name": "Sports Car",
        "Confidence": 80.97046661376953,
        "Instances": [],
        "Parents": [{
            "Name": "Car"
          },
          {
            "Name": "Vehicle"
          },
          {
            "Name": "Transportation"
          }
        ]
      },
      {
        "Name": "Alloy Wheel",
        "Confidence": 71.59758758544922,
        "Instances": [],
        "Parents": [{
            "Name": "Spoke"
          },
          {
            "Name": "Wheel"
          },
          {
            "Name": "Machine"
          }
        ]
      },
      {
        "Name": "Offroad",
        "Confidence": 70.25897216796875,
        "Instances": [],
        "Parents": [{
            "Name": "Vehicle"
          },
          {
            "Name": "Transportation"
          }
        ]
      },
      {
        "Name": "Sedan",
        "Confidence": 62.23975372314453,
        "Instances": [],
        "Parents": [{
            "Name": "Car"
          },
          {
            "Name": "Vehicle"
          },
          {
            "Name": "Transportation"
          }
        ]
      }
    ],
    "LabelModelVersion": "2.0"
  }
}
Now that you see how easy it is to use the plugin in the Greeting API, you can now integrate Image Analysis in your own API Builder APIs and Integrations.
Summary
AWS Rekognition is a powerful Image Analysis service. The API Builder Plugin described here can help developers leverage this service easily in API Builder APIs and integrations.
Need help with API Builder? Extend your skills with Axway University.