
As discussed in this blog post, integrating with the Amplify platform entails two main operations:
1. Responding to platform webhooks (subscription and resource)
2. Making platform API calls
Note that you may do one or the other or both, depending on the use case
Some use cases for integrating with the Amplify platform include:
- Custom API Subscription Approval Workflows
- Integration Webhooks
Many of these examples use Axway’s Integration Builder to respond to the Amplify Webhook call and make Amplify platform API calls. In the coming series of blog posts, we’ll be covering similar use cases using Axway’s API Builder. This will provide Enterprises with maximum flexibility to leverage the platform components that meet their needs best.
In this blog post, we’ll describe how to create an API Builder API and associated flow to service an Amplify webhook. In the next post, we’ll describe how to make Amplify Platform API calls.
The steps are outlined below:
- Create an Integration Webhook resource in Amplify Central
- Test your Integration Webhook
- Create an API Builder API and associated flow to process the Amplify Webhook call
- Configure Integration Webhook to Point to API Builder and Test
Create an Integration Webhook Resource in Amplify Central
In a prior blog post, we described how to use the Axway CLI to create an integration webhook for Amplify Central agents status changes. Refer to that blog post and refer to the section title “Setup Amplify Central Integration Webhooks” and grab the YAML file contents from there and save to a file called agentstatuschangesint.yaml.
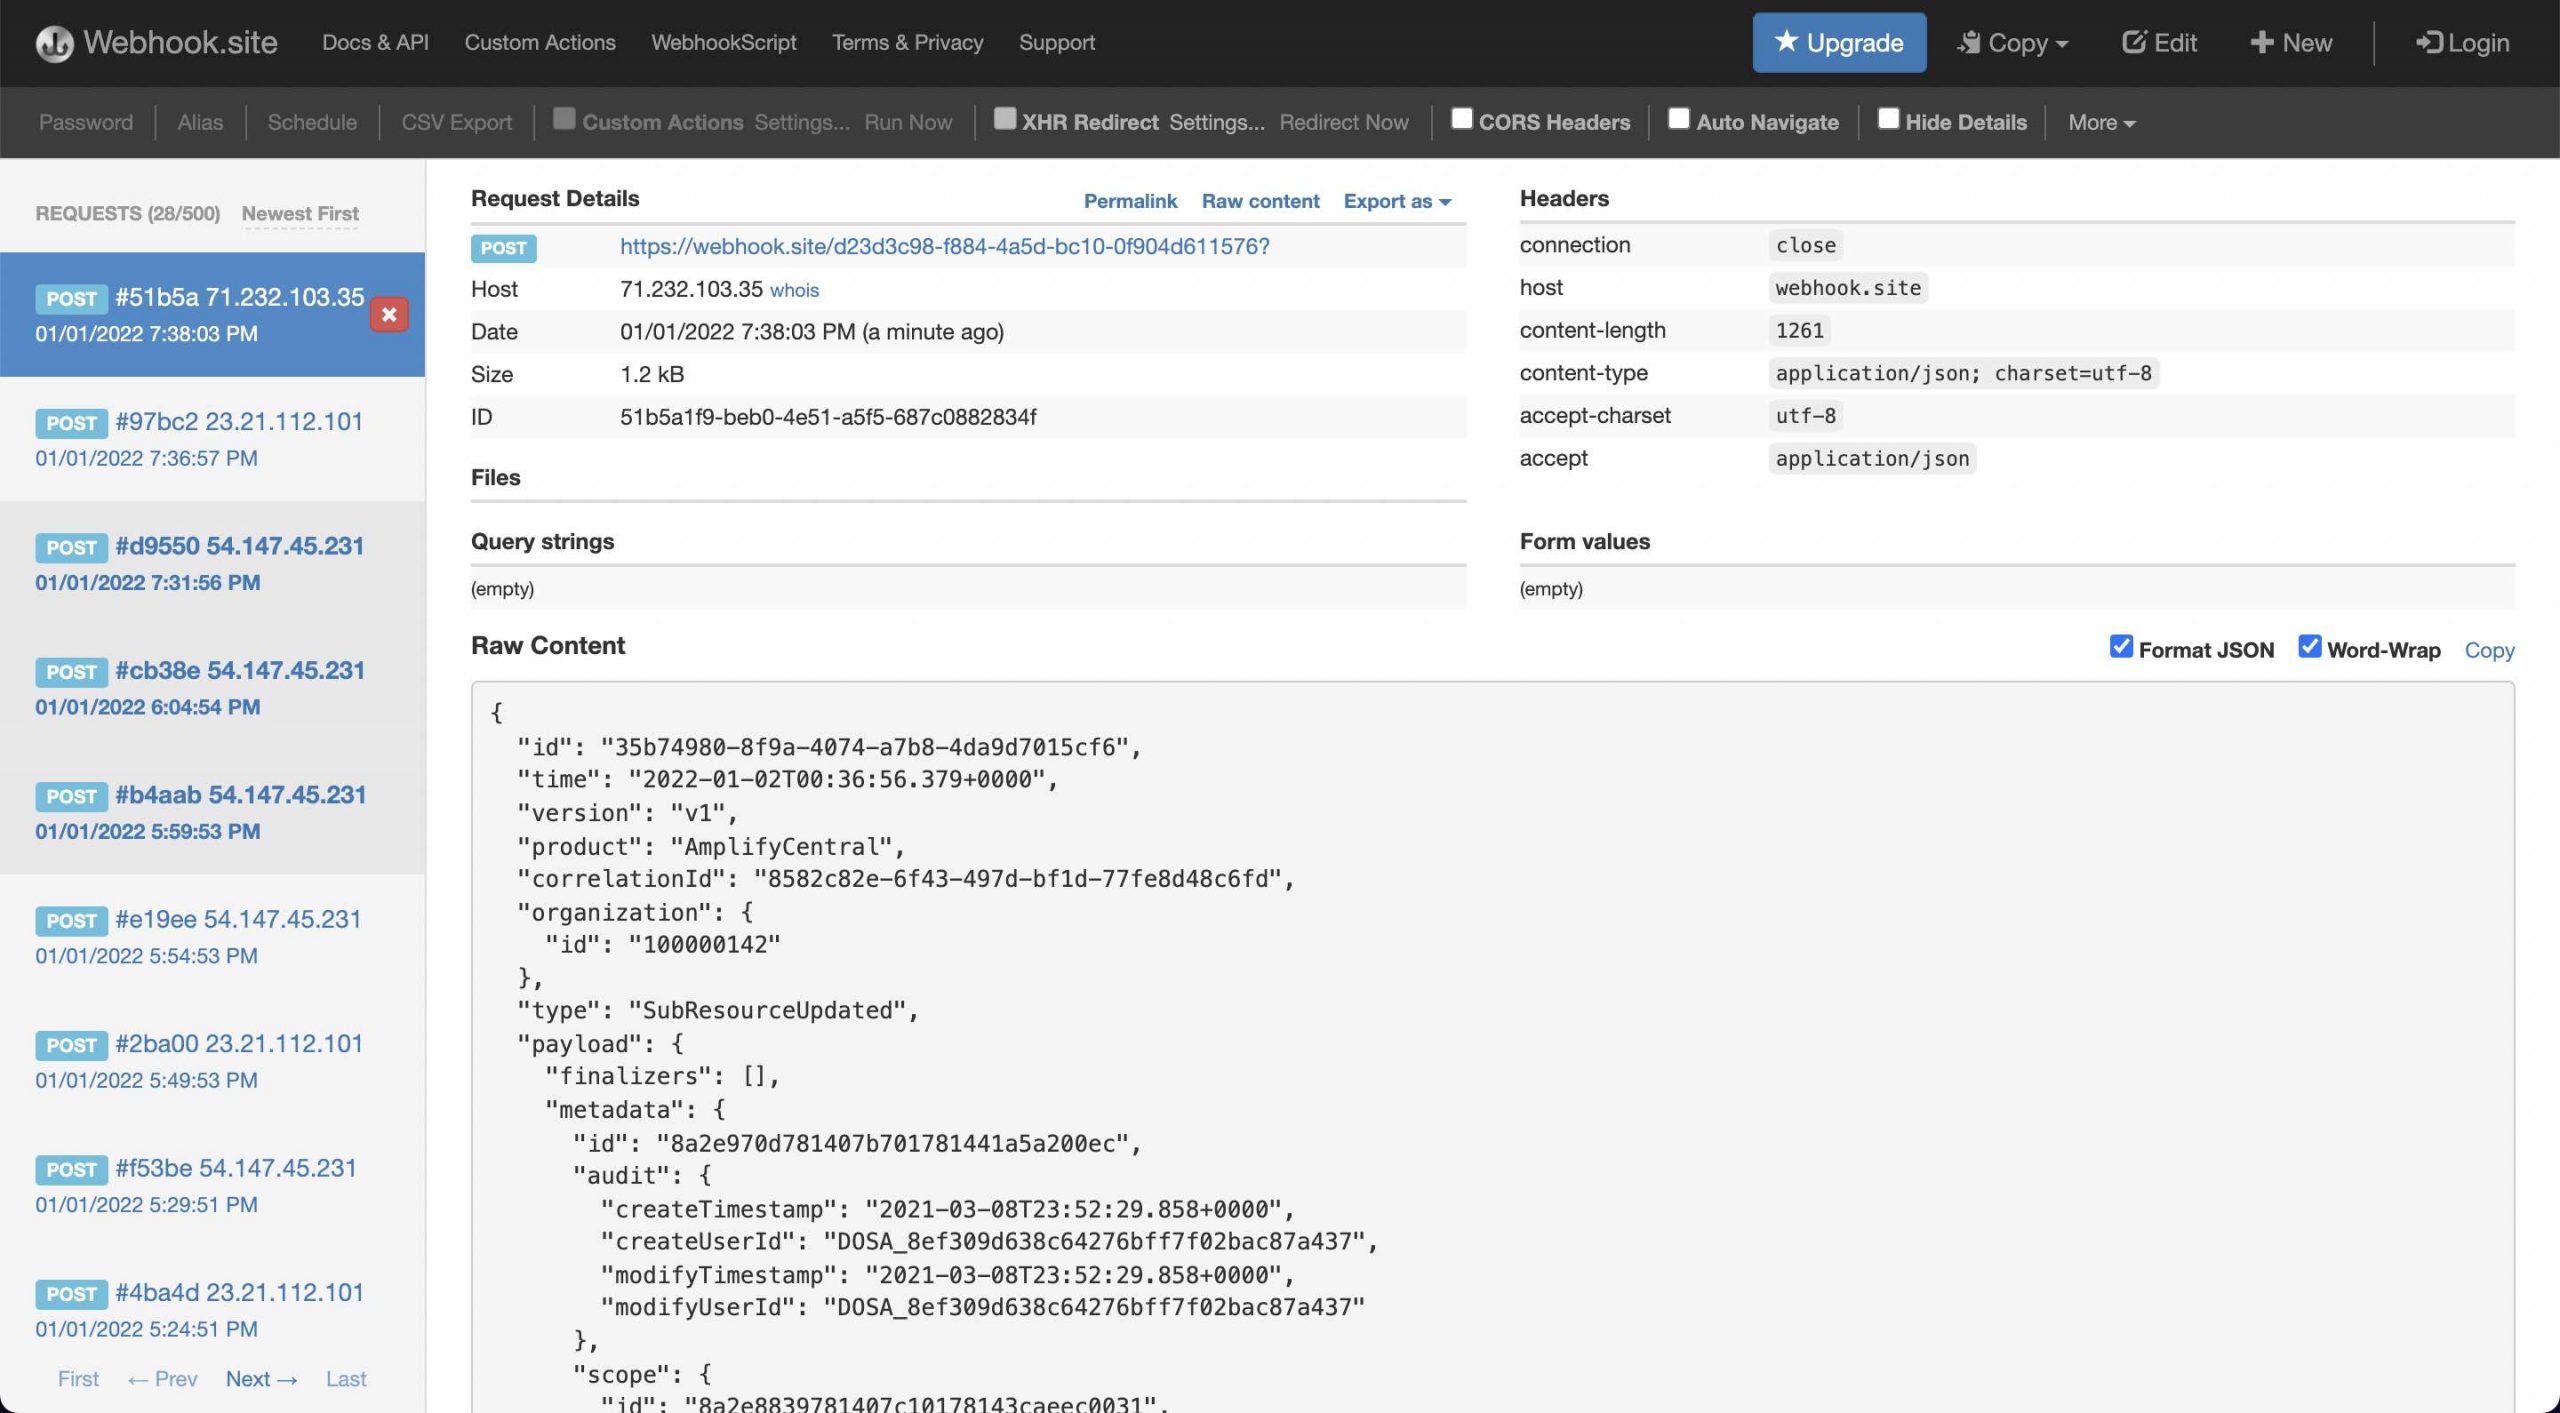
Modify the webhook URL in the YAML file to point to a URL at Webhook.site (or any similar service that enables you to inspect HTTP requests).
Use the YAML file to create the integration using the Axway CLI using:
axway auth login
axway central create -f agentstatuschangesint.yaml
Note that if you want to modify your Integration resource, you can edit the YAML and apply the changed using axway central apply -f agentstatuschangesint.yaml. Also, if you have an error during creation and need to start over, you may need to delete the integration resource using axway central delete integ agentstatuschangesint
Test your Integration Webhook
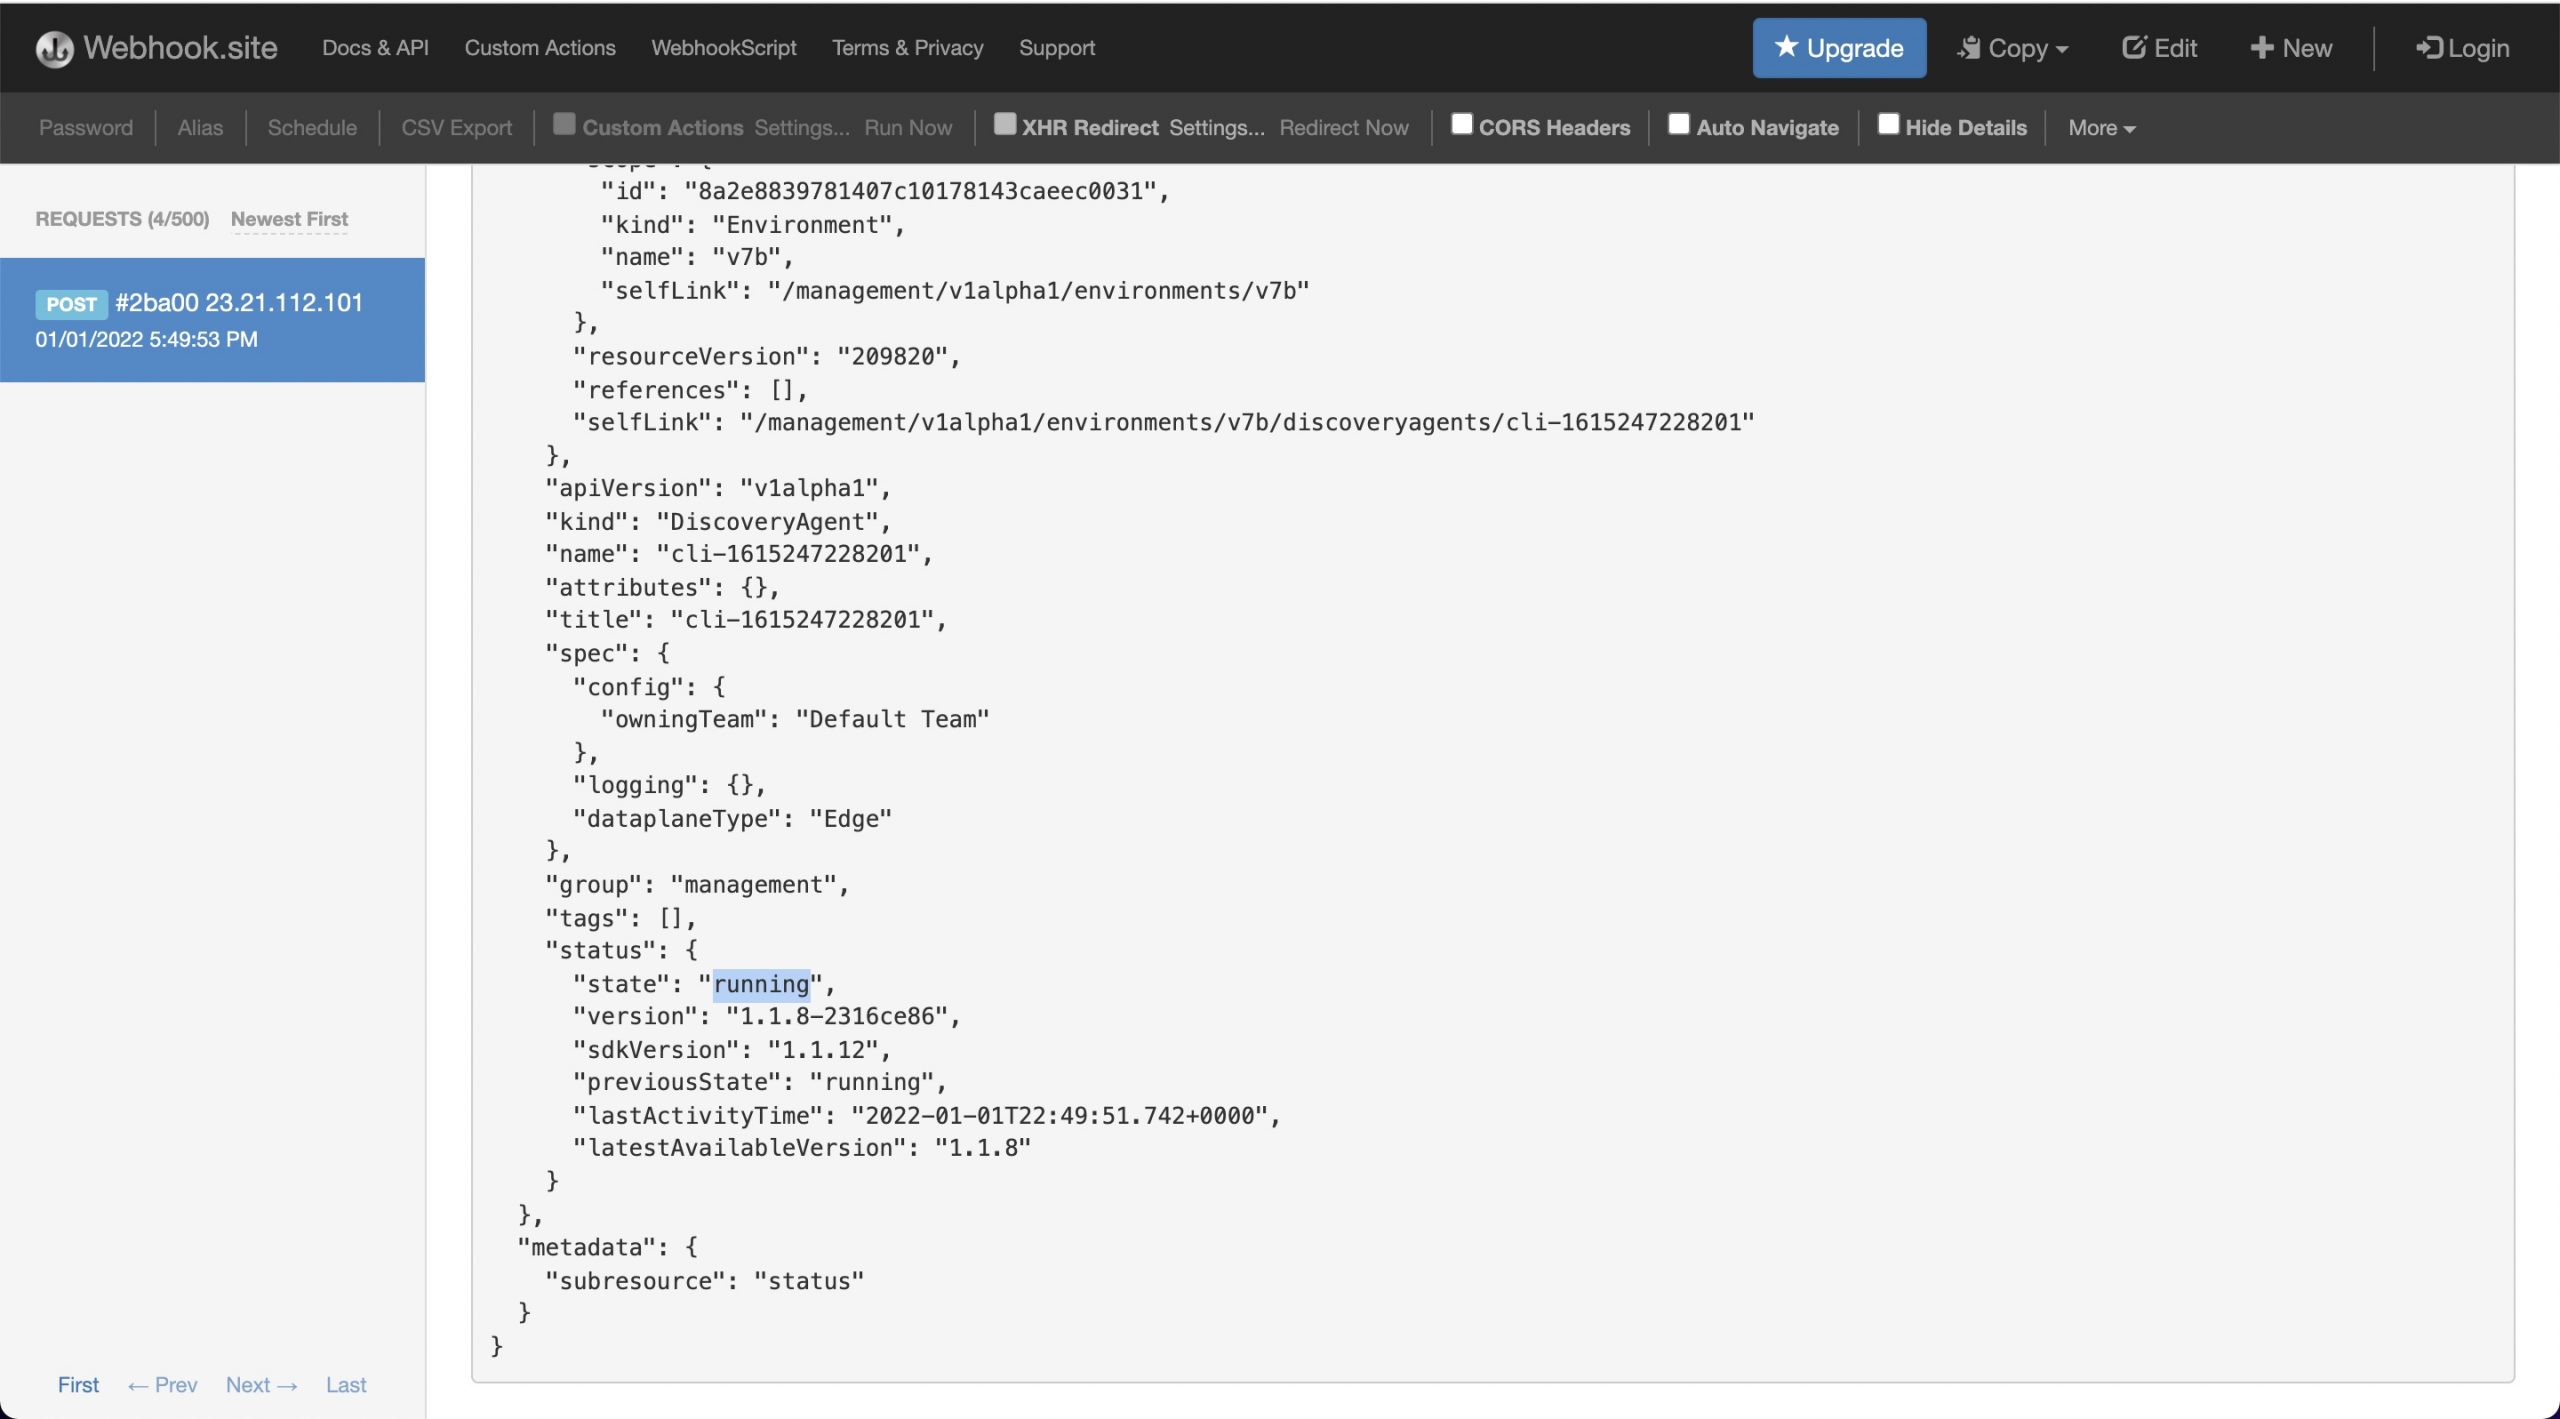
If you have agents running, you will shortly see entries in webhook.site for the agent resource. The type will be SubResourceUpdated and the status will be running.
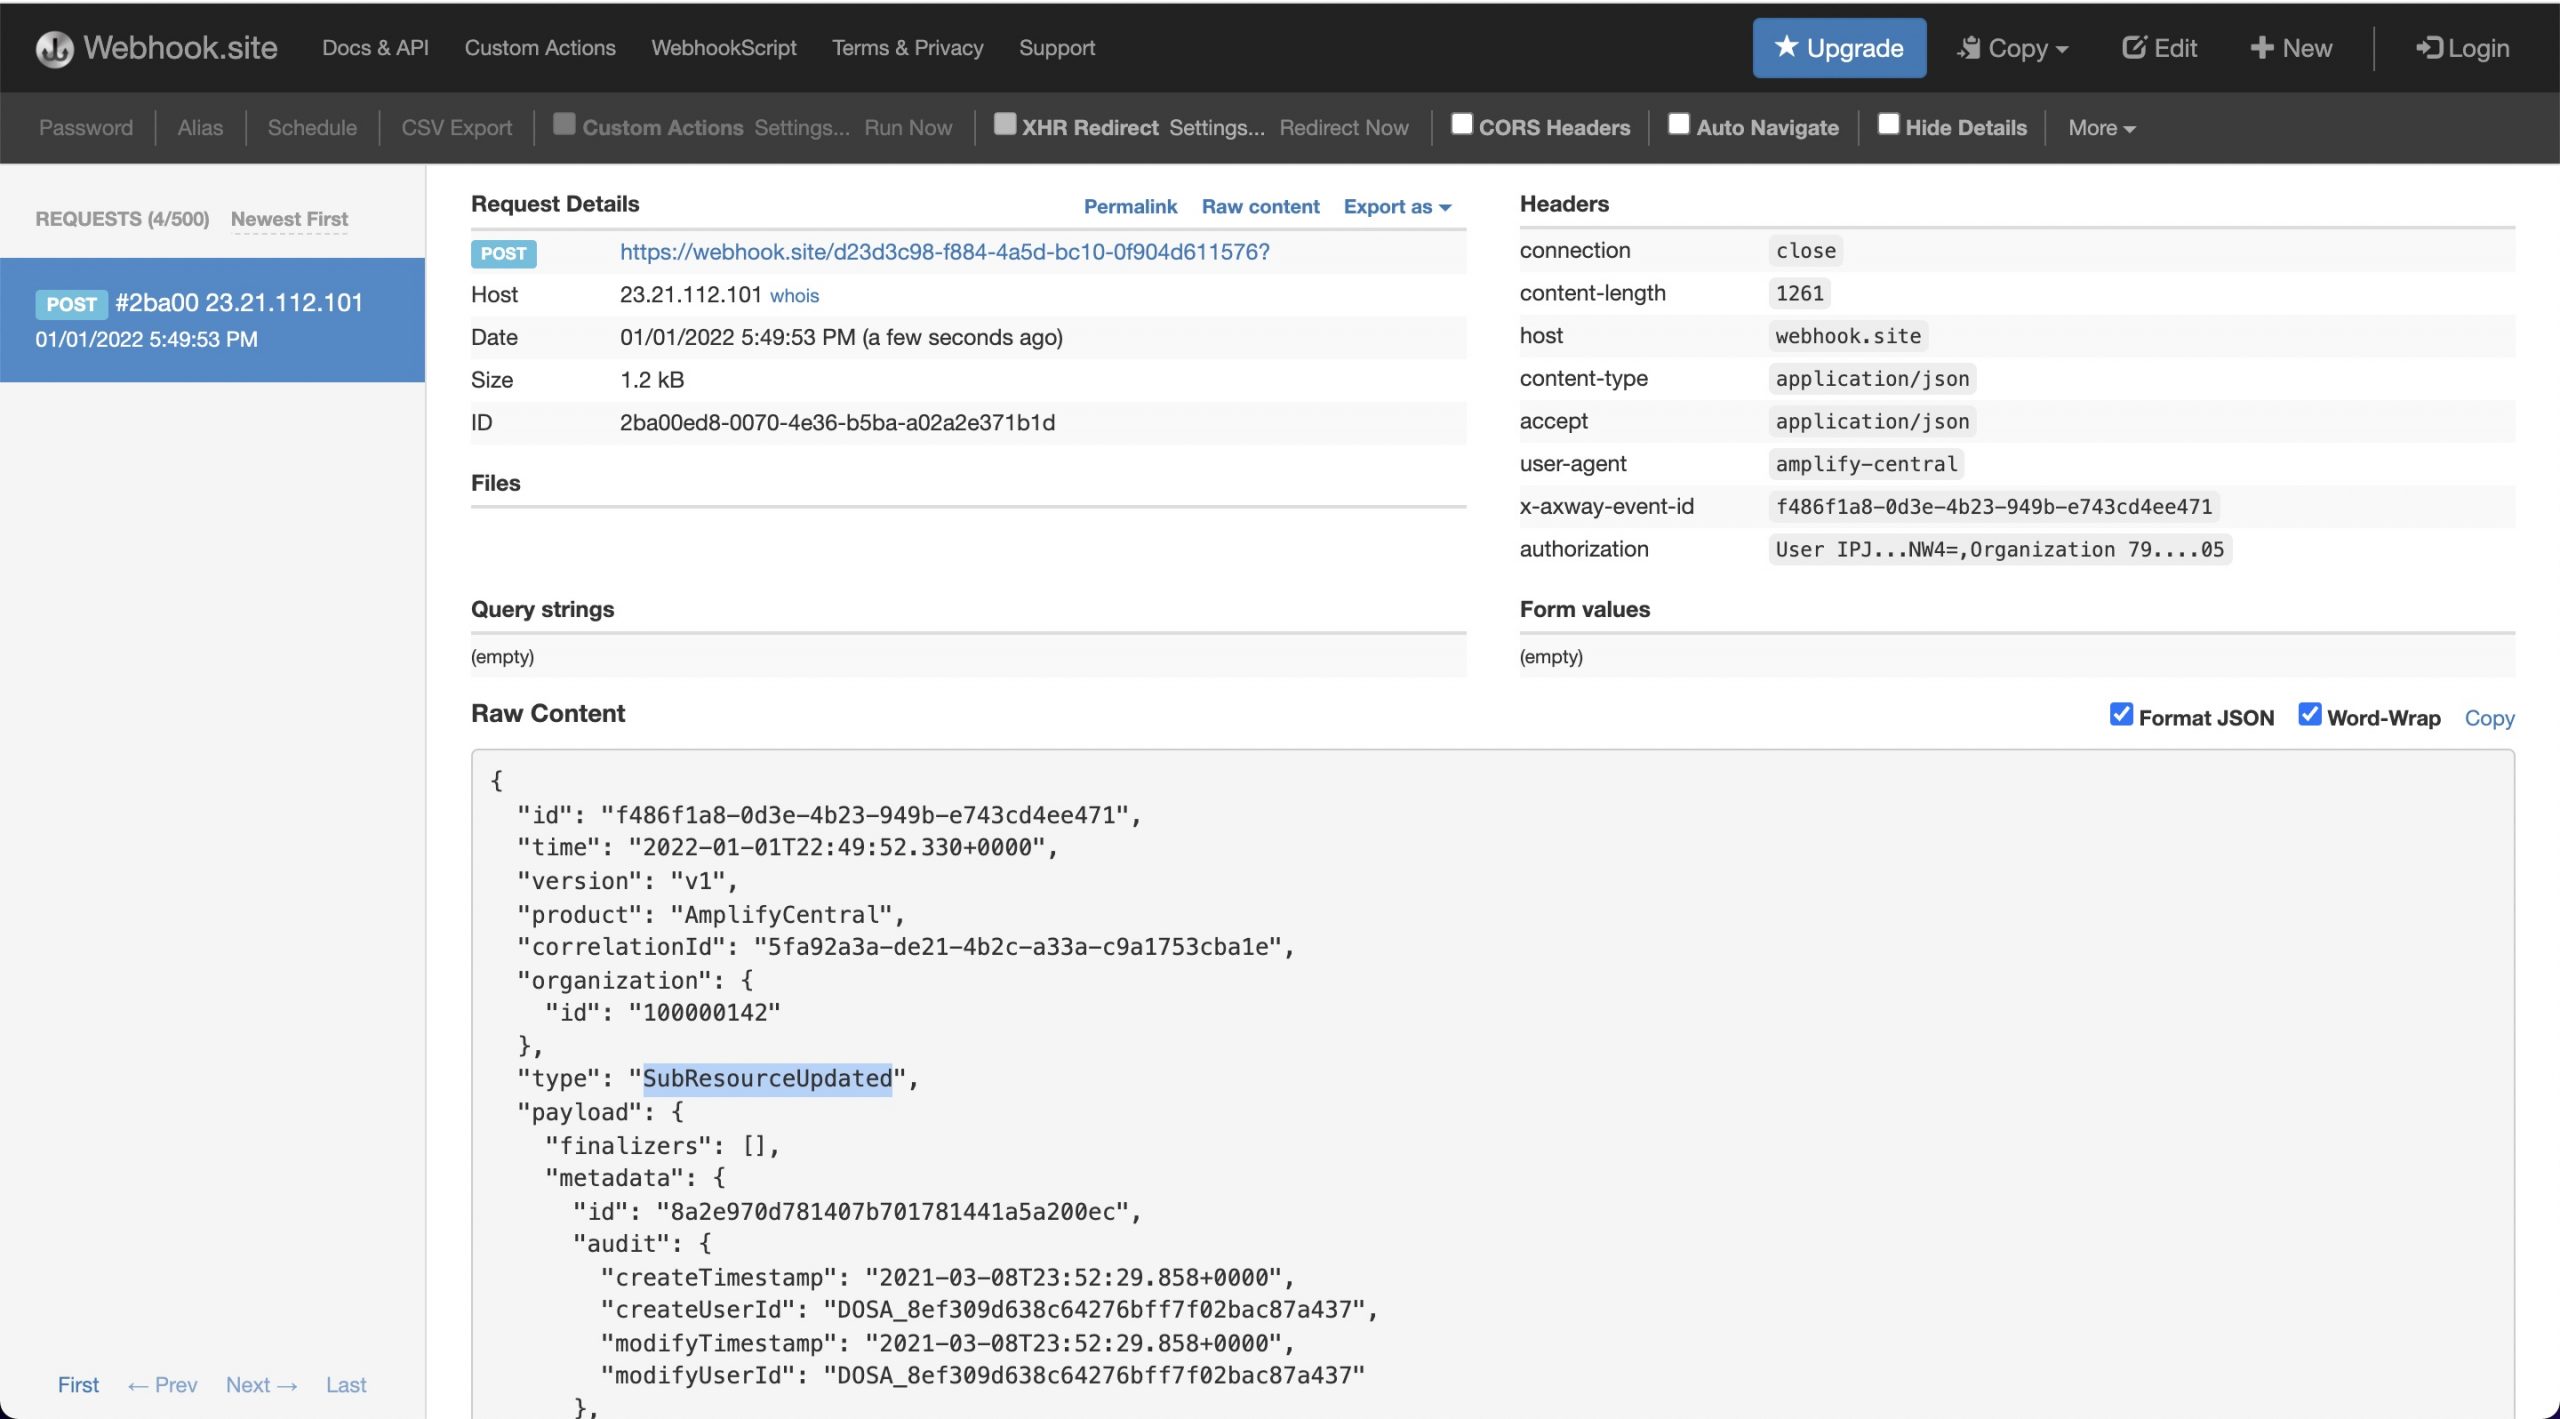
Alternatively, you can bring an agent up or down and you will see a bunch of webhook calls to webhook.site.
Now that we have our agent status change integration webhook set up in Amplify, we can go on to create our API Builder project.
Create an API Builder API To Handle the Amplify Webhook
If you don’t have an API Builder project already created, then follow the API Builder Getting Started Guide to create an API Builder project. Make sure the project runs using npm start (as described in the guide).
In order to create an API Builder API and use the Flow editor to create our API, we need a swagger that defines our API. You can create your own or use the one here that comes from my Stoplight project, amplifycentralwebhookhandlerdefinition.
Let’s get started with our API creation.
- Edit your
/conf/default.jsfile and set authentication to none (from the default ‘basic’) by editing the accessControl property.
accessControl: {
apiPrefixSecurity: 'none', // none | basic | apikey | ldap | plugin
public: []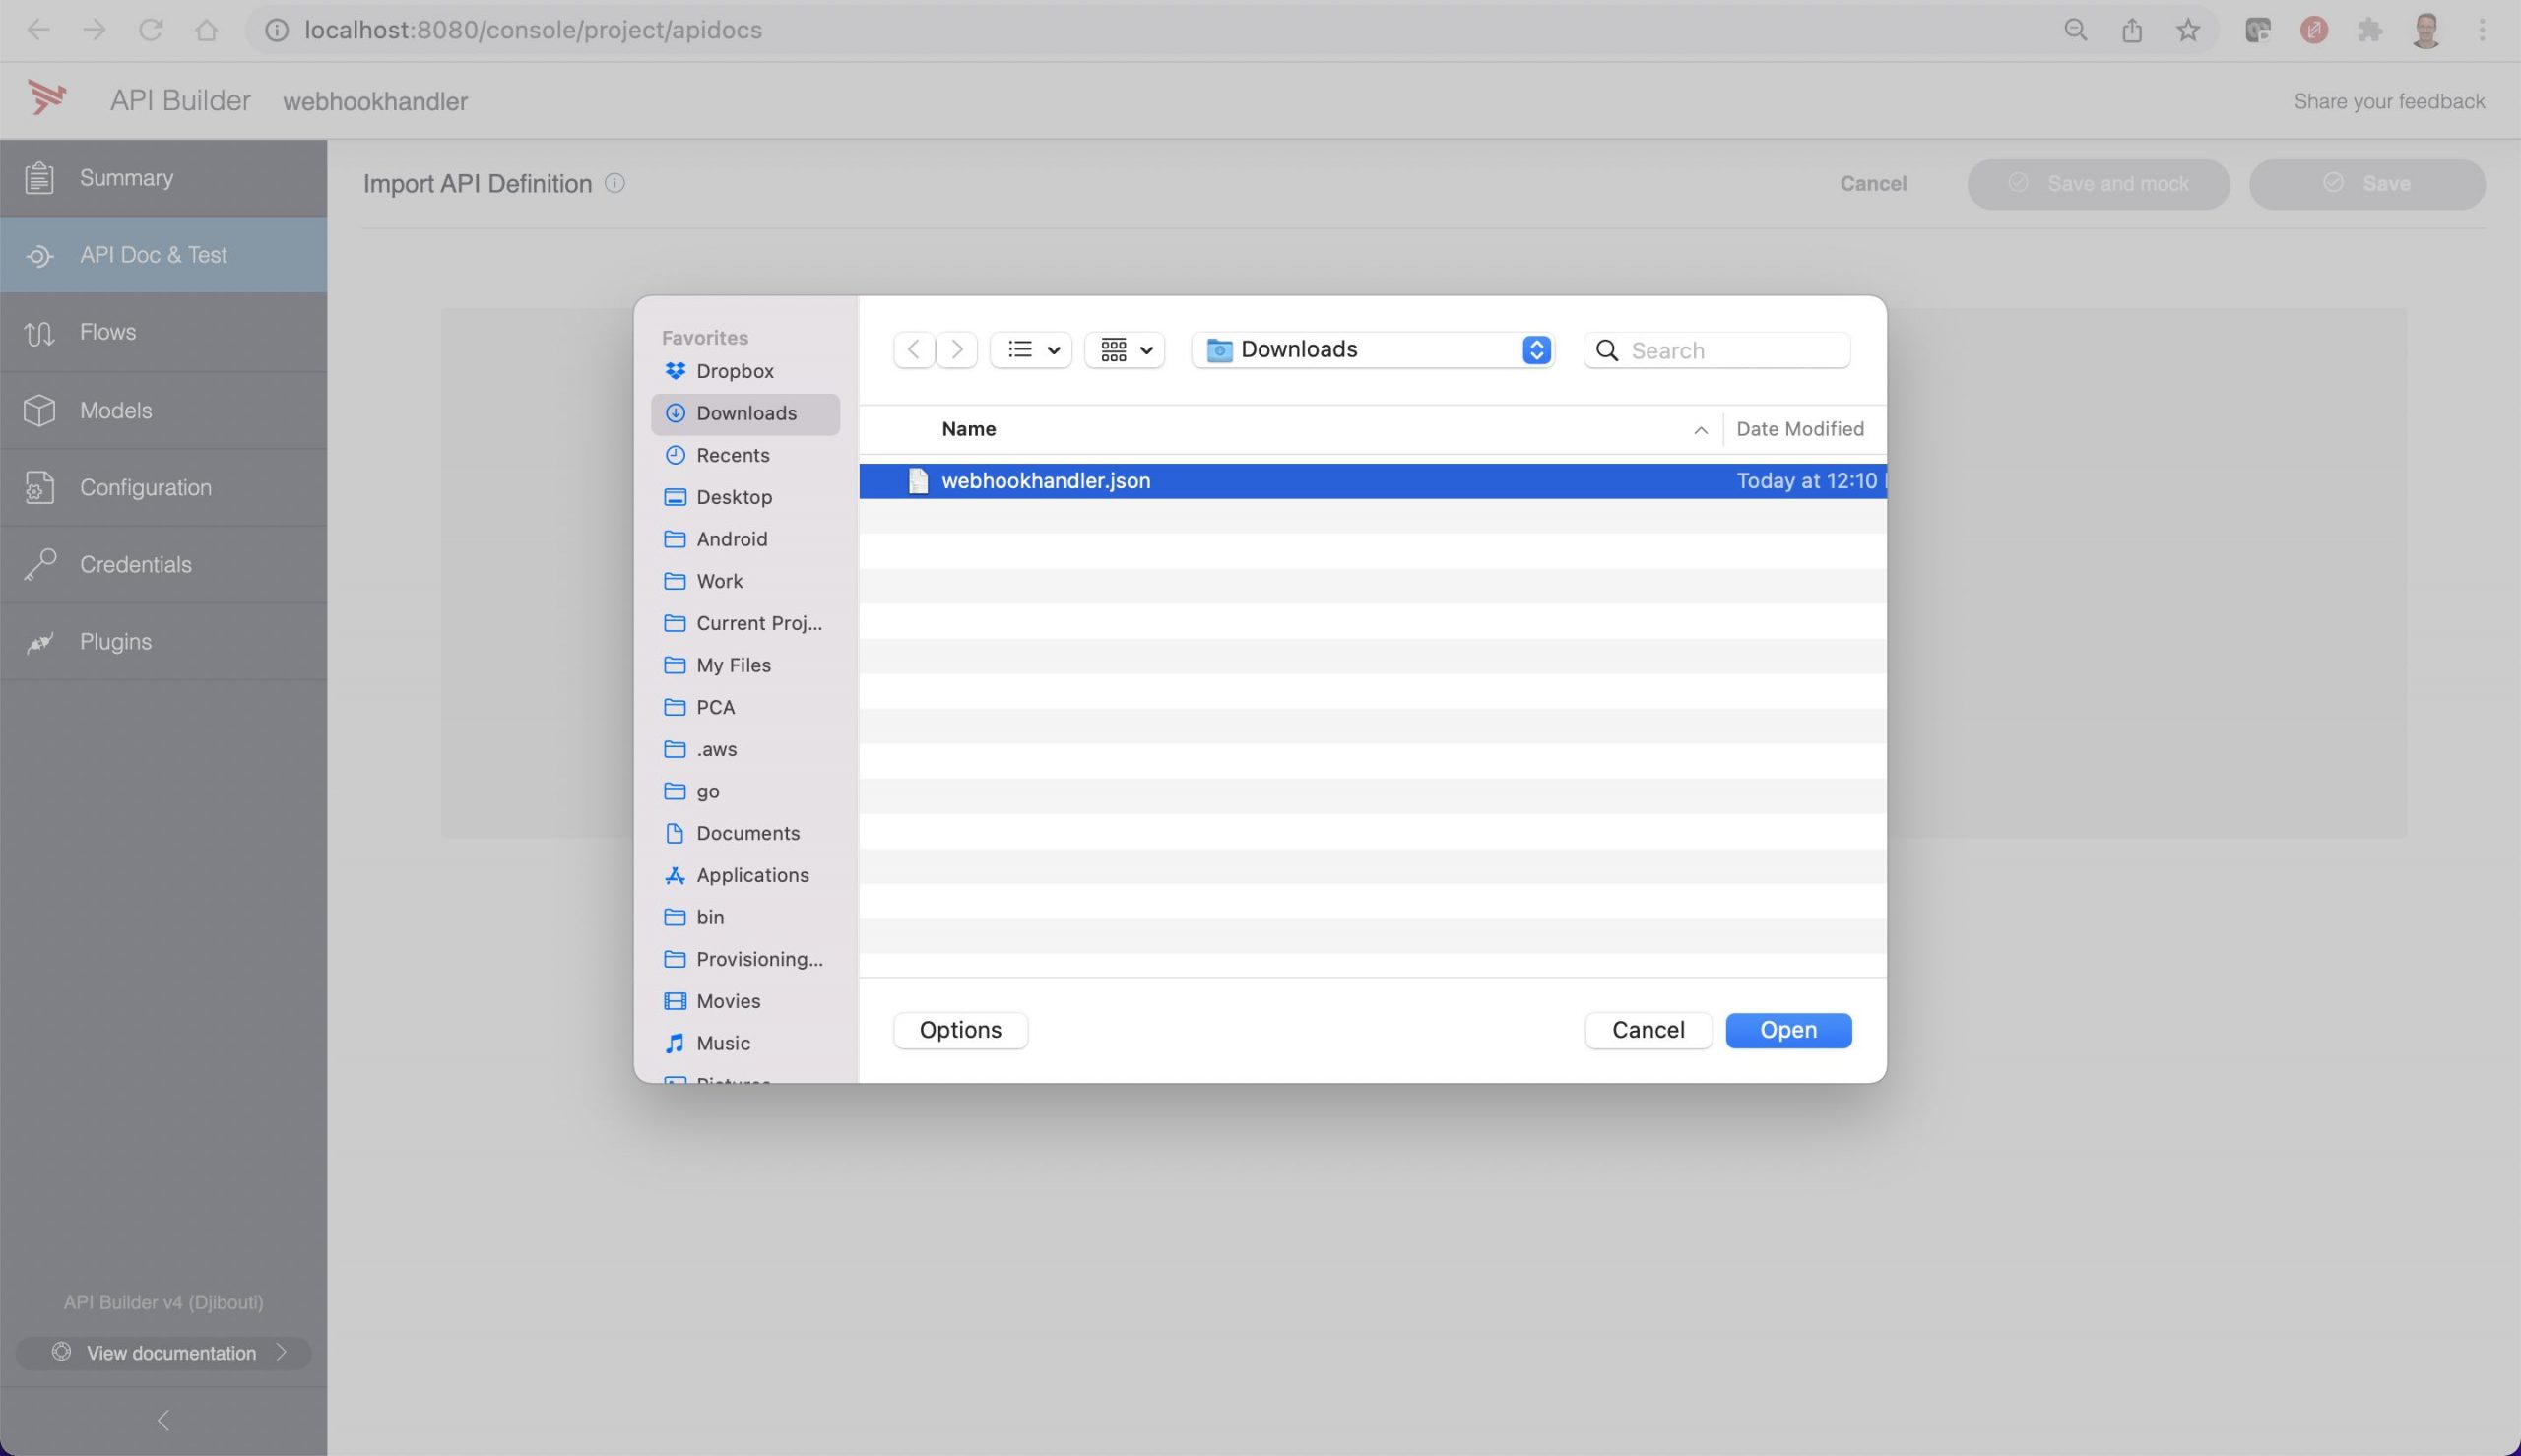
},- Start your API Builder project and click on the API Doc & Test tab and click on + API to import your swagger and create a new API (your webhook handler)
- Browse to the swagger file you created above, import it and click save

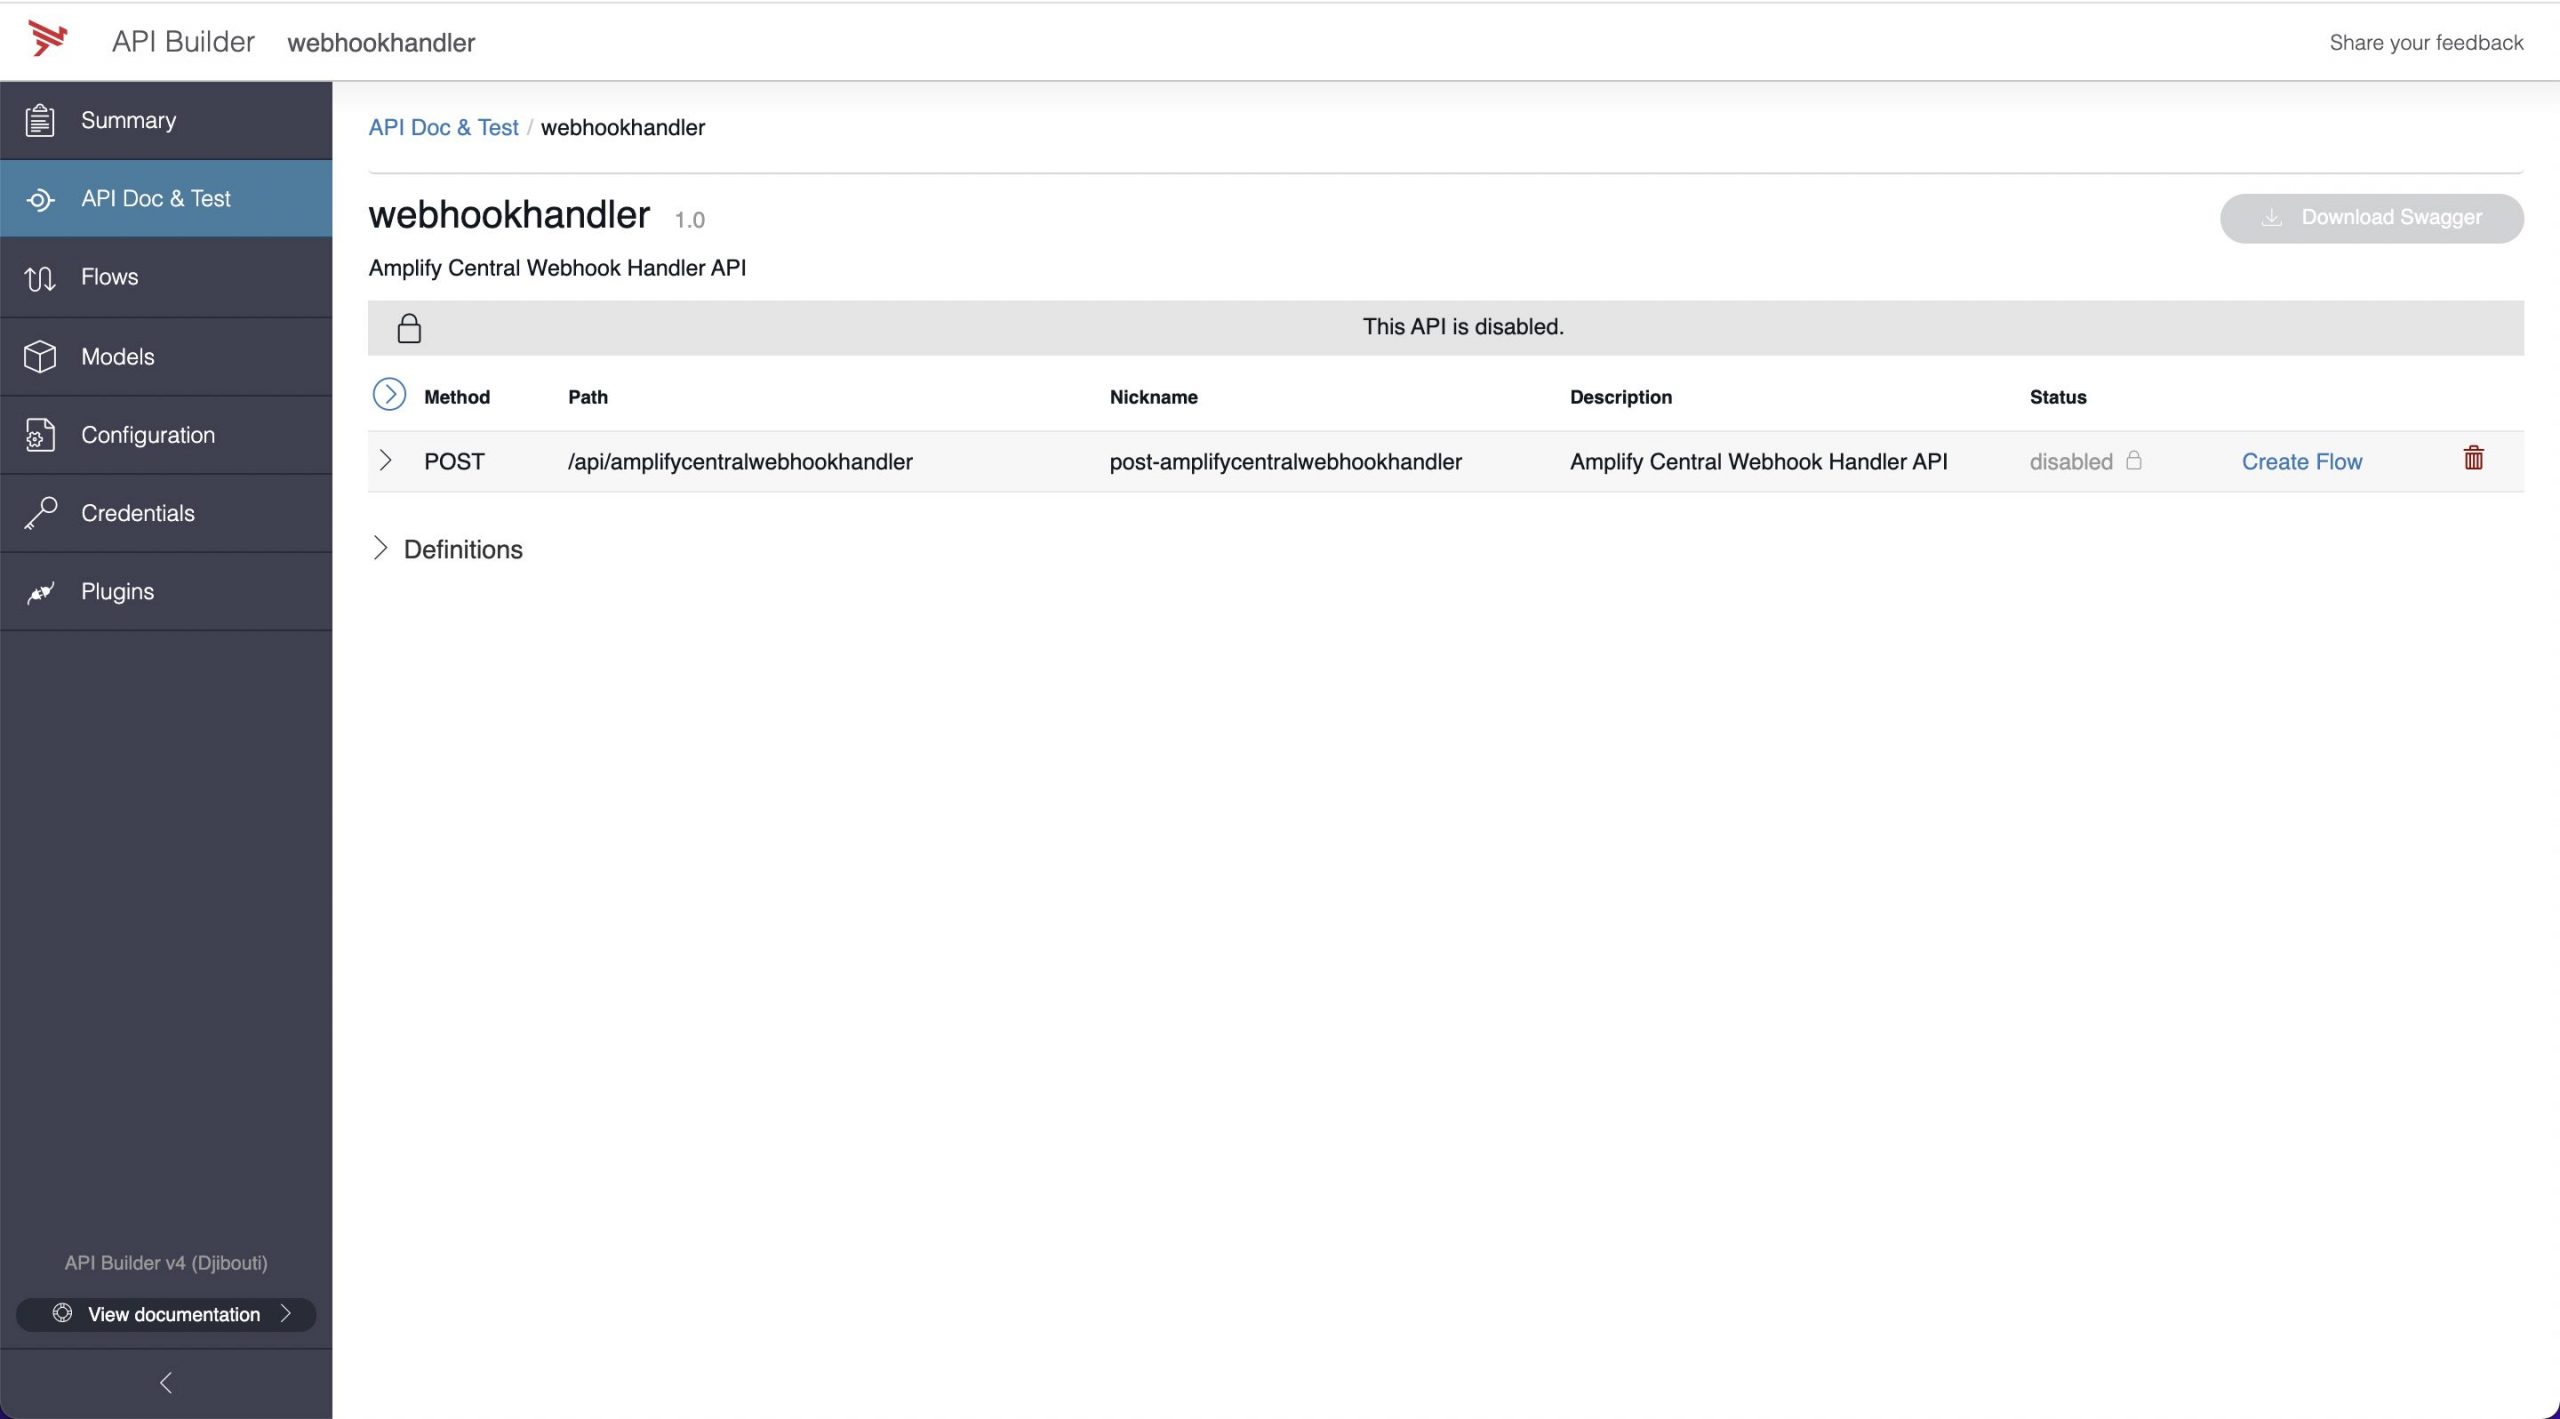
- Click on the Create Flow hyperlink to enter the flow editor

We’re going to build a simple webhook handler that will take the payload and send it to Webhook.site via an https call. As mentioned above, you can use any similar service that enables you to inspect HTTP requests.
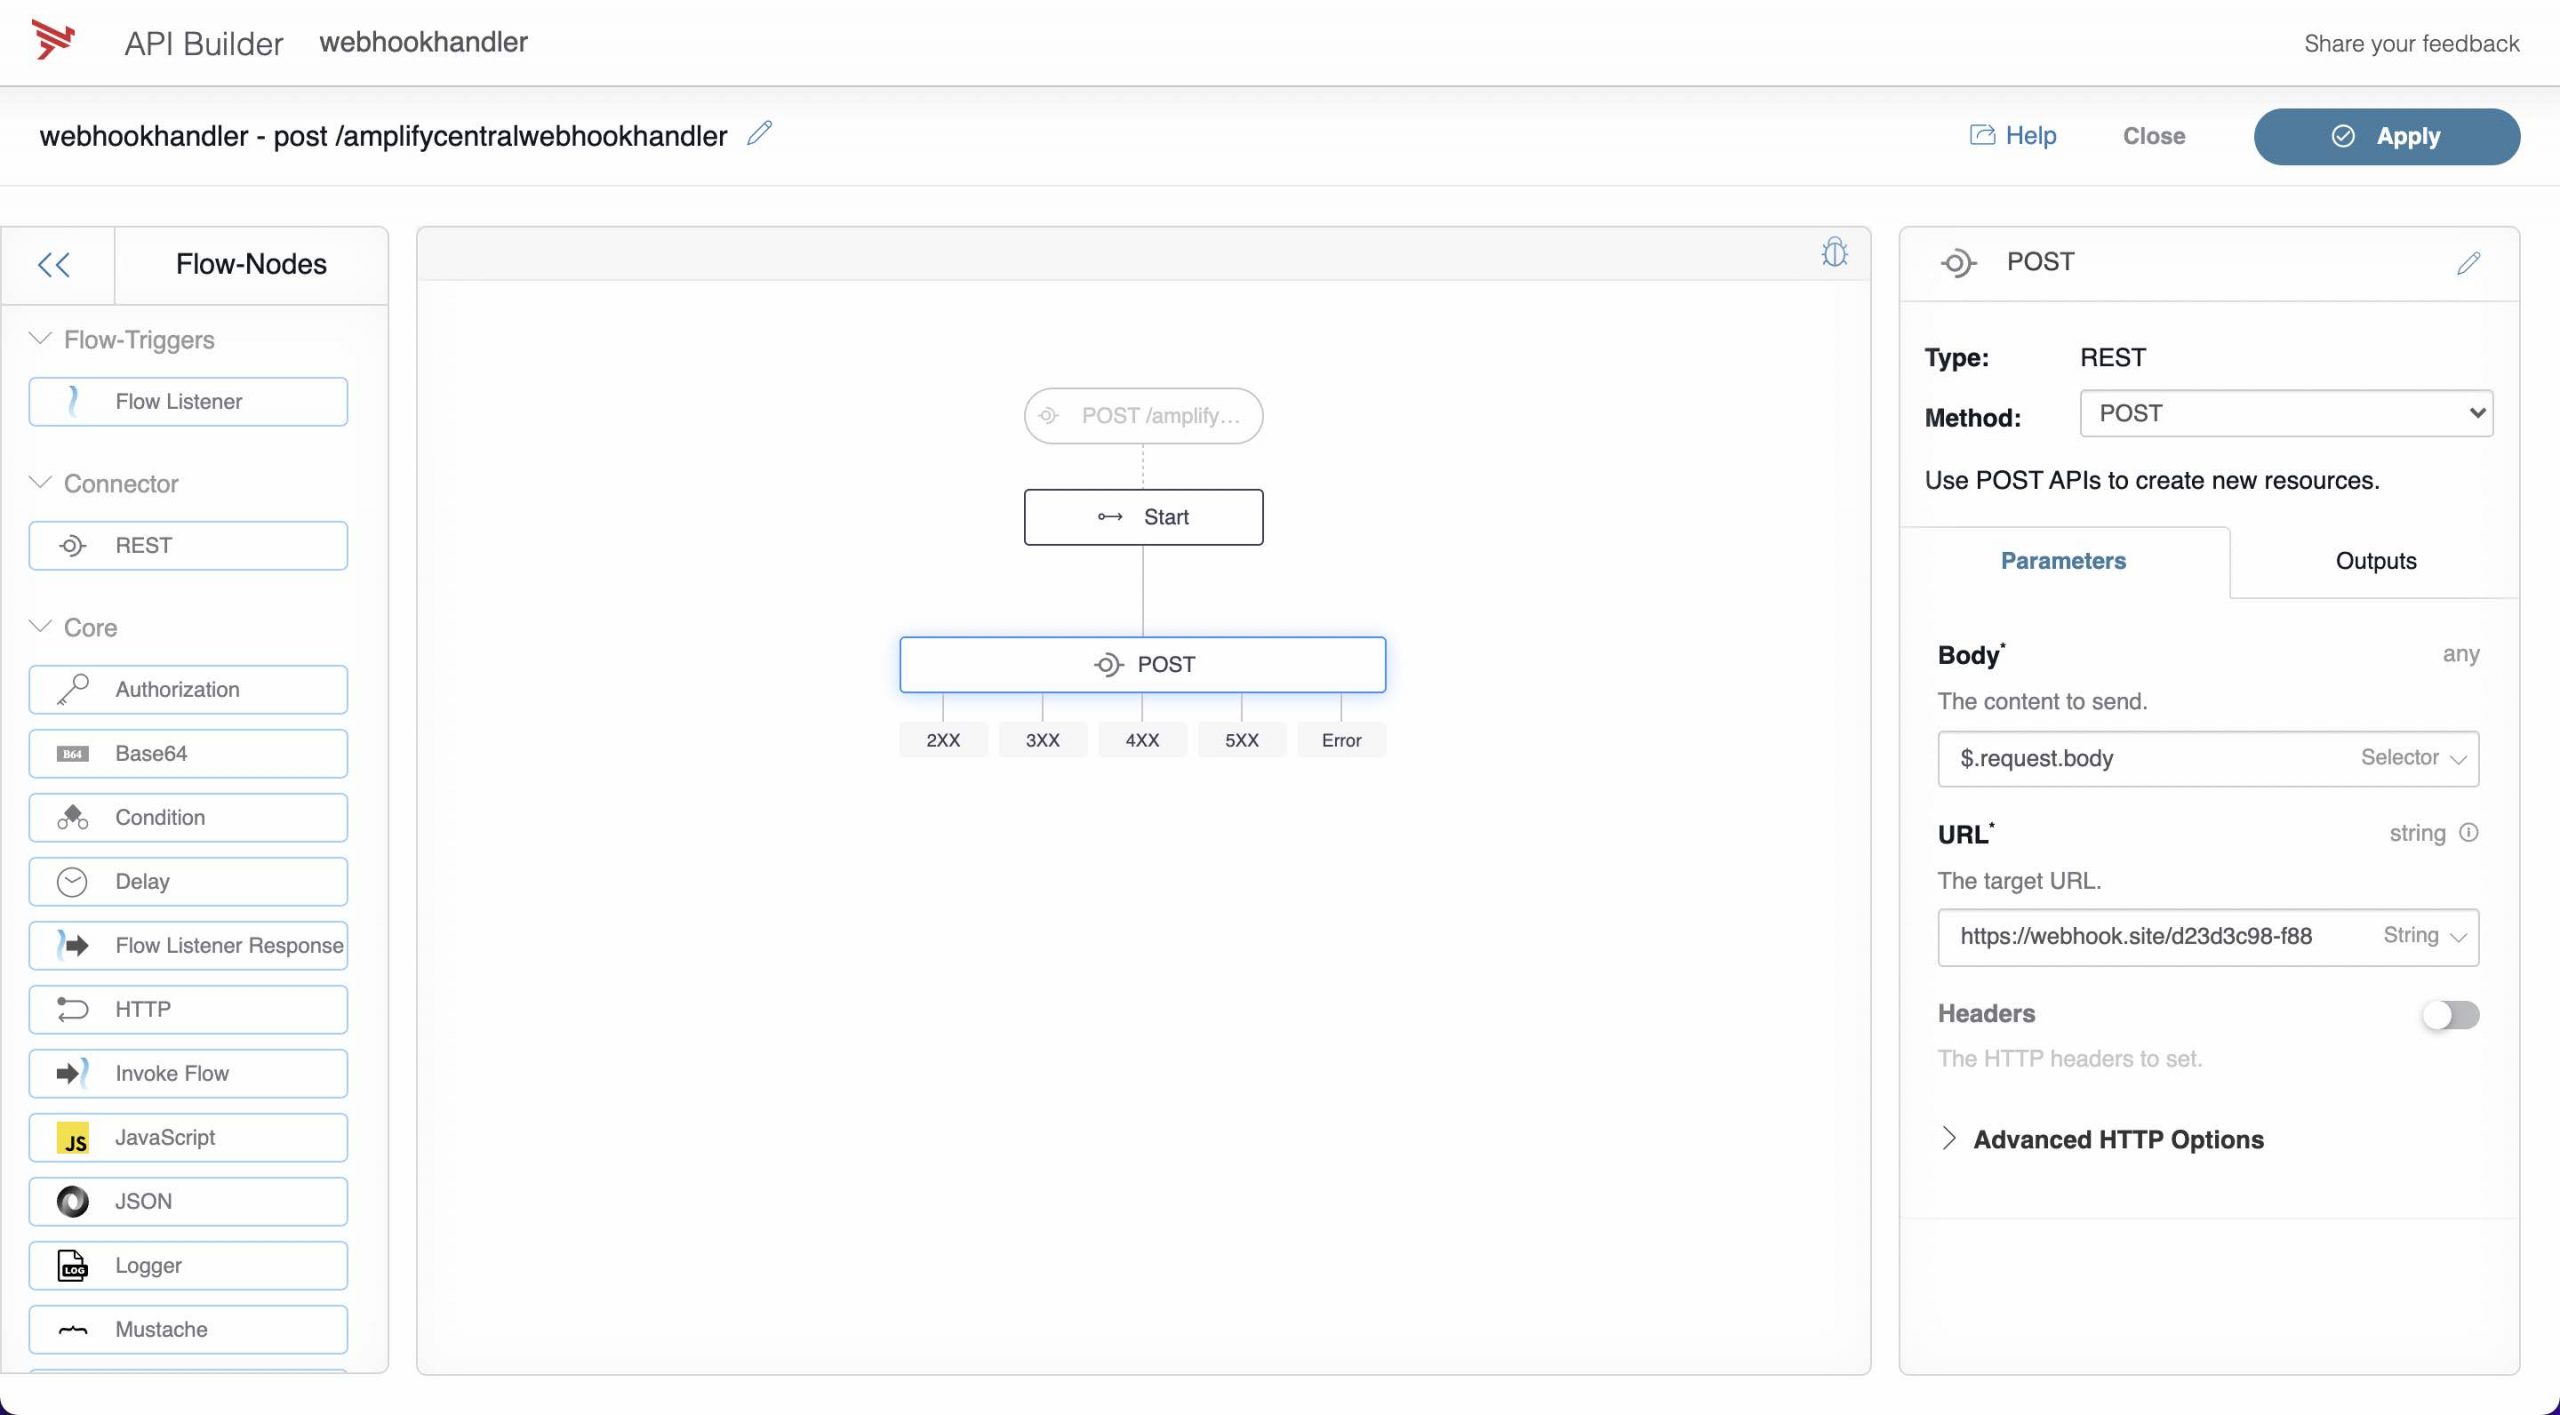
- Drag a REST connector flow-node onto your canvas. It should automatically connect to the Start node. Select POST from the method list on the right.
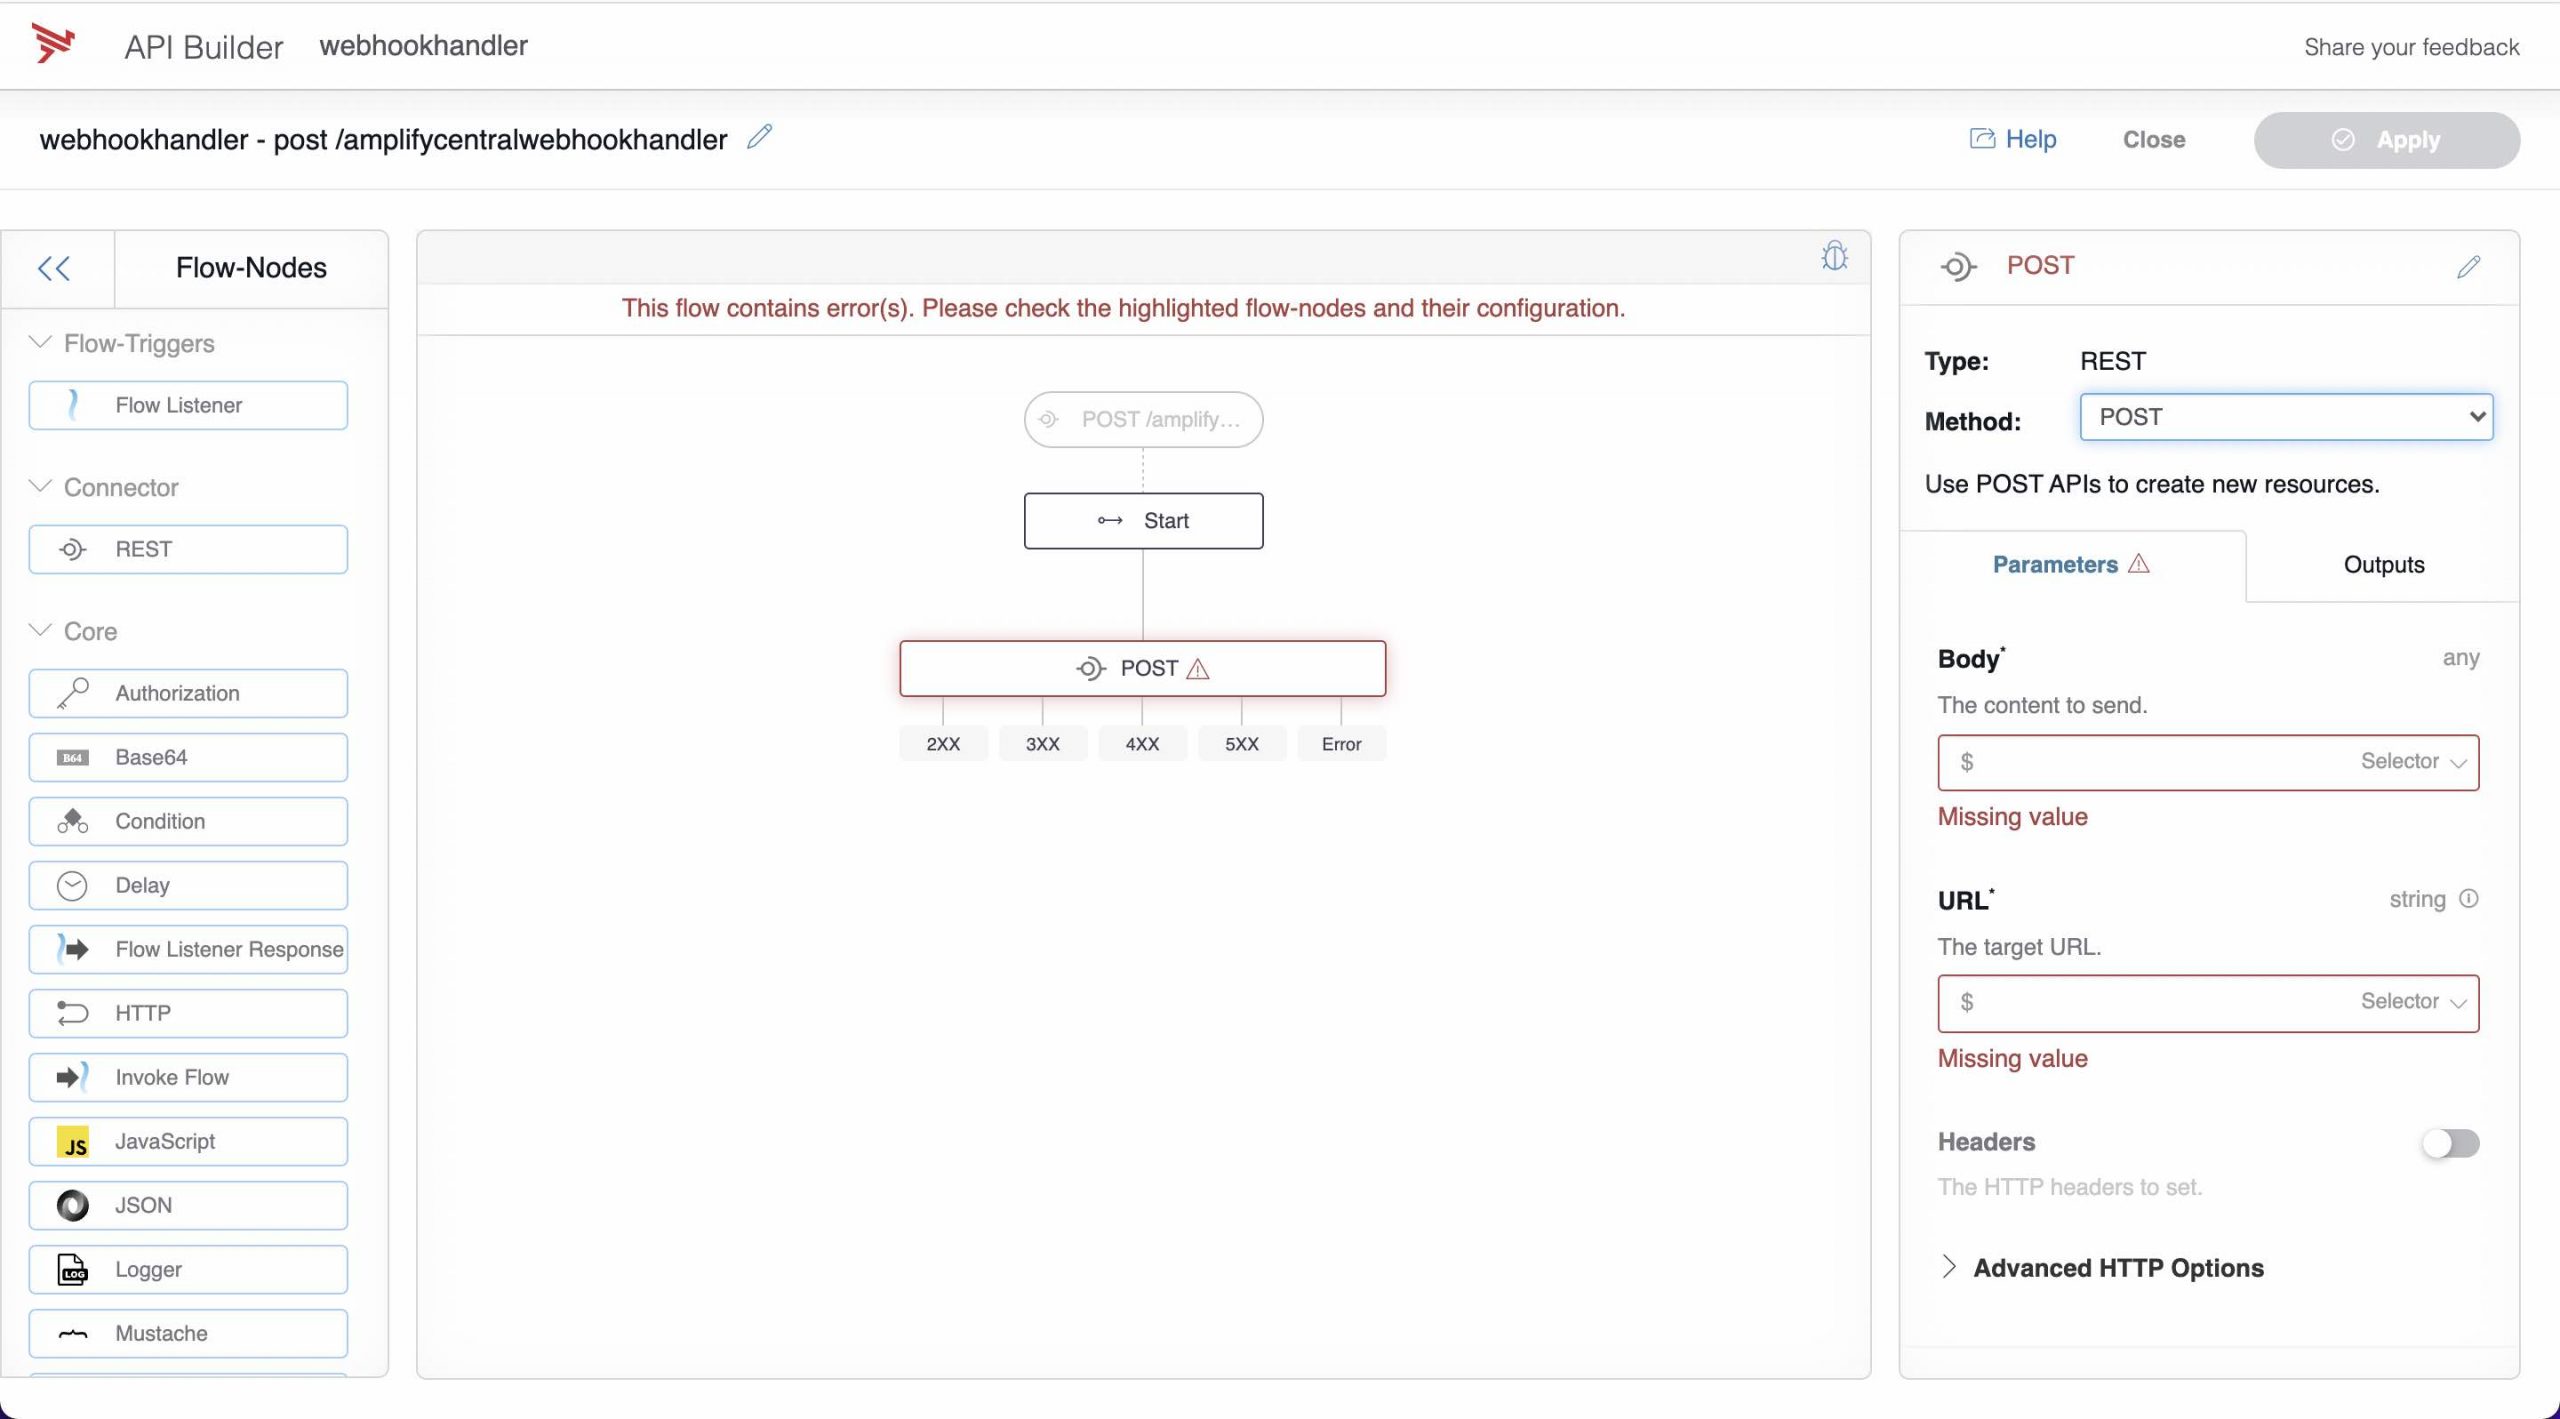
- For the Body parameter, enter $.request.body as a selector to select the incoming body payload of the Amplify webhook call and enter your webhook.site URL for the URL parameter as a string.
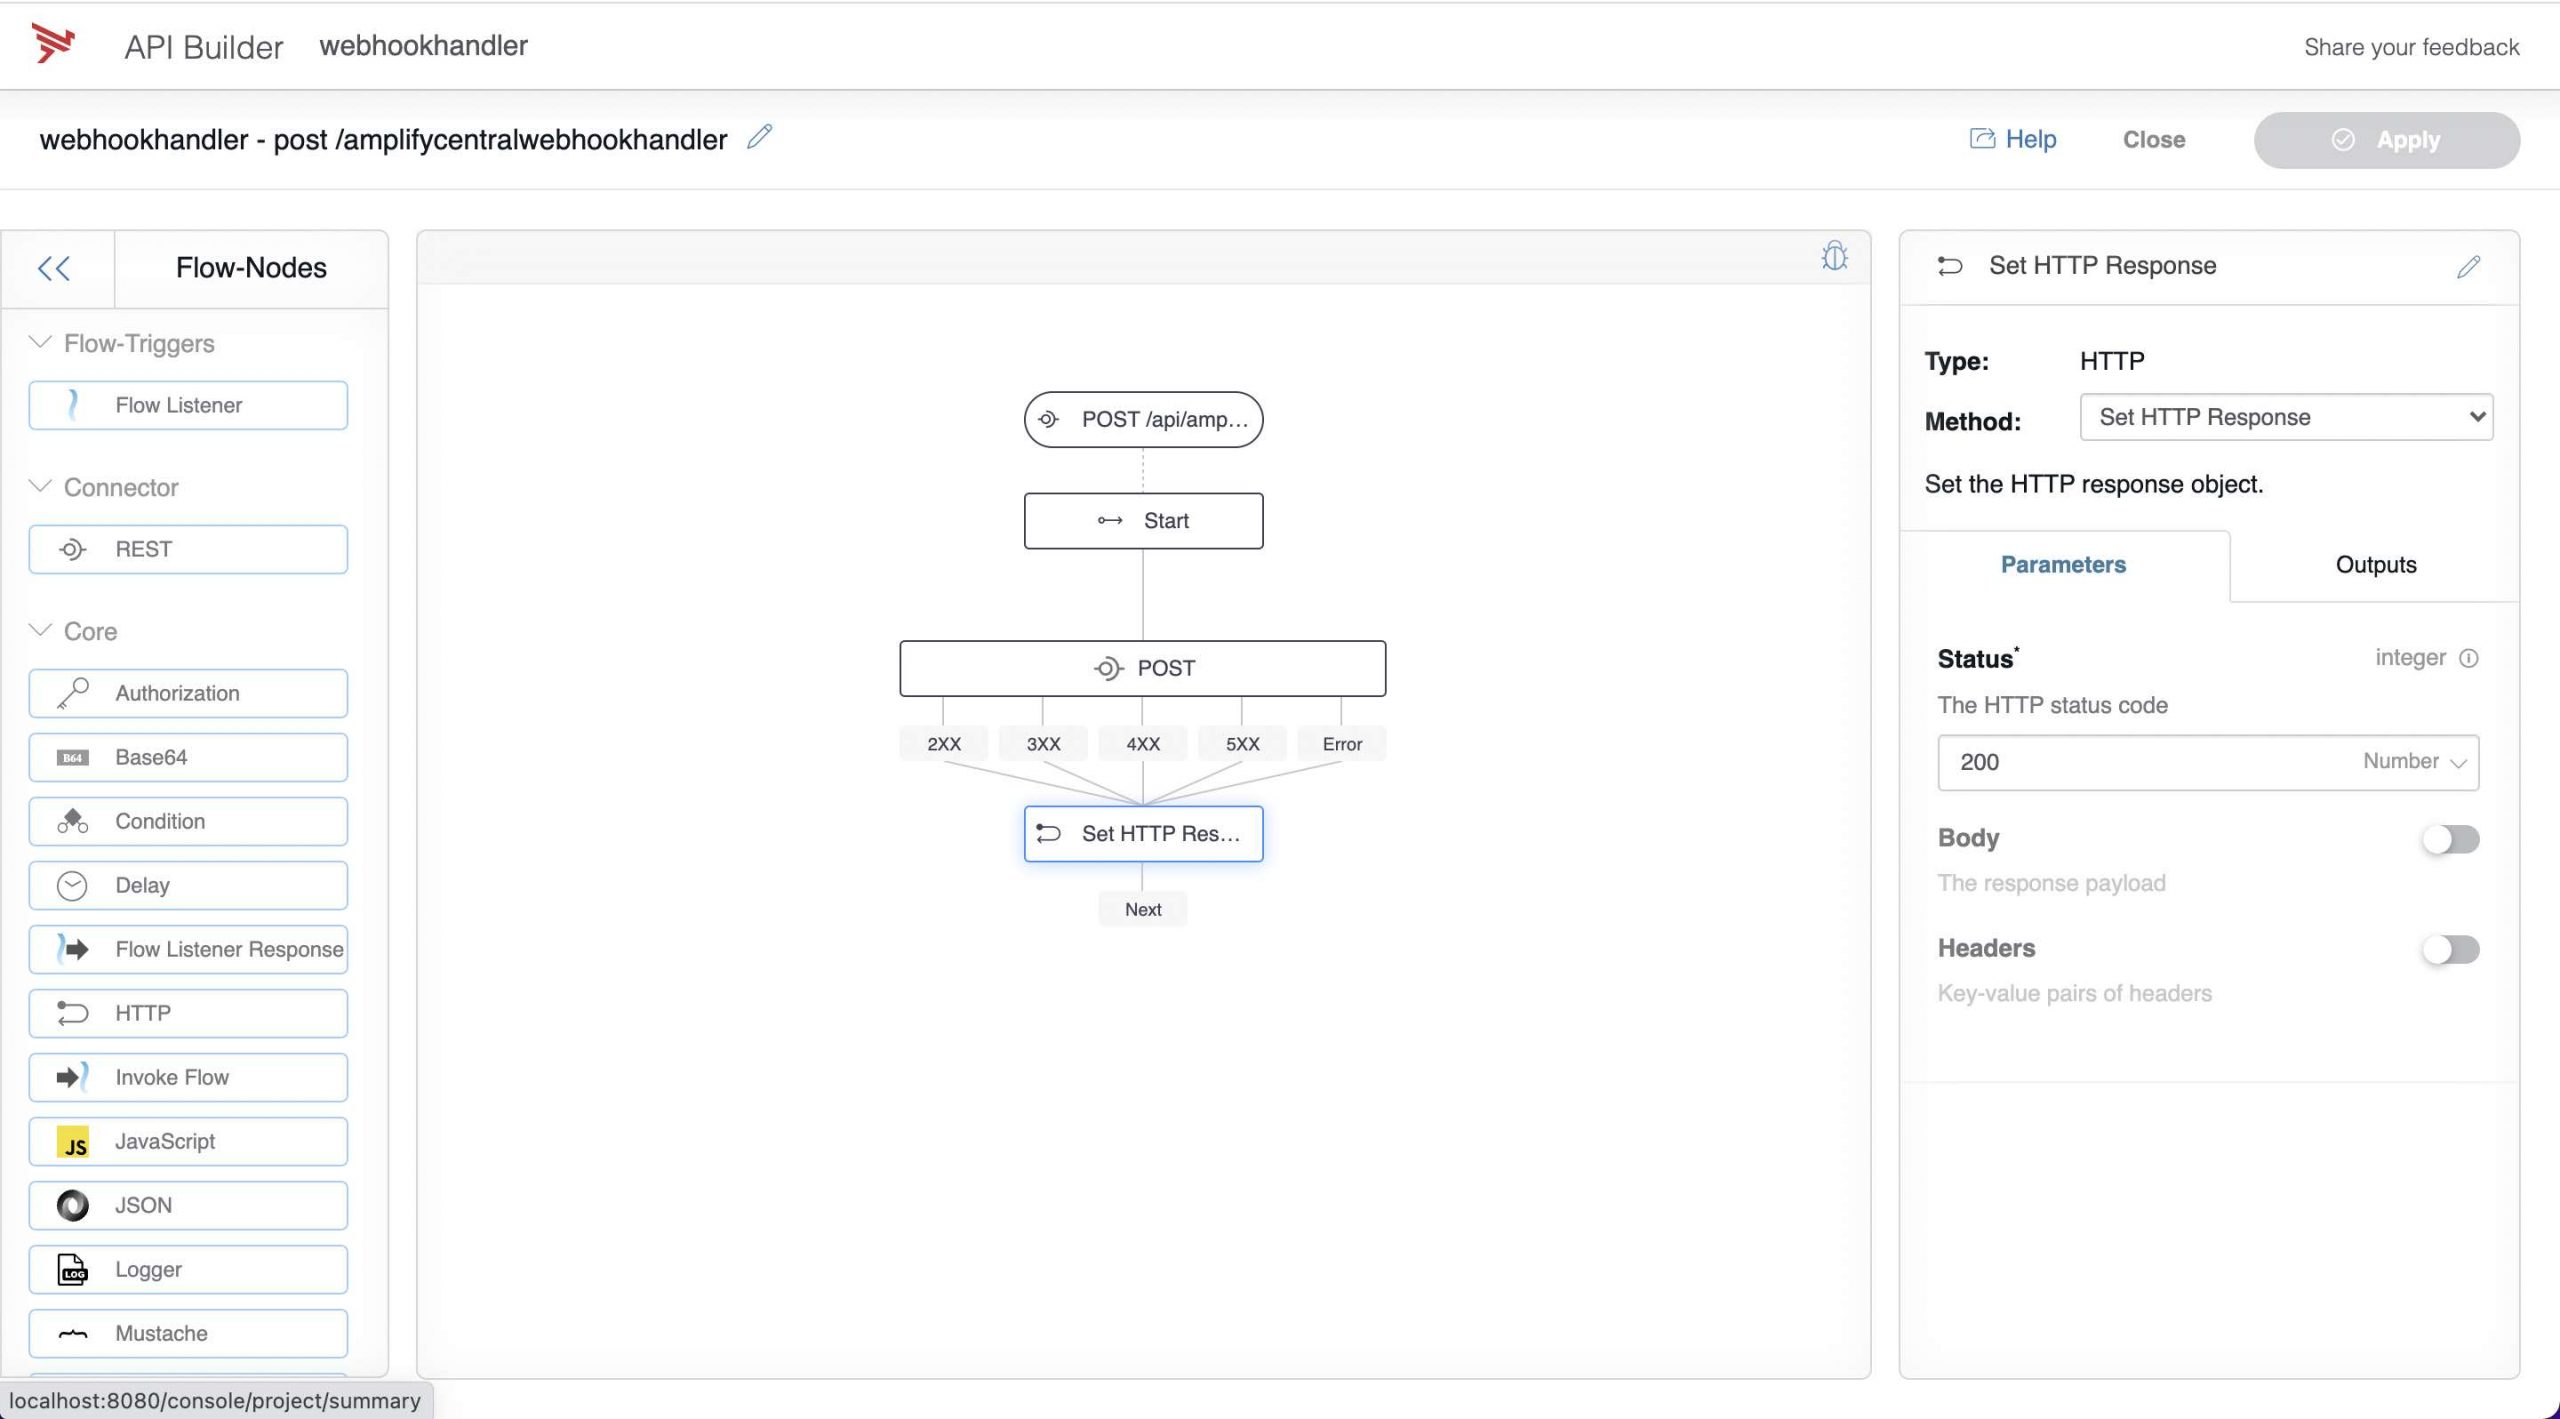
- Drag an HTTP flow-node onto the canvas and connect all the HTTP outputs to it. This is not best practice but since we are simply trying to trigger our API Builder API AND Amplify won’t care about the response to its webhook call, this is OK for a demo/test. Set the status to 200 (number) and click apply.
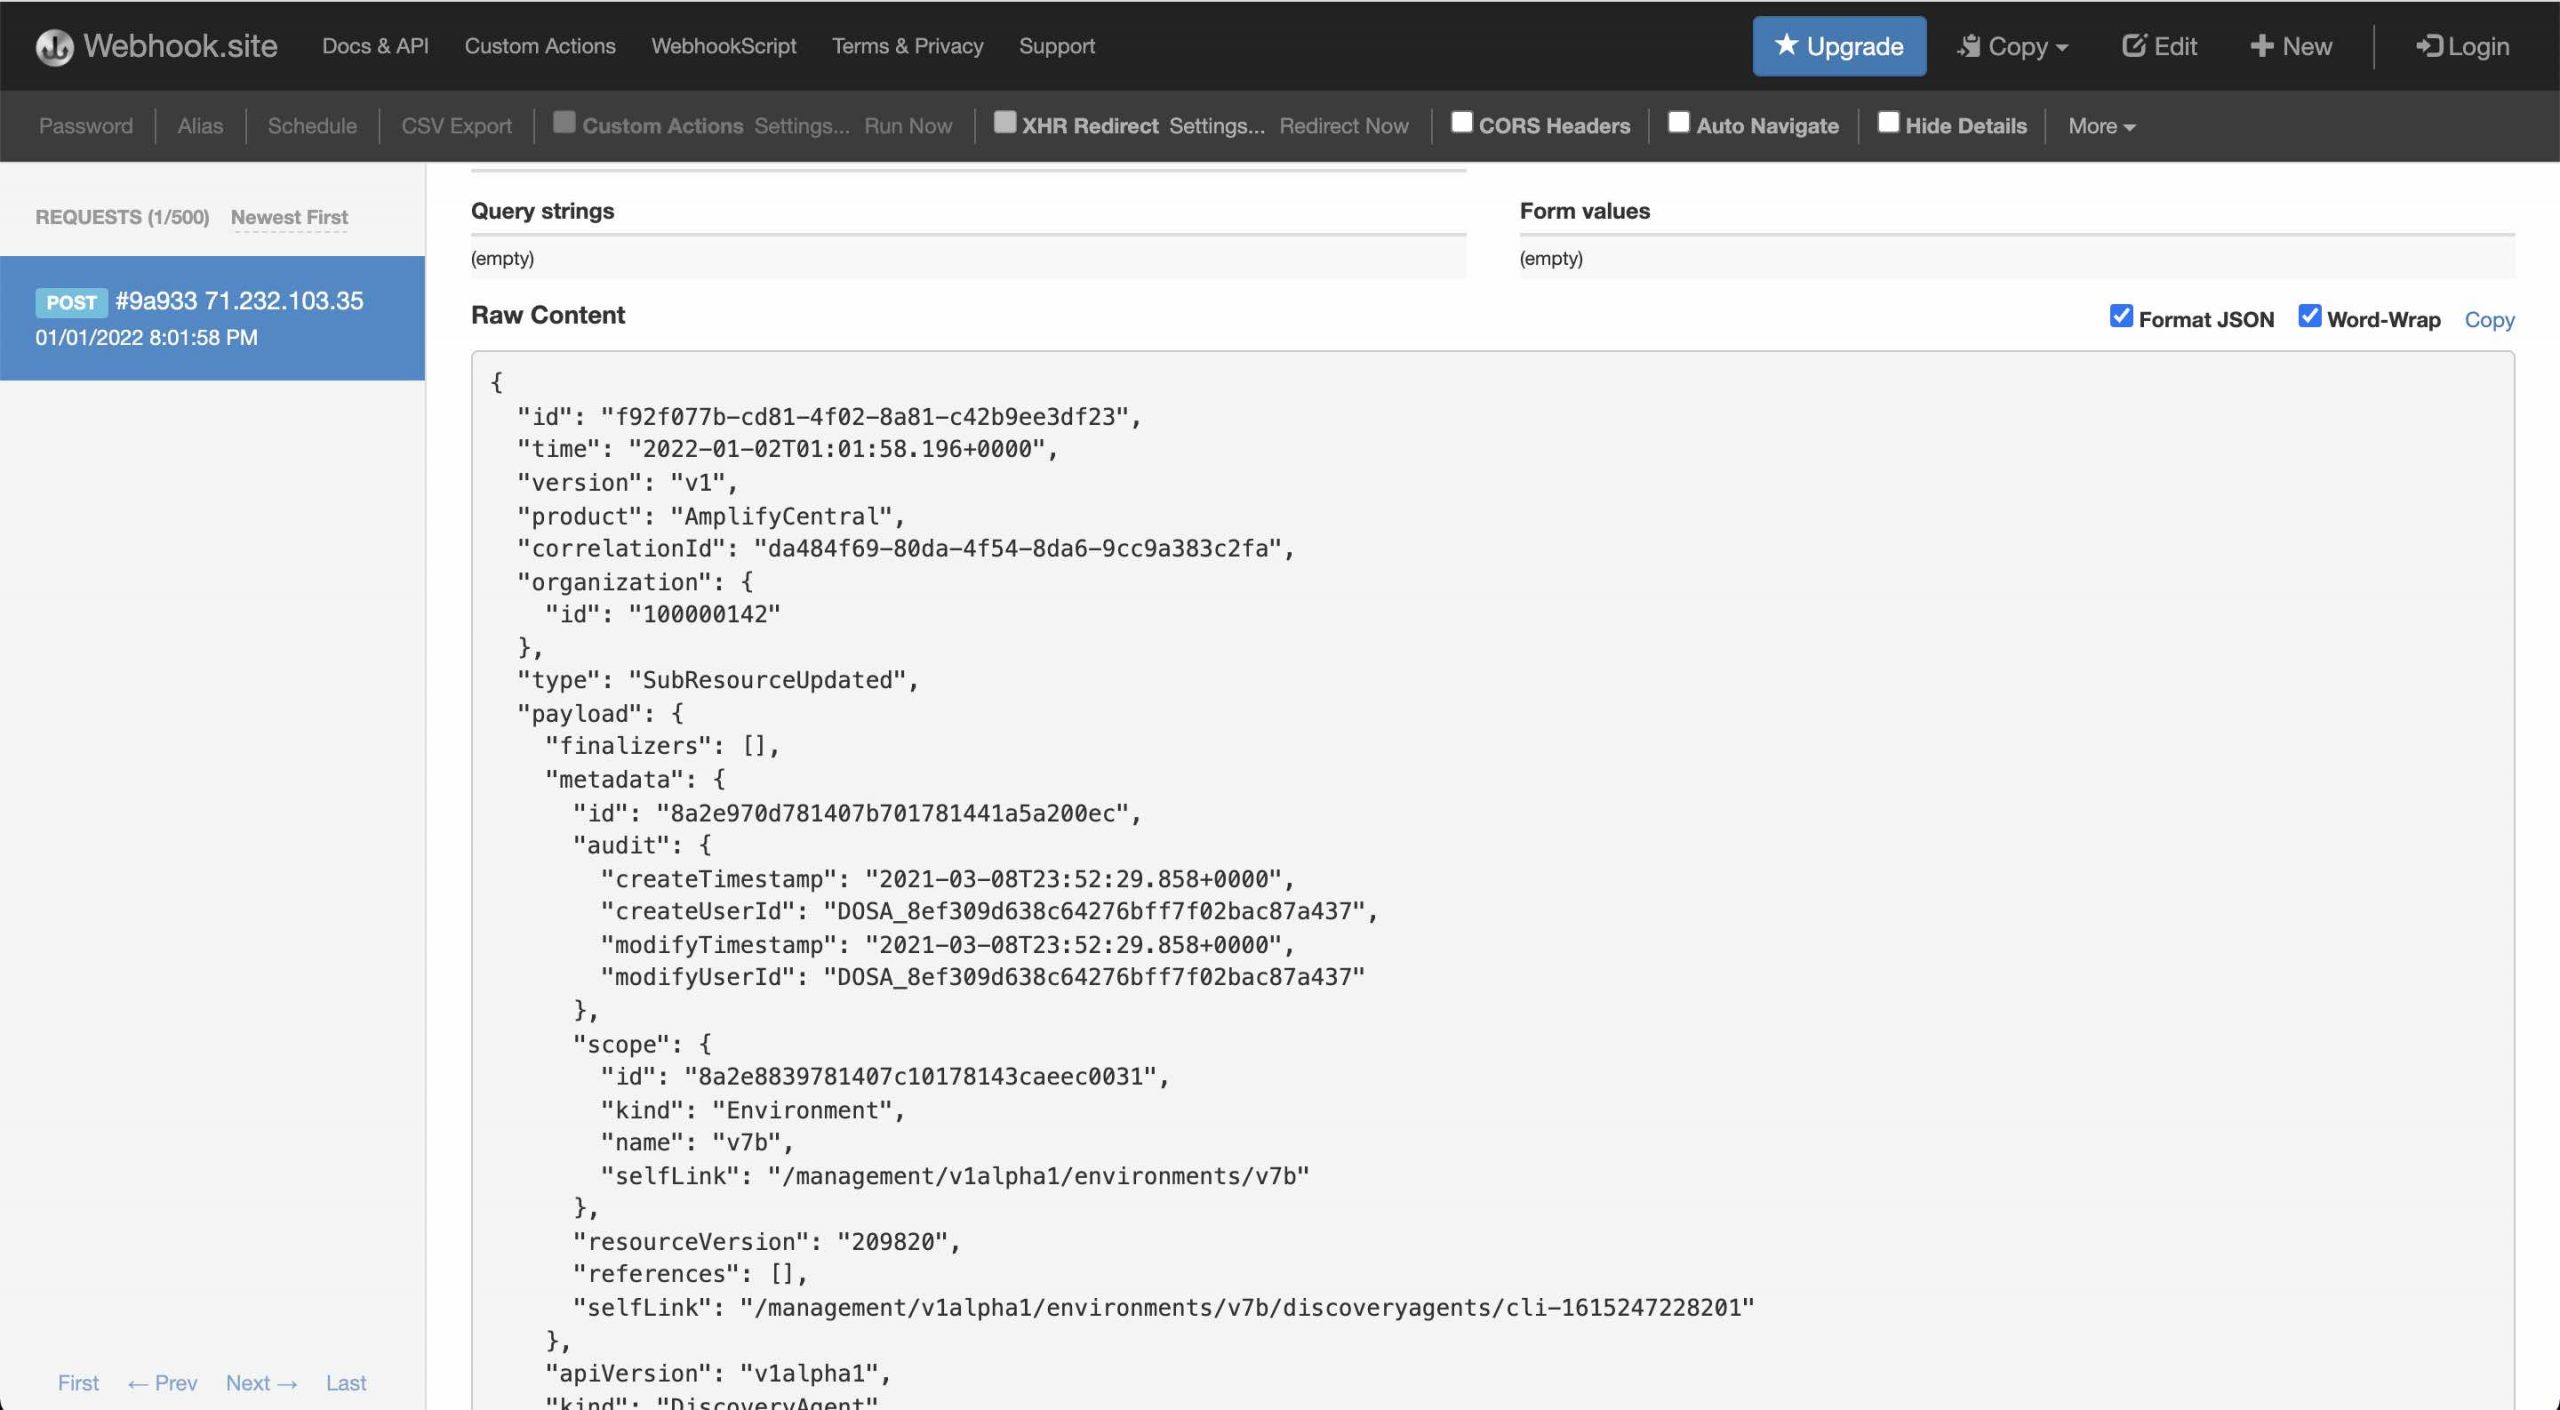
- Click Close and test the API from the console. Copy a sample Amplify webhook payload from webhook.site that we created in the prior steps above and paste into the Body and press Create to test the API.
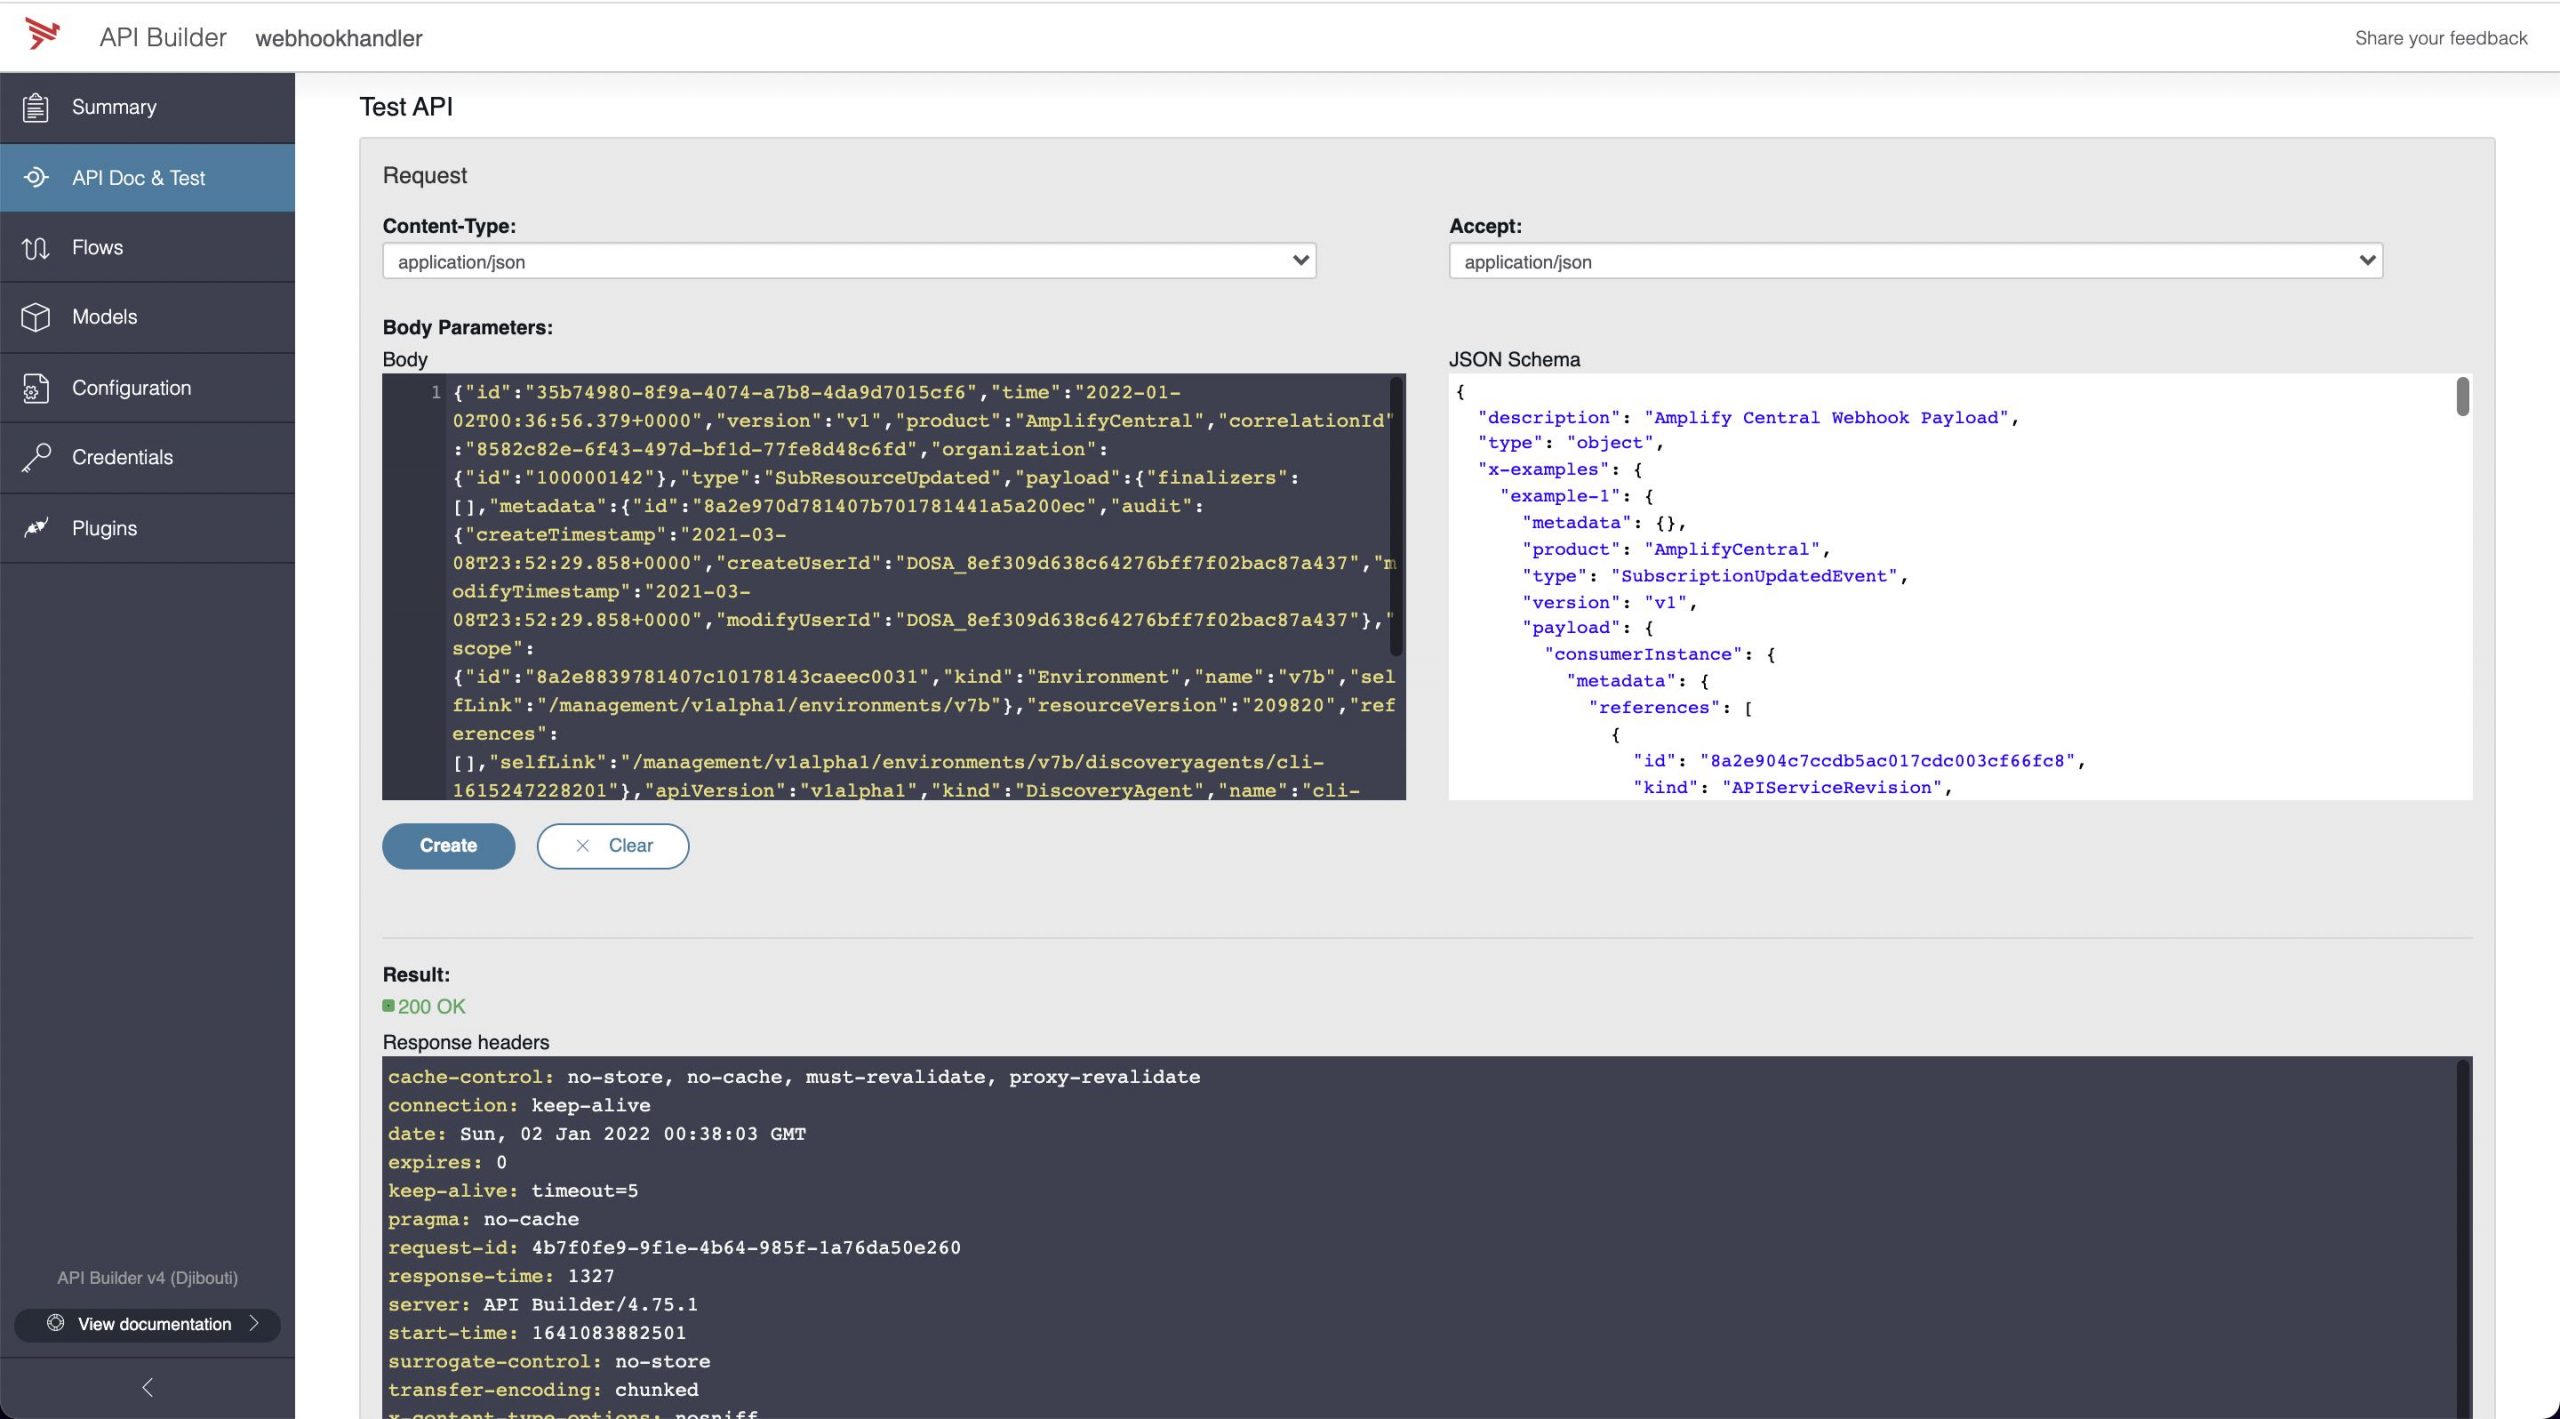
- Check your Webhook.site and you should see the same payload there as a result of the API Builder API call
Configure Integration Webhook to Point to API Builder and Test
Now we’ll modify our YAML and use a URL that will point to our API Builder project running on our machine. I’m using ngrok to accomplish this as described here. In production, you would deploy the API Builder app and point the Amplify Integration Webhook there.
Once you run ngrok, your API Builder API will be accessible as follows:
https://74fd-xx-yyy-zzz-35.ngrok.io//api/amplifycentralwebhookhandler
Note that your URL will be different
Modify the YAML to use this URL. Apply this change as follows:
axway central apply -f agentstatuschangesint.yaml
You can clear all entries in your webhook.site URL and wait for an update. Alternatively, you can stop and restart a running agent to get a bunch of webhook calls.
The API Builder console log should look similar to:
.
.
.
1641085318556 DEBUG [request-id: bc14798f-06b4-417c-bfac-482b3bb36ea6] Invoking: webhookhandler-post-amplifycentralwebhookhandler
1641085318557 DEBUG [request-id: bc14798f-06b4-417c-bfac-482b3bb36ea6] Waiting: POST (rest.1)
1641085318557 DEBUG [request-id: bc14798f-06b4-417c-bfac-482b3bb36ea6] Invoking: POST (rest.1), method: POST
1641085319104 DEBUG [request-id: bc14798f-06b4-417c-bfac-482b3bb36ea6]   POST (rest.1) finished flow-node route: ["http.1"], time: 546 ms
1641085319104 DEBUG [request-id: bc14798f-06b4-417c-bfac-482b3bb36ea6]   POST (rest.1) writing {"status":200,"headers":{"server":"nginx","content-type":"text/plain; charset=UTF-8","transfer-encoding":"chunked","vary":"Accept-Encoding","x-request-id":"9a933ccc-0db4-4676-916b-8d8c1fbfed3b","x-token-id":"d23d3c98-f884-4a5d-bc10-0f904d611576","cache-control":"no-cache, private","date":"Sun, 02 Jan 2022 01:01:58 GMT"},"body":""} to ctx as: $.response
1641085319105 DEBUG [request-id: bc14798f-06b4-417c-bfac-482b3bb36ea6] Waiting: Set HTTP Response (http.1)
1641085319105 DEBUG [request-id: bc14798f-06b4-417c-bfac-482b3bb36ea6] Invoking: Set HTTP Response (http.1), method: Set HTTP Response
1641085319105 DEBUG [request-id: bc14798f-06b4-417c-bfac-482b3bb36ea6]   Set HTTP Response (http.1) finished flow-node route: [], time: 0 ms
1641085319105 DEBUG [request-id: bc14798f-06b4-417c-bfac-482b3bb36ea6]   Set HTTP Response (http.1) writing {"status":200} to ctx as: $.response
1641085319107 INFO  [request-id: bc14798f-06b4-417c-bfac-482b3bb36ea6] Response {"statusCode":200,"headers":{"x-xss-protection":"1; mode=block","x-frame-options":"DENY","surrogate-control":"no-store","cache-control":"no-store, no-cache, must-revalidate, proxy-revalidate","pragma":"no-cache","expires":"0","x-content-type-options":"nosniff","server":"API Builder/4.75.1","request-id":"bc14798f-06b4-417c-bfac-482b3bb36ea6","start-time":"1641085318550","response-time":"556"}}
.
.
.
Summary
In this blog post, we saw how to create an API Builder API that can process Amplify Webhooks. While we demonstrated an Integration webhook based on agents, this same API Builder API can handle Subscription webhooks so it can be used as a starting point for all use cases.
In future blog posts, we’ll look at more practical and useful examples.
Discover more information in this blog post about Amplify Integration Builder Multi-trigger flow.
Follow us on social