
This guest post was authored by Adam Armstrong. Adam has been using Titanium since 2010 and is an Appcelerator Titan. He is the Manager of Mobile Technology at AmWINS Group and does freelance work via https://implicitli.com. You can follow him on Twitter at @adamtarmstrong.
Developing a mobile app is just the beginning. What follows – signing, packaging, managing app meta data, testing, and deploying to the App Stores, can arguably be just as tedious and challenging.
This article will demonstrate one way to configure your environment to manage these tasks when developing apps with Titanium.
- For Testing -> we will use Appium (Local Server) + mocha (npm package)
- For Automation -> we will use Fastlane
TESTING
Set Up Appium Server
Appium is an open source test automation framework for use with native, hybrid and mobile web apps. There are several options here that range from cloud-based, to local node package, and even a simple ‘Appium Desktop’ GUI app for Mac. For this article, I am going to use the simple GUI-based app, as it does everything I need it to do.
- Download the free Appium Desktop App here.
- Validate all required Appium dependencies.
- Install and run ‘Appium Doctor’. This wizard will validate and advise of any additional steps or dependencies that may be needed for your environment. More info can be found here.
npm install -g appium-doctorappium-doctorFollow any steps to install any packages that your environment may be missing.
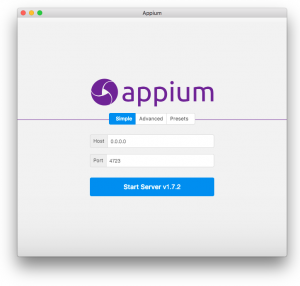
- Launch the Appium (Server) app and start the “Simple” Server using the defaults
Install Mocha
I manage multiple mobile applications, so I chose to manage my tests for each app in a single .js file and all app .js files within a single folder outside of the Appcelerator Project directory. There are numerous ways you can manage this and there is no right or wrong just more of a preference. My structure looks like this:
- Documents
- Appium_Tests
- firstapp_test.js
- anotherapp_test.js
- ……
Depending on your preference, install mocha either globally or locally in your tests directory (‘Appium_Tests’ in my example). More info can be found here.
npm install --global mocha
Create Mocha Test File for Your App
This file will use an “appium client” to connect to your Appium Server to run the automated tests. There are several clients to use and each have their own pros/cons. The general consensus is that ‘webdriver io’ is the preferred client. If you’d like to see the other options and/or see more complex examples, check out this repo of examples.
First, create a test file. Let’s call it firstapp_test.js for future reference in this article.
Next, copy the following block of code into your file:
- port# must match your Appium Server Port.
- The simulator can be customized to match your needs, but the same choice will need to be used when we build from fastlane (set up later in this article).
- Update the path to your built app. *Note: In this tutorial, we are pointing to the app built for the simulator. You can also test against physical devices, but we aren’t covering that in this article.
"use strict";

const opts = {
  port: 4723,
  desiredCapabilities: {
        "platformName": "iOS",
        "platformVersion": "11.2",
        "deviceName": "iPad Pro (12.9-inch) (2nd generation)",
        "app": "/Users/{USERDIR}/Documents/Appcelerator_Studio_Workspace/DASH/build/iphone/build/Products/Debug-iphonesimulator/MyAppName.app",
        "automationName": "XCUITest",
        "noReset": true
  }
};

var wd = require("webdriverio");

describe("FIRST APP TEST", function () {
  this.timeout(300000);
  var driver;
  var allPassed = true;

  before(function () {
    driver = wd.remote(opts);
    return driver.init();
  });

  after(function () {
    return driver
      .end()
  });

  afterEach(function () {
    allPassed = allPassed && this.currentTest.state === 'passed';
  });

   it("Should Login", function () {
        return driver
        .element("~Enter Username").setValue("testusername")
        .element("~Enter Password").setValue("testpassword")
        .click("~Attempting to Log In")
  });

  it("Should Do Something else", function () {
        return driver
        //Do another test here
  });

});
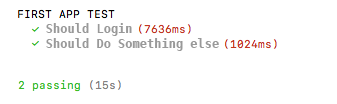
While it is possible to write these tests using node without mocha, I personally like the structure of using mocha (describe/it) as well as the output of such. Using mocha, and my sample script above results in the following:
Write test commands for your app. This is where ‘webdriver io’ stands apart from the rest. Their syntax is shorter and more streamlined than other clients. The ‘webdriver io’ API doc can be found here.
Note: The ~ is a unique Appium character that gets attributed to the AccessibilityId used within your Appcelerator app. This one line will find the UI component with AccessibilityId = “Enter Username” and sets its value:
.element("~Enter Username").setValue("testusername")You can refer to the Appium commands here if you want more info.
Update your Appcelerator UI components with Accessibility Features (in my example, this would be the TextField used for the username). More info on Appcelerator and Accessibility can be found here.
<TextField accessibilityLabel="Enter Username" />Now, you should have mocha configured and a sample test script using webdriverio as the client to interface with your Titanium App keying off of the AccessibilityId. Before continuing to the final piece (automation) you should ensure your test runs successfully on its own.
mocha firstapp_test.jsAUTOMATION
Install Fastlane
Look to Fastlane’s Getting Started Guide to install and init.
For each mobile app, you will have a ‘fastlane’ folder in the root with a few config files.
— fastlane (folder)
    — Pluginfile (this gets created automatically for you)
    — Fastfile (this file you create and define the required steps). As a ‘Quick Start’, I provided the following. Copy this into your ‘Fastfile’ for your app.
Note: there are no file extensions on either file
default_platform :ios

platform :ios do

    before_all do
    end

    desc "Build App for Simulator Tests"
    lane :buildapp do
      ti_build_app(
    appc_cli: "appc run build --platform ios --target dist-adhoc --distribution-name 'implicitli, LLC. (G52GS5PAND)' --pp-uuid c6ea530d-70ea-5661-b013-beb4d25b2a7b --output-dir /dist"
  )
    end

    desc "Runs the tests of the iOS App"
    lane :test do
        ti_build_app(
            appc_cli: "appc run -f -T simulator -p ipad -i 11.2 --device-id 6945AC80-7F29-4A5A-8256-49467E9D1A7D --build-only"
        )
        mocha_run_tests(
            mocha_js_file_name: '/Users/{USERDIR}/Appium_Tests/dash_test.js'
        )
    end


end
Configure Fastlane
Fastlane runs on what they call ‘lanes’. These lanes allow you to break out building, testing, deploying, etc. And, each ‘lane’ can be run by itself or all together in succession. Too much to cover here, read up on their docs for more info, but know that to integrate Titanium into Fastlane, you will need to download 2 plugins I recently wrote – one to build an Titanium App and one to initiate your mocha test file.
In your Titanium project, run this from terminal:
fastlane add_plugin ti_build_appThis plugin leverages the full AppC CLI which you can read up on here.
fastlane add_plugin mocha_run_testsThis plugin just simply runs your mocha test .js file.
Customize Your Fastfile
My first lane, ‘buildapp’ does just that It only builds. I defined the distribution type (adhoc) and what cert and provisioning profile to use. For this lane/example, I now have a packaged app that I can upload to my MDM Server.
I could even go a step further and install the plugin ‘ftp’ to automate the upload process.
See here for all the plugins available.
My second lane, ‘test’ has 2 actions. 1) build the app to simulator & 2) test the app. In this example, I use different AppC CLI commands so that my app is built to a specific simulator and —-build-only prevents it from launching (mocha will launch the simulator and attach to the correct session on its own). Then, the next step executes the mocha test file.
It is important here to note that the simulator I defined in Fastlane MUST match the simulator defined in my mocha test file.
Execute Fastlane
To run only my Fastlane ‘test’ lane, I would simply execute:
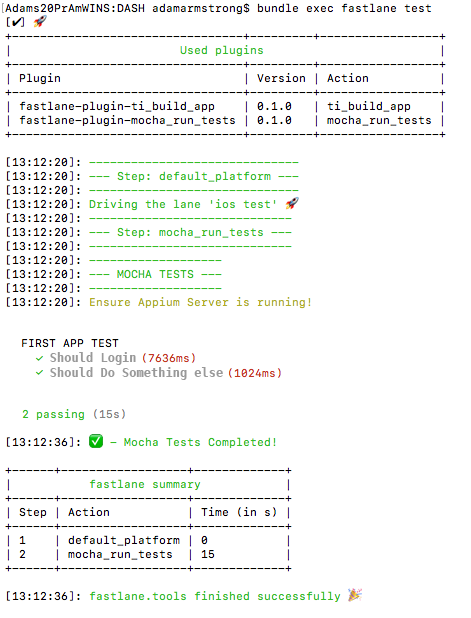
bundle exec fastlane test
You will see AppC CLI commands flash across the screen as it builds the app to the simulator, then mocha executes, simulator opens, and webdriverio performs all your UI interactions. How Exciting!
Example Fastlane output (I hid all the AppC Build Cmds – you’re probably used to those by now and know how long that output is).
NEXT STEPS
- Dig into more ‘actions’ in Fastlane (or plugins) to increment build numbers, capture automated screenshot captures, integrate into Slack, git, send notifications, and so much more. The Fastlane community is vast and options are near limitless.
- I have plans to automate the start/stop of the Appium Server (as mentioned above, as it stands, you need to make sure you manually start Appium Desktop app prior to running your Fastlane). And, I welcome any other suggestions for plugins.
Follow us on social