In this blog post, we’ll describe how to create an Integration Builder connector to an API Builder Microservice. We’ll create an API Builder project, run it and export its swagger definition. Then we’ll import the swagger into Integration Builder and create a connector that can be used in Integration Builder flows.
Create your API Builder Project
In this section, we will create an API Builder project and get the swagger for it.
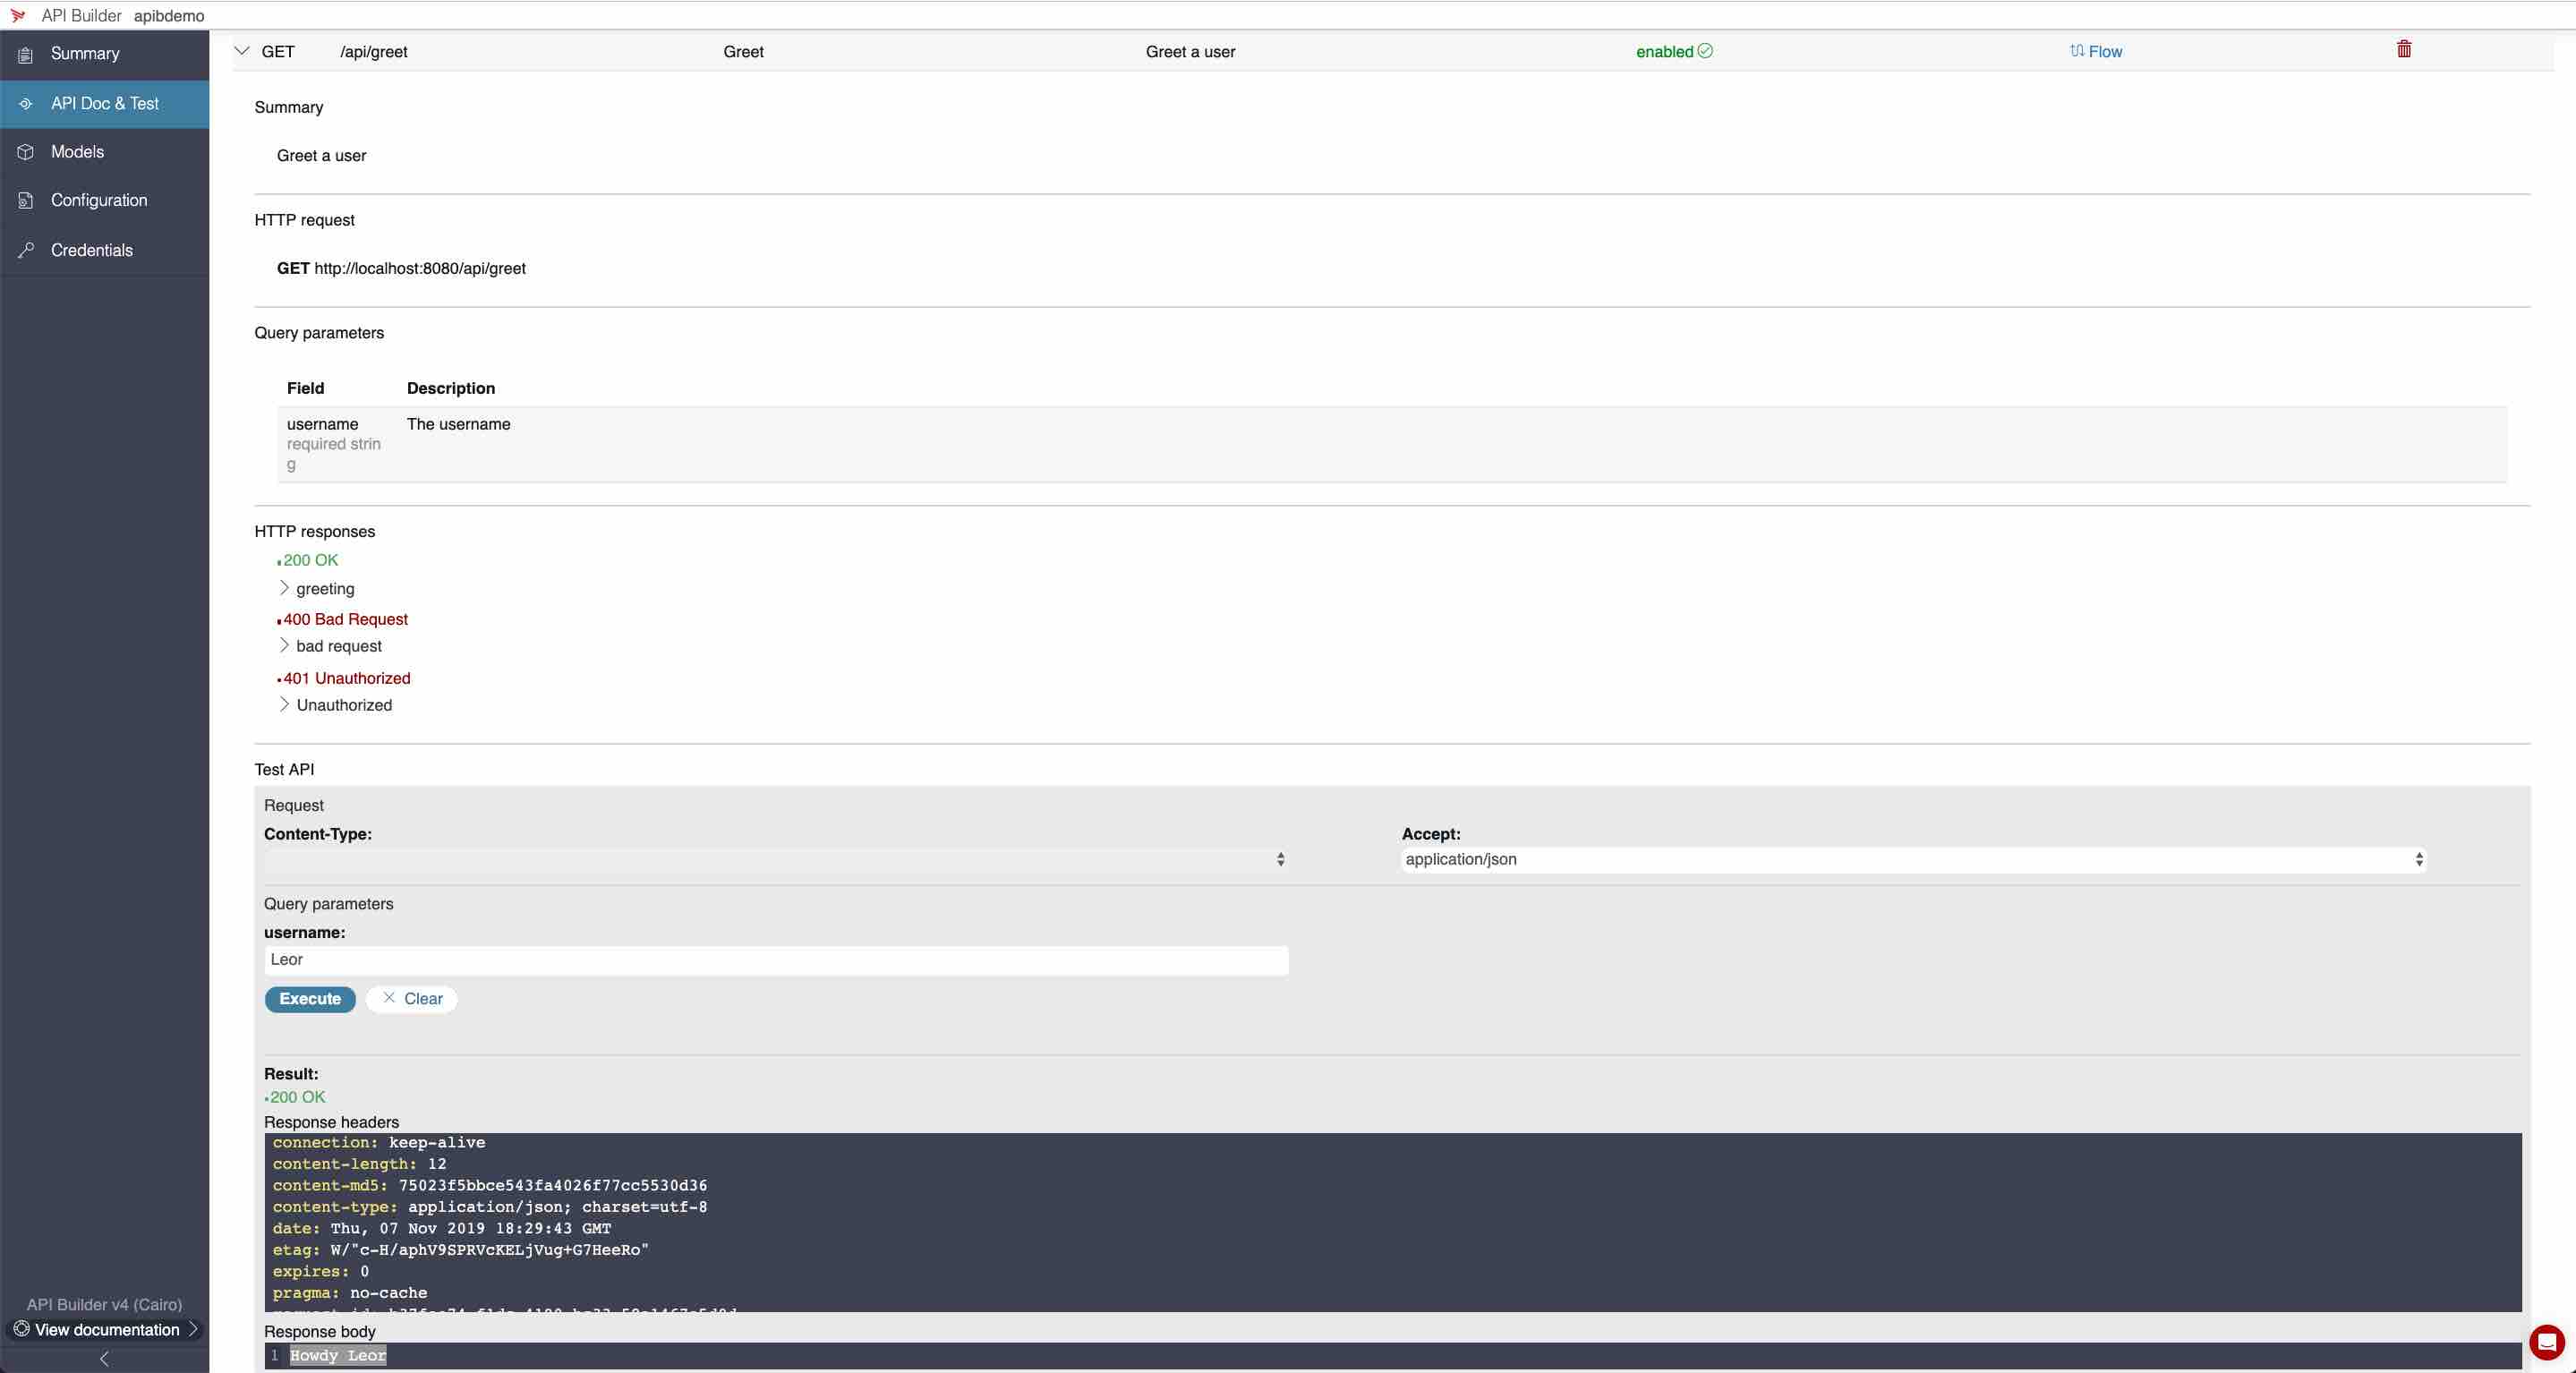
- Follow the instruction here and create an API Builder project, run it and make sure you can log into the console and run the default, built-in greet API
- Switch from basic authentication to api key authentication by editing the /config/default.js file and make note of the API key (in the same file) as we’ll need it later
- Look for the property called accessControl
- Change apiPrefixSecurity from basic to apikey
Stop and restart your API Builder project and make sure the greet API still works
Get the swagger file, either from the console (by clicking on the Download Swagger button) or from http://localhost:8080/apidoc/swagger.json
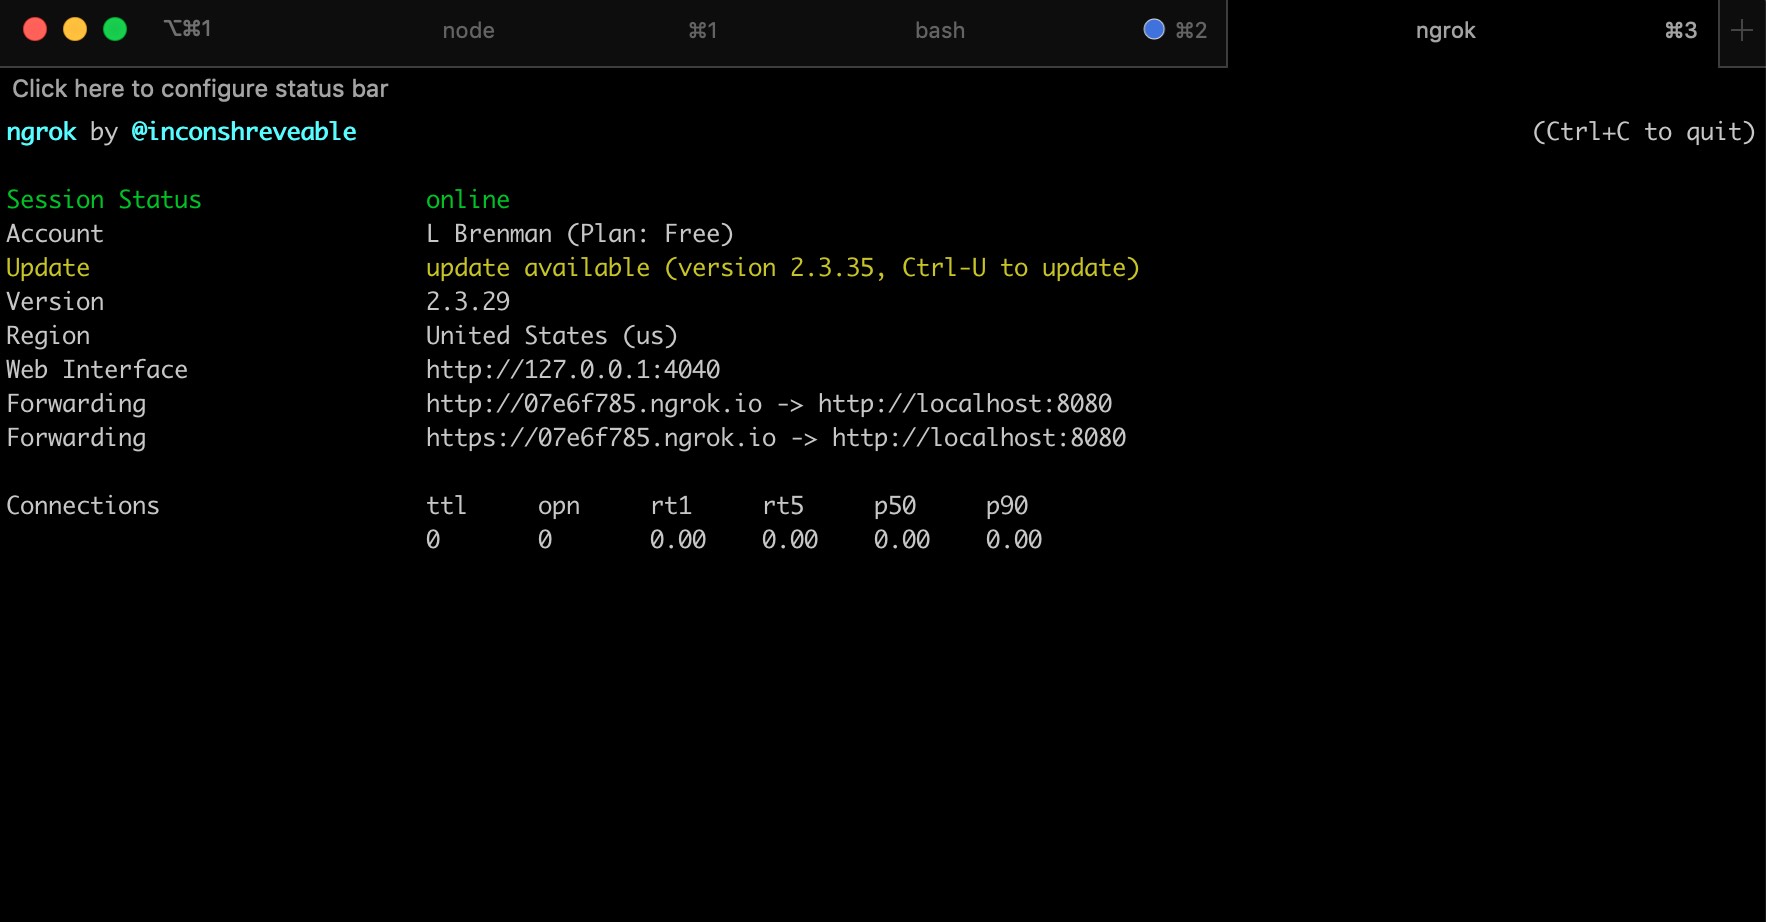
Since Integration Builder is a SaaS product and API Builder is running on localhost, we need a way to enable access of API Builder to Integration Builder. We’ll use ngrok to expose a public URL to API Builder. This was previously described here. Since API Builder is listening on port 8080 by default, use:
ngrok http 8080
This will create a public URL that maps to http://localhost:8080. Make note of the ngrok public URL as we’ll need it shortly
Integration Builder
In this section, we will create an Integration Builder connector to our API Builder microservice by importing the API Builder swagger file.
We can edit the swagger and replace:
"host": "localhost:8080",
with the ngrok public URL, e.g.:
"host": "07e6f785.ngrok.io",
Alternately, we can change this url in Integration Builder after importing it. Let’s do the latter.
- Go to Integration Builder at https://platform.axway.com
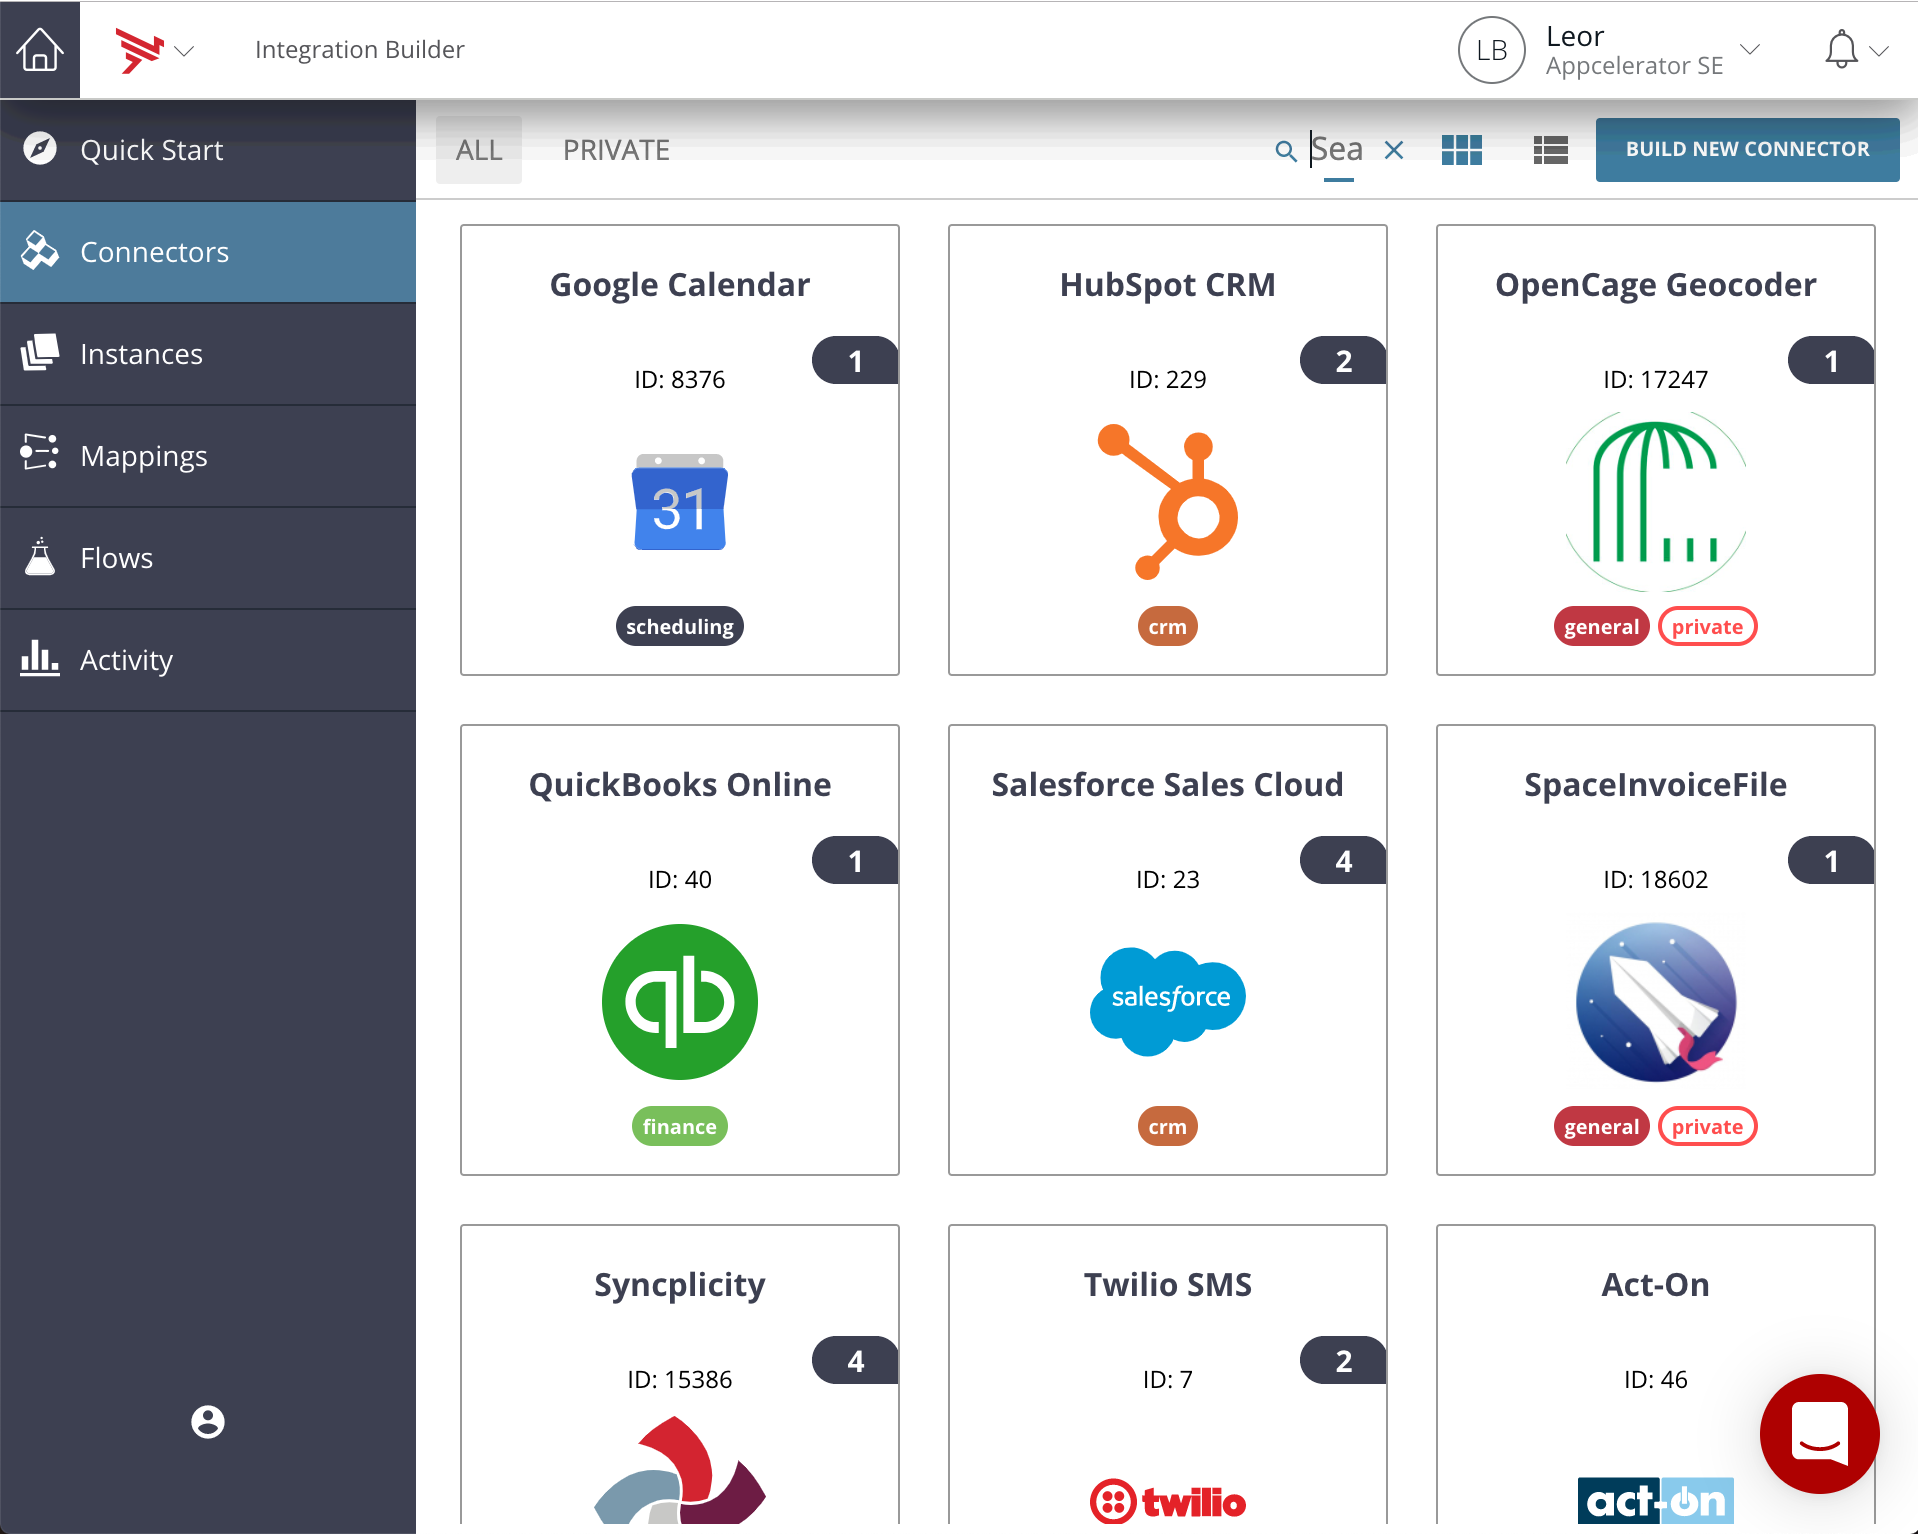
Click on the Connectors tab and click on the BUILD NEW CONNECTOR button
- Click on the Import button
Click on the Swagger tile and click the FROM COMPUTER button to select your API Builder swagger file
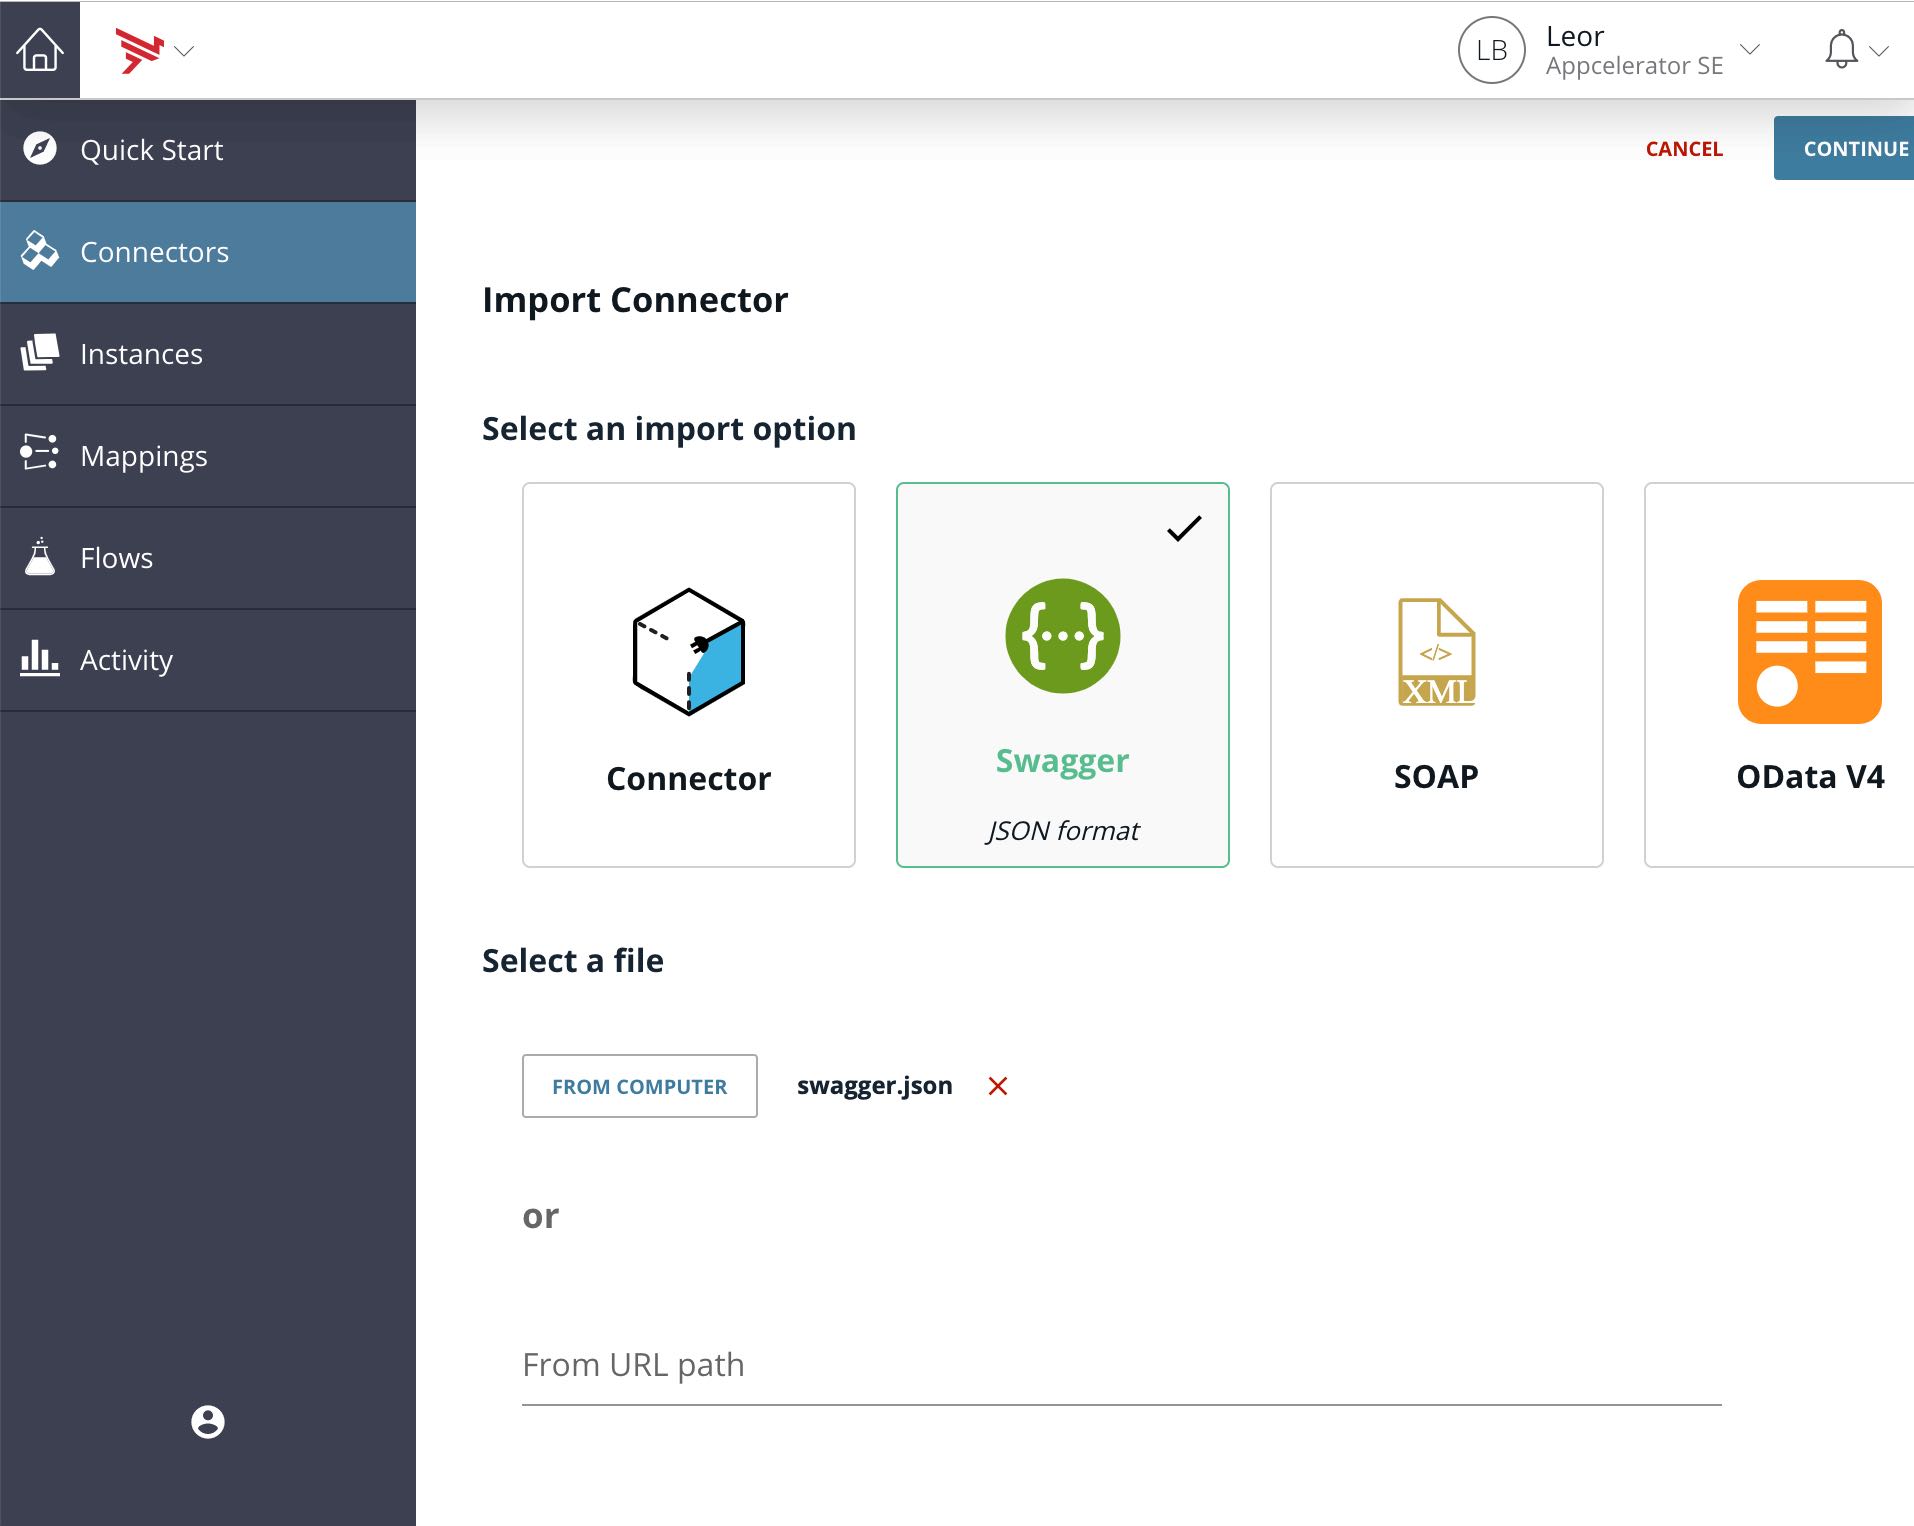
- Click on the CONTINUE IMPORT button and select what APIs you want to import (e.g. I selected greet only)
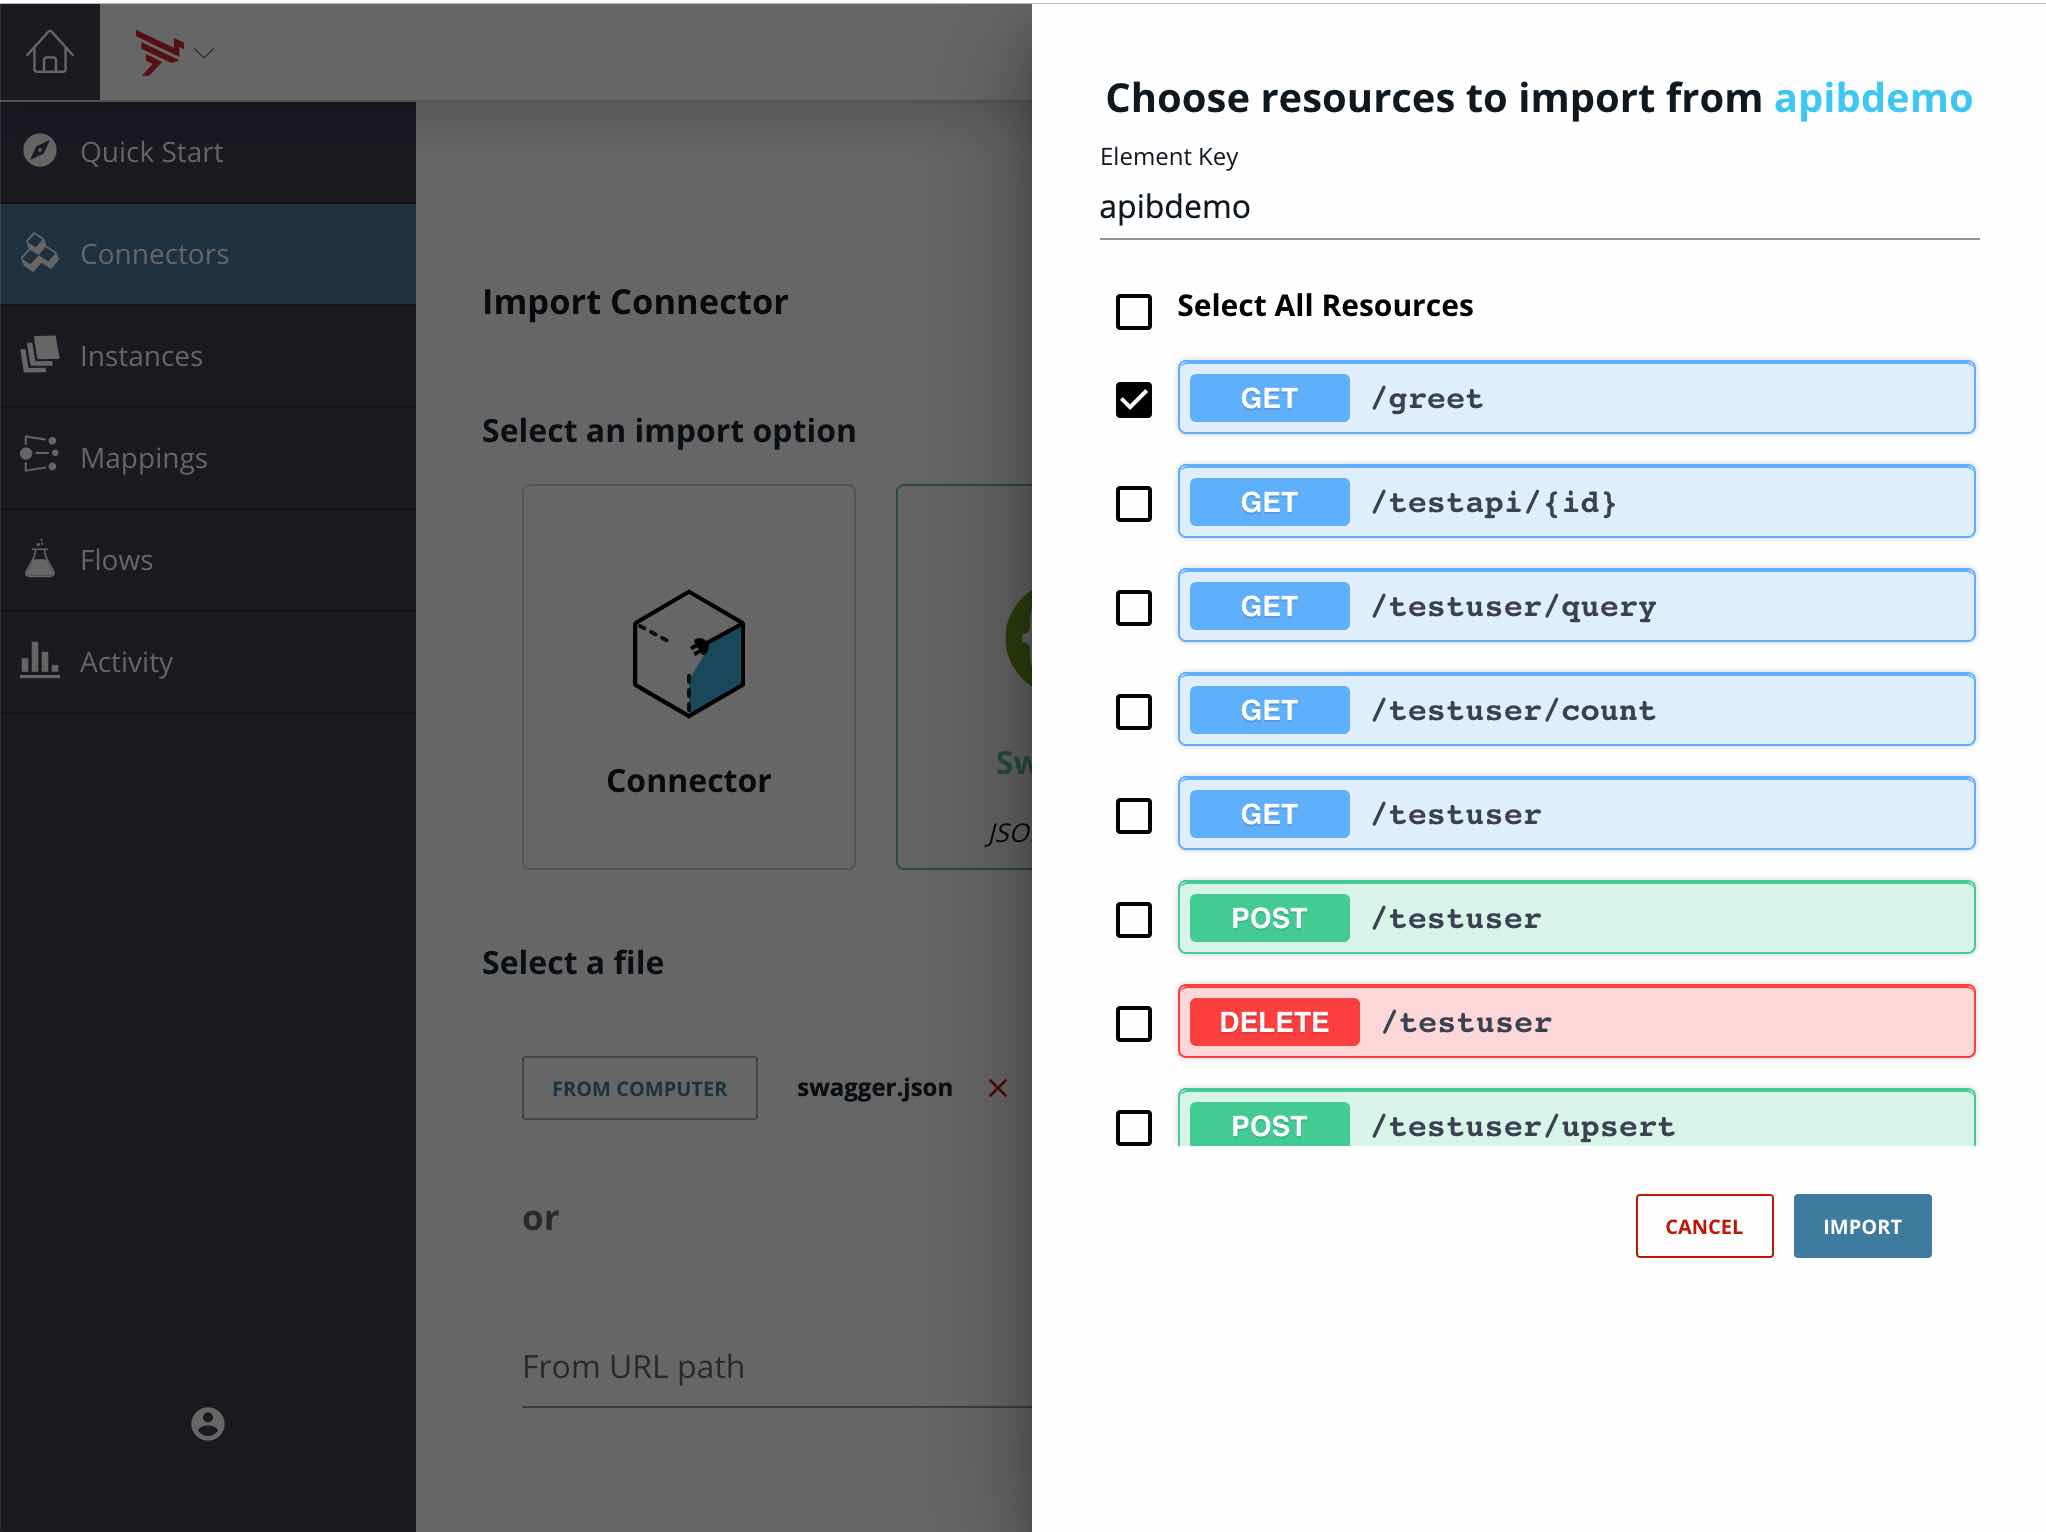
- Click the IMPORT button
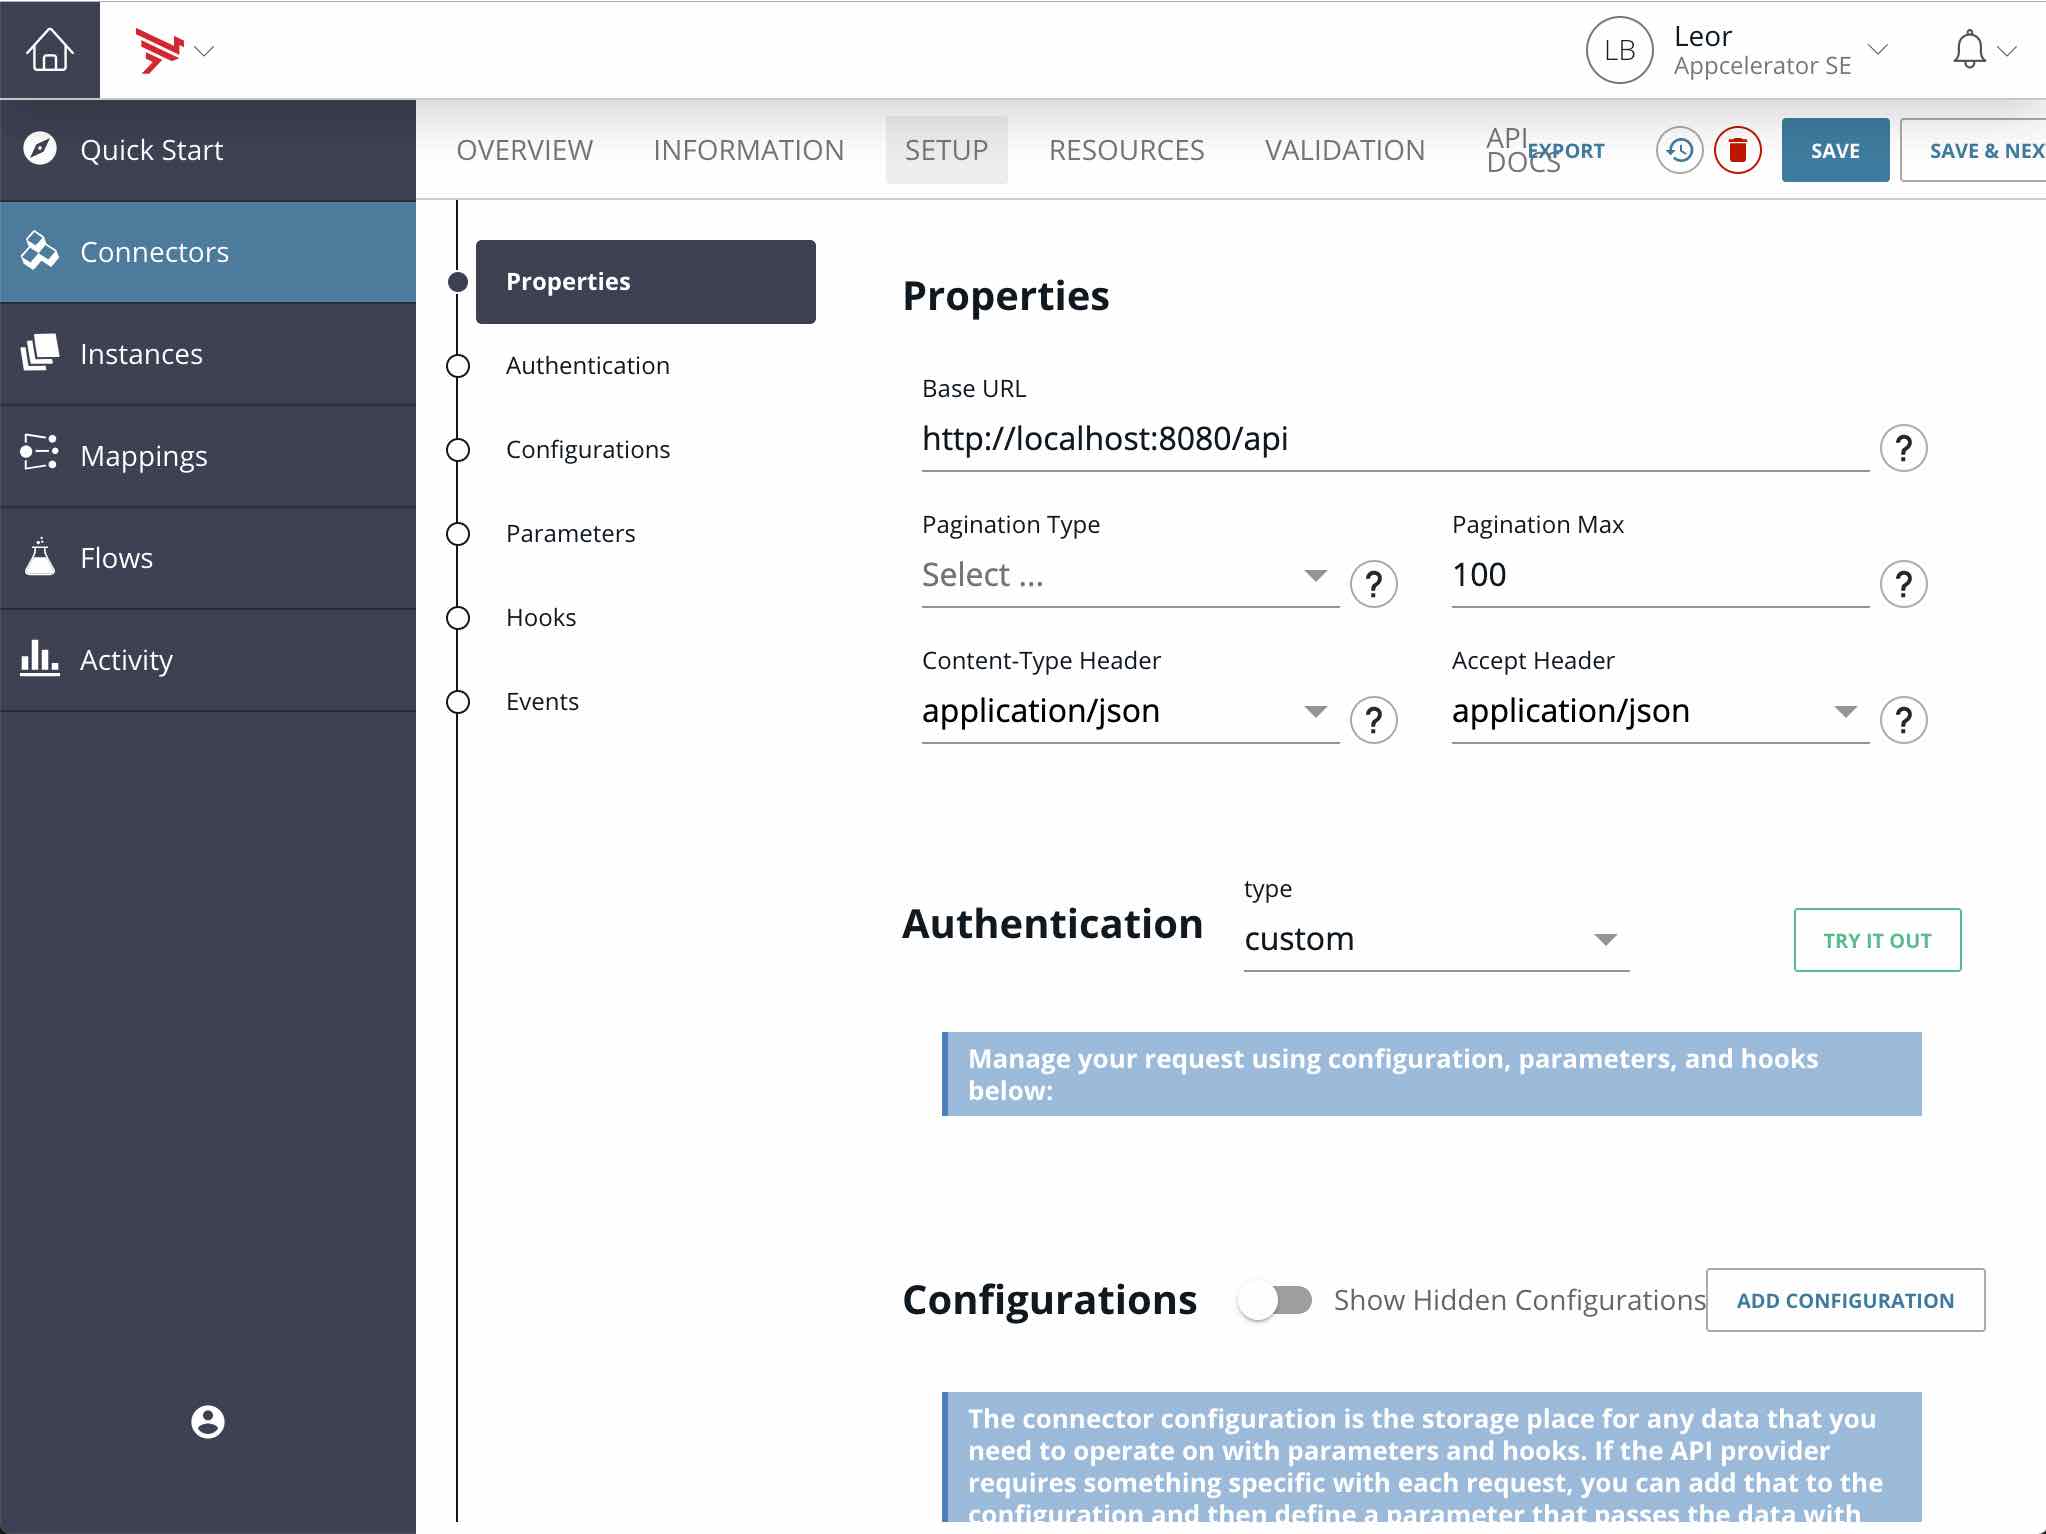
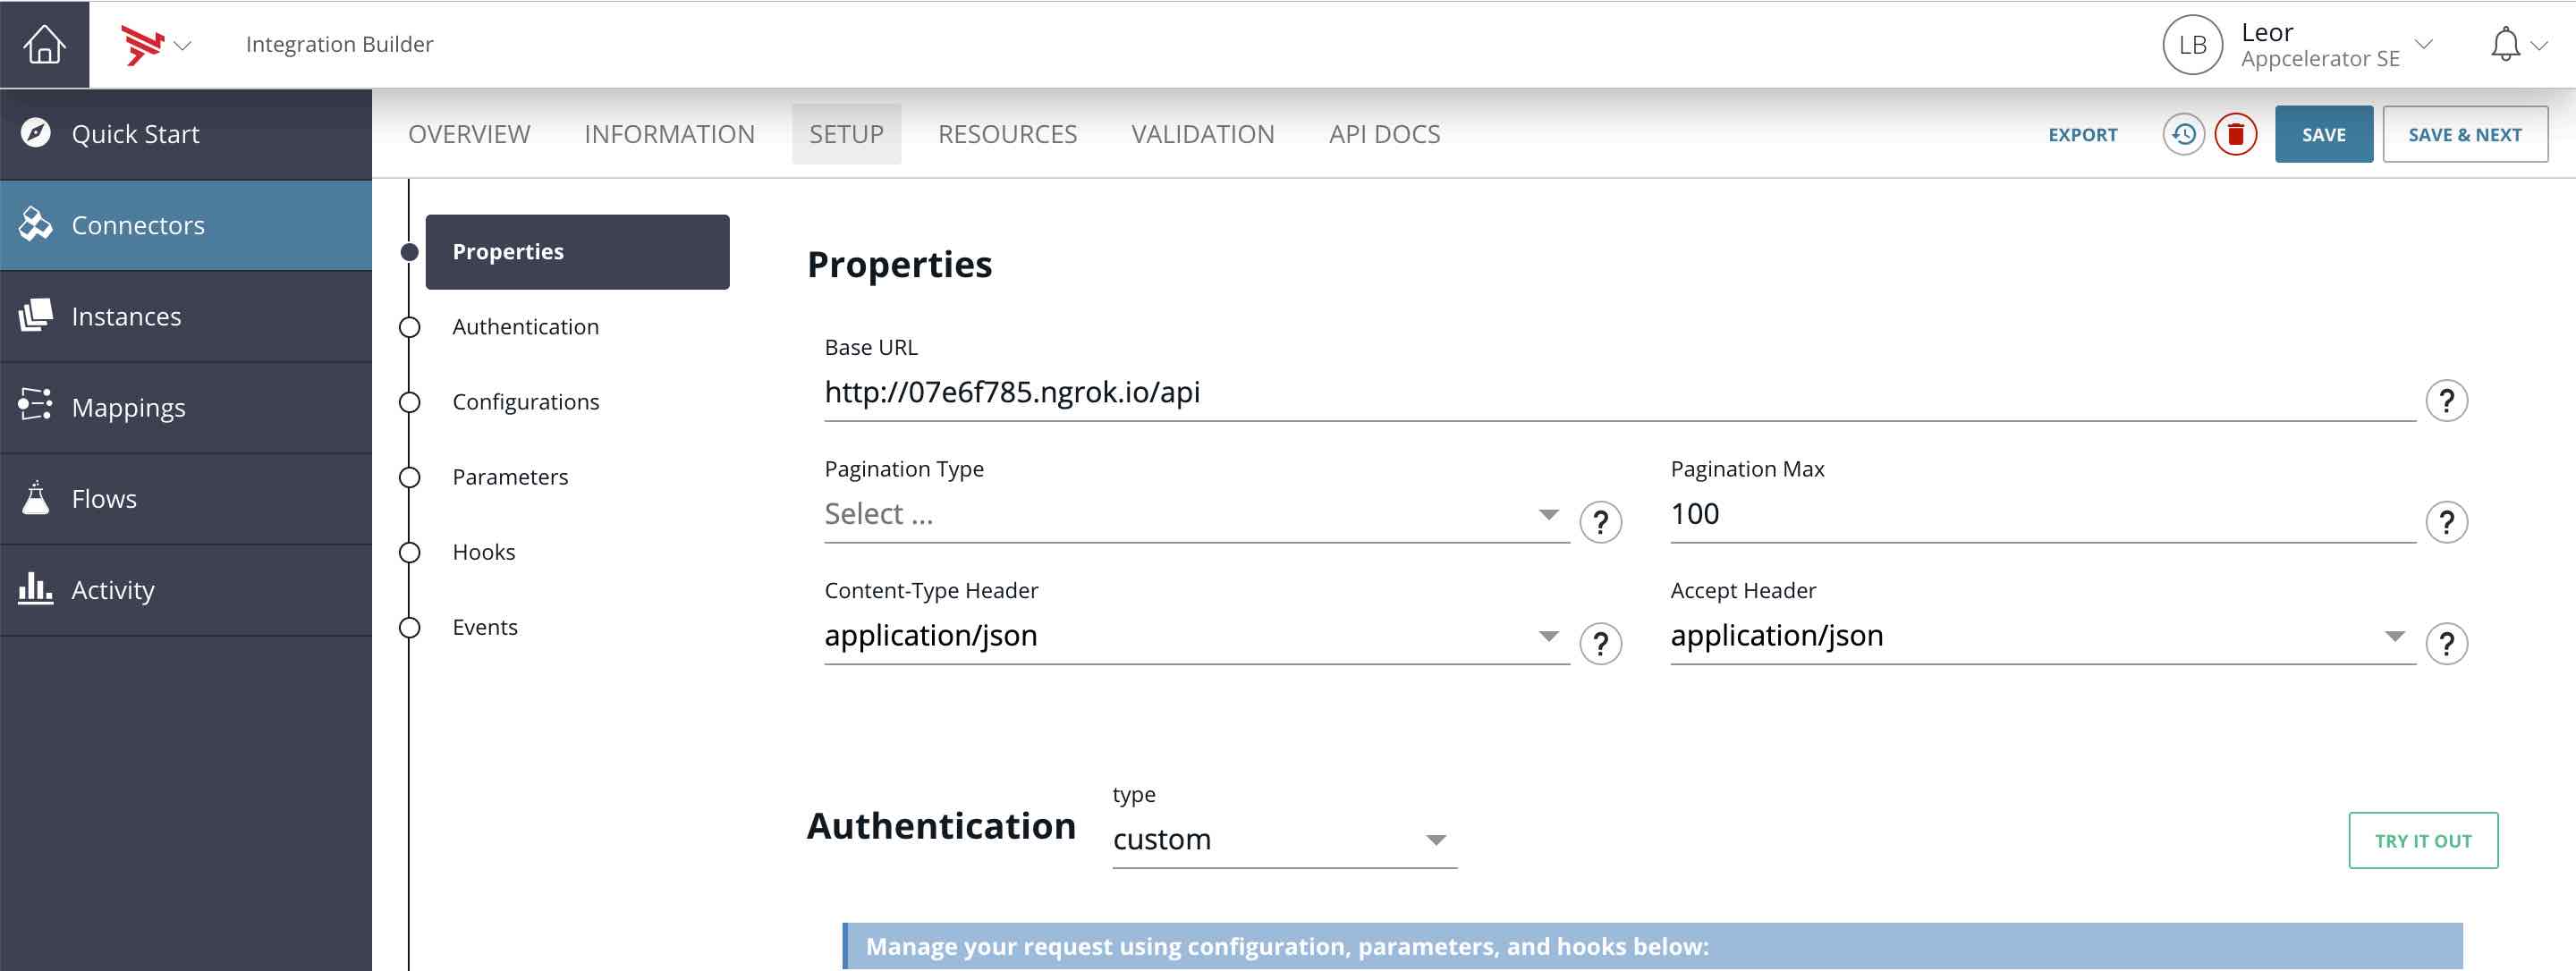
- Update the Base URL with your ngrok public URL (instead of localhost:8080)
Leave Authentication as Custom
- We need to provide a means for the user to enter the API Key when they authenticate the connector. Click the ADD CONFIGURATION button and select Blank. I created a configuration parameter with the following values:
- Name: API Key
- Key: APIKey (this is the API Key name in API Builder)
- Type: test 128
- Required: true

- Now we need the APIKey configuration parameter to be sent in a header with each API request. Click the ADD PARAMETER button and give it the following values:
- Name: APIKey
- Type: configuration
- Vendor Name: APIKey
- Type: Header
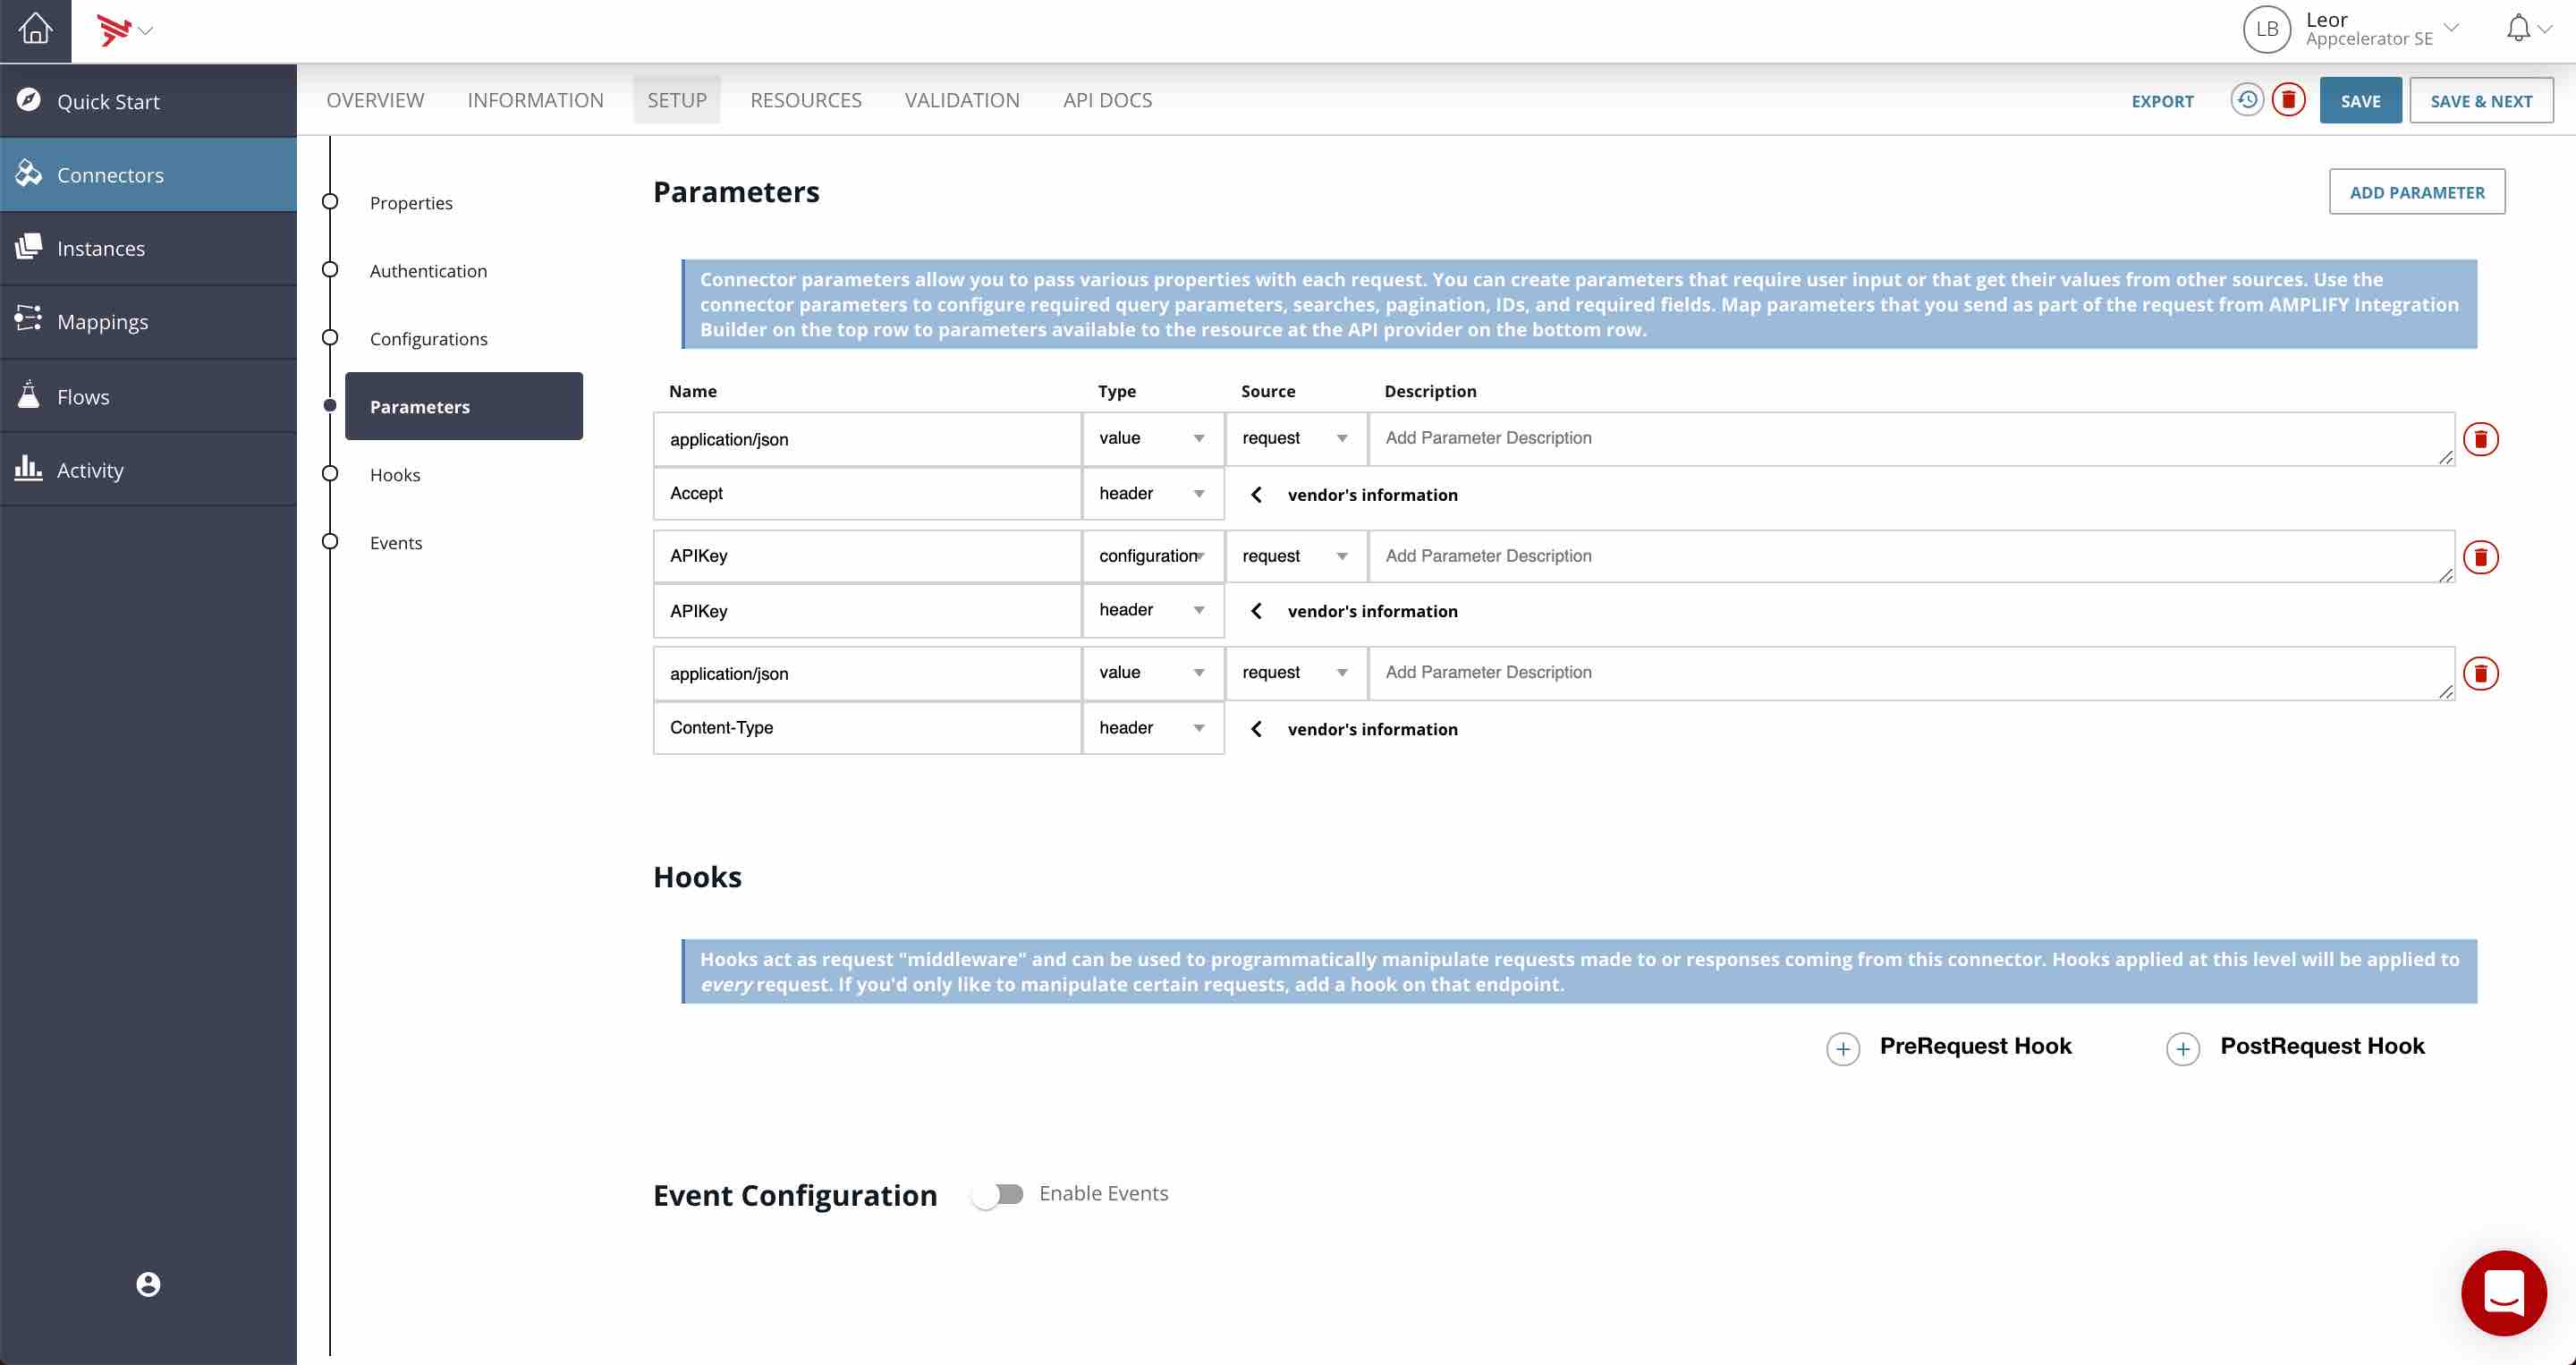
- Press Save
At this point we’re done and we can create an instance of this connector and test it as follows:
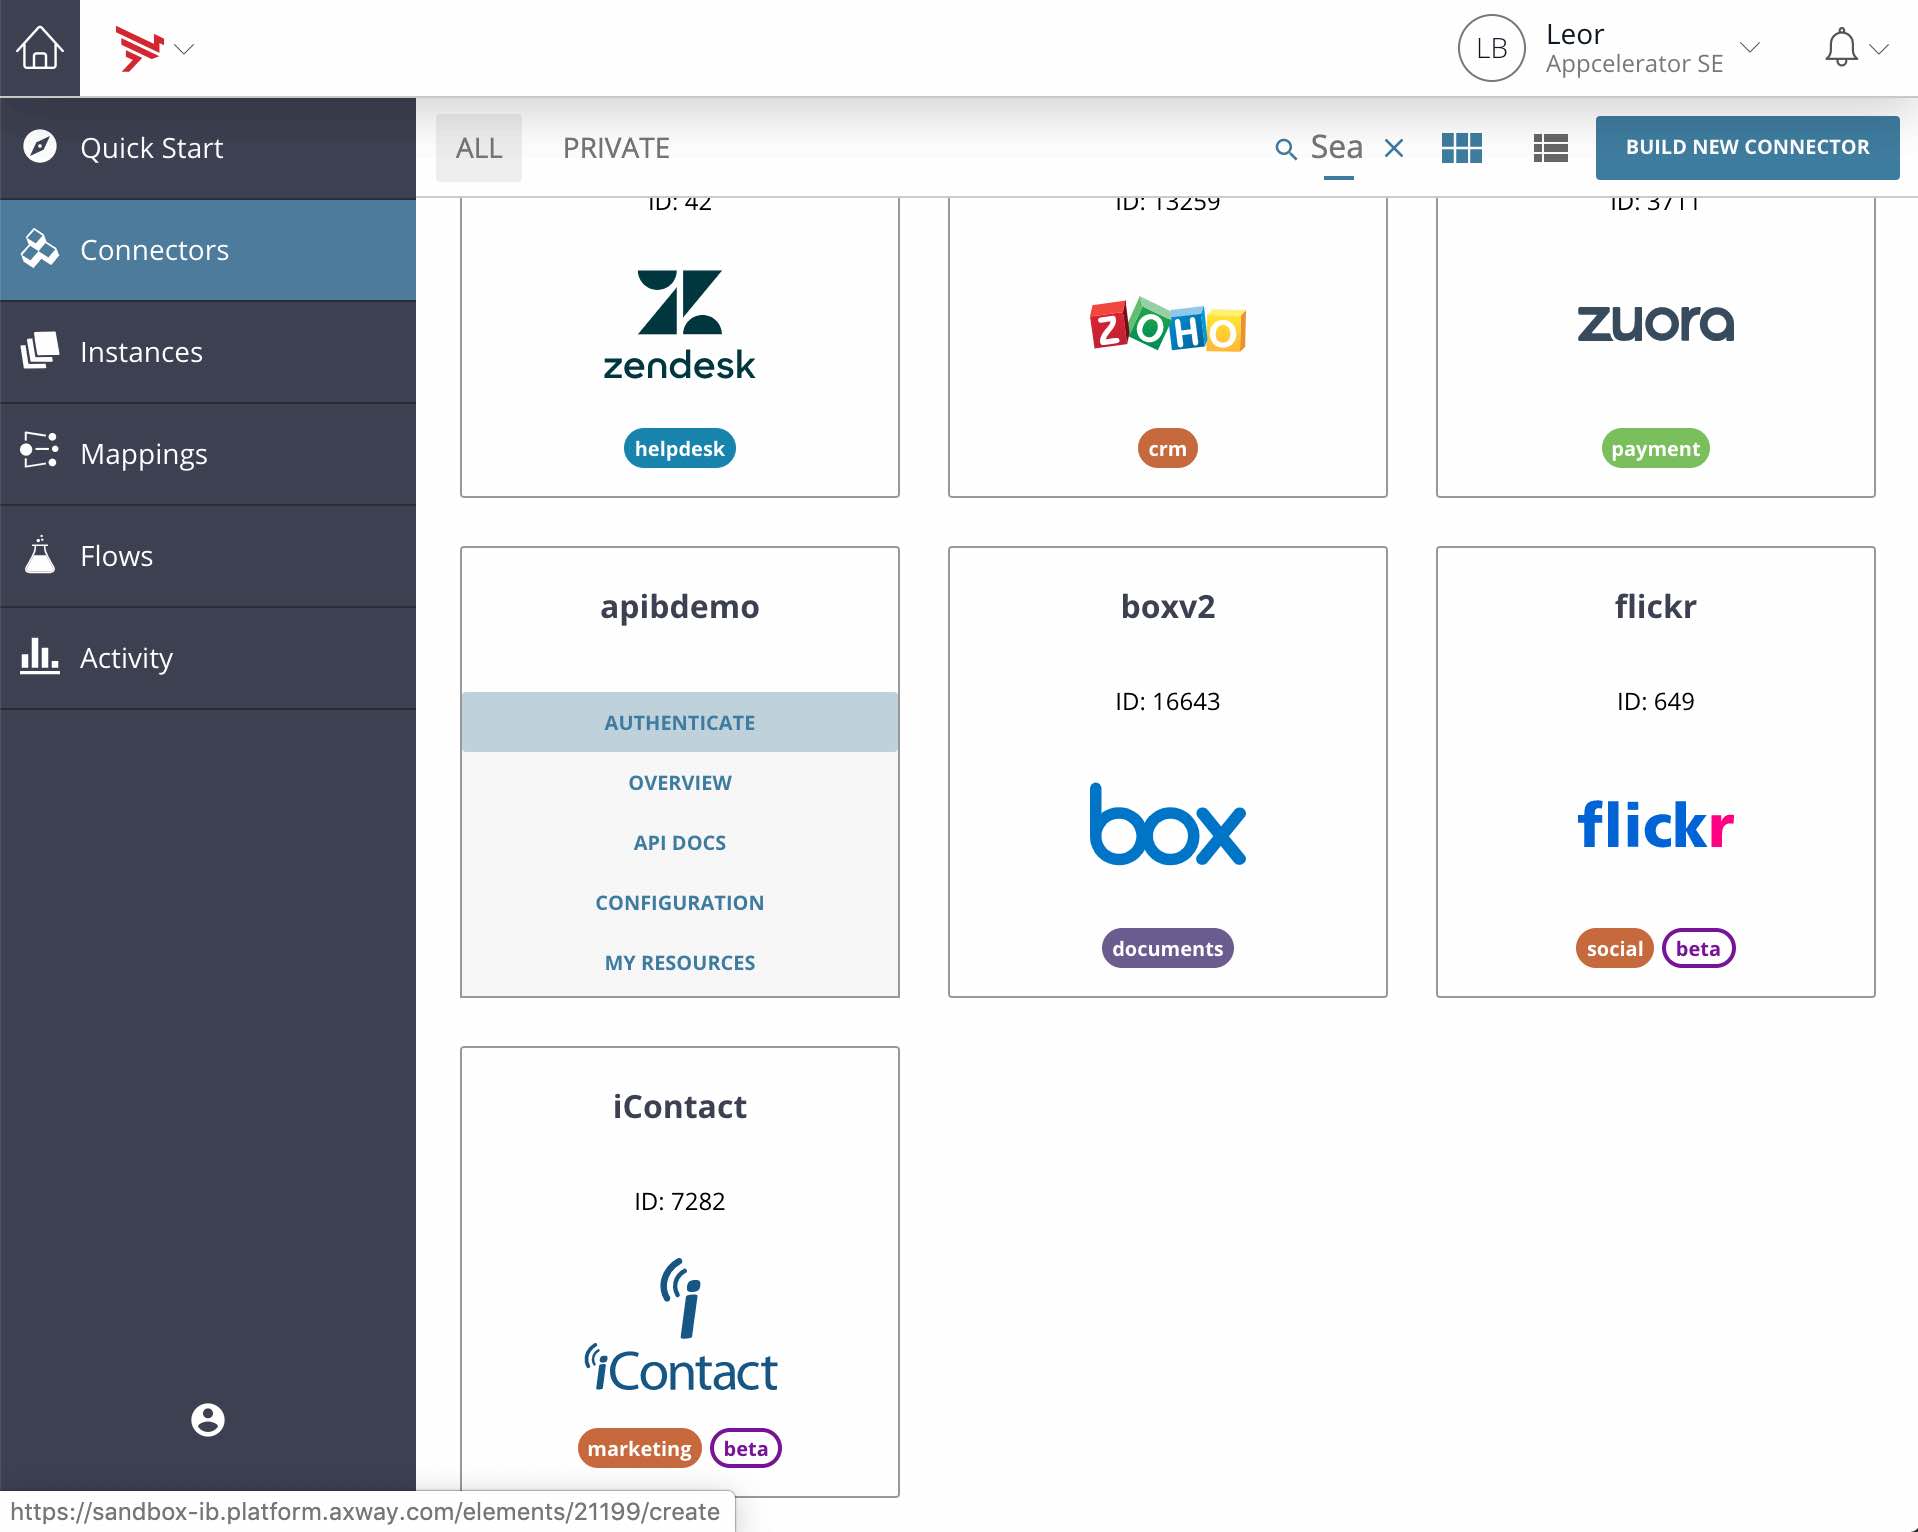
- Click on the Connectors tab and find the connector we just created. It should have the same name as your API Builder project name (e.g. apibdemo) and has an Axway logo. Hover over the connector tile and click on Authenticate.
- Authenticate your connector by giving it a name and entering the API Key from your API Builder /conf/default.js file
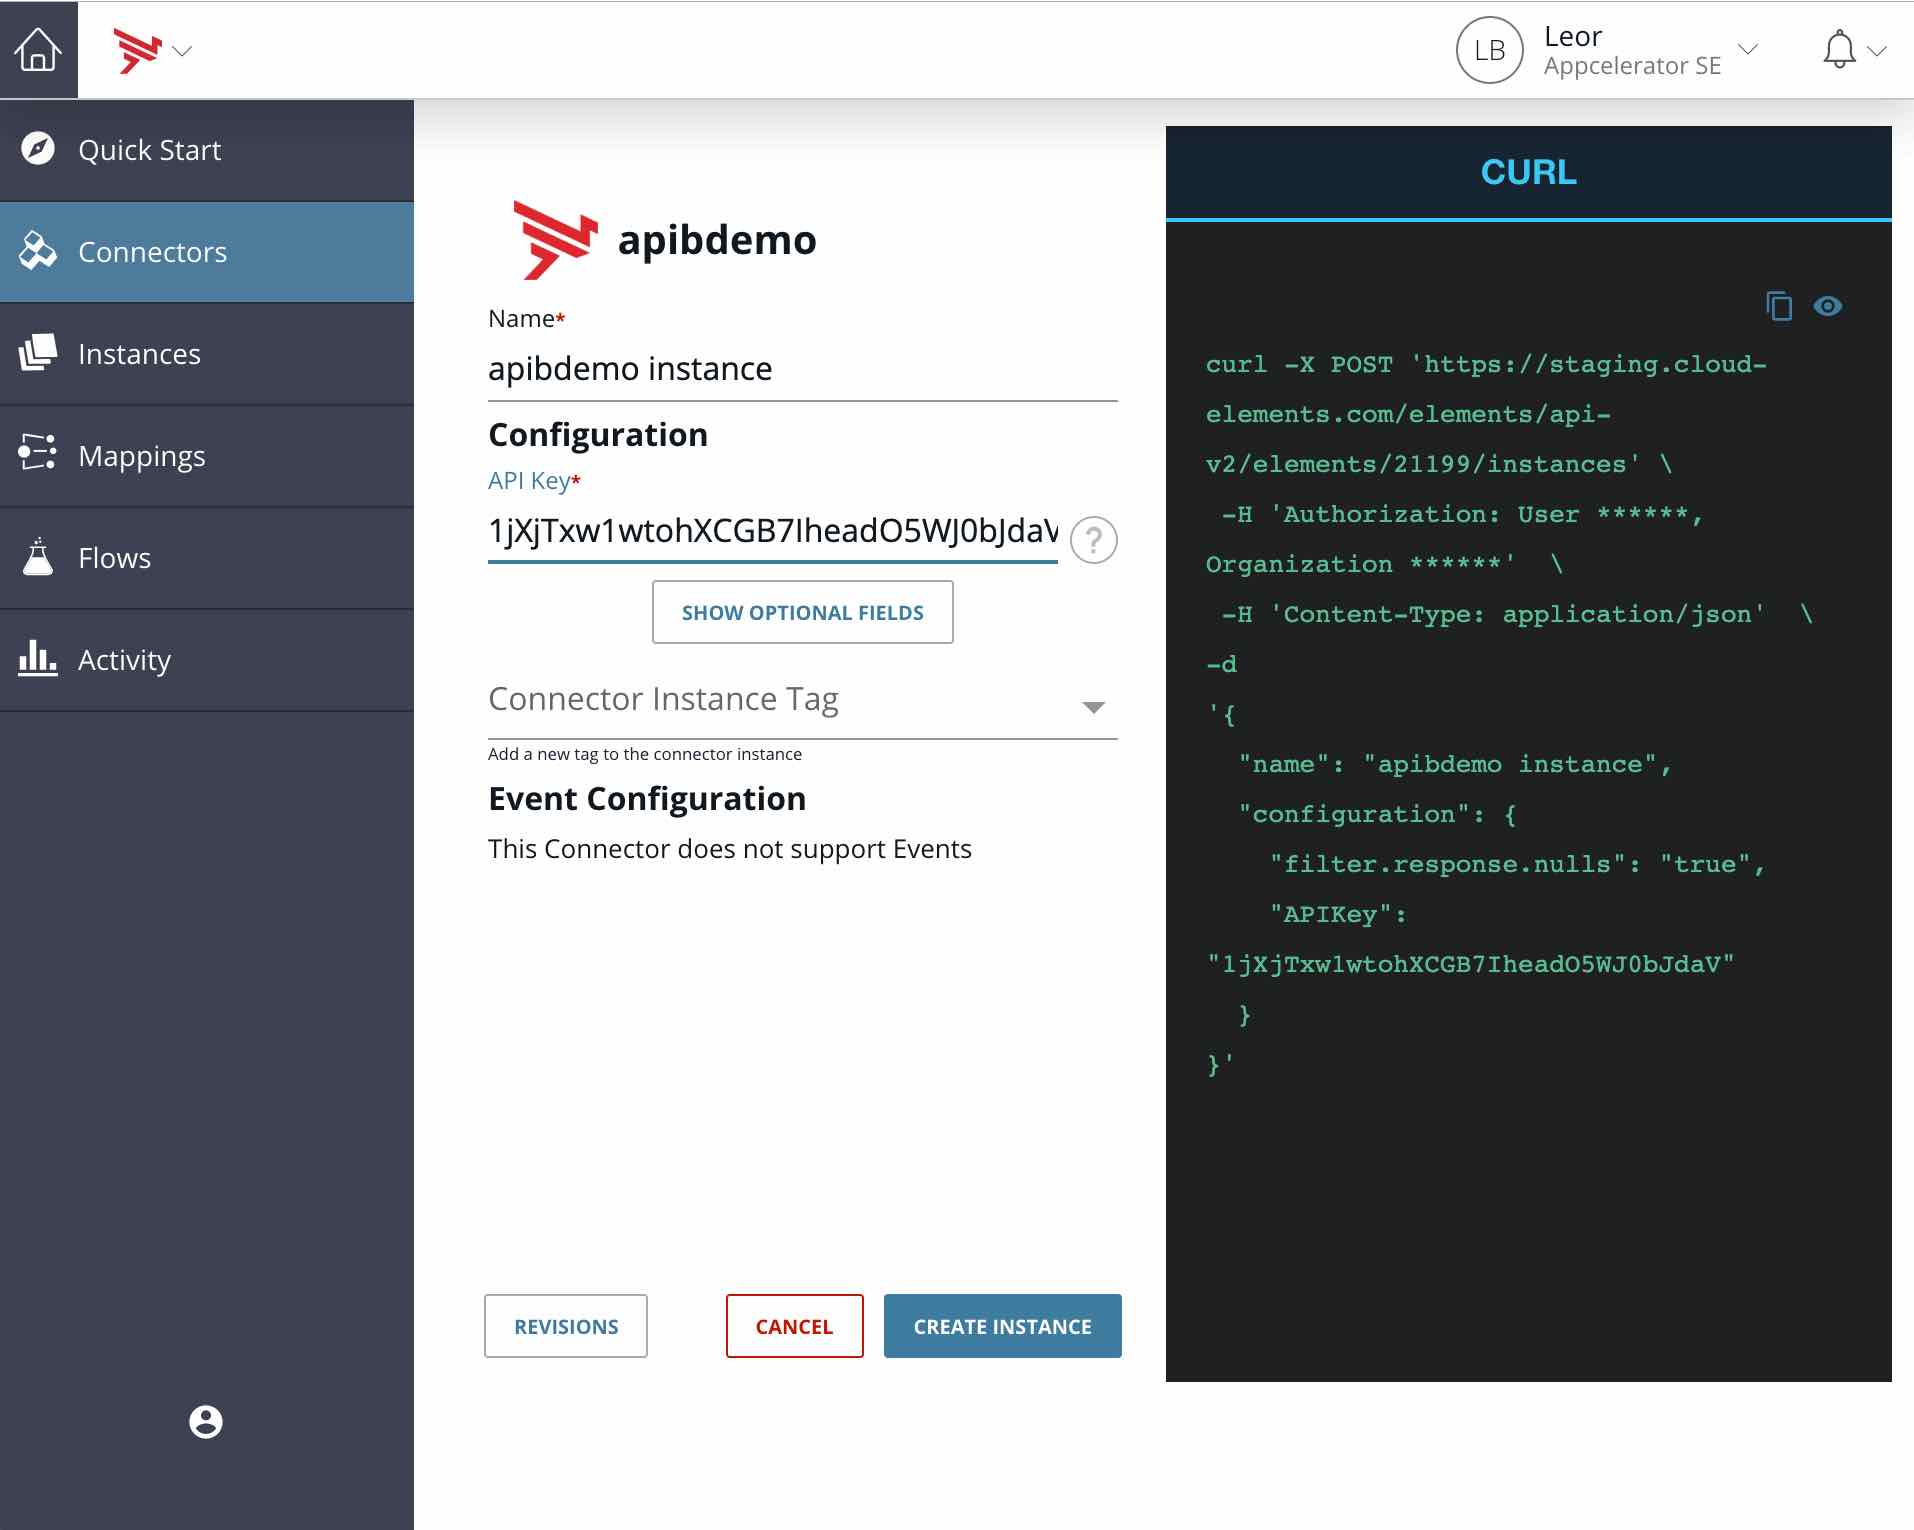
- Click the CREATE INSTANCE button
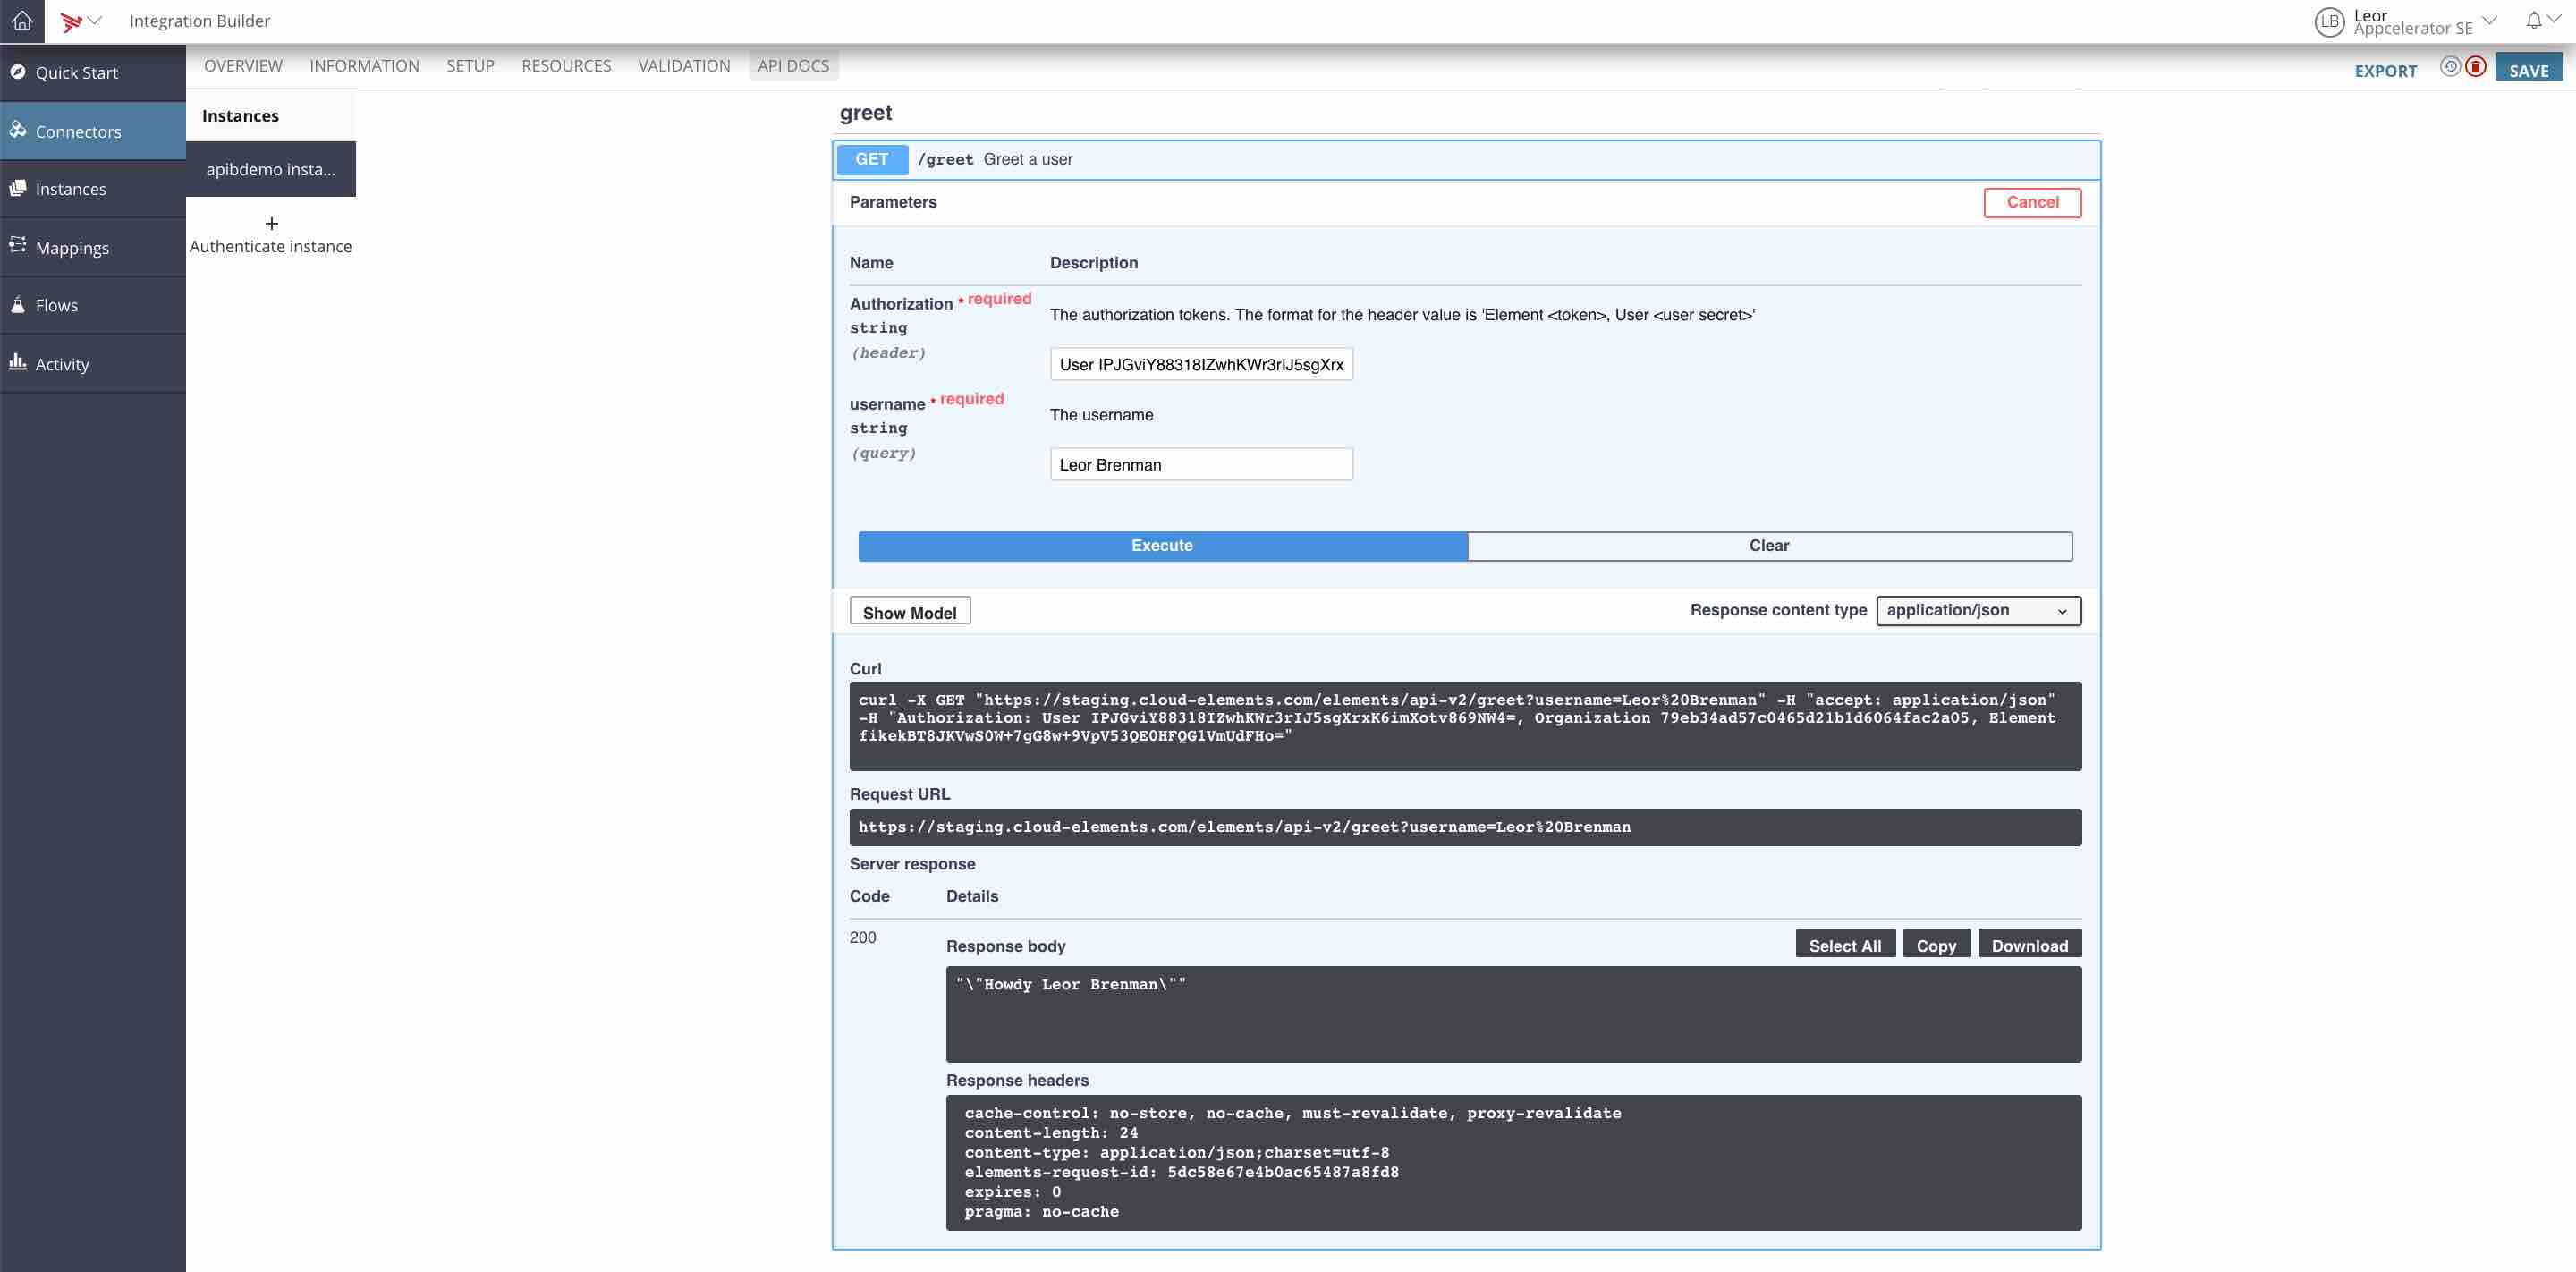
Click the Test in API Docs tile. Click the GET /greet API and click the Try it out button
Enter any string in the username field and click on the Execute button
Docker Container
Stop your API Builder project from running (ctrl-C).
Following the instructions here let’s create and run our API Builder microservice in a Docker Container and see what, if any, changes need to be made to the Integration Builder connector we just created. Hint: None!
Let’s create our Docker container as follows:
docker build -t apibdemo ./
Note that my API Builder project is called apibdemo. In the command above, I am specifying apibdemo as the name of the resulting Docker image
Run your container using:
docker run --name apibdemo -p 8080:8080 -d apibdemo
Note that we are mapping API Builder port 8080 to the host port 8080
Go back to Integration Builder and test your greet API and see that it’s working just as before. The difference is that now your API Builder microservice is running in a Docker container.
When you deploy your API Builder container into a production environment, you can modify the Integration Builder connector’s base address with the URL corresponding to your production environment.
Summary
In this blog post, we demonstrated how to import an API Builder swagger into Integration Builder in order to create connector for our API Builder microservice. This enables us to leverage API Builder microservices in your Integration Builder flows.
Follow us on social